How to Make Sourdough Bread From Starter (An Easy Beginner’s Guide!)
The “Don’t Be Scared” Guide on How to Make Sourdough Bread From Starter
Let’s talk about that jar in your fridge. You know the one. That bubbly, slightly needy, living blob of flour and water that you’ve named something like “Dough-bie Gray” or “Clint Yeastwood.” Or maybe you’ve just been gifted some from a friend, and now you’re staring at it, wondering what to do with this strange, new pet. You, my friend, are ready to learn how to make sourdough bread from starter.
Forget the intimidating Instagram posts and the complicated baker’s percentages for a moment. Baking a loaf of crusty, tangy, artisan-style sourdough is not some mythical feat reserved for professional bakers. It’s a slow, beautiful, and surprisingly simple process. It’s mostly just mixing and waiting. Ready to turn flour and water into pure magic?
Why This Recipe is an Absolute Game-Changer
So, why should you dedicate a weekend to this glorious, carby project?
- The Flavor is Unbeatable: This is the main event. Real, homemade sourdough has a complex, tangy flavor that is a universe away from anything you can buy in a plastic bag. It’s rich, it’s wholesome, and it’s deeply, profoundly satisfying.
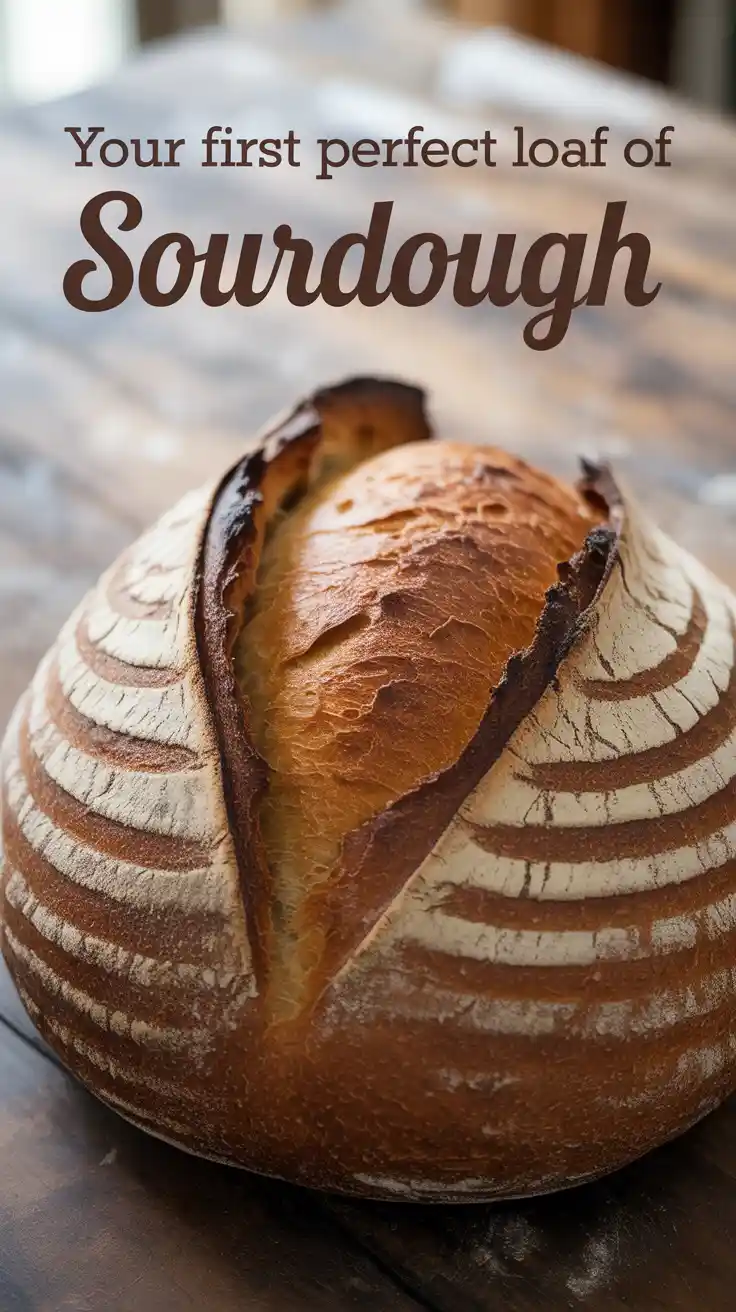
- That CRUST! That CRUMB!: We’re talking a shatteringly crispy, deep golden-brown crust that crackles when you slice into it, revealing a soft, chewy, and airy interior full of beautiful, irregular holes. It’s a textural masterpiece.
- It’s a Hugely Rewarding Process: There is no feeling quite like pulling your very own, perfect loaf of sourdough out of the oven. You will feel like a wizard, a pioneer, a culinary god. You took four simple ingredients and, with a little patience, created something truly spectacular.
The Ingredient List: The Sacred Four

The most beautiful thing about real bread is that it requires almost nothing.
- Active Sourdough Starter: About ½ cup. Your starter should be bubbly, active, and recently fed. It should smell pleasantly sour, not like stinky cheese.
- Bread Flour: 4 ¼ cups (500g). You can use all-purpose flour, but bread flour has a higher protein content, which gives you a chewier, more structured loaf.
- Warm Water: 1 ½ cups (350g). It should feel like a nice, warm bath (about 85-90°F / 29-32°C).
- Fine Sea Salt: 2 teaspoons (10g).
Tools & Kitchen Gadgets: Your Sourdough Arsenal
You don’t need a professional bakery, but a few key tools will make your life a million times easier and your bread a million times better.
- A Dutch Oven: This is the number one secret to achieving a bakery-worthy crust at home. The heavy, lidded pot traps steam, which allows the bread to rise dramatically in the oven.
- A Kitchen Scale: This is the second secret. Baking is a science, and volume measurements (cups) can be wildly inconsistent. A simple digital kitchen scale will give you perfect, repeatable results every single time.
- A Large Mixing Bowl.
- A Bench Scraper: Invaluable for handling and shaping the sticky dough.
- A Banneton Basket (optional): A special basket for the final proof that gives your loaf a beautiful, rustic, swirled pattern. A regular bowl lined with a floured tea towel also works great.
- A Lame or a very sharp Razor Blade: For scoring the top of your loaf.
Step-by-Step Instructions: The Sourdough Dance
Sourdough is a slow dance. It’s a weekend project. Don’t rush it. Let’s break it down.
Step 1: Feed Your Pet (Make the Levain – The Night Before)
The night before you want to bake, you need to prepare your “levain” (which is basically just a purpose-built offshoot of your starter). In a small bowl, mix 2 tablespoons of your active starter, ½ cup of bread flour, and ½ cup of warm water. Cover it and leave it on your counter overnight (8-12 hours). By morning, it should be bubbly, active, and have a pleasant sour smell.
Step 2: The Autolyse (The First Date)
The next morning, in your large mixing bowl, combine 4 ¼ cups of bread flour and 1 ½ cups of warm water. Mix with your hands or a spatula until a shaggy, rough dough forms. Cover the bowl and let it rest for 30-60 minutes. This step, called the autolyse, hydrates the flour and begins gluten development without you having to do any work.
Step 3: The Mix

Your levain should be bubbly and active. Add all of the levain and the 2 teaspoons of salt to your dough. Use your wet hands to squish, squeeze, and fold the dough over itself in the bowl for a few minutes until the levain and salt are fully incorporated. It will be a sticky mess. This is normal.
Step 4: Bulk Fermentation (The Series of Naps)
Cover the bowl and let the dough rest in a warm spot. This is the first big rise, and it will take 4-6 hours. During this time, instead of kneading, we will perform a series of “stretch and folds.”
- Every 30 minutes for the first 2 hours, wet your hands, grab one side of the dough, stretch it up, and fold it over the center. Rotate the bowl a quarter turn and repeat three more times.
- After the first four sets of folds, just let the dough rest for the remaining 2-4 hours, until it has risen by about 30-50% and looks airy.
Step 5: The Shaping
Gently tip your risen dough out onto a lightly floured surface. Gently press it into a rough square. Fold the four corners into the center, then flip the dough over so the seam is down. Using your hands and the bench scraper, gently cup the dough and drag it towards you on the counter to create surface tension, forming it into a tight, round ball (a “boule”).
Step 6: The Cold Proof (The Overnight Snooze)
Generously flour your banneton basket or a bowl lined with a tea towel. Place your shaped dough in the basket, seam-side up. Cover it and place it in the refrigerator for 12-18 hours. This cold fermentation develops an incredible, deep, tangy flavor and makes the dough easier to handle.
Step 7: The Big Bake!
- Place your Dutch oven, with the lid on, into your regular oven and preheat it to 500°F (260°C) for a full hour.
- Once preheated, carefully take your dough out of the fridge. Flip it out onto a piece of parchment paper.
- Using your lame or a razor blade, confidently make one long, curved slash across the top of the loaf.
- Carefully remove the screaming-hot Dutch oven from your regular oven. Using the parchment paper as a sling, lower your loaf into the pot. Put the lid on and place it back in the oven.
- Immediately reduce the oven temperature to 450°F (230°C). Bake, covered, for 20 minutes.
- After 20 minutes, carefully remove the lid. Your loaf should have “sprung” up beautifully.
- Continue to bake, uncovered, for another 20-25 minutes, until the crust is a deep, dark, golden-brown.
Step 8: The Agonizing Rest (THE MOST IMPORTANT STEP)
Carefully remove your beautiful loaf from the Dutch oven and place it on a wire rack. Now, for the hardest part of the entire process: you must let it cool completely for at least 4-6 hours, preferably longer. Slicing into a hot loaf will result in a gummy, doughy interior. The crackling sounds it makes as it cools is the bread singing you a thank-you song.
Calories & Nutritional Info (The Staff of Life)

This is bread in its purest form. Flour, water, salt. It’s a beautiful, wholesome food.
- Serving Size: One thick, glorious slice.
- Good For: Making the best toast of your life, impressing everyone you know, and feeding your soul.
- Bonus: The long fermentation process can make sourdough easier to digest for some people than regular bread.
Common Mistakes to Avoid (Sourdough Sabotage)
- Using a Sleepy, Inactive Starter: Your starter is the engine of your bread. If it’s not bubbly, active, and at its peak when you make your levain, your bread will not rise properly. Feed your starter regularly to keep it strong.
- The “Pancake Loaf”: A flat, dense loaf is the most common beginner’s problem. This is usually caused by under- or over-proofing your dough during the bulk fermentation. Your dough should look airy and jiggle like Jell-O, but not be a soupy, collapsed mess.
- SLICING INTO IT WHILE IT’S HOT: I’m going to say this in all caps because it is the single most tragic thing you can do after all your hard work. The inside of the loaf is still cooking and setting as it cools. Slicing it too early will ruin the crumb and turn it into a gummy, doughy mess. Be strong. Wait.
Final Thoughts
You’ve done it. You have looked into the mysterious, bubbly face of a sourdough starter and you have not blinked. You have taken the four most basic ingredients in the world and, with a little bit of time and a whole lot of magic, you have transformed them into a warm, fragrant, crusty, and utterly spectacular loaf of bread. You are a baker.

So go on. After that agonizingly long but necessary cool-down, slice into your masterpiece. Slather it with good, salty butter. Take a bite, and listen to the crunch. That, my friend, is the sound of victory. You’ll never want to buy a loaf in a plastic bag again.