How to Make Dhokla at Home: Your Guide to Fluffy, Spongy Perfection
Ever look at a piece of dhokla—that bright yellow, impossibly fluffy, savory cake—and think, “What kind of kitchen sorcery is this?” It looks like something that requires years of training and a secret family password to perfect. Well, I’m here to pull back the curtain and tell you that it’s all a glorious lie. This guide on how to make dhokla at home will turn you into a dhokla wizard in under 30 minutes. Seriously. Get ready to impress yourself (and everyone else).
Why This Dhokla Recipe is Officially Awesome
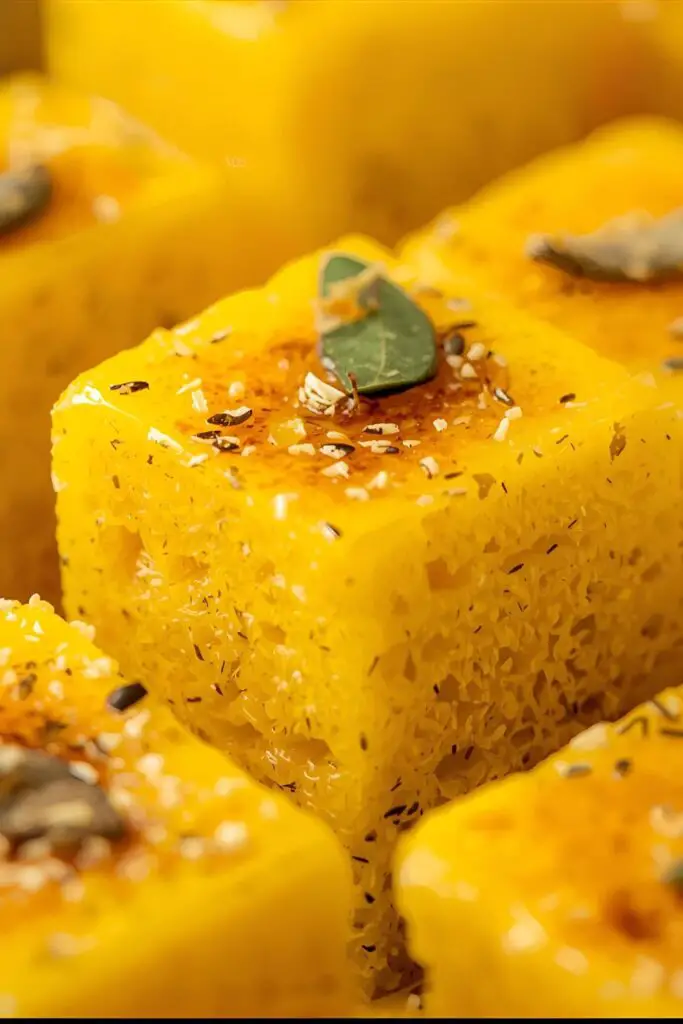
Let’s be honest, life is too short for dense, sad snacks. This recipe is the antidote. We are making a perfectly spongy, moist, and tangy Khaman Dhokla that will melt in your mouth. Forget those dry, crumbly versions you might have tried. This is the real deal.
Best part? It’s an “instant” recipe. That means no overnight soaking, no grinding weird batters, and definitely no waiting around for things to ferment. We’re using a simple trick to get that signature airy texture in minutes. It’s light on the stomach, steamed (not fried!), and looks way more complicated to make than it actually is. What’s not to love?
The Dhokla Ingredient Lineup
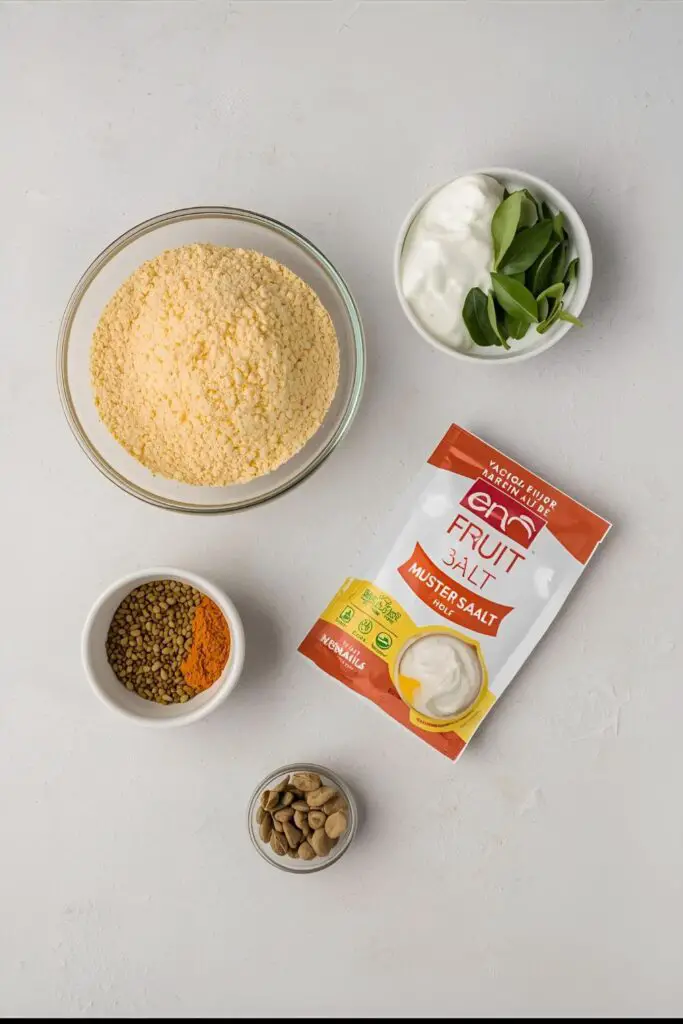
Here’s your mission, should you choose to accept it. The ingredients are simple, but together, they create magic.
For the Dhokla Batter:
- 1.5 cups gram flour (besan): The star of the show. Make sure it’s fresh!
- 1/4 cup fine semolina (sooji/rava): This adds a lovely texture and prevents the dhokla from getting sticky.
- 1 cup plain yogurt (dahi): Slightly sour yogurt works best.
- 3/4 cup water: Adjust as needed to get the right consistency.
- 1-2 green chilies: Finely chopped or ground into a paste.
- 1 inch ginger: Grated or ground into a paste.
- 1/4 teaspoon turmeric powder: For that vibrant yellow color. Don’t overdo it!
- A pinch of asafoetida (hing): Optional, but adds a great authentic flavor.
- 2 teaspoons sugar: Balances the tanginess.
- 1 teaspoon salt: Or to your taste.
- 1 tablespoon oil: Any neutral oil works.
- 1.5 teaspoons Eno fruit salt: This is our secret weapon for instant fluffiness. The unflavored (blue or green packet) one is what you need.

For the Tempering (Tadka):
- 2 tablespoons oil
- 1 teaspoon mustard seeds (rai)
- A pinch of asafoetida (hing)
- 2-3 green chilies: Slit lengthwise.
- 10-12 curry leaves
- 1/2 cup water
- 1 tablespoon sugar
- 1 tablespoon lemon juice
- 2 tablespoons chopped fresh cilantro: For garnish.
- 2 tablespoons grated fresh coconut: Also for garnish (optional but amazing).
Key Substitutions:
- Eno: No Eno? You can use 1 teaspoon citric acid (nimbu ka sat) + 3/4 teaspoon baking soda. Mix the citric acid with the batter first, and add the baking soda right at the end, just like you would with Eno.
- Yogurt: Vegan? Use a plant-based yogurt and ensure it has a bit of tang.
Tools & Kitchen Gadgets You’ll Need
You don’t need a professional kitchen, just a few trusty items.
- A Steamer: Or you can easily create a makeshift one with a large, deep pot with a lid and a small stand or inverted bowl to place your pan on.
- A 7 or 8-inch round or square cake pan: This is what you’ll steam the dhokla in.
- Large Mixing Bowl: For whisking up the batter.
- Whisk: Crucial for getting a smooth, aerated batter.
- Small Pan: For making the tempering (tadka).
- Measuring Cups and Spoons: Because precision matters (sometimes).
- A good knife: For cutting the dhokla into perfect squares.
Let’s Make Some Magic: Step-by-Step Instructions
Read through these steps first. The last part moves quickly, so you need to be ready. Ready? Let’s go!
Step 1: Prep Your Station (This is NOT a Drill!)
- Grease your cake pan with a little oil and set it aside.
- Get your steamer ready. If you’re using a pot, fill it with about 2 inches of water, place a stand inside, and bring the water to a rolling boil over medium-high heat. Your steamer MUST be hot and steamy before your batter is ready. I cannot stress this enough.
Step 2: Whisk Up the Batter
- In your large mixing bowl, add the gram flour (besan) and semolina (sooji). Whisk them together to break up any lumps.
- Add the yogurt, water, green chili-ginger paste, turmeric powder, asafoetida, sugar, salt, and 1 tablespoon of oil.
- Whisk everything together vigorously for a couple of minutes until you have a smooth, lump-free batter. The consistency should be like pancake batter—not too thick, not too runny.
- Let this batter rest for 10 minutes. This allows the semolina to absorb some moisture. While it’s resting, check on your steamer. Is it boiling happily? Good.

Step 3: The “Eno” Moment of Truth
- Okay, it’s go-time. Your steamer is ready, your pan is greased, and your batter has rested.
- Unwrap your packet of Eno fruit salt and sprinkle it all over the batter.
- Immediately, pour about a tablespoon of water over the Eno. You’ll see it start to fizz and bubble like a science experiment.
- Gently but quickly, whisk the Eno into the batter for just a few seconds until it’s incorporated. The batter will become light, frothy, and double in volume. DO NOT overmix!
- Without wasting a single second, pour this frothy batter into your greased pan.
Step 4: The Steamy Sauna
- Carefully place the pan into your preheated steamer.
- Cover with the lid and steam on medium-high heat for 15-20 minutes.
- DO NOT open the lid to peek for the first 15 minutes! You’ll let the steam escape and risk a flat dhokla. Trust the process.
- After 15 minutes, you can check for doneness. Insert a toothpick or knife into the center. If it comes out clean, your dhokla is ready! If not, steam for another 5 minutes.
- Once cooked, carefully remove the pan from the steamer and let it cool for about 10 minutes.
Step 5: The Flavor-Packed Tempering (Tadka)
- While the dhokla is cooling, make the tadka. Heat 2 tablespoons of oil in a small pan.
- Once the oil is hot, add the mustard seeds. Let them pop and splutter (this is important for flavor).
- Add the asafoetida, slit green chilies, and curry leaves. Sauté for a few seconds until the curry leaves are crisp.
- Carefully add the 1/2 cup of water, sugar, and lemon juice. Bring it to a boil and let it simmer for a minute. Your tempering is ready.
Step 6: The Grand Finale
- Run a knife around the edges of the slightly cooled dhokla to loosen it.
- Gently pour the warm tempering all over the dhokla, making sure to distribute it evenly.
- Let it sit for another 10 minutes. This allows the dhokla to soak up all that delicious, tangy liquid.
- Garnish generously with chopped cilantro and grated coconut.
- Cut into squares and serve. It’s divine on its own or with some green chutney.
Calories & Nutritional Info (Approx. per serving of 2 squares)
- Calories: 120-150
- Carbohydrates: 18g
- Protein: 6g
- Fat: 5g
- Fiber: 3g
Nutritional Note: Since it’s steamed and made from lentil flour, dhokla is a relatively healthy, protein-rich, and gluten-free snack! It’s way better for you than that bag of chips calling your name.
Common Mistakes to Avoid (You’ve Been Warned!)
- Getting a Flat, Dense Dhokla: This is the #1 dhokla disaster. It usually happens because your steamer wasn’t hot enough when you put the batter in, or you mixed the batter too much after adding Eno. Be quick and decisive!
- Seeing Nasty Red Spots: If your dhokla looks like it has chickenpox, you’ve added too much turmeric. Turmeric reacts with baking soda (which is in Eno) and turns red. A little goes a long way.
- A Lumpy Batter: Nobody wants that. Sift your gram flour if it looks lumpy, and whisk the batter until it’s completely smooth before you let it rest.
- A Dry Dhokla: Don’t skip the tempering! That sugar-lemon water is what makes the dhokla moist and juicy. Also, don’t over-steam it.
- Soggy Bottoms: Let the dhokla cool down a bit before you pour the tempering over it. Pouring hot liquid on a piping hot cake can make it a bit soggy.
Variations & Customizations (Let’s Get Fancy)
- Sandwich Dhokla: After steaming, slice the dhokla horizontally through the middle. Spread a layer of green coriander chutney on the bottom half, place the top half back on, and then pour the tempering over it. It’s a game-changer.
- Spicy Vegetable Dhokla: Add 1/4 cup of finely grated carrots, peas, or corn to the batter before adding the Eno for some extra nutrition and texture. You can also add a pinch of red chili powder for more heat.
- Rava Dhokla (Semolina Dhokla): A completely different but equally delicious version made with semolina instead of gram flour. It has a slightly grainier texture and is often white in color.
FAQ Section: Your Dhokla Dilemmas, Solved.
- Why is my dhokla not spongy? The most common culprits are: your steamer wasn’t boiling before you added the batter, your Eno was old, or you over-mixed the batter after adding the Eno, knocking all the air out.
- Can I make dhokla without Eno or baking soda? Yes, the traditional way involves fermenting a batter of rice and lentils overnight. But for an instant version, a leavening agent is necessary.
- How long should dhokla be steamed? Typically 15-20 minutes on medium-high heat. The time can vary slightly depending on the thickness of your batter and the size of your pan.
- Can I make dhokla in a microwave? Yes! Pour the prepared batter into a microwave-safe glass dish and microwave on high for about 5-6 minutes, or until a toothpick comes out clean. The texture will be slightly different but still delicious.
- How do you store leftover dhokla? Store it in an airtight container in the refrigerator for up to 2-3 days. It tastes great cold, or you can gently warm it up.
- What is the difference between Khaman and Dhokla? Technically, what we made is Khaman, which is made instantly from gram flour (besan). Traditional Dhokla is made from a fermented batter of rice and split chickpeas (chana dal) and is typically white or off-white. However, colloquially, most people use the names interchangeably.
- Can I prepare the batter in advance? You can prepare the batter (without Eno) a couple of hours ahead and keep it in the fridge. Just bring it to room temperature before adding the Eno and steaming.
Final Thoughts: Go Forth and Be Fluffy!
There you have it. The code has been cracked. You are now armed with the knowledge to create perfectly light, spongy, and delicious dhokla whenever your heart desires. So go on, give it a try! You’ll be amazed at how easy it is, and you’ll never look at a pre-made mix the same way again. Happy cooking! 🙂