How to Make Cookie Icing That Actually Hardens (And Tastes Great!)
We need to talk about cookie decorating. You’ve seen the videos—the mesmerizing loops of pristine white icing, the perfect flood of glossy color that stops exactly at the edge as if by magic. You think, “I can do that!” You bake a batch of beautiful sugar cookies, whip up some icing, and then… chaos descends. Your icing is either runny and transparent, sliding off the cookie in a sad, sugary puddle, or it’s so thick it rips the cookie in half. It’s a sticky, frustrating mess.
If you’ve ever ended a decorating session with more icing on your hands than on the cookies, I’m here for you. Forget the intimidating royal icing recipes that call for weird ingredients like meringue powder. Today, we’re going to show you how to make cookie icing that is incredibly simple, tastes amazing, and—most importantly—dries to a perfect, hard finish so you can stack, gift, and show off your edible masterpieces.
Get ready to unlock your inner cookie artist. It’s easier than you think.
Why This Icing Recipe is a Total Game-Changer
In the world of cookie decorating, a good icing recipe is your most valuable asset. This one is your secret weapon.
First, it’s unbelievably easy and accessible. We’re talking about three, maybe four, core ingredients that you probably already have in your pantry. There are no raw eggs, no weird powders to hunt down online. It’s a straightforward, no-fuss recipe that’s perfect for beginners.

Second, it actually tastes delicious. Let’s be honest, traditional royal icing can sometimes taste a bit… chalky. This icing has a pleasant, sweet vanilla flavor that complements your cookie instead of just sitting on top of it. After all, what’s the point of a beautiful cookie if it doesn’t taste good?
Finally, it sets up perfectly. Thanks to a secret ingredient (spoiler: it’s corn syrup), this icing dries to a smooth, hard finish that won’t smudge. This is the key to creating those beautiful, detailed designs and means you can stack your cookies for transport or package them as gifts without a single worry.
The (Shockingly Simple) Ingredient List
Prepare yourself for this incredibly complex and lengthy list of ingredients.
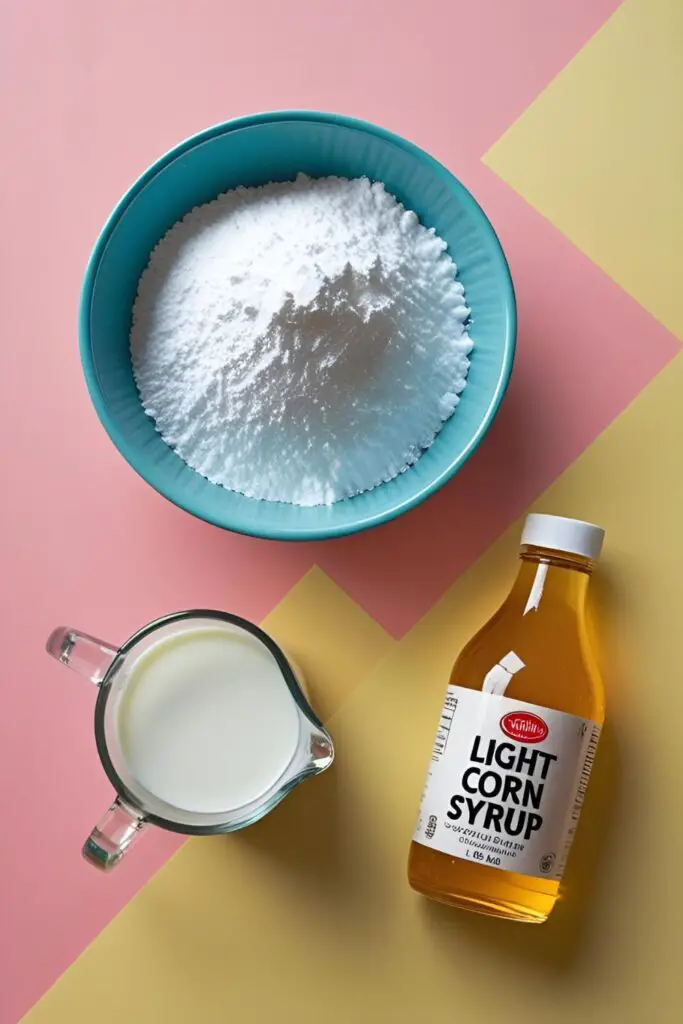
- 4 cups (480g) powdered sugar, sifted
- 4−6 tablespoons milk (or water)
- 2 tablespoons light corn syrup
- 1 teaspoon clear vanilla extract (use clear so it doesn’t tint your white icing)
- A tiny pinch of salt
- Gel Food Coloring: Absolutely essential for vibrant colors without ruining the consistency.
The Decorator’s Toolkit
Having the right gear is half the battle. Here’s your decorating arsenal.
- Mixing Bowls: At least one medium bowl for the base icing, and several smaller bowls for mixing colors.
- Whisk & Silicone Spatula: For mixing and scraping.
- Measuring Spoons: For adding your liquid ingredients precisely.
- Piping Bags or Squeeze Bottles: Essential for applying the icing with any level of control.
- Piping Tips: A few small round tips (like a Wilton #2 or #3) are perfect for outlining.
- A Cookie Scribe or a simple Toothpick: Your magic wand for spreading flood icing, popping air bubbles, and creating designs.
Step-by-Step: The Art of Icing Consistency
Making the icing is easy. The real art is learning to control its consistency.
H3: Part 1: Mixing the Base Icing
- Sift Your Sugar: In a medium bowl, sift your powdered sugar. I know it’s an annoying extra step, but it is 100% non-negotiable. Sifting gets rid of lumps that will clog your piping tip and ruin your day.
- Combine and Whisk: Add 4 tablespoons of milk, the light corn syrup, the clear vanilla extract, and the pinch of salt to the sifted powdered sugar.
- Mix Until Smooth: Using a whisk, mix everything together until it’s smooth and all the sugar is incorporated. It will be very, very thick at this point. This is your starting base.
H3: Part 2: Mastering Outline and Flood Consistency
This is the most important part of the entire process. The secret to beautifully decorated cookies is using two different icing consistencies: one for the border, and one for filling it in.
- Create Your Outline Icing: Scoop about a third of your thick base icing into a separate small bowl. This will be your “outline” icing. Add milk, one half-teaspoon at a time, until you reach the consistency of toothpaste. It should be thick enough to hold its shape and create a dam around the edge of your cookie.
- Create Your Flood Icing: Now, let’s work with the remaining icing in the main bowl. This will be your “flood” icing. Add milk, a half-teaspoon at a time, until you reach the consistency of shampoo or honey.
- The “15-Second Rule”: The best way to test your flood icing is with the “15-second rule.” Drizzle a ribbon of icing back into the bowl. If the line completely disappears and the surface becomes smooth in about 15 seconds, your flood icing is the perfect consistency. If it disappears faster, it’s too thin (add more powdered sugar). If it takes longer, it’s too thick (add a tiny bit more milk).
H3: Part 3: Adding Color and Decorating
- Color Your Icing: Divide your outline and flood icings into separate bowls for each color you want to make. Add a tiny drop of gel food coloring at a time and stir until you reach your desired shade.
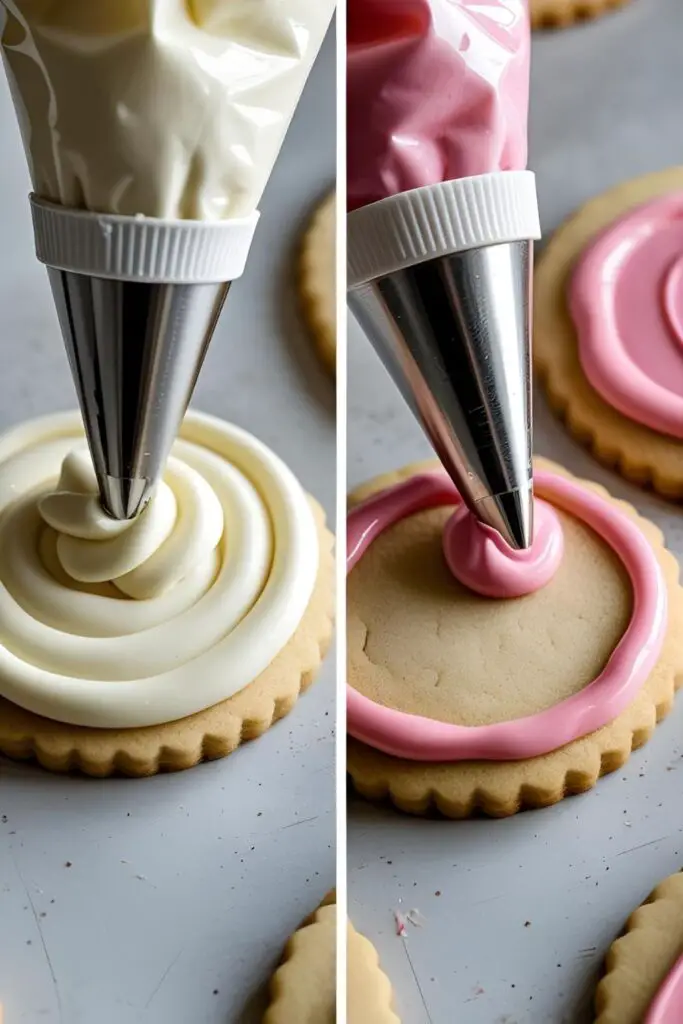
- Bag It Up: Transfer your different icings into their own piping bags or squeeze bottles. If using piping bags, a small round tip (#2 or #3) is perfect for the outline icing. You can use a tip for the flood icing or just snip a small hole at the end of the bag.
- Outline Your Cookie: Using your thick outline icing, pipe a border around the edge of your cookie. Let this set for a few minutes to firm up.
- Flood the Gates! Take your thinner flood icing and fill in the area inside the outline you just created. Don’t overfill it.
- Spread and Smooth: Use your cookie scribe or a toothpick to gently nudge the flood icing into all the corners and to pop any pesky air bubbles that appear. Give the cookie a gentle shake to help it settle into a smooth, glossy surface.
Nutritional Info (The Sweet Truth)

Here’s the breakdown of your edible paint.
- Serving Size: 1 tablespoon of icing
- Estimated Calories: Around 60 kcal
- Main Ingredient: Sugar. Followed by more sugar.
- Note: This is the stuff that turns a simple cookie into a work of art. Its nutritional value is measured in smiles, not grams of protein.
Common Mistakes to Avoid (Icing Infractions)
- The Lumpy Clog: You didn’t sift the powdered sugar. Now there’s a sugar boulder stuck in your piping tip, your hand is cramping, and you’re about to throw the whole project out the window. Always sift.
- Ignoring Consistency: You just made one bowl of icing and went for it. This is why it’s either running off the sides of your cookie or is too thick to spread. Mastering the two consistencies (outline and flood) is the secret.
- Bleeding Colors: You tried to flood a section with a new color right next to a section that was still wet. The colors will bleed into each other. You need to let one section crust over for at least an hour before flooding an adjacent section with a different color.
- Using Liquid Food Coloring: You thought, “How different can it be?” Very. Liquid food coloring will add too much liquid and ruin your carefully balanced icing consistency, making it thin and runny. Only use concentrated gel coloring.
- The Dreaded Craters: You didn’t pop the air bubbles in your flood icing. As the icing dries, those bubbles can collapse, leaving little pits or craters in your beautiful smooth surface. Use a scribe or toothpick to pop them while the icing is still wet.
Variations & Customizations (The Artist’s Palette)
Once you’ve mastered the basics, you can get creative.
- Citrus Zing Icing: Swap the milk for fresh lemon or orange juice and the vanilla extract for a little citrus extract. It creates a delicious, tangy icing that pairs wonderfully with a simple sugar cookie.
- Rich Chocolate Icing: Sift in 2-3 tablespoons of high-quality, unsweetened cocoa powder with your powdered sugar. You may need to add a little extra milk to get the consistency right. Perfect for decorating chocolate or vanilla cookies.
- The “Lazy” Dipped Method: Don’t feel like piping? No problem. Make a batch of flood-consistency icing. Dip the top of each cookie into the icing, let the excess drip off, and place it on a wire rack to set. Add sprinkles while the icing is still wet. Easy and beautiful.
Frequently Asked Questions (Your Icing Help Desk)
What is the best kind of icing for decorating sugar cookies?
For detailed work that needs to harden, an icing like this one (a simple glaze or a royal icing) is best. Buttercream is delicious but stays soft and is better for a simple, rustic look.
How do you make cookie icing that actually hardens completely?
The secret ingredient is light corn syrup. It helps the icing set to a hard, smooth finish with a slight sheen and a softer bite than traditional royal icing.
What is the real difference between outline and flood icing?
Just the amount of liquid. Outline icing is thick (like toothpaste) to create a dam. Flood icing is thinner (like shampoo) to fill in that dam. It’s the same base recipe, just adjusted with a tiny bit of milk or water.
Why is my icing too runny or too thick?
You’ve added too much or too little liquid. It’s a delicate balance. Always add your liquid a half-teaspoon at a time. If it’s too runny, whisk in more sifted powdered sugar. If it’s too thick, add more milk drop by drop.
How long does this icing take to fully dry?

It will form a “crust” and be dry to the touch in about an hour. However, to be fully, deeply hardened for stacking and packing, you should let the cookies sit out at room temperature for at least 6-8 hours, or overnight.
Can I make this icing in advance?
Yes! You can store it in an airtight container with a piece of plastic wrap pressed directly onto the surface of the icing (to prevent a crust from forming) for up to a week in the refrigerator. It may separate a bit, so just give it a good stir before using.
Do I need meringue powder for my icing to harden?
Not with this recipe! Meringue powder (or raw egg whites) is used in traditional royal icing. Our recipe uses corn syrup to achieve that hard finish, making it simpler and more accessible.
Final Thoughts
You are now armed with the knowledge and the power to create beautifully decorated cookies that won’t end in a sticky, tear-filled disaster. You’ve learned the secret language of icing consistency. You are, for all intents and purposes, a cookie decorating wizard.
So go forth. Bake, mix, outline, and flood. Create tiny, edible masterpieces for your friends, for the holidays, or just for yourself. Your cookie jar is about to get a major, beautiful upgrade.