How to Make Condensed Milk (Because Running Out is a Culinary Crisis)
Let’s talk about those moments, shall we? You’re halfway through mixing up a glorious key lime pie, a velvety fudge, or maybe a dreamy no-churn ice cream. You reach for that essential can of sweetened condensed milk, only to find… it’s not there. Or worse, you realize you don’t even have a can opener (don’t judge, it happens!). Panic sets in. Your dessert dreams are crashing faster than a poorly stacked Jenga tower. But what if I told you there’s a secret weapon? What if you could conjure up that magical, sticky-sweet goodness from scratch? Today, my friends, we’re diving deep into how to make condensed milk right in your own kitchen. And trust me, it’s way easier (and more satisfying) than a frantic trip to the store.
Why This Recipe Is Awesome (And Will Save Your Dessert Life)
So, why bother making your own condensed milk when a can is just a few Taka at the nearest grocery store in Khulna? Because this recipe is a life-saver, a game-changer, and frankly, a little bit empowering. Imagine never again having your baking plans derailed by an empty pantry. You’ll always have it on hand, made with simple ingredients you probably already own.
Plus, homemade always tastes better, right? You control the quality of the milk and sugar, resulting in a richer, purer flavor. It’s incredibly versatile for all your sweet cravings, from fudge to tres leches cake. And let’s be honest, there’s a certain smug satisfaction that comes from saying, “Oh, this? I made the condensed milk from scratch.” Get ready to feel like a kitchen wizard!
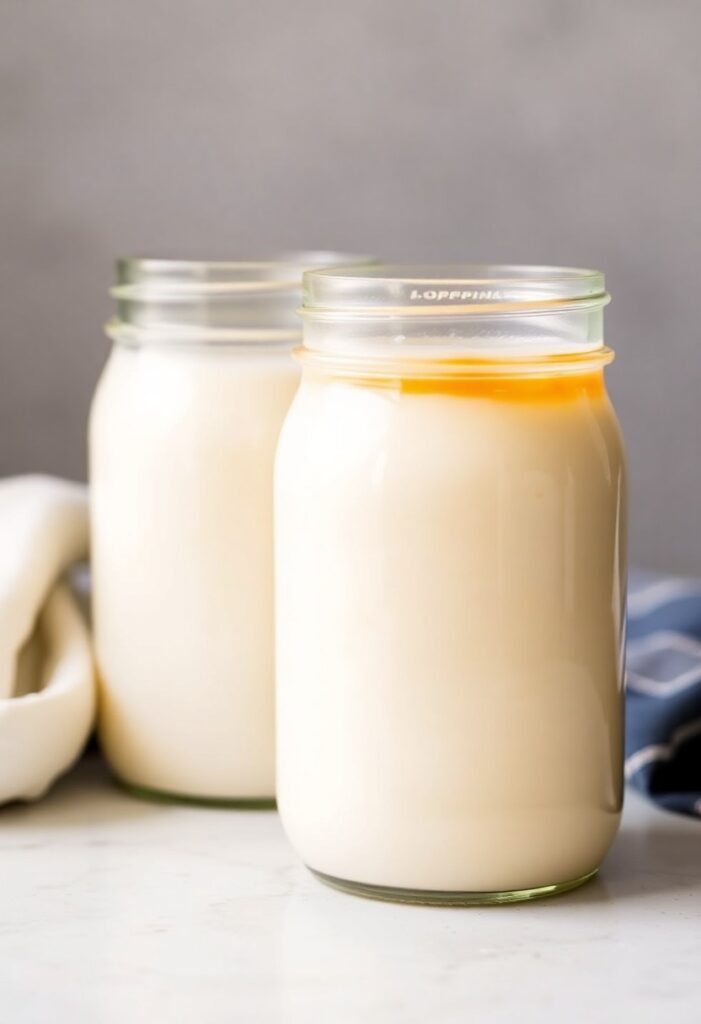
Ingredients: Your Simple Sweet Elixir

You only need two (or three!) basic things to make this liquid gold. Seriously, that’s it.
- 4 cups (1 liter) whole milk (Don’t skimp on the fat, people! Whole milk is key.)
- 1 cup (200g) granulated sugar
- ½ teaspoon vanilla extract (optional, but highly recommended for extra flavor depth)
Key Substitutions:
- Milk: While whole milk is king for richness and a creamy texture, you can use 2% milk. Just know it might take a little longer to reduce, and the end product might be slightly less thick. I wouldn’t recommend skim milk for this; it’s just not going to give you that luscious texture.
- Sugar: You can experiment with brown sugar for a caramel-like flavor, but it will result in a darker condensed milk. Adjust to taste.
Tools & Kitchen Gadgets Used: Your Simmering Sanctuary

You don’t need fancy equipment, just a few kitchen basics.
- Heavy-Bottomed Saucepan (This is crucial! It prevents scorching.)
- Whisk (For stirring, stirring, and more stirring.)
- Heat-Resistant Rubber Spatula (Also good for scraping the bottom.)
- Measuring Cups and Spoons
- Fine-Mesh Sieve (Optional, but handy for a super smooth result.)
- Airtight Jar or Container (For storing your homemade goodness.)
Step-by-Step Instructions: The Art of Reduction
This isn’t hard, but it does require a bit of patience and a watchful eye. Think of it as a soothing kitchen meditation.
- Combine & Heat: Pour the 4 cups of whole milk and 1 cup of granulated sugar into your heavy-bottomed saucepan. Place it over medium-high heat.
- Bring to a Boil (Carefully!): Whisk constantly until the sugar dissolves and the mixture comes to a gentle boil. Watch it like a hawk! Milk loves to boil over in a dramatic, messy fashion the second you turn your back. Don’t be that person.
- Reduce the Heat & Simmer: Once it boils, immediately reduce the heat to low or medium-low. You want a gentle simmer, where you see small bubbles breaking the surface, but nothing too vigorous.
- Stir, Stir, Stir (The Patience Test): This is the main event. Simmer, stirring frequently, especially scraping the bottom, to prevent scorching and sticking. You’re waiting for the milk to reduce by about half its original volume, becoming thick and creamy. This will take 30-60 minutes, depending on your heat and pan. Yes, it’s a marathon, not a sprint.
- Watch for Thickness: The mixture will gradually thicken and turn a pale, creamy yellow. It will coat the back of your spoon. To test: dip a spoon into the milk, then draw a line with your finger through the milk on the back of the spoon. If the line holds and doesn’t immediately run together, it’s ready.
- Add Vanilla (Optional): Once it reaches your desired consistency and you take it off the heat, stir in the ½ teaspoon vanilla extract.
- Cool Completely: Pour the homemade condensed milk into a clean, heat-proof jar. Let it cool completely to room temperature before covering and refrigerating. It will thicken considerably more as it cools. TBH, this part is almost as hard as the stirring.
- Store & Enjoy: Once cooled and thick, cover your jar and store it in the refrigerator. Use it in all your favorite recipes!
Calories & Nutritional Info (Per 2 Tablespoons, Estimated)
This is a rough estimate for 2 tablespoons of homemade condensed milk, which is about the size of a standard serving. Remember, this stuff is calorie-dense magic!
- Estimated Calories: ~100-120 calories
- Fat: ~3-4g
- Carbohydrates: ~18-22g
- Protein: ~2-3g
- Sugar: Yep, pretty much all of the carbohydrates are sugar. It’s in the name!
Nutritional Notes:
- A delicious source of calcium, thanks to the milk.
- Extremely versatile for sweetening coffee, tea, or any dessert.
- Definitely an indulgence, but a homemade one!
Common Mistakes to Avoid: Don’t Let Your Milk Burn!
Avoid these common blunders to ensure your condensed milk dreams don’t turn into a sticky, burnt nightmare.
- Not Using a Heavy-Bottomed Pan: This is crucial! A thin pan will scorch the bottom of your milk faster than you can say “caramelized disaster.”
- High Heat: Resist the urge to crank up the heat to speed things up. High heat leads to boiling over and burnt milk. Low and slow is the mantra here.
- Not Stirring Frequently: Milk solids can easily settle and burn on the bottom of the pan. Stirring frequently, and scraping the bottom, is your best defense against scorching.
- Walking Away: This isn’t a “set it and forget it” kind of recipe. Stay nearby, keep an eye on it, and stir. Trust me, milk will always boil over the second you leave the kitchen.
- Not Letting It Cool Completely: It will look thinner than you expect when hot. Don’t worry! It thickens significantly as it cools. If you over-reduce it while hot, it might become too thick to pour once cold.
Variations & Customizations: Get Fancy With Your Sweetness
Once you’ve mastered the basic, there are a few ways to add extra flair.
- Vanilla Bean Bliss: Instead of vanilla extract, add a split vanilla bean to the milk and sugar at the beginning. Scrape the seeds into the milk and add the pod too. Remove the pod before cooling. So fancy!
- Spiced Condensed Milk: Add a cinnamon stick or a few cardamom pods to the milk and sugar mixture as it simmers. Remove before cooling. Perfect for festive desserts or spiced coffee.
- Coconut Condensed Milk: For a dairy-free option, replace the whole milk with two cans of full-fat coconut milk. It might take a bit longer to reduce and will have a subtle coconut flavor, but it’s a fantastic alternative!
FAQ Section: All Your Condensed Milk Queries, Conquered

Still got questions swirling in your head? Let’s clear them up!
- Q: How long does homemade condensed milk last? A: Store it in an airtight container in the refrigerator for up to 1-2 weeks. Since it doesn’t have the same preservatives as commercial versions, its shelf life is shorter.
- Q: Can I freeze homemade condensed milk? A: Yes, you can! Pour it into freezer-safe containers or ice cube trays. Once frozen, transfer cubes to a freezer bag. It freezes well for up to 3 months. Thaw in the fridge before using.
- Q: Why is my condensed milk turning yellow/brown? A: A slight creamy yellow is normal. If it’s turning distinctly brown, you’re likely either using too high a heat, not stirring enough, or it’s starting to caramelize (which can be delicious, but it’s turning into dulce de leche!).
- Q: My condensed milk is too thin even after cooling. What happened? A: You probably didn’t reduce it enough. It needs to lose about half its volume. Next time, simmer for a bit longer, keeping that constant, gentle simmer going.
- Q: Can I make this with skim milk? A: You can, but it won’t be the same. Skim milk lacks the fat content needed for that rich, creamy texture and can result in a thinner, less satisfying product. Whole milk truly is best.
- Q: How much does this recipe yield? A: From 4 cups of milk, you’ll typically get about 2 cups (or roughly two standard cans’ worth) of homemade condensed milk.
- Q: Is it safe to make this in an Instant Pot or slow cooker? A: While there are recipes out there, those methods can be tricky for homemade condensed milk because you lose the ability to constantly monitor and stir, which is crucial for preventing scorching and achieving the right consistency. IMO, stovetop is best for control.
Final Thoughts: Never Be Without Sweetened Condensed Milk Again!
You’ve officially unlocked a culinary superpower! No more emergency runs to the market for a can of condensed milk. You can now whip up this golden, gooey goodness whenever a craving (or a recipe) calls for it. So go ahead, whip up that key lime pie, those fudge brownies, or just drizzle it over some fresh fruit. Your desserts (and your inner pastry chef) will thank you.