How to Make The Best Cinnamon Rolls (Gooey, Fluffy & Foolproof!)
You know that smell. It’s the one that wafts through airports and mall food courts, a siren song of warm cinnamon, brown sugar, and gooey icing that calls to the most primal part of your brain. It’s the smell of a perfect cinnamon roll. You’ve probably tried to replicate it at home, only to end up with something that’s either dry and sad or comes from a refrigerated tube that pops open with a terrifying hiss. But what if I told you that you could learn how to make a cinnamon roll that blows the food court out of the water?
I’m talking about pillowy-soft, pull-apart dough, a swirl of buttery, cinnamon-sugar goo in the middle, and a thick, tangy cream cheese frosting that melts into every nook and cranny. Scared of working with yeast? Don’t be. I’m going to hold your hand through the entire process.
Forget your past failures. Today, we’re making cinnamon rolls so good, they should be illegal. Let’s get this dough.
Why This Recipe Will Ruin All Other Rolls For You
This isn’t just a recipe; it’s a lifestyle upgrade. Prepare to become a breakfast legend.
First and foremost, the texture is absolutely heavenly. We’re using an enriched dough—loaded with milk, butter, and eggs—which results in a roll that is unbelievably soft, fluffy, and cloud-like. It’s the kind of texture that makes you close your eyes and savor the moment.

Second, we’ve perfected the gooey factor. The secret isn’t just dumping sugar and cinnamon onto the dough. It’s creating a thick, buttery paste that doesn’t leak out during baking but instead melts into a molten river of cinnamon goodness that pools at the bottom of the pan.
Finally, the cream cheese frosting is non-negotiable. It’s the perfect tangy counterpoint to the sweet, rich roll. It cuts through the sweetness and adds a layer of creamy decadence that takes these rolls from “delicious” to “an out-of-body experience.”
The Holy Trinity: Ingredients
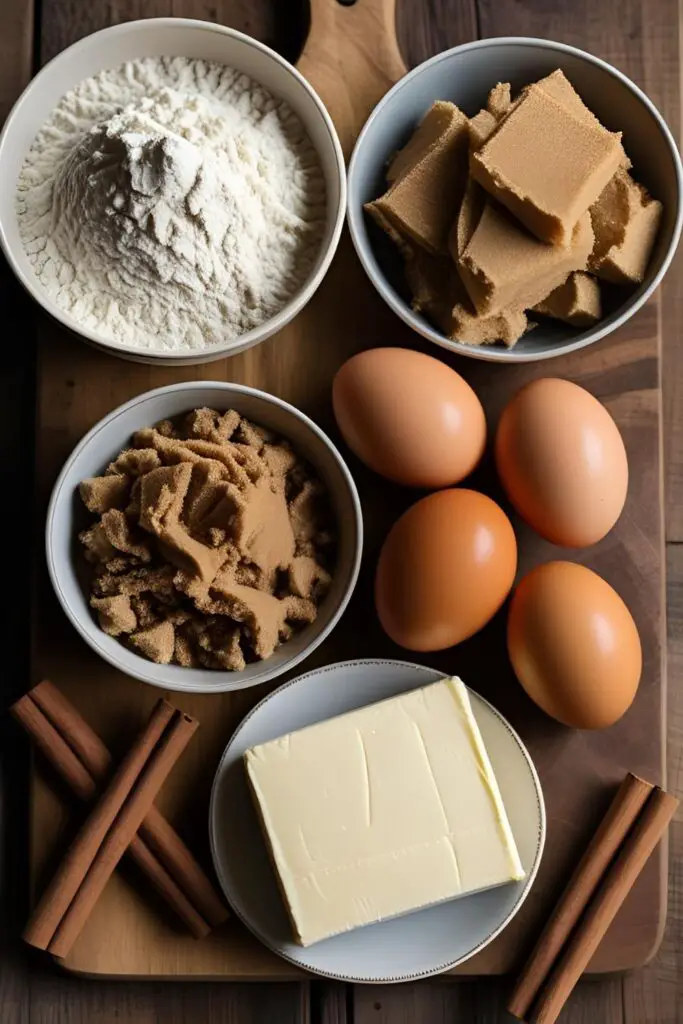
A legendary roll is made of three perfect parts. Here’s your sacred text.
For the Pillowy Dough:
- 1 cup (240ml) whole milk, warmed to about 110°F (43°C)
- 241 teaspoons (1 packet) active dry yeast
- 41 cup (50g) granulated sugar
- 1 large egg plus 1 egg yolk, at room temperature
- 41 cup (57g) unsalted butter, melted
- 321 cups (420g) all-purpose flour, plus more for dusting
- 1 teaspoon salt
For the Gooey Cinnamon Filling:
- 21 cup (113g) unsalted butter, very soft but not melted
- 43 cup (165g) packed light brown sugar
- 2 tablespoons ground cinnamon
For the Tangy Cream Cheese Frosting:
- 4 ounces (113g) full-fat block cream cheese, softened
- 41 cup (57g) unsalted butter, softened
- 121 cups (180g) powdered sugar, sifted
- 1 teaspoon vanilla extract
- 1−2 tablespoons milk or heavy cream (to thin if needed)
The Baker’s Arsenal: Tools & Gadgets
Having the right gear makes you feel like a pro, even if you’re just trying not to kill your yeast.
- Stand Mixer with a Dough Hook: While you can knead by hand, a stand mixer makes this process laughably easy.
- Mixing Bowls: You’ll need a large one for the dough to rise in.
- Instant-Read Thermometer: The best way to ensure your milk is the perfect temperature to coddle your yeast, not murder it.
- Measuring Cups and Spoons: Baking is chemistry. Be precise.
- Rolling Pin: For rolling out your beautiful dough.
- 9×13 inch Baking Pan: The classic vessel for a batch of rolls.
- Bench Scraper: For dividing the dough and cleaning your workspace.
- Unflavored Dental Floss or a Sharp Knife: The secret weapon for cutting perfect, non-squished rolls.
- Offset Spatula: For spreading that glorious frosting.
Step-by-Step: The Path to Gooey Glory
Follow these steps, and you shall be rewarded.
H3: Part 1: Making the Dough (and Befriending Yeast)
- Wake Up the Yeast: In the bowl of your stand mixer, gently whisk together the warm milk, a tablespoon of the sugar, and the yeast. Let it sit for 5-10 minutes. If it gets foamy and smells like bread, congratulations, your yeast is alive! If not, your yeast is dead. RIP. Start over with new yeast.
- Combine the Wet Ingredients: Once the yeast is bubbly, add the remaining sugar, the egg and egg yolk, and the melted butter. Give it a quick mix with the dough hook.
- Add the Dry Ingredients: With the mixer on low, gradually add the flour and salt. Mix until a shaggy dough begins to form.
- Knead It: Increase the speed to medium and let the mixer knead the dough for 5-7 minutes. The dough should be soft, slightly sticky, and pull away from the sides of the bowl. If you’re kneading by hand, do so on a floured surface for about 10 minutes until smooth and elastic.
H3: Part 2: The Rise and the Filling
- The First Rise: Lightly grease a large bowl with oil or cooking spray. Place the dough in the bowl, cover it with plastic wrap or a damp towel, and put it in a warm, draft-free spot for 1 to 1.5 hours, or until it has doubled in size.
- Make the Filling: While the dough is rising, mix the very soft butter, brown sugar, and cinnamon in a small bowl until it forms a thick, spreadable paste. Set aside.
H3: Part 3: The Assembly Line
- Roll It Out: Punch down the risen dough (so satisfying!) and turn it out onto a lightly floured surface. Roll the dough into a large rectangle, about 12×18 inches.
- Spread the Goo: Using your hands or an offset spatula, spread the cinnamon-sugar paste evenly all over the dough, leaving a small border on one of the long edges.
- Roll It Tight: Starting from the long edge opposite the clean border, roll the dough into a tight log. Pinch the seam to seal it shut.
- The Slice: Now for the fun part. Using unflavored dental floss, slide it under the log, bring the ends up, cross them over, and pull. This gives you a perfectly clean cut without squishing the roll. You can also use a very sharp serrated knife. Cut the log into 12 equal-sized rolls.
- The Second Rise: Place the rolls cut-side up in a greased 9×13 inch pan. Cover and let them rise again for 30-45 minutes, until they look puffy and are touching each other. They should look like cozy, happy friends.
H3: Part 4: Baking and Frosting
- Bake It: While the rolls are on their second rise, preheat your oven to 375°F (190°C). Bake the risen rolls for 20-25 minutes, or until they are lightly golden brown.
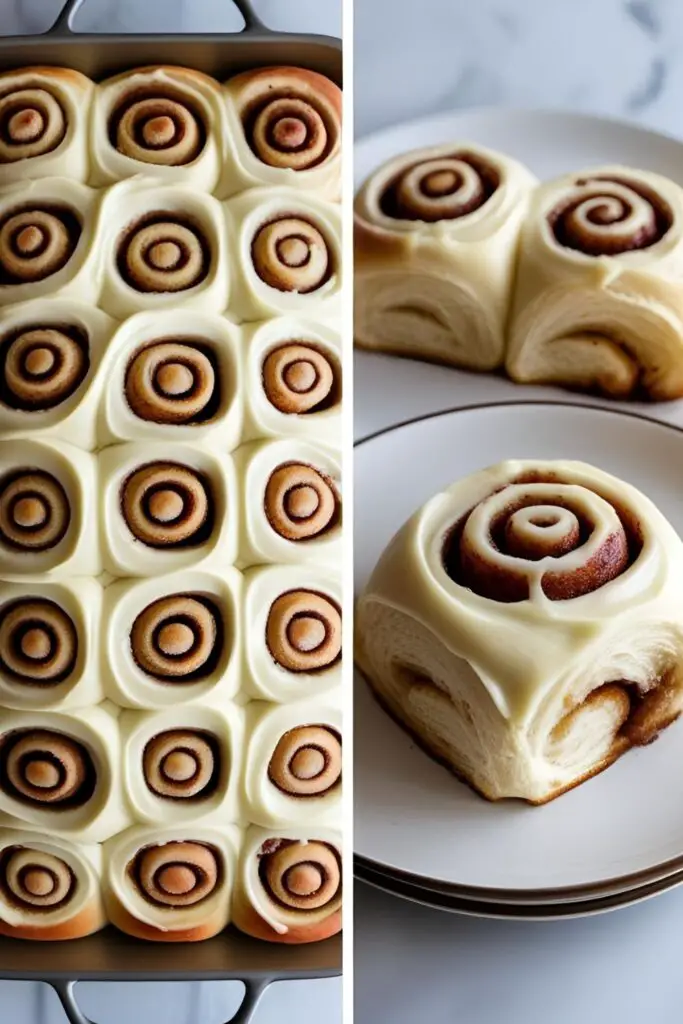
- Make the Frosting: While the rolls bake, beat the softened cream cheese and butter together until smooth. Add the sifted powdered sugar and vanilla and beat until fluffy. Add a splash of milk if it’s too thick.
- Frost While Warm: Let the rolls cool for just 5-10 minutes after they come out of the oven. Then, slather that glorious cream cheese frosting all over them. The warmth will melt it slightly, allowing it to drip into every delicious crevice.
Nutritional Info (Let’s Just Get This Over With)
Consider this a public service announcement.
- Serving Size: 1 cinnamon roll
- Estimated Calories: Around 450-500 kcal of pure bliss.
- Key Nutrients: Sugar, butter, and the will to live.
- Note: This is soul food, not health food. No one has ever eaten a cinnamon roll for the vitamins. Embrace it.
Common Mistakes to Avoid (Your Guide to Not Making Sad Rolls)
- Murdering Your Yeast: The number one crime. If your milk is hotter than 115°F, it will kill the yeast. Too cold, and it won’t wake up. Use a thermometer if you’re unsure.
- Making Dry, Tough Dough: It’s tempting to keep adding flour if the dough is sticky, but don’t. A slightly sticky dough is a happy dough. Too much flour is the path to dry, dense rolls.
- Using Melted Butter in the Filling: This is a rookie mistake. Melted butter will just leak out the bottom of your rolls during the second rise and bake, creating a greasy mess. You need a soft, thick paste that stays put.
- Impatience: Under-proofed rolls (not letting them rise long enough) will be dense and sad. Let them get visibly puffy and doubled in size. Don’t rush the magic.
- Overbaking: There’s a fine line between golden brown and a hockey puck. Keep an eye on them. You want them cooked through but still soft and tender.
Variations & Customizations (Choose Your Own Gooey Adventure)

Once you’ve mastered the classic, why not get a little wild?
- Orange Dream Rolls: Add the zest of one large orange to the dough when you add the eggs. Replace the milk in the frosting with a tablespoon or two of fresh orange juice for a bright, zesty twist.
- Pecan Sticky Buns: Before placing your cut rolls in the pan, pour a layer of melted butter, brown sugar, and a handful of chopped pecans on the bottom. When you bake them, they’ll create their own caramel sauce. Flip the pan over after baking.
- Chocolate Lover’s Rolls: Sprinkle a cup of mini chocolate chips over the cinnamon-sugar filling before you roll up the dough. You won’t regret it.
Frequently Asked Questions (Your Cinnamon Roll Hotline)
Can I make these cinnamon rolls the night before?
Yes, and it’s a brilliant idea! After you place the cut rolls in the pan (after the first rise), cover them tightly with plastic wrap and place them in the refrigerator overnight. In the morning, take them out, let them sit at room temperature for about 45-60 minutes to finish rising, and then bake as directed.
My dough didn’t rise! What went wrong?
There are a few suspects. Your yeast could have been expired (dead on arrival). Your milk could have been too hot (murder). Or your kitchen could be too cold (it’s hibernating). Always check your yeast’s expiration date!
What’s the best way to cut cinnamon rolls without squishing them?
Unflavored dental floss is the undisputed champion. It slices cleanly through the dough without compressing the layers. A very sharp serrated knife is a good backup.
Can I use instant yeast instead of active dry yeast?
You can! If using instant yeast, you can skip the “blooming” step and mix it directly in with your dry ingredients. Your rise times might also be slightly shorter.
How do I store leftovers?
If you somehow have leftovers, store them in an airtight container at room temperature for up to 3 days. Reheat one in the microwave for 15-20 seconds to bring it back to its gooey glory.
Why are my cinnamon rolls tough instead of fluffy?

The most likely culprit is too much flour in the dough or over-kneading. The dough should be soft and pliable, not stiff and hard.
Can I freeze these?
Absolutely. You can freeze the baked and frosted rolls in an airtight container. You can also freeze the unbaked rolls after slicing them. To bake from frozen, let them thaw and rise in the refrigerator overnight, then proceed as the recipe directs.
Final Thoughts
You did it. You faced down your fear of yeast and emerged victorious, armed with a pan of the most decadent, gooey, and perfect cinnamon rolls known to humanity. You are a baker, a champion, a hero of breakfast.
Go on, pull one apart while it’s still warm. Let the frosting get all over your fingers. This is a moment to be savored. And FYI, you’ll probably never be able to look at a can of refrigerated dough the same way again. You’re welcome.