How to Make Chocolate Pudding (The Real, Decadent, Grown-Up Stuff)
Let’s take a trip down memory lane. Remember those little boxes of instant chocolate pudding mix? You’d whisk it with cold milk, watch in mild amusement as it magically thickened, and then eat a bowl of something that tasted vaguely of chocolate and… chemicals? It was fine for a ten-year-old. But you’re a grown-up now. Don’t you think you deserve better? It’s time to ditch the box and learn how to make chocolate pudding from scratch. The real stuff. The kind that’s so rich, so creamy, and so deeply chocolatey, it will ruin you for the instant kind forever.
Why This Recipe Is Awesome (It’s Pure, Unadulterated Comfort)
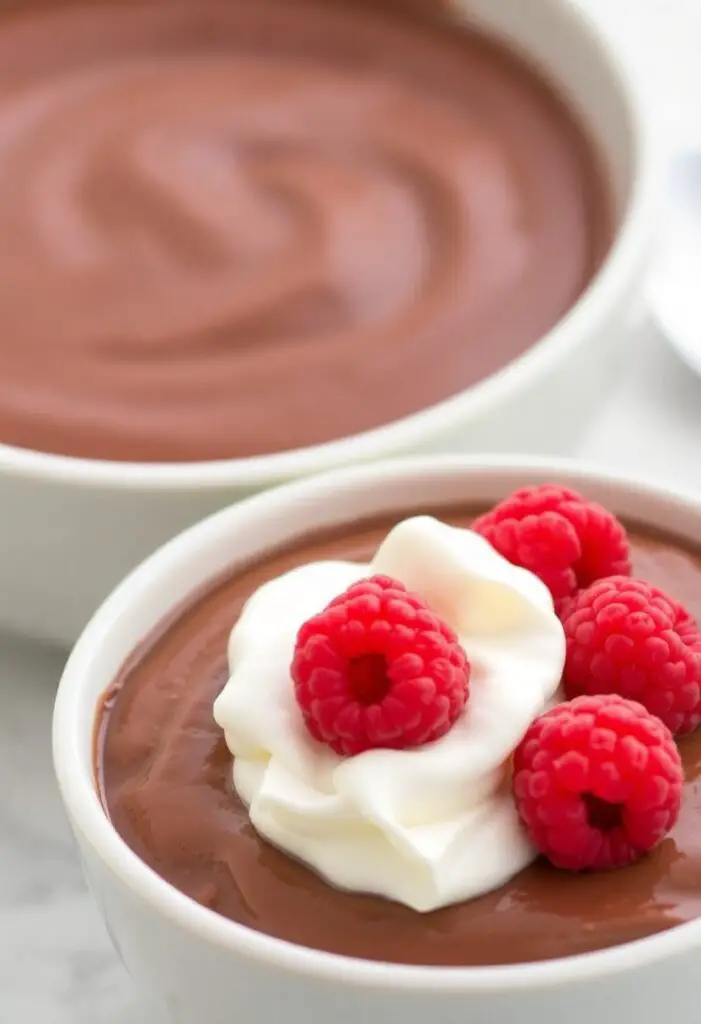
So, why bother with a saucepan and a whisk when a box and 2 minutes exist? Because this homemade chocolate pudding is on an entirely different planet of deliciousness. We’re talking about a silky-smooth, velvety texture with a deep, rich, and complex chocolate flavor that you can only get from using real cocoa and a little bit of love.
This recipe is surprisingly easy, using simple pantry staples to create something truly luxurious. It’s the ultimate comfort food—perfect served warm on a rainy evening in Khulna, or chilled for a refreshing treat. It’s the kind of dessert that makes your guests’ eyes widen as they take their first spoonful, immediately elevating your status to “dessert wizard.” And the best part? You made it yourself, and it was probably easier than you think.
Ingredients: Your Ticket to Chocolate Heaven
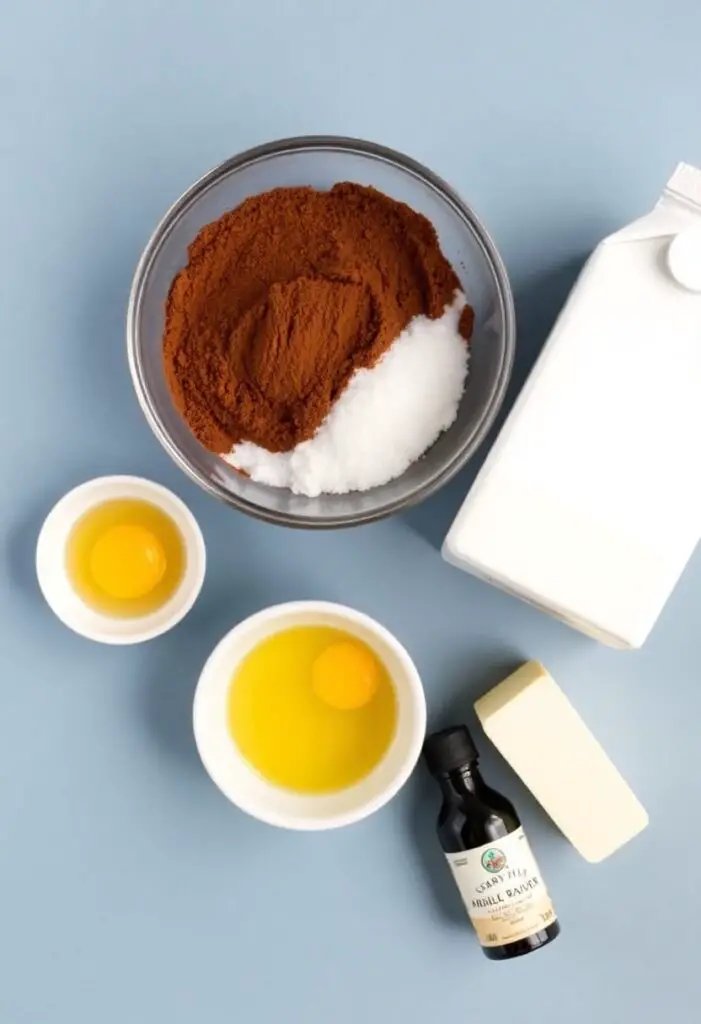
You don’t need a pantry full of fancy items. Just a few quality basics.
- ⅔ cup granulated sugar
- ¼ cup unsweetened cocoa powder (use a good quality one!)
- 3 tablespoons cornstarch
- ¼ teaspoon salt
- 2 ½ cups whole milk, divided
- 3 large egg yolks
- 2 tablespoons unsalted butter, cut into small pieces
- 1 teaspoon vanilla extract
Key Ingredient Notes (Read This!):
- Cocoa Powder: The flavor of your pudding depends on this. Use a good quality unsweetened cocoa powder, like Dutch-processed, for a darker, richer result.
- Egg Yolks: These are the secret to an incredibly rich and creamy pudding. Don’t skip them! They add a lusciousness that cornstarch alone can’t achieve.
- Whole Milk: Now is not the time for skim milk. The fat content in whole milk is crucial for a creamy, satisfying texture.
Tools & Kitchen Gadgets Used: Your Pudding Production Line

The right tools will ensure a smooth, lump-free result.
- Medium Heavy-Bottomed Saucepan (Prevents the bottom from scorching!)
- Whisk (Your #1 weapon against lumps.)
- Two Medium Mixing Bowls
- Fine-Mesh Sieve (Optional, but your ticket to a guaranteed silky-smooth finish.)
- Rubber Spatula
- Measuring Cups and Spoons
- Serving bowls or ramekins
Step-by-Step Instructions: Mastering the Creamy Dream
Don’t be scared by the process. We’re going to break it down. You’ve got this.
Act 1: The Foundation
- Mix the Dry Stuff: In your medium saucepan, whisk together the sugar, cocoa powder, cornstarch, and salt. Whisking them together now helps prevent lumps later on.
- Prep the Yolks: In a separate medium bowl, lightly whisk the 3 egg yolks. Set them aside near your stove. You’ll need them soon.
- The First Whisk: Gradually whisk in about ½ cup of the cold milk into the dry ingredients in the saucepan. Whisk until you have a smooth, thick paste with no lumps.
- Add the Rest: Slowly pour in the remaining 2 cups of milk, whisking constantly until everything is combined.
Act 2: The Tempering Tango (Don’t Scramble Your Eggs!)
- Heat the Milk: Place the saucepan over medium heat. Whisking frequently, bring the mixture to a gentle simmer. It will start to thicken slightly.
- The Tempering: This is the most important part! Once the milk mixture is hot, remove it from the heat. Very, very slowly, pour about one cup of the hot chocolate mixture into the bowl with the whisked egg yolks, whisking the yolks vigorously the entire time. This gently raises the temperature of the eggs without scrambling them. This is called tempering. You are now a fancy chef.
- Return to the Pan: Pour the tempered egg yolk mixture back into the saucepan with the rest of the chocolate milk.
Act 3: The Final Thickening
- Cook Until Thick: Return the saucepan to medium heat. Whisking constantly and vigorously, bring the pudding to a boil. Once it starts bubbling, continue to whisk for 1-2 full minutes. The pudding will thicken considerably.
- The Finishing Touches: Remove the saucepan from the heat. Add the butter and vanilla extract. Stir until the butter is completely melted and the pudding is glossy and smooth.
- Strain for Perfection (Optional but Recommended): For a guaranteed, impossibly silky texture, pour the finished pudding through a fine-mesh sieve into a clean bowl. This will catch any tiny lumps or bits of cooked egg you might have missed.
- Chill Out: To prevent a “pudding skin” from forming, press a piece of plastic wrap directly onto the surface of the pudding.
- Refrigerate: Chill in the refrigerator for at least 3-4 hours, or until completely cold and set. Or, if you’re like me, eat a little bit of it warm because you have no self-control.
Calories & Nutritional Info (Per Serving, Estimated)
This is a rich, decadent dessert. Let’s not pretend it’s a health food. (This is for one serving, assuming 6 servings.)
- Estimated Calories per serving: ~250-300 calories
- Fat: ~15g
- Carbohydrates: ~30g
- Protein: ~6g
- Pure, unadulterated bliss: 100%
Common Mistakes to Avoid: Don’t Let Your Pudding Be a Dud!
Avoid these common slip-ups for pudding perfection.
- Scrambled Eggs: The ultimate pudding tragedy. This happens if you add the hot milk to the eggs too quickly without whisking. Temper slowly and whisk constantly!
- Lumpy Pudding: This can happen if you don’t whisk your dry ingredients together first, or if you don’t whisk constantly while it’s thickening. The final strain through a sieve is your insurance policy.
- The Dreaded Pudding Skin: If you just cover the bowl, a thick, unpleasant skin will form on top as it cools. You must press the plastic wrap directly onto the surface of the pudding.
- Burnt Bottom: If you don’t use a heavy-bottomed pan or you don’t stir constantly, the bottom can scorch, giving your pudding a burnt taste. Keep that whisk moving!
Variations & Customizations: Your Pudding, Your Playground
The classic is perfect, but who doesn’t love to experiment?
- Mexican Hot Chocolate Pudding: Add ½ teaspoon of cinnamon and a pinch of cayenne pepper to the dry ingredients. Serve with a dollop of whipped cream.
- Mocha Madness: Add 2 teaspoons of instant espresso powder to the dry ingredients. It won’t taste like coffee; it will just make the chocolate flavor deeper and more intense.
- Vegan Avocado Chocolate Pudding (A Healthy Twist!): For a completely different, no-cook, and surprisingly healthy version, blend together 2 ripe avocados, ½ cup cocoa powder, ½ cup maple syrup, ¼ cup non-dairy milk, and 1 teaspoon vanilla extract until completely smooth. It’s a different beast, but delicious!
FAQ Section: All Your Pudding Predicaments, Solved
You’ve got questions about this creamy concoction. I’ve got you covered.
- Q: What is tempering, and do I really have to do it? A: Tempering is the process of slowly raising the temperature of a delicate ingredient (like eggs) by adding a small amount of a hot liquid to it. Yes, you really have to do it, or you’ll end up with sweet, chocolatey scrambled eggs.
- Q: My pudding didn’t thicken. What did I do wrong? A: You probably didn’t cook it long enough after adding the eggs back in. You need to bring it to a full boil and whisk it for at least one full minute for the cornstarch to fully activate and thicken the pudding.
- Q: Can I use whole eggs instead of just the yolks? A: You can, but the texture won’t be as rich and creamy. The fat and emulsifiers in the yolks are what give the pudding its luxurious, custardy mouthfeel.
- Q: Can I make this pudding ahead of time? A: Yes! It’s a perfect make-ahead dessert. It needs at least 3-4 hours to chill and set properly anyway.
- Q: How long does homemade chocolate pudding last in the fridge? A: Stored with the plastic wrap on its surface in an airtight container, it will last for up to 4-5 days.
- Q: Can I make this with non-dairy milk? A: You can. A full-fat oat milk or a creamy cashew milk would be your best bets for a similar texture. The flavor will be slightly different.
- Q: Is it supposed to be this thick? A: Yes, homemade pudding is much thicker and richer than the instant kind. It should be thick enough to hold its shape on a spoon.
Final Thoughts: You’ve Graduated from the Box

Congratulations! You have officially left the world of dusty, chemical-laden pudding mixes behind. You are now a purveyor of real, luscious, homemade chocolate pudding. You can whip up a bowl of pure comfort whenever the mood strikes. So go on, grab a spoon, and savor the velvety, chocolatey fruits of your labor. You’ll never look back.