How to Make Cake Pops: A Foolproof Guide for Beginners
Ah, the cake pop. That perfect, glossy little sphere of cake on a stick that stares at you from behind the coffee shop glass, silently judging your life choices. They seem like a culinary dark art, a magical feat only achievable by bakers with an army of tiny elves and superhuman patience. But what if I told you that learning how to make cake pops is not only possible but actually fun?
You don’t need magic. You don’t need to sell your soul for a special machine. You just need a baked cake, some frosting, and a willingness to embrace a process that’s one part baking, one part sculpture, and one part pure, unadulterated chaos.
So, are you ready to conquer the cutest dessert on the planet and stop paying five dollars for a single bite of cake on a stick? Let’s do this.
Why This Recipe is Awesome (AKA Your New Party Trick)
First and foremost, this recipe is the ultimate recycling program for cake. Got some leftover birthday cake? A baking experiment that didn’t turn out quite pretty enough? Crumble it up! This recipe transforms humble cake into something elegant and new.
They are also endlessly customizable. With a simple swap of cake flavor, frosting, or candy coating, you can create a bespoke treat for any holiday, party, or Tuesday afternoon craving. Unicorn pops? Done. Spooky Halloween eyeballs? Easy. The only limit is your imagination (and maybe your sprinkle collection).

Finally, people go absolutely bonkers for them. Show up to any gathering with a bouquet of homemade cake pops, and you will instantly become the most popular person in the room. They are the perfect, portion-controlled, no-fork-required party food. IMO, putting food on a stick just makes it better. It’s science.
Ingredients You’ll Need
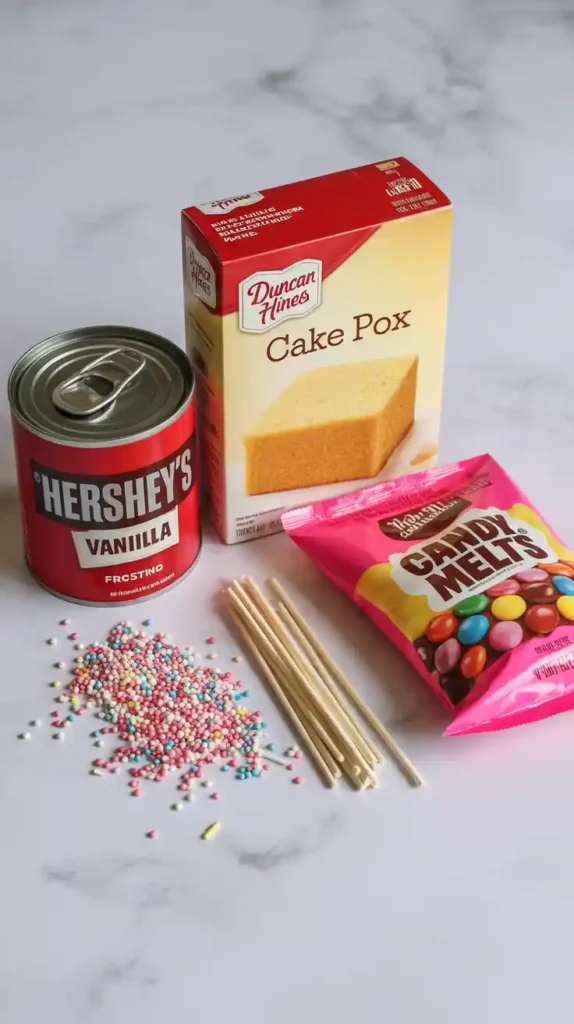
The beauty of this recipe is its simplicity. No need to forage for rare ingredients.
- One 9×13 inch cake, fully baked and cooled: Honestly, a box mix works perfectly here. Chocolate, vanilla, funfetti—you choose! If you’re using a scratch recipe, even better, you overachiever.
- ¾ to 1 cup of frosting: Canned frosting is your friend. It has the perfect consistency. If you’re using homemade, you want it thick and creamy.
- One 12-ounce bag of candy melts: Use candy melts, not chocolate chips. I’ll scream this from the rooftops. They are designed to melt smoothly and harden with a satisfying snap. Pick any color you like!
- Lollipop Sticks: About 40-50, 6-inch sticks are standard.
- Sprinkles!: This is not a suggestion; it’s a requirement for maximum joy.
Tools & Kitchen Gadgets Used
Having the right equipment will save you from a world of sticky frustration. Here’s what you’ll need to make your life easier:
- Large Mixing Bowl: For the cake demolition phase.
- Lollipop Sticks: The vehicle for your cakey creations.
- A Cake Pop Stand or a block of Styrofoam: Absolutely essential for drying your pops without smudging them. A floral foam block from a craft store is a cheap and perfect option.
- Cookie Scoop: A 1.5-tablespoon scoop is your key to making uniform-sized cake balls.
- Baking Sheet lined with Parchment Paper: To hold your cake balls as you work.
- Deep, Microwave-safe Mug or Cup: This is for melting the candy melts. A narrow, deep container is much better for dipping than a wide, shallow bowl.
Step-by-Step Instructions: Let’s Get This Ball Rolling
Alright, deep breath. We’re going in. This process is a marathon, not a sprint. We’ll break it down into manageable chunks.
H3: Part 1: The Cake Dough Creation
- Demolish the Cake: Once your cake is completely cool, crumble it into your large mixing bowl. You can use your hands, a fork, or even a stand mixer with the paddle attachment. Your goal is to get fine, uniform crumbs with no big chunks left. This is your therapy session. Enjoy it.
- Bind It Together: Add about ¾ cup of frosting to the cake crumbs. Now, get your hands in there and mix it all together. It will feel weird. It will feel wrong. But keep going. You’re looking for a consistency like play-doh, where you can squeeze a handful and it holds its shape. If it’s still too crumbly, add more frosting one tablespoon at a time.
- Scoop and Roll: Use your cookie scoop to portion out the cake “dough.” Roll each portion firmly between the palms of your hands to create a smooth, compact ball. Place the finished balls on your parchment-lined baking sheet. You should get around 40-48 cake balls.
H3: Part 2: The Sticking Point & The Big Chill
- The Candy Glue: Melt about ¼ cup of your candy melts in the microwave. Dip the tip of a lollipop stick about ½ inch into the melted candy.
- Insert the Stick: Immediately insert the candy-coated end of the stick into a cake ball, pushing it about halfway through. The melted candy acts as glue to anchor the cake pop to the stick. Repeat for all your cake balls.
- Time for a Chill: Place the entire baking sheet of proto-cake pops into the freezer for 15-20 minutes or the refrigerator for about 30 minutes. You want them to be firm, but not frozen solid. This step is non-negotiable if you want your cake pops to survive the dipping process.
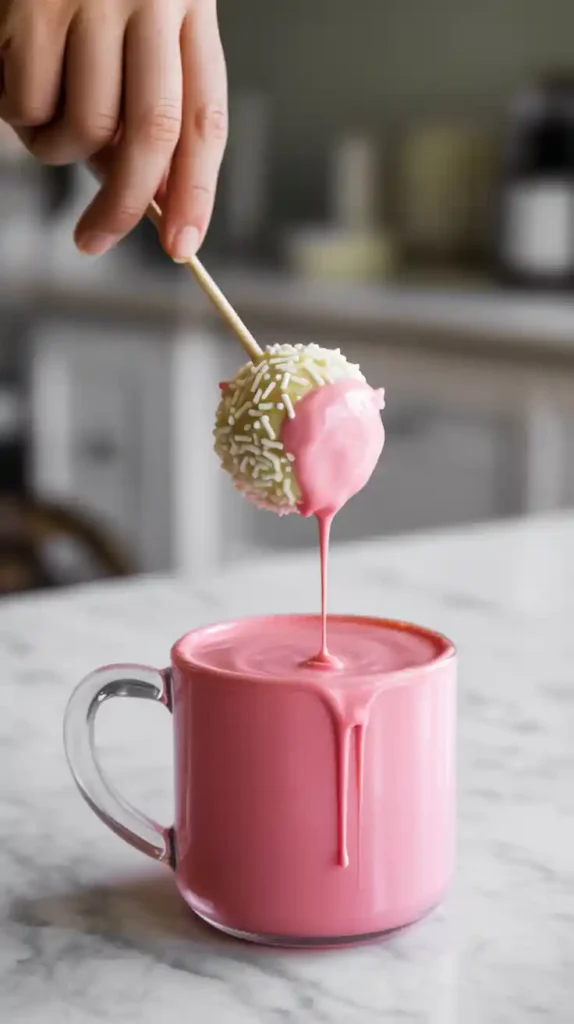
H3: Part 3: The Dip and Decorate Finale
- Melt the Candy: Place the rest of your candy melts in your deep, narrow mug. Microwave them in 30-second intervals, stirring well after each one, until they are completely melted and smooth.
- The Big Dip: Take a few chilled cake pops out of the freezer at a time. Hold the stick and dip one cake pop straight down into the melted candy until the entire ball is submerged. Do not stir it around. Just dip and lift.
- Drip, Drip, Drip: Lift the cake pop straight up out of the candy. Gently tap the stick on the rim of the mug to allow the excess candy to drip off. You can also slowly twirl the pop to help it along.
- Sprinkle Time! While the candy coating is still wet, immediately add your sprinkles. The candy sets fast, so you have to be quick!
- Let It Dry: Place the finished cake pop into your stand or Styrofoam block to dry completely. Don’t lay them down, or they’ll get a flat side. Repeat with the remaining pops until you have a beautiful, edible bouquet.
Calories & Nutritional Info
Let’s be brutally honest with each other. You are eating cake mixed with frosting, covered in candy, served on a stick. It is a glorious indulgence, not a health food.
- Calories per pop: Approximately 150-200 kcal
- Fat: Around 9g
- Carbohydrates: Roughly 20g
- Sugar: A delightful amount.
- Note: These are a treat. A fun, portion-controlled, delicious treat. Enjoy them for what they are and don’t think about the calories. TBH, the joy they bring cancels it out.
Common Mistakes to Avoid (The Cake Pop Hall of Shame)
I have made every single one of these mistakes. Learn from my pain.
- The Dreaded Plop: Your cake ball slides off the stick and tragically drowns in the melted candy. Why it happened: You either skipped the “glue” step of dipping the stick in candy first, your cake balls were too big and heavy, or your dough was too mushy (too much frosting). Keep them around 1.5 tablespoons!
- The Crackle Catastrophe: Your beautiful, smooth candy coating develops unsightly cracks as it dries. Why it happened: Your cake balls were too cold. If they are frozen solid, the extreme temperature difference between the frozen ball and the warm candy causes the shell to crack as it sets. Chill them, don’t freeze them.
- Using Chocolate Chips: You thought you could outsmart the recipe and use that bag of semi-sweet morsels. Now you have a dull, soft coating that never quite sets and melts if you look at it funny. Use candy melts. They contain stabilizers that allow them to set hard and shiny at room temperature.
- A Goopy Mess: Your cake-and-frosting mixture is a greasy, un-rollable mess. Why it happened: You got way too excited with the frosting. Always start with less frosting than you think you need. You can add more, but you can’t take it away.
Variations & Customizations

This is where the real fun begins. The possibilities are endless.
- Ultimate Cookies & Cream: Use a chocolate cake, but mix a hefty amount of finely crushed Oreo cookies into your vanilla frosting. Dip in white candy melts and immediately sprinkle with more Oreo crumbs.
- Birthday Cake Bonanza: Use a funfetti cake mix and classic vanilla buttercream. Dip in a vibrant pink or blue candy melt coating and go wild with rainbow nonpareils. It’s a party on a stick.
- Salted Caramel Mocha: Use a chocolate or coffee-flavored cake. Use a salted caramel frosting. Dip in dark chocolate candy melts and finish with a sprinkle of flaky sea salt. It’s sophisticated and dangerously addictive.
FAQ: Your Most Pressing Cake Pop Questions
- Why do my cake pops keep falling off the stick? This is the classic rookie mistake. The most common reasons are: the cake ball is too large/heavy, the stick wasn’t “glued” in with melted candy, or the cake ball wasn’t chilled enough to be firm.
- How do you make cake pops perfectly round? Use a cookie scoop for uniform size, and roll them firmly and quickly between your palms. Don’t overwork them, or the heat from your hands will make them greasy.
- Can you make cake pops ahead of time? Yes! They are a great make-ahead dessert. You can store finished cake pops in an airtight container in the refrigerator for up to a week.
- Why is my candy coating cracking? The temperature difference between your cake ball and your melted candy is too extreme. Let your cake balls sit at room temp for a few minutes after taking them out of the freezer, and let your melted candy cool slightly before dipping.
- What’s the best way to melt candy melts? The microwave is your best friend. Use a microwave-safe mug, heat in 30-second bursts, and stir thoroughly between each interval. Do not overheat them, or they will become thick and clumpy.
- How do you thin candy melts if they get too thick? Add a very small amount of Paramount Crystals or solid vegetable shortening (like Crisco). Stir it in until smooth. Never, ever add water or any water-based liquid, as it will cause the candy to seize up instantly.
- Do I have to use a box mix and canned frosting? Not at all! If you have a favorite scratch cake and buttercream recipe, go for it! Just make sure the frosting is on the thicker side.
Final Thoughts
You did it. You stared into the candy-coated abyss and emerged victorious, armed with a tray of perfect, adorable cake pops. You are now officially That Person who brings the cool dessert to the party. Welcome to the club.
Now go on, share them with friends, or hoard them for yourself while binge-watching your favorite show. You’ve earned it. And you’ll probably never look at that coffee shop pastry case the same way again.