The “Never Buy Canned Sawdust Again” Guide to Making Bread Crumbs
Let’s talk about the sad, lonely souls at the end of the bread bag. The heels. The slightly stale slices that are past their sandwich-making prime. What’s their fate in your kitchen? Do they languish in the bag until they develop a science experiment, only to be tossed out with a pang of guilt? Well, I’m here to tell you to stop the madness. Their destiny is not the trash can; their destiny is glorious. This is your ultimate guide on how to make bread crumbs, and it’s about to turn your food-waste-guilt into a delicious, crunchy victory.
Forget that sad, dusty canister of bread crumbs you buy at the store. We are about to create a pantry staple that is a million times more flavorful, has a better texture, and costs you practically nothing. Get ready to give your stale bread a heroic and delicious new purpose.
Why This “Recipe” is a Kitchen Superpower
So, why should you bother with this simple, two-step process?
- It’s a Flavor and Texture Upgrade: Homemade bread crumbs are a completely different species from the store-bought kind. They have more texture, more flavor, and they toast up to a more beautiful, golden-brown. They will make your chicken parmesan crispier, your meatballs more tender, and your mac and cheese topping crunchier.
- You’ll Save Money and Reduce Food Waste: This is the ultimate “waste not, want not” kitchen hack. You’re turning something you were about to throw away into a useful, delicious ingredient. It’s good for your wallet and good for the planet. You’re basically a superhero.
- It’s Incredibly Easy and Versatile: If you have stale bread and a food processor (or even a blender), you’re five minutes away from perfect bread crumbs. We’ll cover how to make both fresh, fluffy crumbs and dry, crispy ones, so you’ll be ready for any recipe.
The “Ingredients” (aka Your Stale Bread Collection)

This is less of a shopping list and more of a pantry audit.
- Stale Bread: This is the star. Almost any kind of bread will work, as long as it’s at least a day or two old and a bit dried out.
- Crusty artisan loaves (like sourdough or a baguette) make for amazing, rustic crumbs.
- Sandwich bread (white or whole wheat) makes for a finer, more uniform crumb.
- Leftover hot dog or hamburger buns are also fantastic candidates.
- Optional Flavorings (for Italian-Style Crumbs):
- 1 teaspoon Dried Oregano
- 1 teaspoon Dried Basil
- ½ teaspoon Garlic Powder
- ¼ cup Grated Parmesan Cheese
Tools & Kitchen Gadgets: Your Crumb-Making Crew
You don’t need much to turn stale bread into gold.
- A Food Processor or a High-Powered Blender: This is the fastest and easiest way to get perfect, uniform crumbs.
- A Rimmed Baking Sheet: Essential for toasting the crumbs.
- An Oven.
- An Airtight Container or Ziploc Bag: For storing your beautiful, homemade crumbs.
- Tongs or a Spatula.
Step-by-Step Instructions: The Path to Crumby Perfection
We’re going to tackle the two main types of bread crumbs: fresh and dry. They have different uses, and both are incredibly easy to make.
Method 1: How to Make Fresh Bread Crumbs
(Perfect for binding meatballs and meatloaf, or for a softer topping)
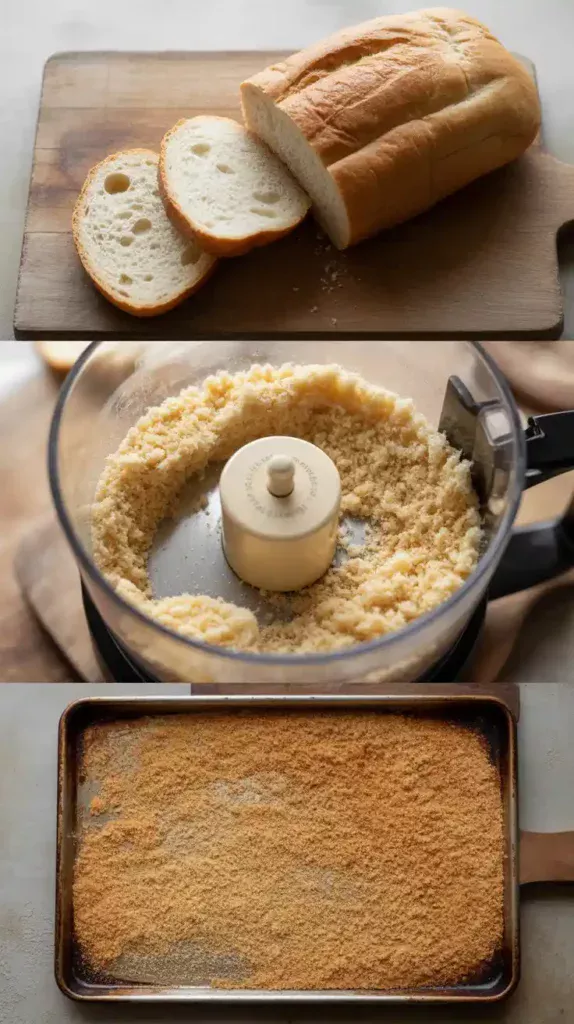
- The Prep: Take your stale (but not rock-hard) bread and tear it into rough, 1-inch chunks.
- The Blitz: Place the bread chunks into the bowl of your food processor. Don’t overcrowd it; work in batches if you need to.
- Pulse to Perfection: Pulse the machine in short bursts until the bread has broken down into soft, fluffy, and fairly uniform crumbs. And that’s it! You’ve just made fresh bread crumbs.
Method 2: How to Make Dry, Toasted Bread Crumbs
(Perfect for breading chicken or fish, and for crispy toppings)
- Follow Steps 1-3 from the Fresh Bread Crumb method above. You always start by making fresh crumbs.
- The Toast: Preheat your oven to 300°F (150°C). Spread your fresh bread crumbs in a single, even layer on a rimmed baking sheet.
- Bake for 10-15 minutes, stirring them with a spatula every 5 minutes, until they are completely dry, golden-brown, and crispy. Watch them like a hawk, as they can go from golden to burnt very quickly.
- The Cool Down: Let the bread crumbs cool completely on the baking sheet.
- The Final Blitz (Optional): If you want a finer, more uniform crumb (similar to the store-bought kind), you can pour your cooled, toasted crumbs back into the food processor and give them a few more quick pulses.
“Nutritional Info” (It’s Bread, Folks)
The nutritional info will depend entirely on the bread you use. But let’s be real…
- Serving Size: ¼ cup of crispy goodness.
- Main Benefit: Rescuing sad bread from a tragic fate.
- Good For: Making delicious food even more delicious.
Common Mistakes to Avoid (Crumb Catastrophes)
- Using Fresh, Squishy Bread: If you try to blitz a fresh, soft loaf of bread, you will not get crumbs. You will get a gummy, doughy paste that will be a nightmare to clean out of your food processor. Your bread needs to be at least a day or two old and slightly dry.
- Burning the Crumbs: When you’re toasting your crumbs in the oven, they can go from perfectly golden to a sad, burnt, bitter mess in about 60 seconds. Stay by your oven and stir them frequently.
- Storing Them While Still Warm: This is a crucial mistake. If you pour your warm, toasted bread crumbs into an airtight container, the residual heat will create condensation, which will turn your beautiful, crispy crumbs into a soggy, sad clump. They must be completely cool before you store them.
- Grinding them into Dust: Use the pulse button on your food processor. If you just turn it on and let it run, you risk over-processing the bread and ending up with a fine powder that’s more like flour than bread crumbs.
Variations & Customizations: The Flavor Factory
Plain bread crumbs are great, but flavored ones are a whole other level of delicious.
1. The Classic Italian-Style
This is a must-have for any kitchen. To your finished, cooled, dry bread crumbs, add dried oregano, dried basil, garlic powder, and a generous amount of grated Parmesan cheese. Toss to combine. Perfect for chicken parmesan, baked pasta, and meatballs.
2. The Panko-Style Crumb
For an extra-light and crispy crumb, use a crustless, soft white sandwich bread. Make fresh crumbs, but be very careful not to over-process them; you want large, flaky crumbs. Toast them until they are dry, but not very colored. The result is a light, airy crumb that provides a superior crunch.
3. The “Everything Bagel” Crumbs
This is a game-changer. Take your stale everything bagels, blitz them into crumbs, and toast them as directed. This creates the most incredible, savory, and crunchy topping you will ever put on a bowl of mac and cheese or a piece of baked fish.
FAQ: Your Crummiest Questions, Answered
What is the absolute best kind of bread to use?
Honestly, almost any kind of stale bread will work! Crusty, artisan-style breads like sourdough and baguettes will give you a more rustic, flavorful crumb. A simple white sandwich bread will give you a more uniform, classic crumb.
What’s the real difference between fresh and dry bread crumbs?
- Fresh bread crumbs are soft, fluffy, and have more moisture. They are best used as a binder in things like meatballs and meatloaf, or for a softer, less crispy topping.
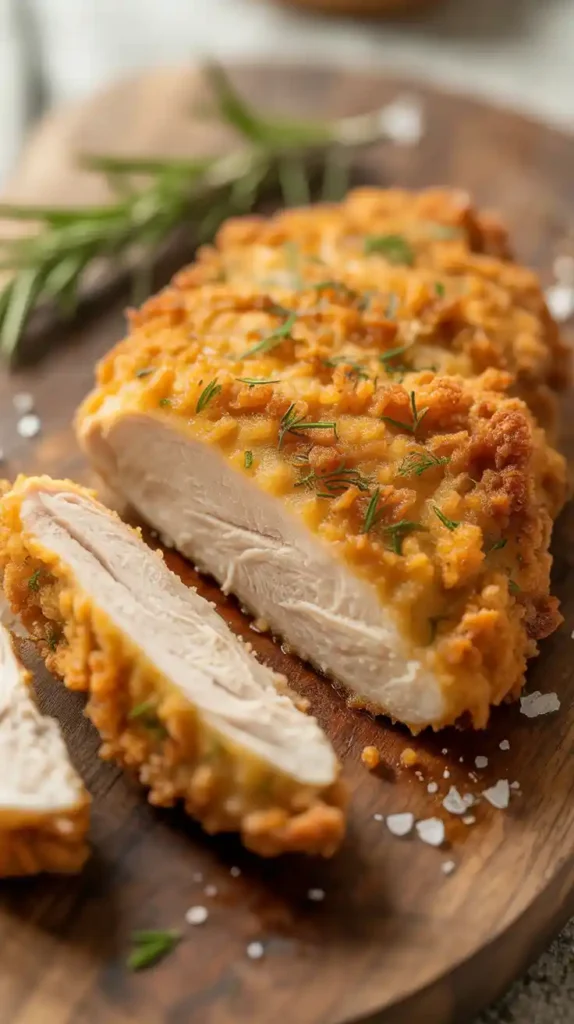
- Dry bread crumbs have been toasted to remove all the moisture. They are crispy and sandy. They are best used for breading fried or baked foods to create a crunchy crust.
I don’t have a food processor. Can I still make bread crumbs?
Yes! It just takes a little more elbow grease. You can use the coarse side of a box grater to grate your stale bread. Or, you can toast the stale slices whole until they are very dry and crispy, place them in a sturdy Ziploc bag, and crush them with a rolling pin.
How long do homemade bread crumbs last?
- Fresh bread crumbs should be stored in an airtight container in the refrigerator for up to a week, or in the freezer for up to 3 months.
- Dry bread crumbs, once completely cool, can be stored in an airtight container in a cool, dark pantry for up to 6 months.
Final Thoughts
You’ve done it. You have looked at a piece of sad, stale bread that was destined for the bin, and you have given it a glorious, crunchy, and delicious new life. You are a kitchen hero, a champion of sustainability, a master of the crumb.
So go on, never throw away a heel of bread again. Your pantry is now stocked with a secret weapon that will make all of your future meals just a little bit better. You’ll never buy that can of dusty crumbs again.


