Unleash Your Inner Lumberjack: How to Make Black Bear Diner Pancakes at Home
Ever rolled out of bed with a pancake craving so intense it could rival a hungry bear emerging from hibernation? Yeah, me too. And let’s be honest, sometimes you just want those gloriously fluffy, slightly sweet discs of joy that a certain bear-themed diner is famous for. So, are you ready to skip the wait and bring that iconic breakfast to your own kitchen? Let’s learn how to make black bear diner pancakes and prepare for some serious flapjack flipping action.
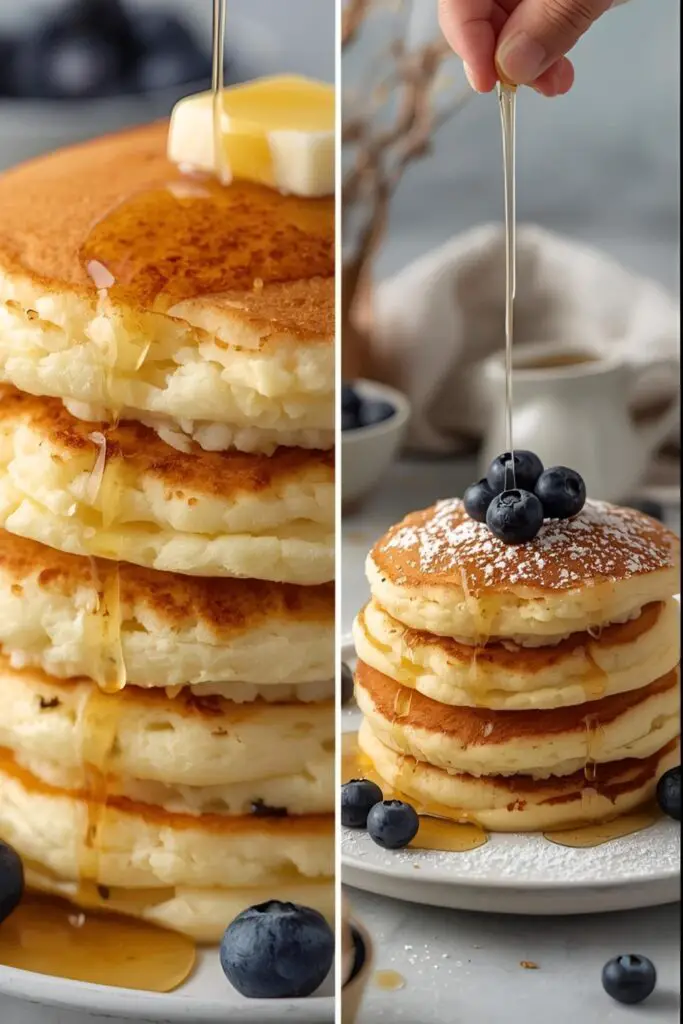
Forget those thin, sad excuses for pancakes you might have attempted before. We’re talking about the real deal: thick, cloud-like pancakes that soak up butter and syrup like a sponge. Get ready to impress your brunch buddies (or just your very enthusiastic self) with this surprisingly simple recipe.
Why These Pancakes Are Bear-y Special (Pun Intended, Obviously)
Why bother trying to recreate these diner classics at home? Let me lay it on you.
First, they’re unbelievably fluffy. We’re talking serious airiness here. These pancakes practically float off the griddle. Who doesn’t want a cloud for breakfast?
Second, the flavor is just right. They’re subtly sweet with a hint of that classic pancake goodness that makes you want to dive in face-first.

Third, you can make them in your pajamas. Need I say more? Skip the morning rush and the potential for questionable diner coffee. Your comfy clothes and a hot stack of pancakes? Winning.
Finally, they’re surprisingly easy to make. Don’t let their impressive height fool you. This recipe uses simple ingredients and straightforward steps. You’ve got this!
The Pancake Powerhouse (Ingredients)
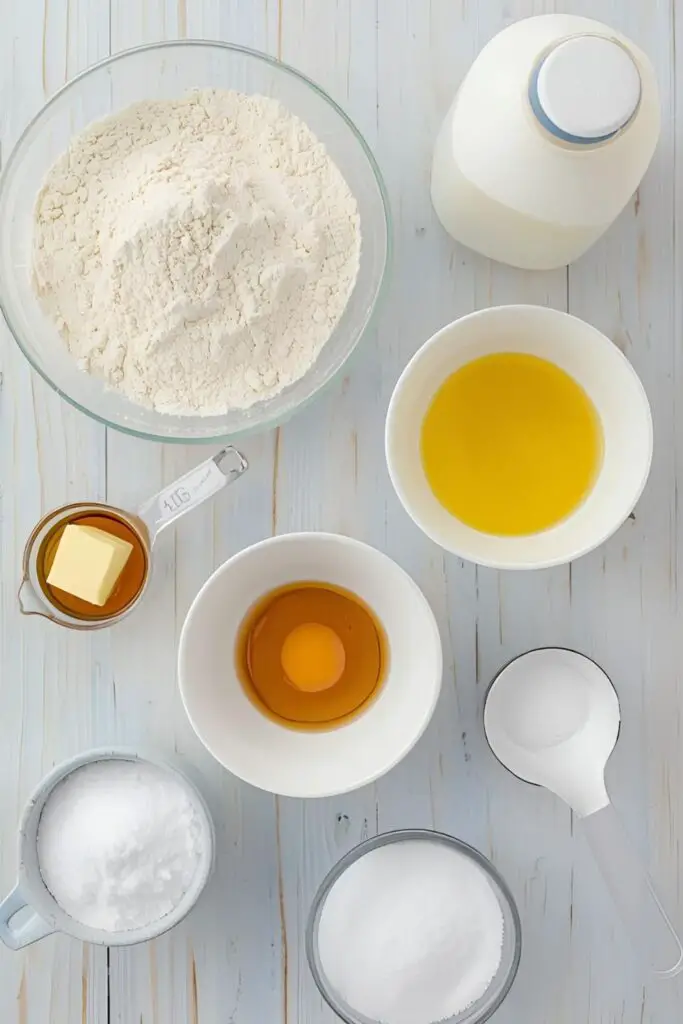
Keep it classic, keep it simple. Here’s what you’ll need to whip up your own bear-sized stack.
- All-Purpose Flour: 2 cups. The foundation of our fluffy dreams.
- Sugar: 2 tablespoons. Just a touch for that perfect hint of sweetness.
- Baking Powder: 4 teaspoons. This is the magic ingredient that creates those glorious air pockets. Don’t skimp!
- Baking Soda: 1 teaspoon. Works with the baking powder for extra lift and a tender crumb.
- Salt: ½ teaspoon. Enhances all the other flavors.
- Buttermilk: 1 ¾ cups. The secret to that signature Black Bear Diner tang and tenderness. If you don’t have buttermilk, see the FAQ for a quick hack.
- Eggs: 2 large. They bind everything together and add richness.
- Unsalted Butter: 4 tablespoons (½ stick), melted and slightly cooled. Don’t use hot butter, or you might cook the eggs!
- Vanilla Extract: 1 teaspoon. Adds a lovely little flavor boost.
Your Pancake-Flipping Toolkit
You won’t need a ton of fancy equipment for this operation.
- Large Mixing Bowl: For combining the dry ingredients.
- Another Large Mixing Bowl: For the wet ingredients.
- Whisk: For mixing the batter. Resist the urge to overmix!
- Griddle or Large Non-Stick Pan: Your cooking surface. A flat griddle is ideal for even cooking.
- Spatula: For flipping those beauties. A thin, flexible one works best.
- Measuring Cups and Spoons: For accurate ingredient ratios.
- Ladle or Measuring Cup (¼ cup or ⅓ cup): For pouring uniform-sized pancakes.
Let’s Get Flippin’: Step-by-Step to Pancake Paradise
Ready to create a stack of pancake perfection? Let’s do this!
Step 1: Dry Ingredients Unite!
In your large mixing bowl, whisk together the all-purpose flour, sugar, baking powder, baking soda, and salt. Make sure everything is evenly distributed. This helps prevent pockets of baking powder (which can lead to weird-tasting pancakes).
Step 2: Wet Ingredients Get Cozy

In your other large mixing bowl, whisk together the buttermilk and eggs until just combined. Then, whisk in the melted and slightly cooled butter and the vanilla extract.
Step 3: The Great Batter Integration (Handle with Care!)
Now, gently pour the wet ingredients into the dry ingredients. Use your whisk to stir until just combined. This is crucial: do NOT overmix! A few lumps are totally fine and even desirable. Overmixing develops the gluten in the flour, which results in tough, rubbery pancakes. Nobody wants that. The batter should be thick but pourable.
Step 4: Heat Up the Griddle (or Pan)
Place your griddle or non-stick pan over medium heat. If using a griddle, aim for a temperature of around 350-375°F (175-190°C). If using a pan, the surface is ready when a drop of water sizzles and evaporates quickly. Lightly grease the cooking surface with butter or cooking spray.
Step 5: Pour and Cook (Patience is a Virtue!)
Pour ¼ cup or ⅓ cup of batter onto the hot griddle or pan for each pancake. Don’t overcrowd the cooking surface; give them some space to spread. Cook for 2-3 minutes per side, or until bubbles start to appear on the surface and the edges look set.
Step 6: Flip Those Flapjacks!
Using your spatula, carefully flip the pancakes. Cook for another 1-2 minutes, or until they are golden brown on the second side and cooked through. Gently press the center of a pancake; it should spring back lightly.
Step 7: Stack ‘Em High and Devour!
Transfer the cooked pancakes to a plate and keep them warm in a low oven (around 200°F or 95°C) if you’re making a big batch. Serve immediately with your favorite toppings: butter, maple syrup (the real stuff, IMO!), fresh fruit, whipped cream… go wild!
Calories & Nutritional Info (Let’s Be Real, They’re Pancakes)

Pancakes are a treat, let’s not kid ourselves. Here’s a rough estimate per serving (about 2-3 pancakes, depending on size, without toppings):
- Serving Size: 2-3 pancakes
- Estimated Calories: 300-400
- Fat: Moderate, depending on the amount of butter used.
- Carbohydrates: High, mostly from the flour and sugar.
- Protein: A decent amount from the eggs and milk.
Common Mistakes to Avoid (Don’t Be a Pancake Disaster)
- The Overmixing Offense: I said it before, and I’ll say it again: don’t overmix the batter! Lumps are okay. Embrace the lumps.
- Cold Griddle Catastrophe: If your griddle or pan isn’t hot enough, you’ll end up with pale, flat pancakes. Make sure the cooking surface is properly heated before pouring the batter.
- Flipping Too Soon Folly: Resist the urge to flip the pancakes before bubbles appear on the surface and the edges are set. Flipping too early can result in a torn, sad pancake.
- Burnt Bottom Blues: Your heat is too high! Adjust it to medium and be patient. Golden brown is the goal, not charcoal black.
- Dry Pancake Despair: You cooked them for too long. Pancakes cook relatively quickly. Once they’re golden brown and cooked through, get them off the heat!
- Sticky Situation: You didn’t grease your griddle or pan properly. A little butter or cooking spray goes a long way in preventing sticking.
Variations & Customizations (Pancake Your Way!)
Want to jazz up your Black Bear Diner-inspired stack? Here are a few fun ideas:
1. Blueberry Bliss Pancakes
Gently fold in ½ cup of fresh or frozen blueberries into the batter just before cooking.
2. Chocolate Chip Chunk Pancakes
Stir in ½ cup of your favorite chocolate chips (milk, dark, or semi-sweet) into the batter.
3. Banana Nut Bonanza Pancakes
Fold in ½ cup of mashed ripe banana and ¼ cup of chopped nuts (walnuts or pecans work well) into the batter.
FAQ: Your Pancake Predicaments, Pondered
Got some burning questions about your flapjack endeavors? Let’s flip through them.
1. What’s the secret to really fluffy pancakes? The combination of baking powder and baking soda, along with not overmixing the batter, is key! Buttermilk also contributes to tenderness and a slight rise.
2. Can I make pancake batter ahead of time? While you can technically make it a little ahead, it’s best to cook pancake batter soon after mixing. The leavening agents (baking powder and soda) start working immediately, and the batter can lose its rising power if left to sit for too long.
3. What can I use if I don’t have buttermilk? No buttermilk, no problem! For 1 ¾ cups of buttermilk, combine 1 ¾ cups of milk with 1 ¾ tablespoons of lemon juice or white vinegar. Stir and let it sit for 5-10 minutes until it thickens slightly and looks slightly curdled.
4. Can I make these pancakes gluten-free? Yes, you can! Substitute the all-purpose flour with a good-quality gluten-free all-purpose flour blend. Make sure it contains xanthan gum or add about ½ teaspoon per cup of flour for structure.
5. How do I keep pancakes warm while I cook the rest? Preheat your oven to a low temperature (around 200°F or 95°C). Place the cooked pancakes on a wire rack set over a baking sheet in the warm oven. This helps prevent them from getting soggy.
6. Can I freeze leftover pancakes? Absolutely! Let the pancakes cool completely, then stack them with pieces of parchment paper or wax paper in between to prevent sticking. Place them in a freezer-safe bag or container and freeze for up to 2-3 months. Reheat them in a toaster, microwave, or oven.
7. Why are my pancakes flat? Likely culprits include overmixing the batter, using old or inactive baking powder/soda, or not having the griddle hot enough.
Final Thoughts
There you have it! You’re now armed with the knowledge to whip up a stack of Black Bear Diner-worthy pancakes right in your own kitchen. Get ready for some seriously fluffy, deliciously satisfying breakfast (or brunch, or even dinner – who are we to judge?).
So go ahead, embrace your inner lumberjack (or just your inner pancake enthusiast) and get flipping! These pancakes are so good, you might just find yourself hibernating a little longer on weekend mornings. Enjoy your bear-y delicious creation!