ow to Make Biscuits (The Ultimate Flaky & Buttery Recipe!)
Before my friends across the pond get delightfully confused, let’s be crystal clear about something. We are not making what you call biscuits (which are, in fact, delicious cookies). Today, we’re talking about biscuits—the tall, flaky, buttery pillars of comfort food, the undisputed champions of the breakfast table, the perfect vehicle for a shocking amount of gravy or jam.
If your current biscuit experience comes from a refrigerated cardboard can that pops open with a terrifying thwack and a cloud of weird dust, then this guide on how to make biscuits from scratch is about to fundamentally change your life for the better. You are about to become a biscuit wizard.
So, are you ready to unlock the secrets to those legendary, pull-apart layers? Let’s get our hands covered in a light, respectable dusting of flour.
Why This Recipe is Awesome
In a world full of dense, crumbly, sad little pucks, these biscuits stand tall. Here’s why you’re going to be obsessed.
- The Layers are Legendary: We are not making scones. We are not making drop biscuits. This recipe is specifically engineered to create those beautiful, distinct, buttery, pull-apart layers that you can peel off one by one. It’s a work of art that you can slather in more butter.
- It’s a Foundational Life Skill: Knowing how to make a perfect biscuit is right up there with knowing how to change a tire or file your taxes (but way more delicious). It’s the base for incredible breakfast sandwiches, the perfect partner for a hearty stew, and a heavenly side for literally any meal.
- It’s Surprisingly Simple Science: Making biscuits look like some kind of Southern magic, but it’s just a simple science experiment involving very cold fat and a little bit of folding. I’m going to demystify the process and turn you into a biscuit-making pro in under an hour.
Ingredients
The ingredient list is short and humble, but the technique is what turns them into gold.
- 2 ½ cups all-purpose flour, plus more for dusting
- 1 tablespoon granulated sugar
- 1 tablespoon baking powder
- ½ teaspoon baking soda
- 1 teaspoon salt
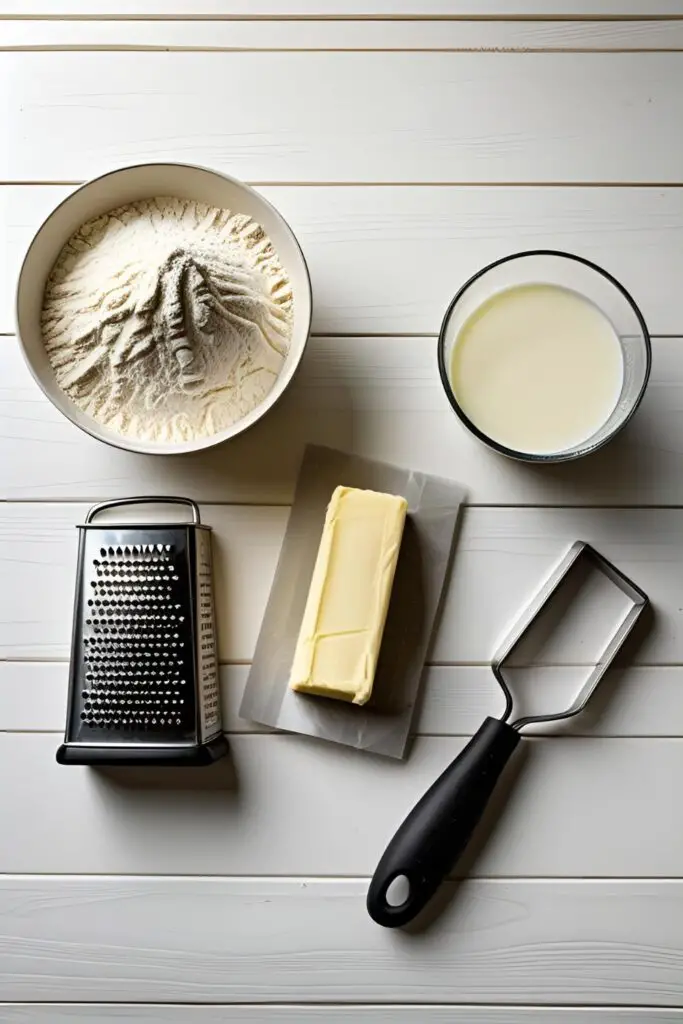
- ½ cup (1 stick) unsalted butter, very cold, preferably frozen
- 1 cup buttermilk, very cold
- 2 tablespoons unsalted butter, melted (for brushing on top)
Tools & kitchen gadgets used
You don’t need a bunch of fancy equipment, but a few key items will make the process much, much easier.
- A Large Mixing Bowl
- A Box Grater (This is my secret weapon for the butter!)
- A Pastry Blender or your own two hands
- A Rolling Pin (optional, you can use your hands)
- A 2.5 or 3-inch Round Biscuit Cutter
- A Baking Sheet
- Parchment Paper
- A Pastry Brush
Step-by-step instructions
Read this through, take a deep breath, and remember the golden rule: keep everything COLD.
Step 1: The Great Chill Before you do anything else, preheat your oven to 425°F (220°C). Line a baking sheet with parchment paper. Now, for the most important prep step: take your stick of butter and put it in the freezer for at least 15 minutes. Yes, the freezer. Trust me.
Step 2: The Dry Team In your large mixing bowl, whisk together the flour, sugar, baking powder, baking soda, and salt. Get them all nice and combined.
Step 3: The Frozen Butter Hack Go get your frozen stick of butter. Using the large holes on your box grater, grate the entire stick of frozen butter directly into your bowl of dry ingredients. This is the ultimate hack for perfect biscuits! It creates uniform, small pieces of cold butter without you having to touch it and warm it up. Use a fork or your fingertips to quickly toss the grated butter into the flour until every little piece is coated.
Step 4: The Buttermilk Flood Make a well in the center of your flour-butter mixture. Pour in your very cold buttermilk all at once. Use a fork to stir everything together just until a shaggy, messy dough starts to form. Do not overmix!
Step 5: The Magic Fold (for Flaky Layers!) Lightly flour your work surface. Turn the shaggy dough out onto the surface. It will be messy. This is okay. Gently press the dough together into a rough rectangle. Now, we create the layers. Fold the dough into thirds, like you’re folding a business letter. Turn the dough 90 degrees. Gently pat it out into a rectangle again, and repeat the letter-fold. Do this a total of 3 to 4 times. This simple process is what creates those incredible, flaky, pull-apart layers.
Step 6: The Cut (No Twisting!) After your final fold, gently pat the dough out until it’s about ¾-inch to 1-inch thick. Dip your biscuit cutter in flour, then press it straight down into the dough. Do not twist the cutter! Twisting seals the edges and prevents the biscuit from rising to its full, glorious height. Cut out your biscuits and place them on your prepared baking sheet with their sides just touching.
Step 7: Bake to Golden Glory Gently gather the scraps, re-pat the dough (don’t overwork it!), and cut out more biscuits. Brush the tops of all the biscuits with the melted butter. Bake for 12-15 minutes, or until they are tall, puffy, and a beautiful golden brown on top.
Calories & Nutritional Info
It’s a vessel for butter and gravy. Let’s be realistic.
- Serving Size: 1 biscuit
- Estimated Calories: Around 180-220 kcal.
- Contains: A significant amount of buttery, flaky happiness.
- Pairs well with: More butter. And jam. And gravy. And life.
Common Mistakes to Avoid
This is your guide to biscuit heaven. Avoid these common paths to biscuit hell.
- Using Warm Ingredients: I will say this until I am blue in the face. Warm butter and warm buttermilk are the sworn enemies of flaky biscuits. The magic happens when those cold little pieces of butter hit the hot oven and create steam, pushing the layers of dough apart. Your butter and buttermilk must be as cold as possible. This is non-negotiable.
- Overworking the Dough: This is a biscuit, not a sourdough loaf that needs to be developed. The more you knead and handle the dough, the tougher and denser your biscuits will be. Handle the dough as little as possible to keep them tender and light.
- The Dreaded Cutter Twist: I know it feels natural to twist the biscuit cutter as you press down. You must fight this urge. Twisting the cutter pinches and seals the edges of the dough, which prevents the biscuit from rising to its full, majestic, flaky potential. Press straight down, and pull straight up.
- Cutting the Dough Too Thin: Wimpy, thin biscuits are sad biscuits. For a tall, impressive biscuit with tons of layers, you need to give it some height to begin with. Pat the dough out to a proud ¾-inch to 1-inch thickness before cutting.
Variations & Customizations
Once you’ve mastered the classic, you can start getting creative with your new favorite carb.
- Ultimate Cheddar & Chive Biscuits: Before you add the buttermilk, gently toss 1 cup of shredded sharp cheddar cheese and ¼ cup of finely chopped fresh chives into the flour and butter mixture. These are absolutely incredible.
- Sweet Cinnamon Sugar Biscuits: Add an extra tablespoon of sugar to the dry ingredients. Before baking, brush the tops with melted butter and a very generous sprinkle of cinnamon sugar. Perfect for a sweet breakfast treat.
- Savory Garlic & Herb Biscuits: Add 1 teaspoon of garlic powder and 1 tablespoon of finely chopped fresh rosemary or thyme to the dry ingredients. Brush with garlic-infused melted butter after they come out of the oven.
FAQ Section
All your flaky, buttery questions, answered.
1. Why didn’t my biscuits rise? The most common culprits are: your baking powder was old and expired, you overworked the dough, or you twisted the biscuit cutter when cutting them out.
2. Why are my biscuits tough instead of tender? One hundred percent, you overworked the dough. The more you handle it after the liquid is added, the more gluten develops, which makes them tough. Be gentle!
3. Can I make biscuits without buttermilk? Yes, you can make a substitute! For 1 cup of buttermilk, simply mix 1 cup of regular milk with 1 tablespoon of white vinegar or lemon juice. Let it sit for 5-10 minutes. It will curdle slightly and be ready to use.
4. Can I make the biscuit dough ahead of time? It’s really best when made fresh, as the baking powder starts to react as soon as it gets wet. However, you can cut out the biscuits, place them on a baking sheet, and freeze them. You can then bake them directly from frozen, adding a few extra minutes to the baking time.
5. How do you get those beautiful flaky layers? The two secrets are very cold, grated butter and the folding/lamination technique described in Step 5. This creates thin layers of butter within the dough that steam up in the oven.
6. What can I use if I don’t have a biscuit cutter? You can use the rim of a sturdy drinking glass, dipped in flour. Just remember not to twist! You can also just use a knife to cut the dough into square-shaped biscuits.
7. How do I store and reheat biscuits? Store them in an airtight container at room temperature for up to 2 days. To reheat and bring them back to life, pop them in a 350°F (175°C) oven for about 5 minutes.
Final Thoughts
And there you have it, folks. A pan of hot, steamy, buttery, flaky perfection, made with your own two hands. You have officially graduated from the terrifying pop of a refrigerated can. You are a biscuit boss.
Now go on, break one open while it’s still warm, watch the steam escape, and slather it with an irresponsible amount of butter. You’ve more than earned it.


