How to Make Beef Broth (And Ruin the Boxed Stuff for Yourself Forever)
Let’s talk about that sad, lonely carton of “beef broth” in your pantry. You know the one. It’s pale, it’s watery, and it tastes vaguely of beef and mostly of salt and disappointment. You’ve been settling, my friend. You’ve been living in a world of mediocre soups and lackluster stews. But today, that all ends. We’re going on a journey to discover a culinary secret weapon, a foundational flavor bomb that will elevate everything you cook. Today, you are going to learn how to make beef broth from scratch—the real stuff, the liquid gold—and it’s so much easier than you think.
Why This Recipe Is Awesome (It’s Liquid Gold, People!)
So, why spend a few hours making something you can buy for a few Taka? Because the difference isn’t just noticeable; it’s monumental. This homemade beef broth is:
- Incomparably Flavorful: We’re talking a deep, rich, complex beefy flavor that the store-bought stuff can’t even dream of. Roasting the bones first creates a depth that is simply out of this world.
- A Kitchen Multitasker: This isn’t just for soup. Use it to deglaze a pan, make incredible gravies and sauces, or cook your rice in it for a huge flavor boost.
- Nourishing and Wholesome: It’s packed with collagen, gelatin, and minerals extracted from the bones. It’s the original superfood, long before that became a trendy buzzword.
- A “Lazy” Weekend Project: While it takes time, most of it is hands-off. Your house will fill with the most incredible, comforting aroma—perfect for a rainy day in your Khulna home. It’s a small effort for a massive reward.
Honestly, once you make your own, you’ll look at that carton in the store with a mixture of pity and disdain. You’ve been warned.
Ingredients: Your Broth-Making Blueprint
You don’t need a long list of fancy ingredients, just a few quality basics.
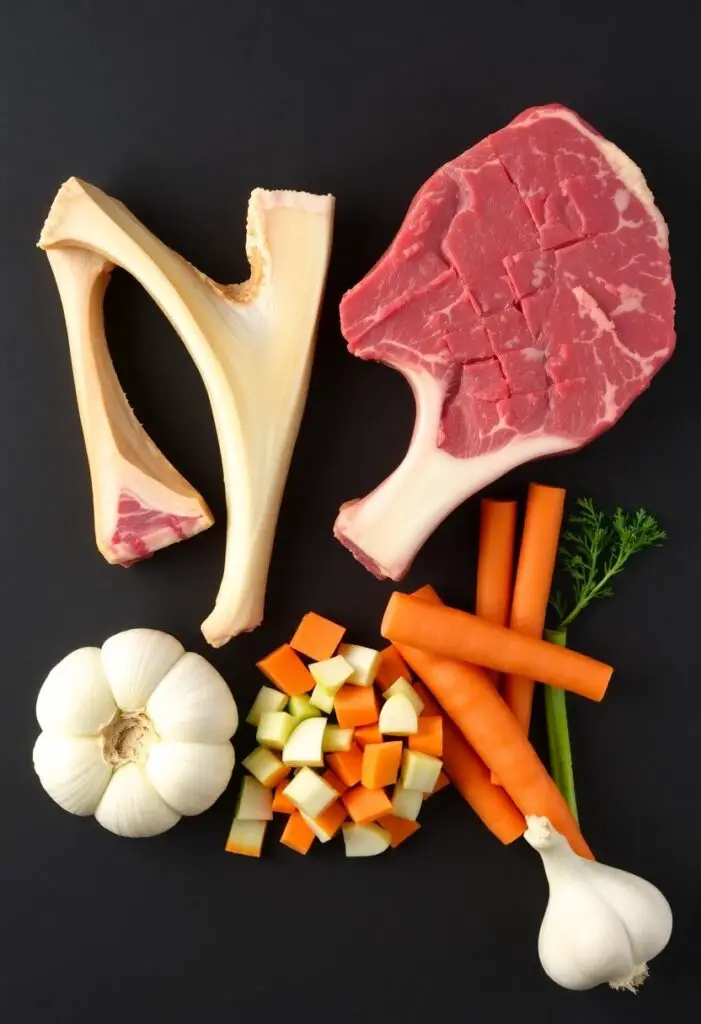
- 3-4 pounds beef bones (A mix of marrow bones, knuckle bones, and some with a little meat on them, like oxtail or short ribs, is ideal.)
- 2 large onions, unpeeled and quartered
- 2 large carrots, roughly chopped
- 2 celery stalks, roughly chopped
- 1 whole head of garlic, sliced in half crosswise
- 2 tablespoons tomato paste
- 2 bay leaves
- 1 tablespoon whole black peppercorns
- A splash of apple cider vinegar (about 2 tablespoons – helps extract minerals from the bones!)
- Cold water
Key Ingredient Notes:
- The Bones: Don’t be shy! Ask the butcher at your local market. They often have soup bones for very cheap. A mix of bones gives you the best of both worlds: marrow for richness and joint bones for collagen.
- Unpeeled Onions: Leaving the skins on the onions adds a beautiful, deep amber color to your finished broth. It’s a pro-level tip!
Tools & Kitchen Gadgets Used: Your Broth-Building Kit
The right tools will make this process a breeze.
- A Large, Heavy Roasting Pan or a Sturdy Baking Sheet
- A Large Stockpot or Dutch Oven (At least 8 quarts, bigger is better!)
- A Fine-Mesh Sieve or a Colander lined with Cheesecloth
- A Ladle
- A large bowl (for straining the broth into)
- Tongs
- Containers for Storage (Large jars, freezer-safe containers, or even ice cube trays)
Step-by-Step Instructions: The Journey to Liquid Gold
This process is a marathon, not a sprint. Put on some good music and enjoy the incredible smells.
Act 1: The Roasting (The Non-Negotiable Flavor Step)
- Prep Your Oven: Preheat your oven to a blazing 425°F (220°C).
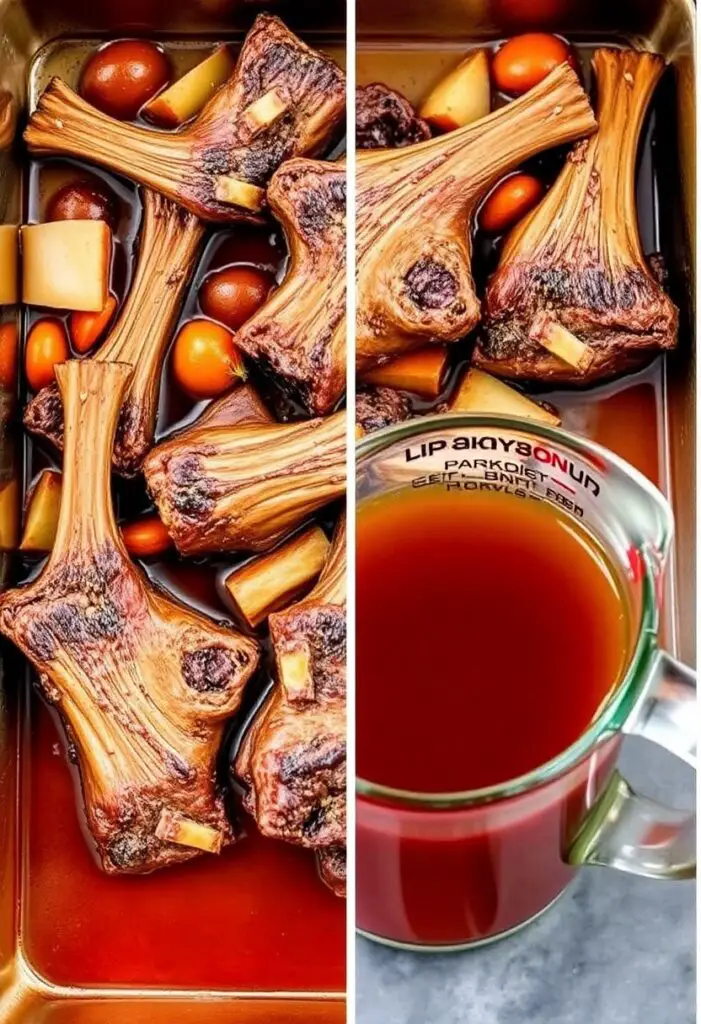
- Get Roasting: Spread the beef bones, quartered onions, chopped carrots, celery, and halved garlic head in a single layer on your roasting pan.
- Add the Tomato Paste: Dollop the tomato paste over the bones and veggies. Use your hands (yes, get a little messy!) to rub it all over. This helps create a deep, savory flavor and rich color.
- Roast Until Glorious: Roast for 45-60 minutes, flipping the bones and veggies halfway through, until they are deeply browned and caramelized. Your kitchen will start to smell absolutely incredible. Do not skip this step! This is where 90% of the flavor comes from.
Act 2: The Long, Slow Simmer
- Transfer to the Pot: Using tongs, transfer the roasted bones and vegetables to your large stockpot.
- Deglaze the Pan (Secret Flavor Boost!): Place the hot roasting pan on your stovetop over medium heat. Pour in about a cup of water and use a wooden spoon or spatula to scrape up all those delicious, browned bits stuck to the bottom of the pan. This is called “deglazing,” and all that flavor gets poured right into your pot.
- Cover with Water: Add the bay leaves, peppercorns, and the splash of apple cider vinegar to the stockpot. Pour in enough cold water to cover everything by at least 2 inches.
- Bring to a Simmer (NOT a Boil!): Place the pot over high heat and bring it just to a simmer. As soon as you see bubbles breaking the surface, reduce the heat to low. You want the gentlest of simmers, with just a bubble or two rising every few seconds. A rolling boil will make your broth cloudy.
- Skim the Scum: During the first hour of simmering, you’ll see some foamy scum rise to the surface. Use a spoon to skim this off and discard it.
- The Long Wait: Let the broth simmer gently, partially covered, for at least 6 hours, and up to 12 hours. The longer it simmers, the richer the flavor. Just let it do its thing.
Act 3: The Finishing Touches
- Strain Everything: Carefully ladle or pour the broth through a fine-mesh sieve (or a colander lined with cheesecloth) into a large, clean bowl. Discard the bones and vegetables.
- Cool It Down: Let the broth cool to room temperature. For faster cooling, you can place the bowl in an ice bath in your sink.
- De-Fat the Broth: Once the broth is completely cold, a solid layer of fat will have formed on the top. Easily lift this off with a spoon and discard it (or save it for cooking!). You’ll be left with a beautiful, clear, gelatinous broth.
- Store Your Gold: Pour the finished broth into jars or freezer-safe containers. You are now a Broth Boss.
Calories & Nutritional Info (Per 1-Cup Serving)
This is more about nourishment than calories. It’s practically a health tonic!
- Estimated Calories per cup: ~30-50 calories
- Fat: ~1-3g (after de-fatting)
- Protein: ~5-8g
- Good Stuff: Packed with collagen, gelatin, and minerals like calcium and magnesium.
Common Mistakes to Avoid: Don’t Make Sad, Watery Broth!
Avoid these common mistakes for a rich, flavorful result.
- Skipping the Roasting: This is the biggest mistake you can make. Unroasted bones will give you a pale, weak broth that tastes boiled, not rich. You must roast your bones.
- Boiling Instead of Simmering: A hard boil emulsifies the fats and impurities into the liquid, resulting in a cloudy, greasy broth. A gentle simmer is key.
- Forgetting to Skim: That initial scum is made of impurities. Skimming it off in the first hour leads to a clearer, cleaner-tasting broth.
- Adding Salt Too Early: It’s best to make your broth unsalted. This makes it a versatile ingredient you can season later in whatever dish you’re using it in. If you salt it now, it can become too salty as it reduces.
Variations & Customizations: Your Broth, Your Base
The classic recipe is a perfect all-purpose broth, but you can definitely tweak it.
- Asian-Inspired Broth (Pho-Style): During the last hour of simmering, add a 2-inch piece of ginger (sliced), 2-3 star anise pods, and a cinnamon stick for a fragrant broth perfect for noodle soups.
- Spicy Kick: Add one or two dried chilies (like chile de árbol) to the pot along with the other aromatics for a subtle background heat.
- Mushroom & Herb Broth: Add a handful of dried mushrooms (like shiitake or porcini) and some fresh thyme or parsley stems to the pot for an even deeper, earthier flavor.
FAQ Section: All Your Broth Bafflements, Answered
You have questions about this pot of liquid magic. I have answers.
- Q: What’s the difference between beef broth and beef stock? A: Generally, stock is made primarily from bones and is simmered for a very long time to extract collagen, resulting in a gelatinous texture. Broth is typically made with more meat along with the bones, is simmered for a shorter time, and is often seasoned. Honestly, the terms are used pretty interchangeably in home cooking. This recipe is a hybrid that gives you the best of both.
- Q: What are the best bones to use? A: A combination is best! Marrow bones add rich flavor and healthy fats. Knuckle bones and joint bones are full of cartilage and collagen, which gives the broth body and that wonderful gelatinous texture when chilled. A few meaty bones like oxtail or short ribs add even more beefy flavor.
- Q: Can I make beef broth in a slow cooker or pressure cooker? A: Yes!
- Slow Cooker: After roasting, place everything in the slow cooker, cover with water, and cook on low for 10-12 hours.
- Pressure Cooker/Instant Pot: After roasting, place everything in the pot, cover with water (don’t go past the max fill line!), and cook on high pressure for 2-4 hours. Let the pressure release naturally.
- Q: Why is my finished broth cloudy? A: You probably let it boil instead of simmer. A rolling boil will agitate the impurities and fat, making them emulsify into the liquid. It will still taste good, it just won’t be as clear.
- Q: How do I store homemade beef broth? A: It will last in an airtight container in the refrigerator for up to 5-7 days. For longer storage, freeze it.
- Q: What’s the best way to freeze broth? A: You can freeze it in freezer-safe jars (leave headspace for expansion!), plastic containers, or freezer bags. My favorite hack is to freeze it in ice cube trays or muffin tins. Once frozen, pop out the broth “pucks” and store them in a bag. Then you can grab just a small amount whenever you need it!
- Q: My broth didn’t turn into jelly when it got cold. What did I do wrong? A: It’s okay! It just means you might have used fewer collagen-rich bones (like knuckle/joint bones) or your bone-to-water ratio was a little off. It will still be a thousand times more flavorful than store-bought.
Final Thoughts: You Are Now a Broth Boss
Congratulations! You’ve officially graduated from carton-dweller to a true Broth Boss. You have created a foundational ingredient that will make every soup, sauce, and stew you make from now on exponentially better. Go ahead, stock your freezer with this liquid gold, and feel the smug satisfaction of knowing you’ll never have to buy that sad, beef-flavored water again.


