Why These Puerto Rican Arepas Are Seriously Awesome
Still on the fence about adding another bread-like item to your repertoire? Let me lay down the reasons why these puerto rican arepas are about to become your new obsession.
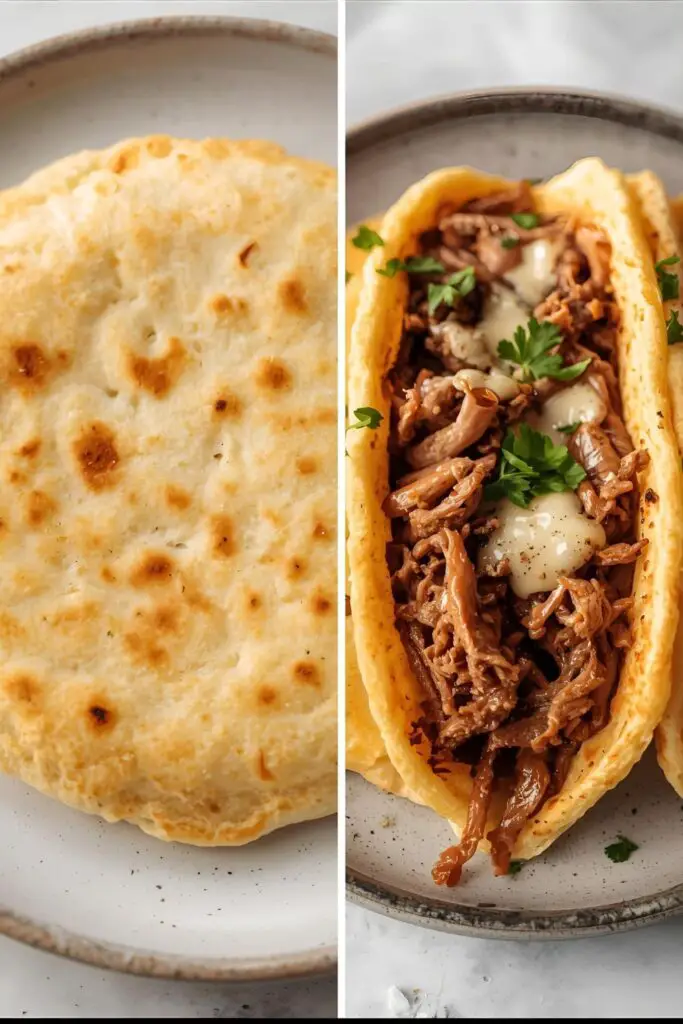
First, they’re ridiculously versatile. Seriously, you can stuff these bad boys with anything your heart desires. Eggs and cheese for breakfast? Pulled pork for dinner? Beans and avocado for a vegetarian delight? The possibilities are endless. They’re like edible little huggable containers for your favorite fillings.
Second, they’re surprisingly easy to make. We’re talking about a simple dough with minimal ingredients and a quick cook time on a griddle or pan. You don’t need any fancy equipment or years of baking experience. If you can stir and cook something on a pan, you’ve got this.
Finally, they’re naturally gluten-free. For all my gluten-sensitive friends out there, rejoice! Arepas are made with pre-cooked cornmeal, making them a fantastic and flavorful gluten-free alternative to wheat-based breads. No more sad, crumbly gluten-free substitutes!
The Simple Yet Magical Ingredient Lineup

You won’t need a trip to a specialty store for most of these.
- Masa Harina: 2 cups. THIS IS KEY! Do not try to substitute with regular cornmeal or wheat flour. Masa harina is specifically treated corn flour used for making tortillas, arepas, and other Latin American staples. Look for brands like Maseca.
- Warm Water: 2 ¼ – 2 ½ cups. The amount can vary slightly depending on your masa harina. Add it gradually until you reach the right dough consistency.
- Salt: 1 teaspoon. Enhances the flavor. Don’t skip it unless you’re on a very low-sodium diet.
- Oil or Butter: 1-2 tablespoons, for cooking. Vegetable oil, olive oil, or butter all work well, depending on your preference. Butter will add a little extra richness.
Your Arepa-Making Toolkit (Simple is Best!)

You really don’t need much to get started.
- Large Mixing Bowl: For making the dough.
- Measuring Cups and Spoons.
- Griddle or Large Skillet: A flat, non-stick surface is ideal for cooking the arepas evenly. Cast iron works beautifully too!
- Spatula: For flipping the arepas.
- Clean Kitchen Towel or Plastic Wrap: For resting the dough.
Step-by-Step: Let’s Get Cooking!
Ready to whip up these delightful corn pockets? Let’s do it!
Step 1: Make the Dough (The Masa Magic)
In your large mixing bowl, combine the masa harina and salt. Gradually add the warm water, mixing with your hands until a soft, smooth dough forms. It should feel like playdough – not too sticky and not too dry. If it’s too dry, add a tiny bit more water (a teaspoon at a time). If it’s too sticky, add a tablespoon of masa harina.
Step 2: Knead and Rest (Patience is a Virtue, Sort Of)
Knead the dough in the bowl for about 2-3 minutes until it’s nice and smooth. Cover the bowl with a clean kitchen towel or plastic wrap and let the dough rest for about 10-15 minutes. This allows the masa harina to fully absorb the water, making the arepas less likely to crack.
Step 3: Shape the Arepas (Little Discs of Joy)
Divide the dough into 6-8 equal portions. Roll each portion into a smooth ball. Then, gently flatten each ball between the palms of your hands to form a disc about ½ to ¾ inch thick and 3-4 inches in diameter. Try to make them as uniform as possible for even cooking. Don’t worry if they’re not perfectly round; rustic charm is totally acceptable here.
Step 4: Cook ‘Em Up (The Sizzle is Your Soundtrack)
Heat your griddle or skillet over medium heat. Add the oil or butter and let it melt and coat the surface evenly. Place the arepas on the hot griddle, being careful not to overcrowd the pan.

Cook for about 5-7 minutes per side, or until they are golden brown and slightly crispy on the outside. You should see some nice toasty spots.
Step 5: The Secret to the Pocket (The Double Cook)
This is the key to getting that perfect arepa pocket! Once the arepas are golden brown on both sides, you have a couple of options:
- Oven Method: Preheat your oven to 350°F (175°C). Transfer the arepas to a baking sheet and bake for another 15-20 minutes, or until they puff up slightly and sound hollow when tapped.
- Stovetop Method (Slightly Faster): Reduce the heat on your griddle to low. Cook the arepas for another 5-7 minutes per side, pressing down gently with a spatula occasionally. This helps them cook through and create that internal pocket.
Step 6: Stuff and Enjoy! (The Best Part!)
Once your arepas are cooked and have that lovely pocket inside, carefully slice them open horizontally, being careful not to cut all the way through. Now comes the fun part: stuff them with your favorite fillings! Think cheese, shredded meats, beans, avocado, eggs – the sky’s the limit!
Calories & Nutritional Info (It Depends on the Stuffing!)
The arepa itself is relatively simple, so the calorie count will depend heavily on what you decide to stuff it with. Here’s an estimate for a plain arepa:
- Serving Size: 1 plain arepa (about 3-4 inches in diameter)
- Estimated Calories: 150-200
- Key Nutrients:
- Carbohydrates: Primarily from the masa harina.
- Fiber: A decent source due to the corn.
- Fat: Low, unless you use a lot of oil for cooking.
- Nutritional Note: Arepas are a good source of complex carbohydrates and fiber. Keep an eye on your fillings to control the overall calorie and fat content.
Common Mistakes to Avoid (Don’t Let Your Arepas Fall Flat!)
- Using the Wrong Flour: I can’t stress this enough: it MUST be masa harina! Regular cornmeal will not work the same way and will result in a crumbly, sad mess.
- Adding Too Much Water (Or Not Enough): The dough should be soft and pliable, like playdough. If it’s too sticky, you’ll have a hard time shaping them. If it’s too dry, they’ll crack. Add the water gradually!
- Not Letting the Dough Rest: This resting period is crucial for proper hydration and prevents cracking. Don’t skip it!
- Cooking Them Too Quickly: You want them to cook through evenly and develop that nice golden crust. Keep the heat at medium and be patient.
- Cutting All the Way Through: Remember, you want to create a pocket, not two separate discs. Only slice them about three-quarters of the way through.
Variations & Customizations (Spice It Up!)
Want to get a little fancy with your arepas? Here are a few ideas:
1. Cheesy Arepas (Queso Power!)
Mix about ½ cup of shredded cheese (like mozzarella or a queso blanco) directly into the masa harina dough before adding the water. This will create cheesy arepas from the inside out.
2. Herbaceous Arepas (Flavor Boost!)

Mix in some finely chopped fresh herbs like cilantro, chives, or parsley into the dough for an extra layer of flavor. About 2-3 tablespoons should do the trick.
3. Sweet Arepas (For a Different Vibe)
Add a tablespoon of sugar or a little bit of anise seeds to the dough for a slightly sweet arepa that pairs well with cheese or even a drizzle of honey.
FAQ: Your Arepa Inquiries, Answered
Let’s tackle some of those burning arepa questions.
1. Are arepas the same as Venezuelan arepas? While both Puerto Rican and Venezuelan arepas are made from masa harina and are essentially grilled or baked corn cakes, there can be slight differences in the preparation and common fillings. This recipe leans towards the Puerto Rican style.
2. Can I make the dough ahead of time? Yes! You can make the dough, wrap it tightly in plastic wrap, and store it in the refrigerator for up to 2 days. Let it sit at room temperature for about 30 minutes before shaping and cooking.
3. How do I reheat cooked arepas? You can reheat cooked arepas in a skillet over medium heat for a few minutes per side, or in a toaster oven until warmed through and slightly crispy.
4. What are some popular Puerto Rican arepa fillings? Some classic fillings include queso blanco (white cheese), pernil (roasted pork), pollo guisado (stewed chicken), and various combinations of beans, avocado, and plantains. Get creative!
5. Can I freeze cooked arepas? Yes, you can freeze cooked arepas. Let them cool completely, then wrap them individually in plastic wrap and place them in a freezer-safe bag or container. They can be frozen for up to 3 months. Thaw them overnight in the refrigerator or reheat them directly from frozen in a skillet or toaster oven.
6. My arepas are cracking while cooking. What am I doing wrong? This usually means the dough is a little too dry. Next time, try adding a touch more water to the dough until it’s softer and more pliable. Make sure you’re also letting the dough rest.
7. Can I bake these entirely instead of cooking on a griddle first? While the stovetop-then-oven method in the recipe creates the best texture and pocket, you can bake them entirely. Preheat your oven to 375°F (190°C) and bake for about 25-30 minutes, flipping halfway through. They might not puff up quite as much, but they’ll still be delicious.
Final Thoughts
Well, there you have it! You’re now officially equipped to bring the joy of puerto rican arepas into your own kitchen. These versatile little corn cakes are just waiting to be the star of your next meal. So go ahead, mix up that masa harina, get your griddle sizzling, and prepare for a taste of Puerto Rico that will have you saying “¡Qué rico!” with every bite. Now, if you’ll excuse me, I think my arepas are calling for some pernil… and maybe a little avocado. ¡Buen provecho!