How to Make Applesauce From Scratch (It’s Easier Than Opening a Jar!)
Let’s be honest, most of us think of applesauce as that watery, vaguely apple-flavored, sandy-textured stuff that comes in a jar or a little plastic cup with a foil lid you can never quite peel off cleanly. It’s… fine. It’s the food you eat when you’re sick or what you give to a toddler. But what if I told you that in about 30 minutes, with almost zero actual effort, you could learn how to make applesauce that is so vibrant, so deeply flavorful, and so ridiculously delicious that it will ruin the jarred stuff for you forever?
This isn’t just a recipe; it’s a revelation. It’s one of the easiest, most rewarding, and most fragrant kitchen upgrades you will ever make. You are about to become an applesauce snob, and you will never look back.
So, are you ready to unlock the simple secret to the best applesauce of your life? Let’s get saucy.
Why This Recipe is Awesome
If you’re still thinking, “Why would I make something I can buy for three dollars?” allow me to enlighten you.
- It Makes Your House Smell Like Actual Heaven: I’m not kidding. The scent of fresh apples and warm cinnamon gently simmering on your stove is pure, unadulterated, cozy-sweater-on-a-crisp-autumn-day magic. It is better than any scented candle you could ever buy, and you get to eat the results.
- You Are in Complete and Utter Control: This is your world; the apples just live in it. You control the sweetness, the spice level, and most importantly, the texture. Like it super smooth and velvety? We can do that. Prefer it rustic and chunky, with discernible bits of apple? You got it. You are the master of your own apple destiny.
- It’s Incredibly Simple and Genuinely Healthy: You’re taking a beautiful, natural fruit and just… cooking it down. That’s it. You can add as little or as much sugar as you want, or none at all! It’s a simple, wholesome, and delicious treat that you can feel great about eating.
Ingredients
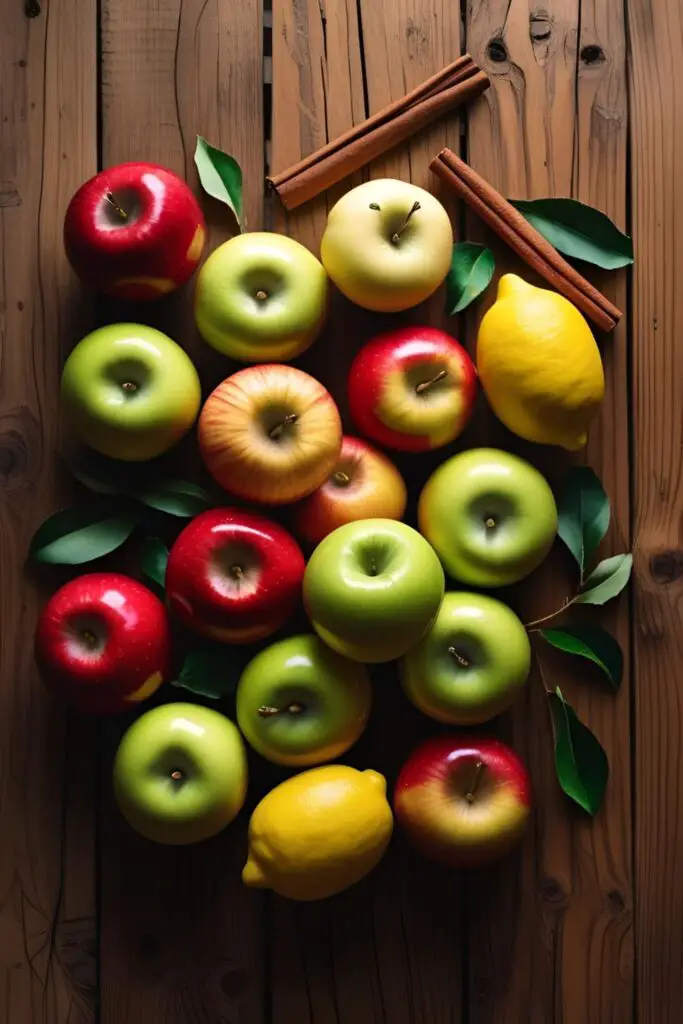
The key to amazing applesauce is using a variety of amazing apples. Don’t just use one kind!
- 4 pounds of apples (about 8-10 medium apples): For the best flavor, use a mix!
- Soft & Sweet: McIntosh, Golden Delicious, or Gala (These break down easily and form the base).
- Tart & Firm: Granny Smith or Braeburn (These add a wonderful tangy kick).
- Sweet & Crisp: Honeycrisp or Fuji (These add a bright, complex sweetness).
- ½ cup water or apple cider: Just a splash to get things started.
- 1 tablespoon fresh lemon juice: This prevents the apples from turning a sad brown color.
- 1 cinnamon stick: Or ½ teaspoon of ground cinnamon.
- Optional Sweetener, to taste: 2-4 tablespoons of brown sugar, maple syrup, or honey. You might not even need any!
Tools & kitchen gadgets used
You don’t need a fancy apple-contraption for this. Just a few kitchen basics.
- A Large, Heavy-Bottomed Pot or Dutch Oven
- A Vegetable Peeler
- An Apple Corer or a simple Paring Knife
- A Potato Masher (for a chunky sauce)
- An Immersion Blender or a Regular Blender (for a smooth sauce)
- A Wooden Spoon
- Measuring Cups and Spoons
Step-by-step instructions

This is less of a “recipe” and more of a “put things in a pot and wait” situation. It’s glorious.
Step 1: Prep the Apples (The Only “Hard” Work) This is the most labor-intensive part of the entire process, and it only takes about 10 minutes. Go ahead and peel, core, and roughly chop your apples into 1 to 2-inch chunks. Don’t worry about making them look pretty or uniform; they’re about to be cooked into delicious oblivion.
Step 2: Combine Everything in the Pot Place your chopped apples, the ½ cup of water or apple cider, the tablespoon of lemon juice, and your cinnamon stick (if you’re using one) into your large pot. Give it a quick stir.
Step 3: Simmer to Softness Now, we let the stove do all the work. Place the pot over medium-high heat and bring the mixture to a boil. Once it’s bubbling, reduce the heat to low, cover the pot, and let it simmer for 15 to 25 minutes. You’ll know it’s ready when the apples are incredibly soft, tender, and easily fall apart when you poke them with a spoon.
Step 4: Choose Your Own Texture Adventure This is where you decide what kind of applesauce person you are. First, remove the cinnamon stick.
- For a Rustic, Chunky Applesauce: Grab your potato masher and go to town! Mash the soft apples directly in the pot until you reach your desired level of chunkiness.
- For a Silky, Smooth Applesauce: Grab your immersion blender and puree the sauce directly in the pot until it’s velvety smooth. Alternatively, you can carefully transfer the hot apples to a regular blender and blend until smooth (just be sure to vent the lid to let steam escape!).
Step 5: Sweeten and Spice to Taste Now, it’s time to taste your creation. It might be perfectly sweet already, depending on the apples you used! If you’d like it sweeter, stir in your optional sweetener (brown sugar, maple syrup, etc.), one tablespoon at a time, until it’s just right. If you used a cinnamon stick, you can stir in a little extra ground cinnamon now for a stronger spice flavor.

Step 6: Serve or Store Your homemade applesauce is ready! You can enjoy it warm, like a hug in a bowl, or let it cool completely and store it in the fridge. It’s absolutely delicious either way.
Calories & Nutritional Info

This is for an unsweetened version. It’s a pretty virtuous treat!
- Serving Size: ½ cup
- Estimated Calories: Around 50-70 kcal.
- Rich in: Fiber, Vitamin C, and the smug satisfaction that comes from making something so simple and wholesome.
Common Mistakes to Avoid
Avoid these simple slip-ups for the best applesauce of your life.
- Using Only One Kind of Apple: You can, of course, use only one type of apple. But the secret to a truly complex, deeply flavorful applesauce is using a mix of different apples. The combination of sweet, tart, soft, and firm apples creates a much more interesting and delicious final product.
- Adding Way Too Much Liquid: You only need a small splash of water or cider at the very beginning. This is just to prevent the apples from scorching on the bottom of the pot and to help create some steam. The apples will release a ton of their own liquid as they cook, so don’t be tempted to drown them!
- Forgetting the Lemon Juice: This isn’t just for flavor (though it does add a lovely brightness!). The acid in the lemon juice is crucial because it prevents your beautiful apples from oxidizing and turning a sad, unappetizing brown while they cook.
- Scorching the Bottom of the Pot: Even though this is a simple, hands-off simmer, you still need to give it a good stir every 5 minutes or so. This ensures that nothing is sticking to the bottom of the pot and burning, which would give your applesauce a bitter, scorched taste.
Variations & Customizations
Your basic applesauce is a beautiful canvas. Here are a few ways to paint it.
- Warmly Spiced Pear Applesauce: Replace half of the apples with ripe, juicy pears (like Bartlett or Anjou). Add a star anise and a few whole cloves to the pot while it simmers for a warm, fragrant, and incredibly cozy flavor. Just remember to remove the whole spices before you mash or blend.
- Festive Cranberry Applesauce: Add 1 cup of fresh or frozen cranberries to the pot along with the apples. The cranberries will burst as they cook, giving your applesauce a beautiful, rosy pink color and a wonderful tart, festive flavor. This is a showstopper for holiday meals.
- Savory Applesauce (The Perfect Partner for Pork!): Make an unsweetened version of the applesauce. After you’ve mashed or blended it, stir in a tablespoon of apple cider vinegar and a pinch of finely chopped fresh thyme and sage. This savory version is the absolute best thing to serve with roasted pork chops or turkey.
FAQ Section
All your saucy questions, answered.
1. What are the absolute best apples to use for homemade applesauce? The best applesauce comes from a mix! Try to use at least two or three different kinds. McIntosh, Golden Delicious, and Gala are great for a soft, sweet base. Granny Smith and Braeburn add a necessary tartness. Honeycrisp and Fuji add a bright, complex sweetness.

2. Do I have to peel the apples? Nope! You can absolutely make “skins-on” applesauce. The peels contain extra fiber and nutrients. Just be aware that if you want a super smooth sauce, you’ll need a very powerful blender to completely pulverize the skins. If you like it chunky, leaving the skins on adds a lovely rustic texture and color.
3. Can I make applesauce in a slow cooker or an Instant Pot? Yes, to both! For a slow cooker, just add all the ingredients and cook on low for 4-6 hours until the apples are very soft. For an Instant Pot, cook on high pressure for about 8 minutes, then let the pressure release naturally.
4. How long does homemade applesauce last? Stored in an airtight container (like a mason jar) in the refrigerator, your homemade applesauce will stay fresh and delicious for up to 10 days.
5. Can I freeze homemade applesauce? Yes! It freezes beautifully. Let it cool completely, then portion it into freezer-safe bags or containers. It will last in the freezer for up to a year.
6. How do you make completely unsweetened applesauce? Just follow the recipe and omit the optional sweetener! If you use a good mix of sweet apples (like Fuji and Gala), you’ll find that it’s naturally sweet and delicious all on its own.
7. What can I use homemade applesauce for, besides just eating it with a spoon? It’s incredibly versatile! Serve it warm with pork chops, use it as a replacement for oil in many baking recipes (like muffins and quick breads), swirl it into your morning yogurt or oatmeal, or serve it with potato latkes.
Final Thoughts
And there you have it. You are now officially a person who makes their own applesauce. You’ve unlocked one of the simplest, most wholesome, and most delicious kitchen secrets there is. You have seen the light, and you will never be able to go back to the sad, watery jarred stuff again.
Go forth and enjoy the fruits of your (very, very minimal) labor. Your kitchen smells amazing, and you have a delicious, healthy treat waiting for you. You’re basically winning at life.