Aloo Paratha: Your Guide to Making the Ultimate Stuffed Flatbread (No More Sad, Empty Ones!)
Ever stared longingly at those perfect, golden-brown aloo parathas in pictures, wondering if you could ever achieve such deliciousness at home? Well, my friend, get ready to high-five yourself because this recipe for how to make aloo paratha is about to become your new bestie. Forget those flimsy, sad excuses for stuffed flatbreads. We’re talking about the real deal: flavorful, perfectly cooked potatoes hugged by soft, chewy dough. Intrigued? You should be!
Why This Aloo Paratha Recipe is Officially Awesome
Let’s be real. There are approximately one million aloo paratha recipes floating around the internet. So, why bother with this one? Because, darling, this one works. We’re not messing around with bland potatoes or dough that tears faster than your favorite jeans. This recipe focuses on flavor-packed filling, easy-to-handle dough, and simple steps that even your slightly-challenged-in-the-kitchen friend can nail. Plus, imagine the look on your guests’ faces when you serve up these golden beauties. Instant rockstar status, guaranteed. Who needs therapy when you have homemade aloo paratha, am I right?
Aloo Paratha: The Ingredient Lineup
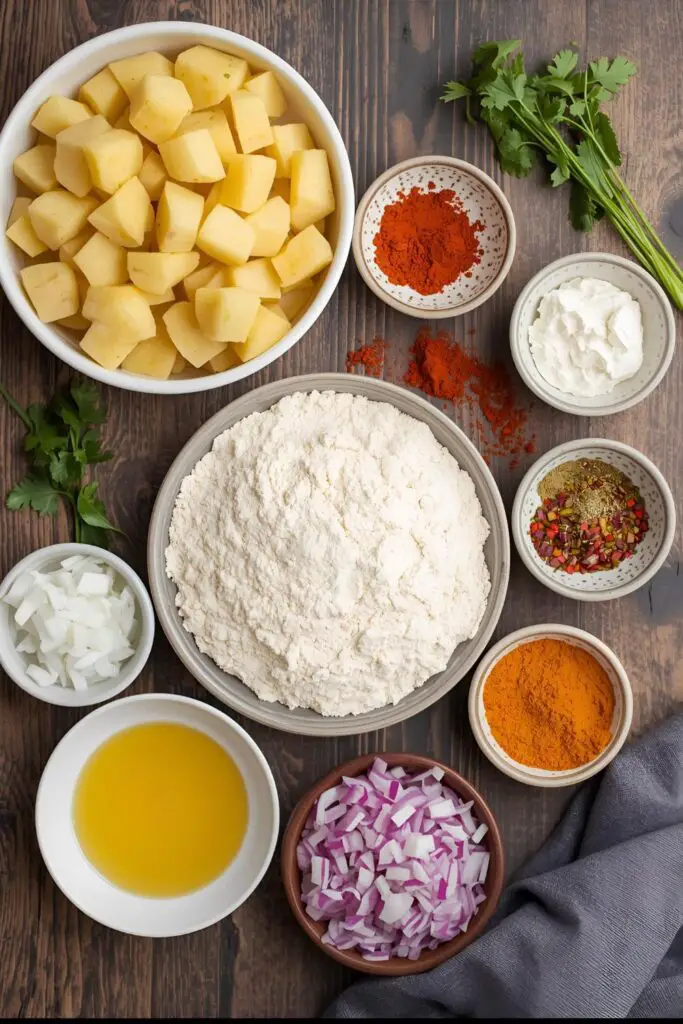
Here’s what you’ll need to whip up these potato-stuffed wonders:
For the Dough:
- 2 cups whole wheat flour (atta): This is the classic choice for that authentic paratha texture.
- 1/2 teaspoon salt: Just a pinch to enhance the flavor.
- 1 tablespoon oil or ghee: For that extra bit of softness.
- About 3/4 cup warm water: You might need a little more or less, so go slow.
For the Potato Filling (Aloo Masala):
- 3-4 medium-sized potatoes: Boiled, peeled, and mashed. Make sure they are lump-free, nobody likes a chunky surprise inside their paratha (unless it’s chocolate chips, but that’s a story for another day).
- 1 medium onion: Finely chopped. Tears? Maybe. Flavor? Absolutely.
- 1-2 green chilies: Finely chopped (adjust to your spice level – we’re not trying to breathe fire here… unless you are, in which case, go wild!).
- 1 teaspoon ginger-garlic paste: The flavor powerhouse.
- 1/2 teaspoon red chili powder: For that extra kick (optional).
- 1/2 teaspoon turmeric powder: Adds a lovely color and earthy flavor.
- 1/2 teaspoon coriander powder: Aromatic and essential.
- 1/4 teaspoon garam masala: That secret ingredient that makes everything taste better.
- 1/4 teaspoon dried mango powder (amchur): Adds a tangy touch (if you don’t have it, a squeeze of lemon juice at the end works too).
- 2 tablespoons chopped fresh cilantro: For freshness and a pop of green.
- Salt to taste: Because bland is boring.
- 2-3 tablespoons oil or ghee: For cooking the parathas.

Key Substitutions:
- Flour: You can use a mix of whole wheat and all-purpose flour if you prefer a slightly softer texture.
- Green Chilies: Skip them entirely if you’re spice-averse, or use a pinch of cayenne pepper for a different kind of heat.
- Dried Mango Powder: As mentioned, lemon juice works in a pinch.
Tools & Kitchen Gadgets You’ll Need
Alright, let’s talk tools. You won’t need a spaceship, promise. Just the basics:
- Mixing bowl: For kneading the dough.
- Potato masher or fork: To get those potatoes nice and smooth.
- Chopping board and knife: For chopping veggies (duh!).
- Rolling pin (belan): Your weapon of choice against stubborn dough.
- Rolling board (chakla): The stage for your rolling pin acrobatics.
- Tava or flat griddle: For cooking the parathas to golden perfection.
- Spatula: For flipping those beauties.
- Small bowl: To hold extra oil or ghee for cooking.
- Clean kitchen towel or paper towels: For keeping the rolled parathas moist.
Let’s Get Cooking: Step-by-Step Aloo Paratha Magic
Okay, deep breaths. We’re about to embark on a culinary adventure. Don’t worry, it’s more fun than it sounds.
Step 1: Kneading the Dough (The Calming Part?)
- In your mixing bowl, combine the whole wheat flour and salt. Give it a quick mix.
- Add the oil or ghee. Rub it into the flour with your fingertips until the mixture resembles coarse crumbs. This helps make the parathas soft.
- Gradually add warm water, a little at a time, while mixing with your hand. You’re aiming for a smooth, pliable dough that’s not sticky. Think of playdough, but edible (eventually!).
- Once the dough comes together, knead it for 8-10 minutes until it becomes soft and elastic. This is where the magic happens, trust me.
- Cover the dough with a damp kitchen towel and let it rest for at least 30 minutes. This allows the gluten to relax, resulting in softer parathas. Patience, young padawan!
Step 2: Making the Flavor Bomb (Aloo Masala)
- In a bowl, take your boiled and mashed potatoes. Make sure there are no lumps. Seriously, no one wants a potato surprise.
- Add the finely chopped onion, green chilies, and ginger-garlic paste to the mashed potatoes.
- Now for the spices! Add red chili powder (if using), turmeric powder, coriander powder, garam masala, and dried mango powder (if using).
- Stir in the chopped fresh cilantro.
- Season generously with salt. Remember, the filling needs to be flavorful! Taste and adjust as needed. Is it singing? It should be singing.
Step 3: The Art of Stuffing (Not Like Your Uncle’s Turkey)
- Gently punch down the rested dough. Divide it into equal-sized balls, about the size of a golf ball. You should get around 8-10 balls.
- Take one dough ball and flatten it slightly with your palm.
- Using your thumb, create a small well in the center of the flattened dough, like a little bowl.
- Spoon a generous amount of the potato filling into the well. Don’t be shy! But also, don’t overstuff to the point where it might burst. There’s a delicate balance, my friend.
- Bring the edges of the dough together to cover the filling completely. Pinch the edges to seal it tightly, making sure there are no openings. Gently press down the sealed edges.
- Lightly dust your rolling board and rolling pin with some whole wheat flour.
- Place the stuffed dough ball on the rolling board, sealed side down. Gently flatten it with your palm.
- Using the rolling pin, gently roll out the dough into a circle of about 4-5 inches in diameter. Apply even pressure to avoid tearing. If you see the filling peeking out a little, don’t panic! Just try to seal it gently. We’ve all been there.

Step 4: Cooking to Golden Perfection (The Grand Finale)
- Heat your tava or griddle over medium-high heat. It should be hot enough that a drop of water sizzles and evaporates quickly.
- Carefully place the rolled-out paratha on the hot tava.
- Cook for about 1-2 minutes on each side, or until you see small bubbles starting to appear and the surface looks slightly cooked.
- Now, drizzle a little oil or ghee around the edges and on the surface of the paratha.
- Flip the paratha and cook the other side, pressing gently around the edges with a spatula. This helps it cook evenly and puff up.
- Continue cooking, flipping occasionally and adding more oil or ghee as needed, until the paratha turns golden brown and has crispy spots. This usually takes another 2-3 minutes per side.
- Remove the cooked aloo paratha from the tava and keep it warm in a clean kitchen towel or a hot pot to maintain its softness.
- Repeat the process with the remaining dough balls and filling.
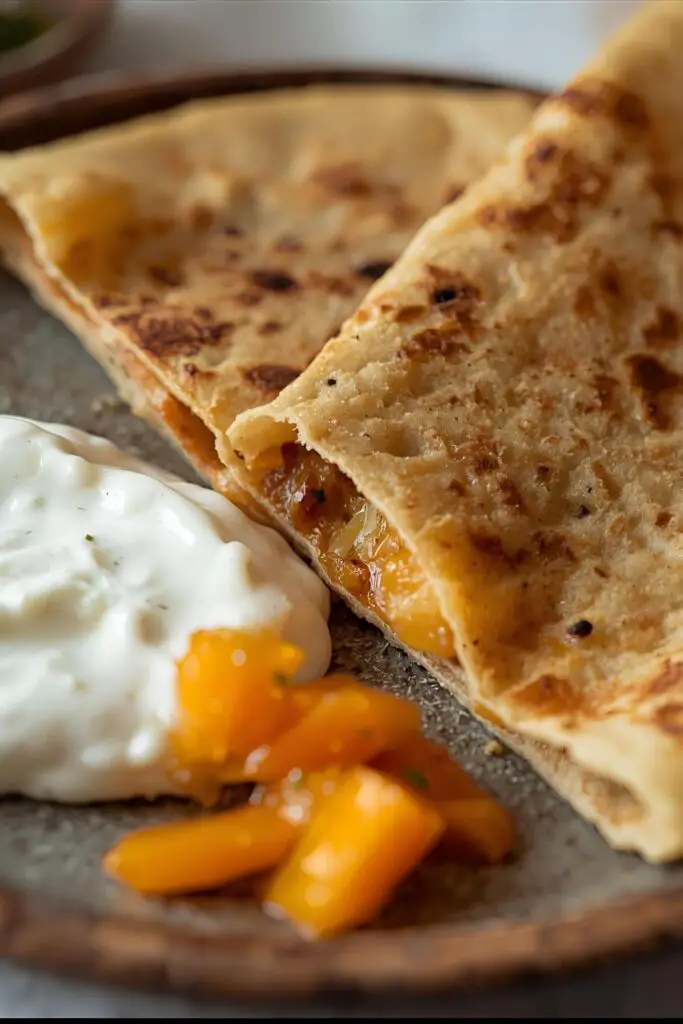
Step 5: Devour!
Serve your glorious aloo parathas hot with a dollop of butter or ghee, some yogurt, pickles, or your favorite chutney. You deserve it!
Calories & Nutritional Info (Approximate per Paratha)
- Calories: 150-200 (depending on size and amount of oil/ghee used)
- Carbohydrates: 20-25g
- Protein: 4-5g
- Fat: 5-10g
- Fiber: 3-4g
Nutritional Notes: Aloo parathas provide carbohydrates for energy, some protein, and fiber. However, the calorie and fat content can increase with the amount of oil or ghee used. Enjoy in moderation as part of a balanced diet.
Common Mistakes to Avoid (And My Snarky Solutions)
- Lumpy Potato Filling: Seriously? Mash those potatoes properly! Nobody wants a surprise potato pebble in their paratha. Use a masher or even a fork and put some elbow grease into it.
- Dough That’s Too Sticky or Too Dry: Dough is like a relationship, it needs the right balance. Add water gradually if it’s too dry, and a tiny bit of flour if it’s too sticky. Don’t just dump things in!
- Overstuffing: We all love a generous filling, but trying to cram in the entire potato sack will only lead to tears (and torn parathas). Find that sweet spot.
- Not Sealing the Filling Properly: Imagine your precious potato filling escaping during cooking. Tragic! Pinch those edges like you mean it.
- Rolling Too Aggressively: Treat your dough with respect! Gentle, even pressure is the key. You’re not trying to flatten a rogue planet.
- Cooking on Low Heat: Low and slow is great for some things, but not for parathas. Medium-high heat is your friend for that perfect golden crisp.
- Skipping the Resting Time for the Dough: Impatience is a virtue sometimes, but not here. Let the dough rest. It makes a world of difference. Trust me.
Variations & Customizations (Let’s Get Creative!)
- Spicy Aloo Paratha: Craving some extra heat? Add more green chilies, a pinch of cayenne pepper to the filling, or even some finely chopped pickled chilies. Warning: May cause spontaneous combustion (of flavor!).
- Paneer Aloo Paratha: For an extra dose of protein and creamy texture, add some grated paneer (Indian cheese) to the potato filling. It’s like a party in your mouth.
- Methi Aloo Paratha: Stir in some finely chopped fresh or dried fenugreek leaves (methi) into the dough or the filling for a slightly bitter and aromatic twist. It’s surprisingly delicious.
FAQ Section: Your Burning Aloo Paratha Questions Answered
- Why do my aloo parathas break while rolling? This usually happens if the dough isn’t rested enough, the filling has lumps, or you’ve overstuffed it. Make sure your dough is smooth and rested, your filling is lump-free, and you’re gentle while rolling.
- How do I prevent the filling from coming out? Seal the edges of the dough very well after stuffing. Also, avoid overstuffing. Gentle rolling also helps.
- Can I freeze aloo parathas? Yes, you can! Cook them until they are lightly golden brown, let them cool completely, then wrap them individually in plastic wrap and store them in a freezer bag. Reheat them on a tava or in a pan with a little ghee.
- What should I serve with aloo paratha? Yogurt, pickles (like mango or lime), white butter, and various chutneys (mint, coriander, tamarind) are classic accompaniments. You can also serve them with a side of raita or a simple Indian gravy.
- How can I make my aloo parathas softer? Kneading the dough well and letting it rest is crucial. Adding a tablespoon of oil or ghee to the dough also helps. Cooking them over medium-high heat and not overcooking them will also keep them soft.
- Is aloo paratha healthy? It provides carbohydrates, some protein, and fiber. However, it can be high in calories and fat depending on the amount of oil/ghee used. Enjoy in moderation as part of a balanced diet.
- Can I make aloo paratha without onion and garlic? Absolutely! Simply omit the onion and garlic from the filling. The other spices will still provide plenty of flavor.
Final Thoughts: Go Forth and Paratha!
Well, there you have it! Your comprehensive, slightly sarcastic, but ultimately helpful guide to making the most amazing aloo parathas this side of the internet (IMO). Now go forth, conquer that dough, and stuff those potatoes like a pro. Say goodbye to sad, empty flatbreads and hello to golden, flavorful perfection. Once you master this, you’ll never look at a store-bought paratha the same way again. Happy cooking, my foodie friend! And don’t forget to share your glorious creations (and any hilarious kitchen mishaps) – we’re all in this together! 🙂