How to Make a Smash Cake: A Recipe for Adorable Chaos
You are about to spend a significant amount of your precious time and energy creating a beautiful, miniature work of art. You will lovingly craft it, frost it with care, and present it with pride… all for the sole purpose of watching a one-year-old with questionable motor skills demolish it with their bare hands in under five minutes. Welcome to the joy of a first birthday! It’s Friday afternoon here in Khulna, the perfect time to plan for this weekend’s beautiful mess. This is your ultimate guide on how to make a smash cake that is not only picture-perfect but also something you can actually feel good about your little one devouring.
Why This Recipe Is a Parent’s Best Friend
Let’s be real, the smash cake is more of a photo prop and a sensory experience than a culinary one for the baby. So why is this specific recipe the one you need? First and foremost, it’s baby-friendly. We’re talking a soft, moist cake that’s naturally sweetened with fruit, not loaded with a cup of refined sugar. The frosting is a light, tangy, and low-sugar concoction that’s perfect for a first taste of dessert. Secondly, it’s adorably tiny. A 4-inch or 6-inch cake is the perfect size for one tiny human to go to town on, making for the absolute best first birthday photos you’ll cherish forever (and maybe use for a little blackmail when they’re a teenager).
This recipe is also incredibly easy. You don’t need fancy decorating skills or complicated techniques. It’s a simple, small-batch cake that you can whip up while the baby is napping. You get the joy and savings of a DIY smash cake, plus the peace of mind knowing exactly what your little one is face-planting into.
The Wholesome (ish) Ingredients List
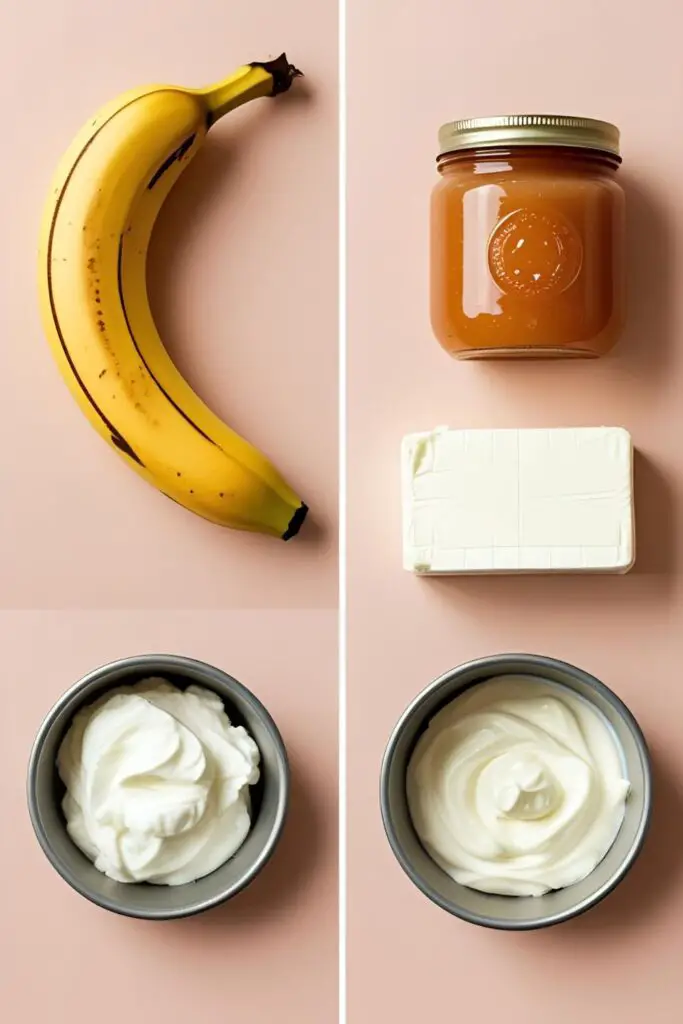
We’re keeping this simple and as healthy as a “cake” can reasonably be.
For the Baby-Friendly Banana Cake:
- All-Purpose Flour (¾ cup): The basic structure for our little cake.
- Baking Soda (½ teaspoon): To give our cake a nice, gentle lift.
- A Very Ripe Banana (1 large): This is our primary sweetener and provides a ton of moisture. The spottier, the better!
- Unsweetened Applesauce (¼ cup): More natural sweetness and moisture.
- A Large Egg (1): To bind everything together.
- Vegetable Oil or Melted Coconut Oil (2 tablespoons): For a soft, tender crumb.
- Vanilla Extract (½ teaspoon): Because even babies appreciate good flavor.
For the Low-Sugar Cream Cheese Frosting:
- Full-Fat Block Cream Cheese (4 oz): Cold, straight from the fridge. This helps the frosting stay firm.
- Plain Greek Yogurt (¼ cup): Adds a nice tang and keeps the frosting light. Use full-fat for the creamiest texture.
- Pure Maple Syrup (1-2 tablespoons): Just a touch of sweetness. You can adjust this to your preference.
- Vanilla Extract (¼ teaspoon): A little splash for flavor.
The Smash Zone Toolkit (Tools & Kitchen Gadgets)
The tools for the cake are simple. The tools for the smashing are another story.
- Two 4-inch or 6-inch Round Cake Pans: These are essential for creating that perfect, tiny layer cake.
- An Electric Mixer (Hand or Stand): Very helpful for making a smooth batter and a lump-free frosting.
- Mixing Bowls: One for wet ingredients, one for dry.
- A Whisk and a Silicone Spatula.
- Parchment Paper: To line your tiny pans.
- A Small Offset Spatula: For frosting your miniature masterpiece.
- THE REAL ESSENTIALS: A high chair, a plastic splash mat or tarp for the floor, a patient and camera-ready adult, and a mountain of wet wipes.
Step-by-Step to the Cutest Cake You’ll Ever Make

Let’s build this tiny tower of deliciousness, destined for destruction.
Step 1: Prep Your Mini Pans
Preheat your oven to 350°F (175°C). Grease and flour your two small cake pans. Line the bottoms with circles of parchment paper for a guaranteed easy release.
Step 2: Make the Simple Cake Batter
In a medium bowl, mash your very ripe banana until it’s a smooth paste. Whisk in the applesauce, egg, oil, and vanilla extract. In a separate, larger bowl, whisk together the flour and baking soda. Pour the wet ingredients into the dry ingredients and stir with a spatula until just combined. Do not overmix! A few lumps are perfectly fine.
Step 3: The Quick Bake
Divide your batter evenly between the two prepared pans. They will seem quite shallow, but that’s okay. Bake for 15-20 minutes, or until a wooden toothpick inserted into the center comes out clean. Because they’re so small, they bake quickly!
Step 4: Cool It Down
Let the tiny cakes cool in their pans for about 10 minutes before carefully inverting them onto a wire rack. Peel off the parchment paper and let them cool completely. This is crucial before frosting.
Step 5: Whip Up the Frosting
In a clean bowl, use your electric mixer to beat the cold cream cheese on high speed for about a minute until it’s smooth. Add the Greek yogurt, maple syrup, and vanilla and beat again until the frosting is smooth and creamy.
Step 6: Assemble the Masterpiece (Pre-Destruction)

Place one cooled cake layer on a small plate or cake stand. Spread a thin layer of frosting on top. Place the second cake layer on top of the first. Now, use your small offset spatula to cover the top and sides of the cake with the remaining frosting. It doesn’t have to be perfect—remember its fate.
Calories & Nutritional Info (It’s Still Cake!)

This is a “healthier” cake, but let’s manage our expectations.
- Serving Size: The whole dang cake (for the baby, anyway).
- Calories: The entire cake is approximately 800-900 calories.
- Key Feature: No refined sugar in the cake itself, relying on the natural sweetness of bananas and applesauce.
- The Frosting: Significantly lower in sugar than a traditional buttercream.
- The Takeaway: It’s a treat you can feel good about for a very special first birthday.
Common Mistakes to Avoid (Smash Cake Sabotage)
Don’t let these simple slip-ups ruin the big moment.
- Making a Full-Sized Cake: A smash cake is meant to be a personal-sized, baby-friendly portion. A giant cake can be overwhelming for a one-year-old.
- Using Traditional, Sugary Frosting: A classic American buttercream is way too sweet for a baby’s first taste and can be a texture they’re not ready for. Keep the frosting soft, light, and low in sugar.
- Using Choking Hazards for Decorations: Avoid small, hard candies, nuts, or any decorations that could be a choking risk. Soft fruits or simple piping are your safest bets.
- Forgetting to Prep the Smash Zone: I cannot stress this enough. There will be cake and frosting everywhere. Put down a tarp, strip the baby down to a diaper, and have your cleanup crew (aka, the other parent) on standby with wipes and a towel.
Variations & Customizations (Pimp Your Baby’s Cake)
Even a baby’s cake can have a little flair.
- Sweet Potato Spice Smash Cake: Swap the mashed banana for an equal amount of mashed, cooked sweet potato. Add a pinch of cinnamon and nutmeg to the dry ingredients for a cozy, spiced flavor.
- Berry-Licious Frosting: Muddle a few fresh raspberries or strawberries and swirl the puree into the cream cheese frosting. It will create a beautiful, natural pink color and add a lovely fruit flavor.
- Dairy-Free & Vegan Smash Cake: To make it vegan, use a flax egg (1 tbsp ground flaxseed + 3 tbsp water) in the cake. For the frosting, use a dairy-free cream cheese alternative and a thick, dairy-free Greek-style yogurt.
FAQ: Your First Birthday Freak-Outs, Answered
Let’s soothe those pre-party jitters.
1. What is the ideal size for a smash cake?
4-inch or 6-inch round cakes are perfect. They create a cute, small two-layer cake that’s just the right size for a baby.
2. Is this cake actually safe for a one-year-old to eat?

Yes, this recipe is designed to be safe. It’s soft, low in sugar, and uses simple ingredients. However, you should always be mindful of any potential allergies your child may have (like eggs or dairy).
3. Do I need to make a separate cake for the party guests?
YES! This cannot be overstated. The smash cake is a prop for the baby. You will need a larger sheet cake or cupcakes for the actual guests to eat, as the smash cake will be… well, smashed.
4. How do I get the best smash cake photos?
Find a spot with lots of good natural light. Use a simple, uncluttered background so the focus is on the baby and the cake. Get down on their level and be ready to take a hundred photos the second that cake is in front of them.
5. My frosting seems a little soft. What can I do?
The yogurt-based frosting is naturally softer than traditional frostings. If it’s too soft to work with, just pop it in the refrigerator for 15-20 minutes to let it firm up before you frost the cake.
6. Can I bake the cake layers ahead of time?
Absolutely. You can bake the layers, let them cool completely, and then wrap them tightly in plastic wrap. They can be stored at room temperature for a day or in the freezer for up to a month. Just thaw them before frosting.
7. What are some safe, natural ways to color the frosting?
You can use a tiny bit of beet puree for pink, a pinch of turmeric for yellow, or a small amount of spirulina powder for a greenish-blue.
Final Thoughts
You are now fully prepared to create the most adorable, delicious, and destructible cake for the big one-year-old milestone. You’ve embraced the beautiful absurdity of baking a cake that’s destined to become aJackson Pollock painting of frosting and crumbs.
So go on, bake this tiny cake with love. Set up your smash zone, get your camera ready, and prepare for the most wonderfully messy moment. The photos will be priceless, the memories will be hilarious, and your baby will have the time of their life. Embrace the chaos!