How to Make a Simple Floral Cake (That Looks Anything But Simple!)
Ever scroll through your social media feed and see them? Those effortlessly chic, rustic cakes that look like they were decorated by a woodland fairy, adorned with delicate, real flowers? You probably sighed, double-tapped, and thought, “Well, that’s beautiful, but I could never do that.”
What if I told you that you absolutely can? What if I told you that you could create a stunning, bakery-worthy, simple floral cake with a technique that’s infinitely easier than piping a respectable-looking rosette? Today, we’re letting nature do the heavy lifting. We’re about to create a masterpiece that is long on elegance and shockingly short on effort.
So, are you ready to make the prettiest cake of your life? Let’s get started.
Why This Recipe is Awesome
If the idea of creating a work of art with minimal stress hasn’t already convinced you, here’s why this is your new go-to celebration cake.
- Maximum Beauty, Minimum Effort: This is the ultimate secret weapon for looking like a baking professional. A simple, well-made cake is instantly transformed into a showstopper with the addition of a few beautiful, well-placed flowers. No complex, hand-cramping piping skills are required.
- It’s Uniquely and Organically Yours: No two flowers are exactly alike, which means no two of these cakes will ever be identical. It’s a rustic, natural style that’s full of personality and charm, and it feels so much more personal than generic decorations.
- Perfect for Any Elegant Occasion: Is there a celebration this cake wouldn’t be perfect for? Bridal showers, birthdays, Mother’s Day, an anniversary, a spring brunch… this cake is pure, understated elegance that fits any special moment.
Ingredients
The cake itself should be a delicious but simple canvas that lets the flowers shine. A classic, fragrant vanilla bean cake is the perfect choice.

For the Simple Vanilla Bean Cake:
- 2 ½ cups cake flour, sifted
- 1 ½ cups granulated sugar
- 1 tablespoon baking powder
- ½ teaspoon salt
- ½ cup (1 stick) unsalted butter, softened
- 4 large egg whites, at room temperature
- 1 cup buttermilk, at room temperature
- 2 teaspoons vanilla bean paste (for those beautiful specks!) or pure vanilla extract
For the Rustic Buttercream:
- 1 cup (2 sticks) unsalted butter, softened
- 3-4 cups powdered sugar, sifted
- 2-3 tablespoons heavy cream or milk
- 1 ½ teaspoons vanilla extract
- Pinch of salt
The Main Event: The Flowers!
- A selection of fresh, organic, pesticide-free, food-safe flowers. This is the most important part! (More on this in the instructions, I promise).
Tools & kitchen gadgets used
Baking the cake is business as usual, but the decorating requires a few specific, but simple, items.
- Standard Cake Baking Equipment: A stand mixer or hand mixer, two 8-inch round cake pans, a wire cooling rack, etc.
- A Turntable (Cake Decorating Stand): This makes getting that smooth, semi-naked finish so much easier.
- An Offset Spatula
- A Bench Scraper
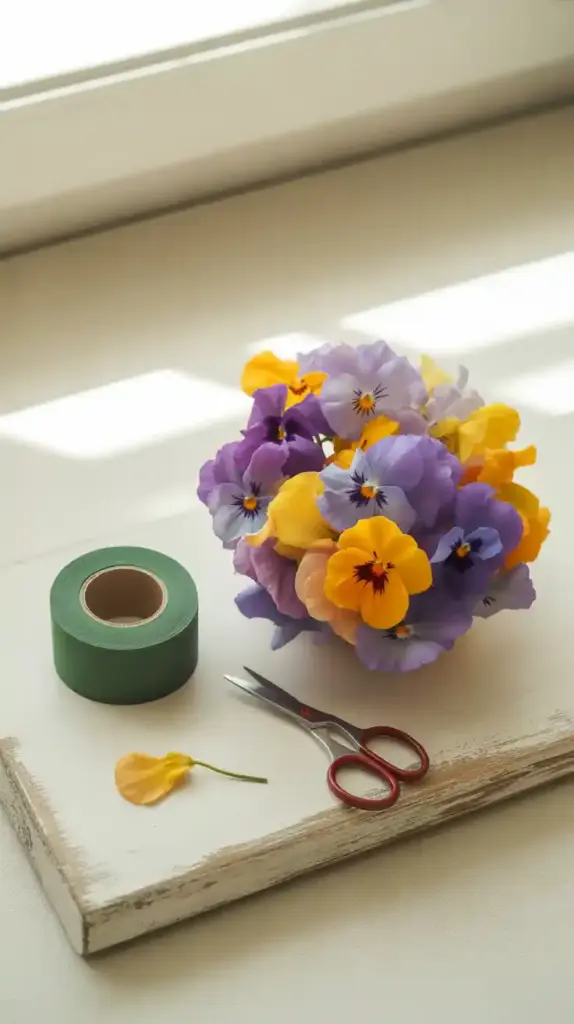
- Small, Sharp Scissors (for trimming flower stems)
- Food-Safe Tweezers (optional, but helpful for placing delicate petals and small blooms)
- Floral Tape or Plastic Wrap (for safely wrapping certain stems)
Step-by-step instructions
This is a two-part mission: first, we create our beautiful canvas, and then we adorn it with nature’s artistry.
Part 1: The Cake and Frosting
- Bake a Beautiful Cake: Preheat your oven to 350°F (175°C). Grease and flour your cake pans. Prepare the vanilla bean cake batter and bake for 30-35 minutes until a toothpick comes out clean.
- Cool Completely: Let the cakes cool in their pans for about 15 minutes before turning them out onto a wire rack to cool completely. I cannot stress this enough. A warm cake and frosting are a recipe for a slippery, melty disaster.
- Whip up the Frosting: While the cakes cool, make your simple vanilla buttercream. Beat the butter until fluffy, then gradually add the powdered sugar, cream, vanilla, and salt, and whip until light and airy.
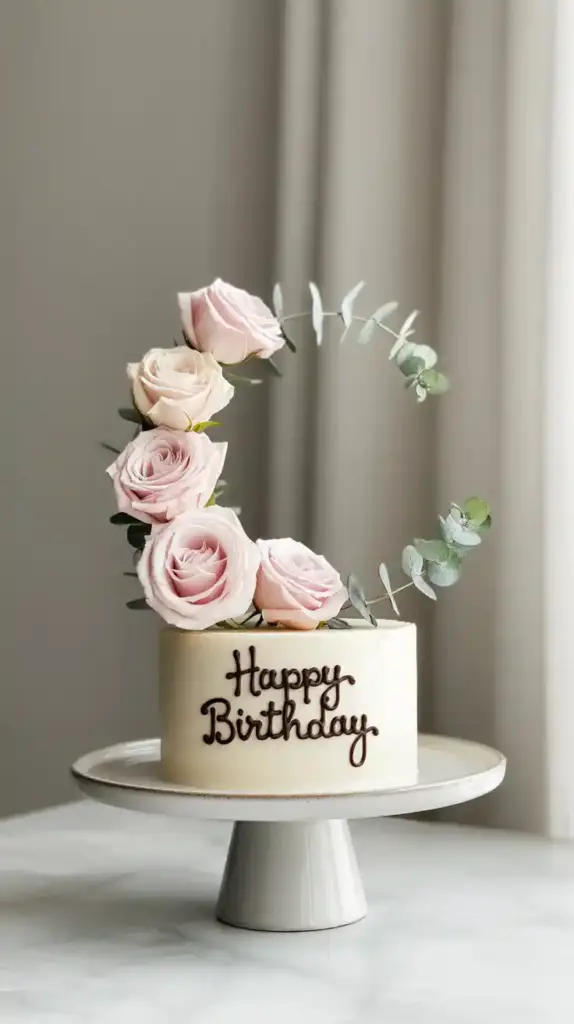
- The “Semi-Naked” Finish: Once the cakes are cool, level them and stack them with a thin layer of frosting in between. Now, for the trendy and wonderfully forgiving “semi-naked” look. Apply a thin layer of frosting all over the cake with your offset spatula. Then, take your bench scraper, hold it flat against the side of the cake, and gently scrape off most of the frosting as you spin your turntable. This leaves a rustic, beautiful finish where parts of the cake layer peek through.
Part 2: The Floral Decorating (Read This Carefully!)
Step 5: CHOOSE YOUR FLOWERS SAFELY! This is the most critical step of the entire process. Not all flowers are safe to be near food. Some are toxic. Before you even think about putting a flower on your cake, you must ensure it is food-safe.
- Truly Edible Flowers: These can be placed directly on the cake and even eaten. Great choices include Pansies, Violas, Roses, Lavender, Chamomile, Marigolds, and Cornflowers.
- Non-Toxic but Not Edible: Some flowers are safe to be near food but shouldn’t be eaten (like some Dahlias or Freesia). These still need their stems wrapped.
- The Golden Rule: You MUST source your flowers from a place that you know is 100% organic and pesticide-free. Flowers from a standard florist or the grocery store are often treated with chemicals. Look for “edible flowers” at a farmers’ market, a specialty store, or from your own chemical-free garden.

Step 6: Prep and Clean Your Blooms Once you have your beautiful, safe flowers, it’s time to prep them. Gently rinse them under cool water to remove any dirt or tiny critters. Let them air dry completely on a paper towel. A wet flower will make your frosting sad and slide right off.
Step 7: The Art of Arranging Now for the fun part! There’s no right or wrong way to do this, but here are a few tips:
- For truly edible flowers like pansies and violas, you can pluck the blossoms and press them gently directly onto the buttercream.
- For flowers with stems (like roses or chamomile), trim the stem to about 1-2 inches. Even if they are non-toxic, it’s best practice to wrap the stem tightly in a small piece of floral tape or plastic wrap to create a barrier between the stem and the cake.
- A popular design is a “crescent moon” shape, where you arrange the flowers in a cascade down one side of the cake.
- Start with your largest flowers first to create the basic shape, then fill in the gaps with smaller blooms, buds, and safe greenery like mint or rosemary sprigs.
Calories & Nutritional Info
This is for a slice of the cake itself. Please remove the pretty decorations before eating!
- Serving Size: 1 slice (assuming the cake is cut into 12 slices)
- Estimated Calories: Around 400-500 kcal.
- Note: The nutritional information does not include the flowers. While some are edible, they are primarily for decoration and should be removed before serving.
Common Mistakes to Avoid
Please read this section. A beautiful cake should never be a health hazard.
- USING UNSAFE OR POISONOUS FLOWERS: I will be very serious for a moment, because this is critical. Some very common and beautiful flowers, like Hydrangeas, Calla Lilies, and Daffodils, are poisonous. Do not ever grab flowers from a bouquet or your garden unless you know with 100% certainty that they are non-toxic and pesticide-free. When in doubt, leave it out.
- STICKING BARE STEMS INTO THE CAKE: Never, ever do this. Even if a flower is non-toxic, its stem has been in soil and water and can leak bitter-tasting sap into your delicious cake. You must wrap every single stem that will be inserted into or have prolonged contact with the cake.
- Forgetting That “Simple” is in the Title: The beauty of a simple floral cake is its minimalism. Don’t feel the need to cover every square inch with blooms. A few well-placed, beautiful flowers are often far more elegant and impactful than a giant, heavy flower hedge sitting on top of your cake. Less is more.
- Using Wet Flowers: Water is the enemy of buttercream. It can cause the frosting to get weepy, slide, and just look messy. Make absolutely sure your flowers are completely dry before they touch your beautiful cake.
Variations & Customizations
The cake is your canvas, and nature is your paint box. Get creative!
- Lemon & Lavender Dream: Use a bright lemon cake recipe and fold 1 teaspoon of culinary-grade dried lavender into your buttercream frosting. Decorate with fresh, organic lavender sprigs and delicate chamomile flowers for a fragrant and beautiful combination.
- Rich Chocolate & Rose: A deep, rich chocolate cake with a dark chocolate buttercream is a dramatic and romantic base. Decorate simply with the petals of a deep red, fragrant, organic rose.
- Pressed Flower Perfection: For a different, more delicate look, use pressed edible flowers. Once your cake is frosted, you can use a pair of tweezers to gently arrange the flat, translucent pressed flowers on the sides and top of the cake. It creates a beautiful, stained-glass or watercolor effect.
FAQ Section
All your budding questions about decorating with flowers, answered.

1. What are the best, safest fresh flowers to put on a cake? Great, safe, and easy-to-find choices include roses, pansies, violas, chamomile, carnations, cornflowers, and lavender. Always ensure they are from a pesticide-free source.
2. What is the difference between “edible” and “non-toxic” flowers? This is a key distinction! Edible flowers (like pansies) are safe to eat entirely. Non-toxic flowers (like some roses) won’t harm you if they touch your food, but they aren’t meant to be eaten and should be removed before serving.
3. How do you prepare fresh flowers to put on a cake? Gently rinse them, let them dry completely, and then wrap any stems that will touch the cake tightly in floral tape or plastic wrap.
4. Do I really need to use organic, pesticide-free flowers? Yes, absolutely. Conventional flowers from a florist or grocery store are grown for their looks, not for consumption, and are often treated with heavy pesticides and fungicides that are not food-safe.
5. How long will fresh flowers last on a cake? It’s best to decorate the cake with fresh flowers on the day you plan to serve it for maximum freshness. Most flowers will look good for several hours, but delicate blooms can wilt, especially in warm weather.
6. Can I decorate the cake the day before my event? You can bake and frost the cake the day before, but for the best results, add the fresh flowers as close to serving time as possible (e.g., the morning of the event).
7. How do I get that rustic “naked cake” look? This is the “semi-naked” or “naked” style. After you fill your cake layers, apply a very thin layer of frosting all over, and then use a bench scraper to scrape most of it off, leaving the layers of the cake peeking through. It’s beautiful and very forgiving for beginners!
Final Thoughts
And there you have it. You’ve created a cake that is simple, elegant, and in perfect harmony with nature. It’s proof that the most stunning decorations don’t always require hours of painstaking piping—sometimes, they’re just waiting for you in a garden or at a local farm.
You’ve successfully and safely combined the art of baking with the beauty of the natural world to create something truly special. Now go on, take about a hundred photos before anyone dares to cut into your masterpiece. You’ve earned this beautiful moment.