How to Make a Swiss Roll Cake Without Having a Meltdown
It’s nearly 3 AM here in Khulna. You’re probably deep into a marathon of some baking competition show, watching contestants flawlessly create elegant swirls of cake and cream. You see that perfect spiral, and a single thought enters your mind: “Nope. I could never.” The Swiss roll seems like a mythical beast of the baking world, beautiful to behold but destined to crack, crumble, and break your spirit if you dare attempt it. Well, I’m here from the future (or at least, very late at night) to tell you that you are wrong. Today, we’re learning how to make a swiss roll cake, and I promise, with a few key tricks, you’ll conquer this beautiful dessert and wonder why you were ever afraid of it.
Why This Recipe Is Your New Secret Weapon
So why should you attempt this seemingly complicated confection? Because nothing, and I mean nothing, gets a bigger “Wow!” from guests than a perfectly spiraled Swiss roll. It looks like it took hours of painstaking, professional-level work, but the secret is that the cake itself bakes in about 10 minutes. It’s a high-impact, low-bake-time miracle. This recipe yields a light, airy, chocolatey sponge cake that’s flexible and forgiving, wrapped around a simple, stable whipped cream filling. It’s delicate, delicious, and a showstopper at any gathering. You’ll go from “I can’t bake” to “Oh, this old thing?” in one afternoon. The power move is intoxicating.
The Cast of Characters for Your Cake Roll
The ingredients are surprisingly simple. The magic is all in the technique, especially how you handle the eggs.
For the Chocolate Sponge Cake:
- Large Eggs (4 of them): The star of the show. They need to be separated, with yolks and whites in different bowls. This is key to the cake’s light texture.
- Granulated Sugar (¾ cup, divided): We’ll use some for the yolks and some for the whites.
- All-Purpose Flour (¼ cup): Not a lot of flour is needed for this light sponge.
- Unsweetened Cocoa Powder (⅓ cup): Use a good quality one for the best chocolate flavor.
- Salt (¼ teaspoon): Balances all the flavors.
- Vanilla Extract (1 teaspoon): Because everything is better with vanilla.
For the Whipped Cream Filling:
- Heavy Whipping Cream (1 cup): It must be very cold to whip up properly.
- Powdered Sugar (¼ cup): To sweeten the cream.
- Vanilla Extract (½ teaspoon): For a little extra flavor.
- Extra Powdered Sugar or Cocoa Powder: For dusting your work surface.
The Tools for a Triumphant Roll
Having the right equipment is your insurance policy against a cracking, crumbling tragedy.
- A Jelly Roll Pan (10×15 inches): This is highly recommended. Its specific size ensures the cake bakes to the perfect thickness for rolling. A standard cookie sheet is usually too large.
- Parchment Paper: Absolutely non-negotiable. You will line the pan with it, and it will save your cake from sticking.
- An Electric Mixer (Hand or Stand): You really need one to get the proper volume in your egg whites and to whip the cream.
- Several Mixing Bowls: You’ll need at least two for separating and whipping eggs.
- A Fine-Mesh Sieve: For sifting your dry ingredients to ensure a lump-free, delicate sponge.
- A Thin, Lint-Free Kitchen Towel: A clean tea towel is perfect. This will be your primary tool for rolling the cake.
- An Offset Spatula: Ideal for spreading the batter and filling in thin, even layers.
Step-by-Step to a Perfect Spiral
Deep breaths. We’re going to break this down. The key is to work quickly and confidently once the cake is out of the oven.
Step 1: Prepare for Rolling Success

First, preheat your oven to 375°F (190°C). Next, line your 10×15 inch jelly roll pan with parchment paper, allowing a little overhang on the short sides to act as handles. Grease and flour (or dust with cocoa powder) the parchment. Finally, lay out your clean kitchen towel and generously dust it with powdered sugar or cocoa powder. This is where your hot cake will land.
Step 2: Make the Airy Sponge Batter
In a large bowl, use your electric mixer to whip the egg whites on high speed until foamy. Gradually add ¼ cup of the sugar and continue to beat until stiff, glossy peaks form. In a separate bowl, beat the egg yolks and the remaining ½ cup of sugar until the mixture is pale yellow, thick, and ribbon-y (about 3-5 minutes). Beat in the vanilla.
Sift the flour, cocoa powder, and salt together. Gently fold the dry ingredients into the yolk mixture until just combined. Now, gently fold the whipped egg whites into the batter in three additions. Be delicate! You want to keep all that air you just whipped into them.
Step 3: The Quick Bake
Pour the batter into your prepared pan and use your offset spatula to spread it into a thin, even layer. Bake for just 10-12 minutes. The cake is done when it springs back when you gently touch it. Do not overbake!
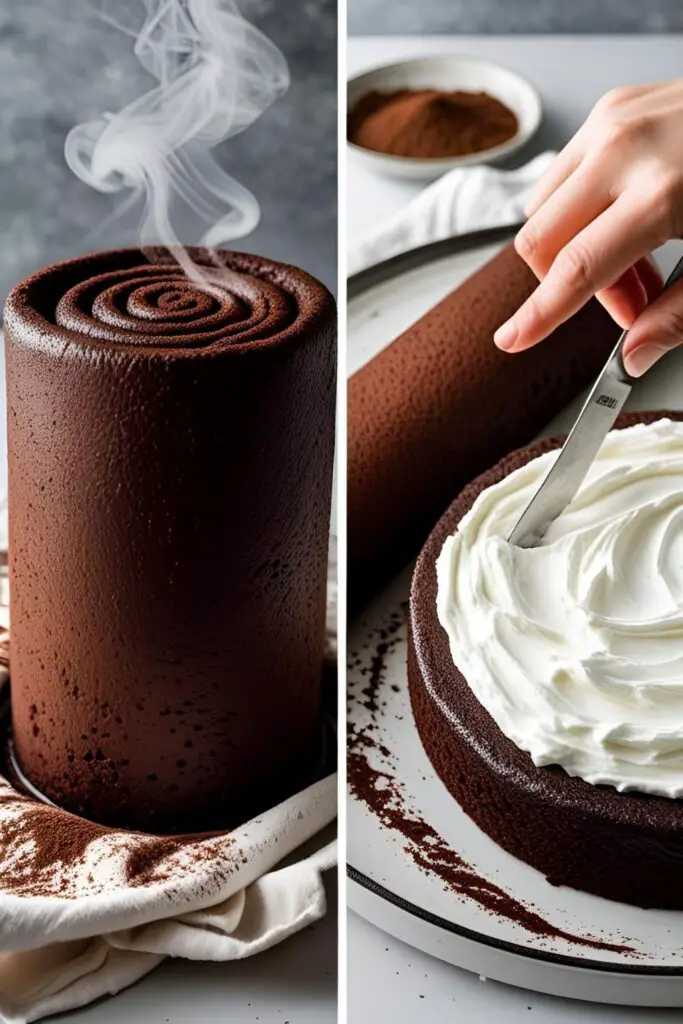
Step 4: THE ROLL (Don’t Be Scared!)
This is the most important part, and you must act fast. As soon as the cake comes out of the oven, run a knife around the edges to loosen it. Immediately invert the hot cake onto your prepared, dusted kitchen towel. Carefully peel off the parchment paper. Starting from one of the short ends, immediately and confidently roll the warm cake up with the towel inside.
Step 5: The Big Chill
Place the rolled-up cake (towel and all) on a wire rack and let it cool completely to room temperature. This can take about an hour. This step is teaching the cake its new, curly shape. It’s creating “cake memory.”
Step 6: Whip the Filling

While the cake is cooling, make your filling. In a cold bowl, whip the cold heavy cream, powdered sugar, and vanilla extract on high speed until stiff peaks form.
Step 7: Fill and Re-Roll
Once the cake is completely cool, gently and carefully unroll it. It will want to stay curved, which is a good thing! Spread the whipped cream filling evenly over the surface, leaving about a 1-inch border all around to prevent it from squishing out. Now, re-roll the cake (without the towel this time!) into a tight log.
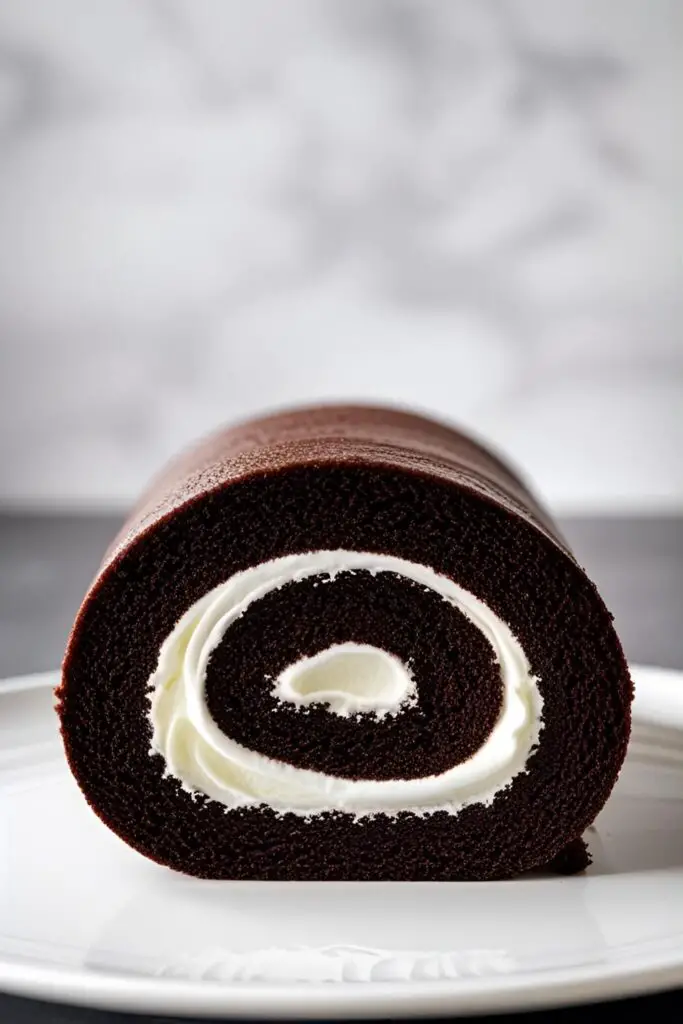
Step 8: The Final Chill & Serve
Wrap your finished Swiss roll tightly in plastic wrap and refrigerate it for at least 1 hour to allow the filling to set. When ready to serve, you can dust it with more powdered sugar or cocoa powder and slice it into beautiful, spiraled rounds.
Calories & Nutritional Info (It’s Lighter Than You Think!)
Because this cake is mostly air from the eggs, it’s lighter than a traditional butter cake. But it’s still dessert, so let’s be real.
- Serving Size: One 1-inch slice
- Calories: Approximately 180-220 kcal.
- Good to Know: It feels indulgent and light at the same time. The perfect balance, IMO.
Common Mistakes to Avoid (Swiss Roll Tragedies)
Read this section twice. This is your anti-crack insurance policy.
- Overbaking the Cake: A dry, overbaked cake is brittle and is guaranteed to crack. Watch it like a hawk and take it out as soon as it springs back to the touch.
- Not Rolling the Cake While It’s HOT: This is the #1 reason Swiss rolls fail. A cold cake has no flexibility. You must roll it within a minute of it coming out of the oven. Be brave!
- Deflating the Batter: When you fold the egg whites and dry ingredients in, be gentle! If you stir or beat the batter, you will knock out all the air, and your cake will be dense and flat.
- Overfilling the Cake: If you pile on too much filling, it will all squish out the sides when you roll it up, creating a sticky mess. A thin, even layer with a border is all you need.
Variations & Customizations (Remix Your Roll)
The classic chocolate roll is just the beginning.
- Classic Vanilla Jelly Roll: Omit the cocoa powder and add an extra ¼ cup of flour to the cake batter. Once cooled, spread a thin layer of raspberry jam over the cake, then top with the whipped cream filling before rolling.
- Pumpkin Spice Roll: The quintessential autumn dessert! Use a spiced pumpkin sponge cake recipe and fill it with a tangy, sweet cream cheese frosting.
- Lemon & Berry Roll: Make a vanilla sponge, but add the zest of one lemon to the batter. Fill with a thin layer of lemon curd and fresh berries along with the whipped cream.
FAQ: Your Swiss Roll Anxieties, Soothed

Let’s tackle the questions that keep aspiring Swiss-rollers up at night.
1. Why did my Swiss roll crack?
This is the million-dollar question. The most common reasons are: the cake was overbaked, it wasn’t rolled immediately while hot, or it was rolled too tightly the second time.
2. Can I make this ahead of time?
Yes! It actually slices more cleanly after it has chilled for a few hours. You can make it up to a day in advance and keep it well-wrapped in the refrigerator.
3. How do I store leftovers?
Store any leftover Swiss roll tightly covered in the refrigerator for up to 3 days.
4. My cake is stuck to the kitchen towel! What did I do wrong?
You probably didn’t dust the towel generously enough with powdered sugar or cocoa powder. You need a good, thick layer to prevent sticking.
5. Can I use a different filling?
Absolutely! Buttercream, chocolate ganache, pastry cream, jam, or lemon curd are all fantastic fillings. Just make sure they are spreadable and not too wet.
6. Do I really need a jelly roll pan?
It’s highly recommended. The 10×15 inch size is perfect for creating a thin cake that bakes quickly and is flexible enough to roll. Using a different size pan will alter the thickness and baking time, increasing the risk of cracking.
7. Can I freeze a Swiss roll?
Yes, they freeze surprisingly well! Wrap the finished, chilled roll tightly in a double layer of plastic wrap and then a layer of foil. It can be frozen for up to a month. Thaw it overnight in the refrigerator.
Final Thoughts
Congratulations! You have officially faced one of baking’s most intimidating challenges and emerged victorious with a stunning, spiraled masterpiece. You can now confidently say you know how to make a Swiss roll, and you didn’t even have a nervous breakdown.
Go ahead, slice into that beautiful swirl of cake and cream. Admire your handiwork. You’ve created something elegant, delicious, and deeply impressive. Just be prepared to become the official “fancy dessert” person for all future family gatherings. It’s a tough job, but someone’s got to do it.