How to Make a Half and Half Cake (And End the Chocolate vs. Vanilla Debate)
You know the scene. It’s a birthday party. The cake comes out. A chorus of oohs and aahs fills the room, but then, the battle lines are drawn. Half the room are chocolate purists who wouldn’t touch a vanilla cake with a ten-foot pole. The other half are vanilla devotees who find chocolate “a bit much.” You, the benevolent host, are caught in the crossfire. What if I told you there’s a way to achieve world peace… at least at the dessert table? Today, I’m going to show you how to make a half and half cake, the deliciously diplomatic dessert that will make you a hero.
This isn’t just a cake; it’s a solution. It’s the answer to indecisiveness. It’s two glorious cakes in one, and it’s about to become your go-to party trick. So, grab your apron and let’s end this flavor war for good.
Why This Recipe Is a Game-Changer
Okay, why should you, a busy person with things to do, embark on this baking adventure? Let me count the ways.
First, it’s the ultimate crowd-pleaser. You will literally satisfy everyone. No more polite-but-disappointed faces when you cut the cake. With a half and half cake, everyone gets what they want, and you look like a culinary genius who can bend the laws of baking to your will.
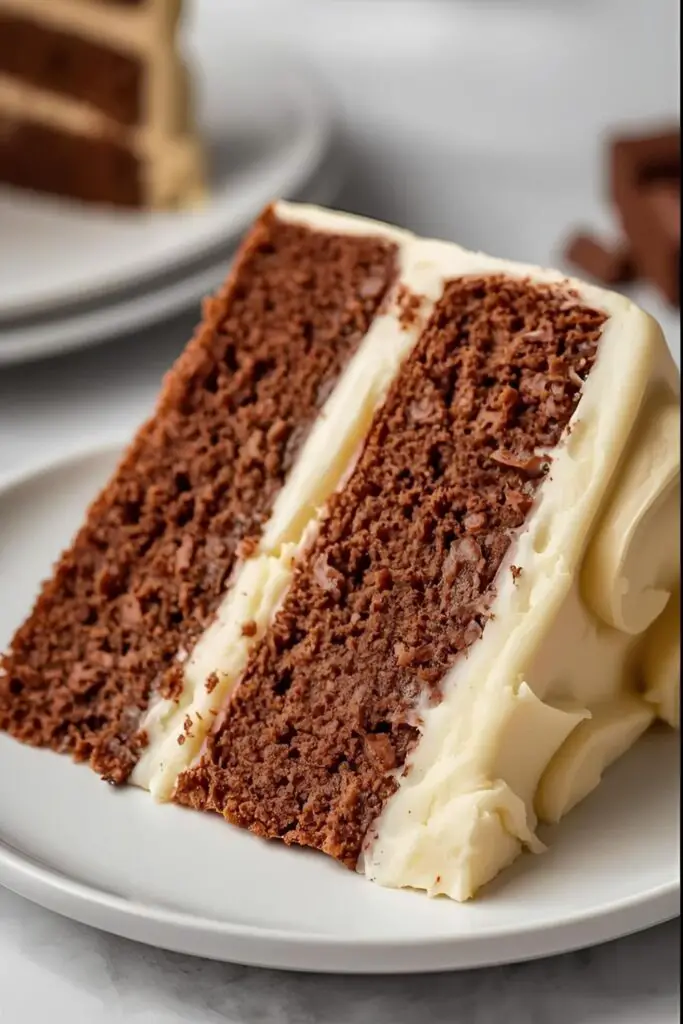
Second, it looks way more complicated than it is. Slicing into a cake to reveal a perfect split of dark chocolate and light vanilla is a serious “wow” moment. Your guests will assume you spent all day toiling away with two separate, complicated recipes. We’ll let that be our little secret.

And the best part? You only need to make one base batter. That’s right. This entire masterpiece starts from a single, glorious vanilla batter that we cleverly divide and conquer. It’s maximum impact with surprisingly minimal effort. TBH, it’s the smartest you’ll ever feel while holding a spatula.
The Diplomatic Ingredients
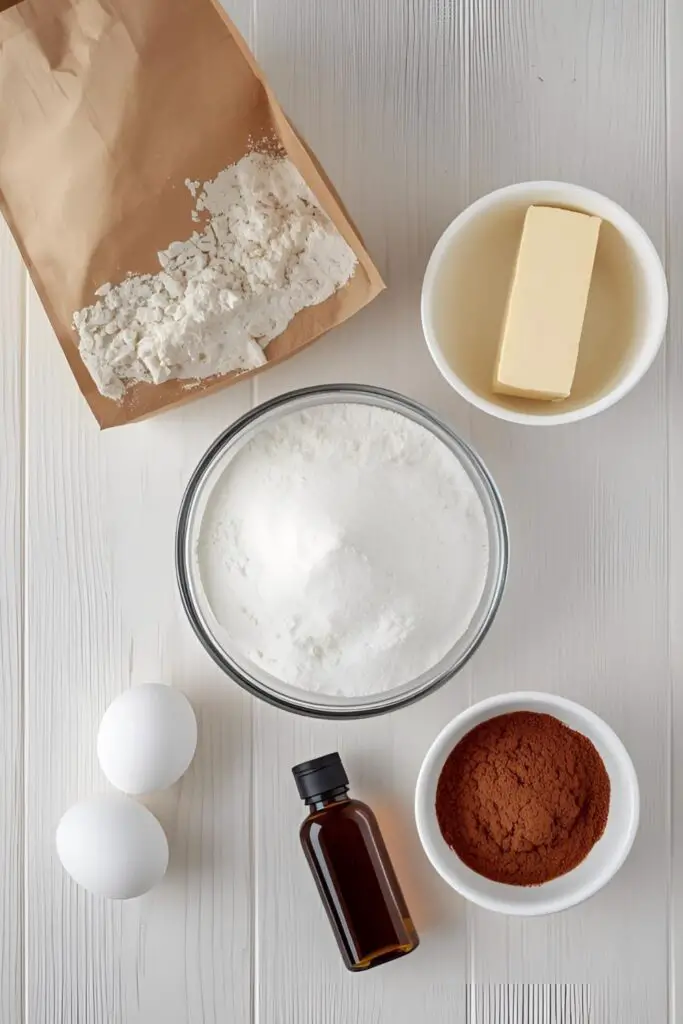
We’re making this cake from scratch, but don’t panic. The ingredients are simple pantry staples. The key is to start with one master vanilla batter and then transform half of it.
For the Master Vanilla Batter:
- All-Purpose Flour: 2 ½ cups
- Baking Powder: 2 ½ teaspoons
- Salt: ½ teaspoon
- Unsalted Butter: 1 cup (2 sticks), softened to room temperature. This is not a suggestion.
- Granulated Sugar: 1 ¾ cups
- Eggs: 4 large, also at room temperature. Seriously, don’t make me come over there.
- Pure Vanilla Extract: 1 tablespoon (use the good stuff!)
- Whole Milk: 1 cup, you guessed it, at room temperature.
For the Chocolate Transformation:
- Unsweetened Cocoa Powder: ⅓ cup, sifted
- Hot Water or Brewed Coffee: 3 tablespoons. Coffee deepens the chocolate flavor, which is a pro move.
For the Peacemaker Buttercream:
- Unsalted Butter: 1 ½ cups (3 sticks), softened
- Powdered Sugar: 4 cups, sifted
- Heavy Cream or Milk: 3-4 tablespoons
- Pure Vanilla Extract: 1 ½ teaspoons
- Pinch of Salt
The Essential Tools for Operation Two-Face
To pull off this culinary magic trick, you’ll need some standard baking gear. No weird, single-use gadgets required (unless you want one).
- Stand Mixer or Electric Hand Mixer: Creaming butter and sugar by hand is a workout I don’t wish on my worst enemy.
- Two 9-inch Round Cake Pans: The battlefield for our flavors.
- Parchment Paper: To line the bottom of your pans and prevent sticking.
- Mixing Bowls: You’ll need a large one for the main batter and a medium one for the chocolate half.
- Silicone Spatulas: For scraping, folding, and getting every last drop of batter.
- Wire Cooling Rack: Crucial for preventing soggy cake bottoms.
- Cake Pan Divider (Optional): You can buy a special divider for round pans. Or, you can DIY one with a piece of cardboard wrapped tightly in aluminum foil and parchment paper. It makes for a super clean line.
- Offset Spatula: For getting that smooth, professional-looking frosting finish.
Step-by-Step: How to Unite the Flavors
Alright, let’s bake. Follow these steps, and you’ll be swimming in cake-fueled adoration.
Step 1: Prep Your Station
Preheat your oven to 350∘F (175∘C). Grease your two 9-inch round cake pans with butter or baking spray. Line the bottoms with parchment paper rounds, then grease the parchment paper too. A little flour dusting wouldn’t hurt either. Overkill? Maybe. But your cake will slide out like a dream.
Step 2: Create the Master Batter
In a medium bowl, whisk together the flour, baking powder, and salt. Set it aside.

In the large bowl of your stand mixer (or using a hand mixer), beat the softened butter and granulated sugar on medium-high speed for about 3-5 minutes, until it’s light, pale, and fluffy. Don’t rush this part; you’re beating air into the base of your cake.
Add the room temperature eggs one at a time, beating well after each addition. Scrape down the sides of the bowl as you go. Finally, beat in the vanilla extract.
Reduce the mixer speed to low and add the flour mixture in three parts, alternating with the milk (begin and end with the dry ingredients). Mix only until the last streaks of flour disappear. Do not overmix, or you’ll get a tough cake.
Step 3: The Great Divide
Now for the magic. Carefully pour exactly half of the vanilla batter into your second mixing bowl. You can eyeball it or use a kitchen scale if you’re a perfectionist. No judgment here.
Step 4: Journey to the Dark Side
In a small bowl, whisk together the sifted cocoa powder and the hot water/coffee until you have a smooth, thick paste. This “blooming” process brings out a richer chocolate flavor.
Add this chocolate paste to one of the bowls of batter. Gently fold it in with a spatula until it’s evenly combined and no vanilla streaks remain. Now you have two glorious bowls of batter: one vanilla, one chocolate.
Step 5: Filling the Pans (The Moment of Truth)

You have two options here for creating the split.
- The Careful Pour Method: This requires a steady hand. Start pouring the vanilla batter into one side of the prepared cake pan while simultaneously pouring the chocolate batter into the other side. Try to pour at the same rate.
- The Divider Method (Recommended): Place your store-bought or DIY divider firmly in the center of the pan. Pour the vanilla batter into one half and the chocolate into the other. Then, holding the divider steady, carefully pull it straight up and out. You should have a beautifully clean line. Repeat for the second pan.
Step 6: Bake, Cool, and Frost
Bake the cakes for 30-35 minutes, or until a wooden skewer or toothpick inserted into the center of EACH side comes out clean.
Let the cakes cool in their pans on a wire rack for about 15 minutes before inverting them onto the rack to cool completely. And I mean completely. Frosting a warm cake leads to a soupy, sliding mess.
Once cool, make your buttercream. Beat the butter until creamy, then gradually add the powdered sugar. Mix in the vanilla and salt. Add the cream or milk one tablespoon at a time until you reach a smooth, spreadable consistency. To assemble, place one cake layer on your serving plate, frost the top, then place the second layer on top, aligning the chocolate and vanilla sides. Frost the top and sides of the entire cake. For a pro look, you can even make a half-batch of chocolate buttercream to frost the chocolate side!
Calories & Nutritional Info (A Slice of Indecisive Joy)
This is a celebration cake. Let’s not get bogged down in numbers, but if you must know…
- Serving Size: 1 slice (1/12th of the cake)
- Estimated Calories: 450-550 (depending on your frosting generosity)
- Carbohydrates: Mostly from sugar and flour. Delicious, delicious carbs.
- Fat: Yes, there’s butter. That’s why it’s good.
- Main Benefit: Cures indecisiveness and promotes party harmony.
Common Mistakes to Avoid (I Made Them So You Don’t Have To)
- The Accidental Marble Cake: You got a little too excited and swirled the batters together. Resist the urge to get artsy. This is a half and half cake. The beauty is in the clean divide.
- The Dreaded Dry Cake: You overbaked it. The toothpick test is your best friend. Check both the chocolate and vanilla sides, as they can sometimes bake at slightly different rates.
- Cold Ingredients Chaos: You used cold butter, eggs, or milk. Room temperature ingredients emulsify better, creating a smoother, more uniform batter and a lighter cake crumb. Don’t skip this step!
- The Frosting Meltdown: You tried to frost a warm cake. I’ve said it before, and I’ll say it again: patience is a virtue in baking. Let it cool completely.
Variations & Customizations
Once you’ve mastered the classic chocolate and vanilla, why stop there?
1. Citrus & Berry Twist
Instead of chocolate, make the second half a lemon or raspberry cake. For lemon, add the zest of one lemon and a tablespoon of lemon juice to half the batter. For raspberry, gently fold in about ⅓ cup of raspberry puree.
2. The Neapolitan Dream
Feeling ambitious? Divide the master batter into three. Keep one vanilla, make one chocolate, and add strawberry puree or strawberry extract to the third. This works best in a 9×13 inch rectangular pan, pouring the batters in three distinct sections.
3. The Black & White Frosting
Embrace the theme completely! Make a half-batch of chocolate buttercream and frost the chocolate side of the cake with it, while frosting the vanilla side with vanilla buttercream. The visual effect is stunning.
FAQ: Your Half and Half Cake Quandaries, Answered
Here are the questions I get asked most often about this diplomatic dessert.
1. Can I just use a box cake mix? Absolutely! IMO, it’s a great shortcut. Prepare one box of white or vanilla cake mix according to the package directions. Divide the batter in half and fold the cocoa powder mixture into one part. Easy peasy.
2. How do you keep the two batters from mixing in the pan? The divider method is the most foolproof way to get a clean line. If you don’t have one, pouring both batters simultaneously and carefully is your best bet. A little mixing where they meet is okay!
3. Can I bake this in a 9×13 rectangular pan? Yes, and it’s even easier to pour the batters side-by-side in a rectangular pan. The baking time might be slightly longer, so start checking for doneness around the 35-minute mark.
4. How do you suggest frosting the cake to show off the two flavors? Frost the entire cake with vanilla buttercream. Then, you can use a decorative line of chocolate sprinkles or chocolate frosting down the middle to signal the surprise inside. Or go for the half-and-half frosting look!
5. Do I really need a special cake pan divider? Nope. The DIY cardboard-wrapped-in-foil-and-parchment trick works surprisingly well. Just make sure it’s snug in the pan before you pour.
6. Can this cake be made gluten-free? Yes. You can substitute the all-purpose flour with a good quality 1-to-1 gluten-free baking flour blend (one that contains xanthan gum).
7. How should I store the finished cake? Store it in an airtight cake carrier at room temperature for up to 3 days. If your kitchen is very warm, you might want to refrigerate it, but let it come to room temperature before serving for the best flavor and texture.
Final Thoughts
There you have it. You are now armed with the recipe for the most politically correct, crowd-pleasing, argument-ending cake known to humankind. No longer will you be forced to choose between the light side and the dark side. You can have both.
So go forth and unite the dessert lovers in your life. Bake this cake, watch the jaws drop when you slice into it, and gracefully accept your new title as the Official Party Hero. You’ve earned it.