Warning: May Cause Extreme Happiness (and Chocolate Messes): How to Make a Chocolate Pinata
Okay, let’s get serious for a hot second. Are you tired of the same old boring desserts? Do you crave a little drama, a little excitement, maybe even the socially acceptable destruction of something delicious? Then, my friend, you’ve stumbled upon the answer to your sugary prayers. Today, we’re diving headfirst into how to make a chocolate pinata, and trust me, your next party (or Tuesday night, no judgment) is about to get a whole lot more interesting.
Forget those flimsy paper mache contraptions that vaguely resemble animals. We’re talking about a glorious vessel made entirely of chocolate, just waiting to be cracked open and unleash a torrent of sweet surprises. Intrigued? You should be. This isn’t just a dessert; it’s an experience. It’s a guaranteed way to make everyone, from the smallest kid to the most jaded adult, light up with childlike glee. So, grab your melting chocolate and prepare for a sugar-fueled adventure that ends with a satisfying smash.
Why This Chocolate Pinata is the Ultimate Party MVP
Still wondering if you should embark on this chocolatey quest? Let me lay down the reasons why this is the dessert you didn’t know you needed (but definitely do).
First off, it’s pure, unadulterated fun. Seriously, is there anything more entertaining than watching someone whack a chocolate sphere until it bursts open with candy? It’s interactive, it’s exciting, and it makes for fantastic photos and videos (hello, viral potential!).
Second, it’s surprisingly versatile. You can customize the size, the shape (round is classic, but get creative!), and of course, the filling. Tailor it to any theme or occasion. The possibilities are as endless as your imagination (and your candy stash).

Third, it tastes incredible. We’re talking about a shell made of glorious chocolate, people! And what’s inside? Your favorite treats! It’s a win-win situation for your taste buds.
Finally, it’s a conversation starter. Trust me, people will be talking about the chocolate pinata long after the last piece of candy has been devoured. You’ll be known as the host who throws epic parties.
Your Chocolate Construction Crew: Ingredients
Here’s what you’ll need to build your edible piñata. Keep it simple; the chocolate is the star here.
- 1 pound (about 450g) good quality melting chocolate (dark, milk, or white – your choice!). You can use chocolate chips, but melting wafers or couverture chocolate will give you a smoother finish.
- Your favorite small candies, sprinkles, mini chocolates, etc. for the filling. Get creative! Think about size – they need to fit inside and fall out easily.
- Optional: Edible glitter, sprinkles, or colored candy melts for decorating the outside.
Your Piñata-Making Power Tools: Kitchen Gadgets
These are the tools that will help you mold, fill, and (eventually) break your chocolate masterpiece.
- Microwave-safe bowls (at least two): For melting the chocolate.
- Spatula or spoon: For stirring the chocolate.
- Balloons (round or slightly oval shape): These are your molds! Make sure they are fully inflated.
- Parchment paper or a silicone baking mat: To protect your work surface.
- Scissors: To cut the balloon.
- Tall glass or bowl: To help hold the balloon upright while the chocolate sets.
- Optional: Piping bags and tips: For decorating.
Let’s Get Smashing: Step-by-Step Instructions
Ready to bring your chocolate piñata dreams to life? Let’s get cracking (pun intended!).
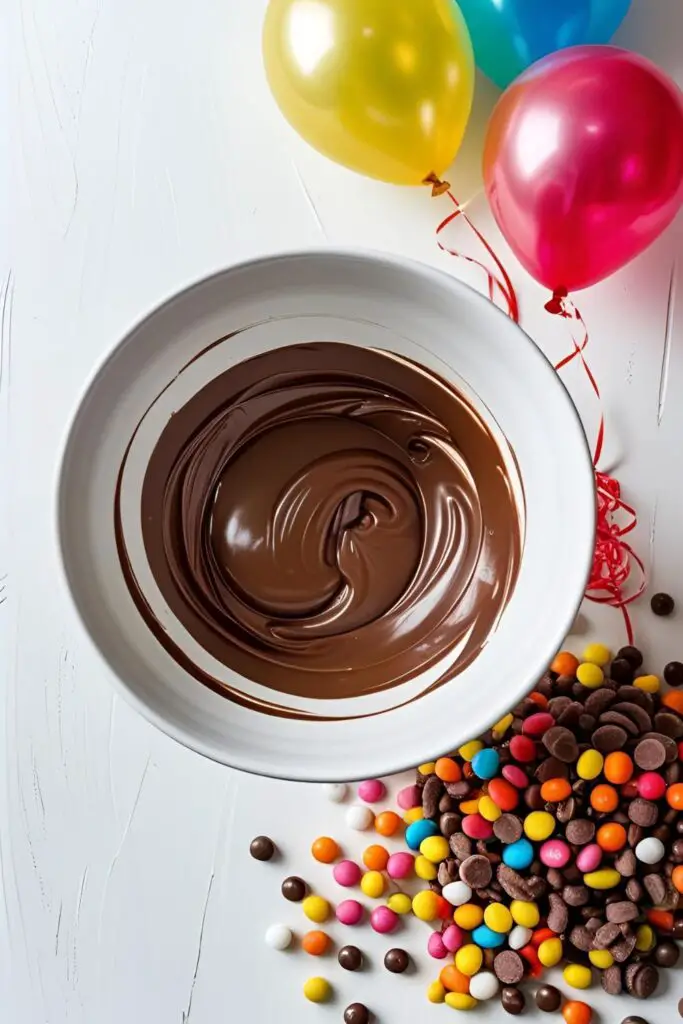
Step 1: Melt the Chocolate (The Delicious Foundation) Pour your melting chocolate into a microwave-safe bowl. Microwave in 30-second intervals, stirring well after each interval, until the chocolate is completely smooth and melted. Be patient! Don’t overheat the chocolate, or it can seize up and become grainy. If you prefer, you can melt the chocolate over a double boiler.

Step 2: Coat the Balloon (The Chocolate Shell) Place a sheet of parchment paper or a silicone mat on your work surface. Hold the inflated balloon by the knot. Dip the bottom half of the balloon into the melted chocolate, rotating it to ensure an even coating. Don’t go too close to the knot! You’ll need some space to deflate and remove the balloon later.
Step 3: Let It Drip (Gravity is Your Friend) Hold the chocolate-coated balloon over the bowl of melted chocolate for a few moments to let any excess drip off. This will help create a smoother shell.
Step 4: Set It Up (Time to Chill) Carefully place the chocolate-coated balloon, knot-side up, into a tall glass or bowl to help it stay upright. Place the whole thing in the refrigerator and let the chocolate harden completely. This will take at least 1-2 hours, depending on the thickness of your chocolate shell. Don’t rush this step! A soft shell will collapse.
Step 5: Second Coat (For Extra Durability) Once the first layer of chocolate is hard, you can apply a second coat for extra strength. Remelt your chocolate if necessary and repeat steps 2-4. A thicker shell will be more satisfying to break!
Step 6: Deflate and Remove the Balloon (The Delicate Part) Once the second coat is completely hardened, carefully remove the balloon from the refrigerator. Using scissors, make a small snip near the knot of the balloon. The balloon will slowly deflate and pull away from the chocolate shell. Be gentle! If it sticks, you might need to make a few more small snips. Once deflated, carefully pull the balloon out of the chocolate opening. You should now have a hollow chocolate shell!
Step 7: Fill ‘Er Up (The Sweet Surprise) Now for the fun part! Carefully fill your chocolate shell with your chosen candies, sprinkles, and mini chocolates through the opening where the balloon knot was. Don’t overfill it, but be generous!

Step 8: Seal the Opening (The Grand Finale) Melt a little more chocolate. Use a spatula or spoon to spread a small amount of melted chocolate around the opening of your shell. You can either try to seal it completely with a chocolate “lid” (this can be tricky to get perfectly smooth) or simply drizzle some extra melted chocolate around the opening to help keep the candies inside.
Step 9: Decorate (Make It Fancy!) While the chocolate used to seal the opening is still slightly wet, you can decorate your pinata with edible glitter, sprinkles, or melted colored candy melts drizzled over the top. Get creative and make it festive!
Step 10: Chill Again (One Last Time) Place your filled and (optionally) decorated chocolate pinata back in the refrigerator for about 15-20 minutes to allow the seal to harden completely.
Step 11: Time to Smash! (The Satisfying Conclusion) When you’re ready to unleash the sugary goodness, carefully place the chocolate pinata on a sturdy surface. Give someone (preferably an enthusiastic participant) a blunt object (like a wooden spoon or rolling pin) and let them have at it! Enjoy the shower of candy!
Knockout Nutritional Info (A Sweet Treat)

Let’s be real, this is mostly chocolate and candy. It’s not exactly a health food, but it’s definitely good for the soul! Here’s a very rough estimate per serving (assuming you break it into several pieces):
- Calories: Highly variable depending on the amount and type of chocolate and fillings used. Let’s ballpark it at around 300-500 kcal per serving (it’s mostly chocolate and sugar, after all!).
- Sugar: Definitely a significant amount.
- Fat: Comes from the chocolate.
- Fun Factor: 10/10 would recommend.
- Note: This is a celebratory treat. Enjoy in moderation (if you can resist!).
Bashing Blunders: Common Mistakes to Avoid
Don’t let your chocolate dreams shatter (too early). Watch out for these common pitfalls.
- Overheating the Chocolate: Burnt chocolate is sad chocolate. Melt it gently in short intervals.
- Not Letting the Chocolate Fully Harden: A soft shell will collapse when you try to remove the balloon or fill it. Patience is key!
- Making the Chocolate Shell Too Thin: A thin shell is more likely to crack prematurely. Apply at least two coats.
- Being Too Rough with the Balloon: Handle the chocolate-coated balloon gently, especially when deflating and removing the balloon.
- Forgetting to Leave Space Near the Knot: You need room to deflate and remove the balloon! Don’t coat the chocolate all the way up.
Sweet Surprises: Variations & Customizations
Want to put your own spin on this smashing dessert? Here are a few ideas.
- Themed Piñatas: Use different shaped balloons (star, heart, etc.) to match your party theme. You can also decorate the outside to look like a specific character or object using colored candy melts.
- Flavor Infusions: Add a drop or two of peppermint, orange, or raspberry extract to your melted chocolate for a subtle flavor twist.
- Adult Version: Fill it with mini bottles of liquor, gourmet chocolates, or even small, fun favors for an adult party. Just make sure everyone knows what’s inside!
Your Chocolate Curiosity Quenched: FAQ
1. What kind of chocolate is best for a chocolate pinata? Melting wafers or couverture chocolate are ideal because they melt smoothly and set up nicely. However, good quality chocolate chips will also work. Avoid compound chocolate if you want a really rich flavor.
2. How far in advance can I make a chocolate pinata? You can make the chocolate shell a few days in advance and store it in a cool, dry place. Fill it with candy on the day of your event to prevent the candy from getting sticky.
3. My chocolate shell cracked when I removed the balloon! What do I do? Don’t panic! You can usually patch small cracks with a little more melted chocolate. Just spread it gently over the crack and let it harden.
4. Can I make a vegan chocolate pinata? Yes! Just use vegan melting chocolate (many dark chocolates are naturally vegan) and fill it with vegan-friendly candies.
5. How do I break the chocolate pinata without making a huge mess? Place it on a large platter or tray to catch the falling candy. You can also do the smashing outside if the weather permits.
6. What if I don’t have balloons? Can I use something else as a mold? You could try using a sturdy plastic bowl lined with parchment paper. Once the chocolate sets, you can carefully remove it. However, the balloon method usually creates a more classic piñata shape.
7. How much chocolate do I really need? One pound is a good starting point for a decent-sized pinata (around 6-8 inches in diameter). If you want a larger or thicker shell, you might need more.
Final Thoughts
Congratulations, you are now officially a chocolate piñata architect! You’ve taken melted chocolate, a humble balloon, and a whole lot of candy and transformed them into a vessel of pure joy (and deliciousness). Now, all that’s left to do is find someone enthusiastic enough to give it a good whack.
So go forth, host your party, and watch the gleeful chaos unfold. Just maybe keep a vacuum cleaner handy for the post-smashing cleanup. You’ve created a dessert that’s not just eaten; it’s an event. And let’s be honest, who needs boring cake when you can smash your way to sugary happiness? 😉