How to Season Pork Chops for Grilling (So They’re Actually Juicy and Not Sad)
Let’s talk about the pork chop. Specifically, the grilled pork chop. For too many of us, it’s a source of culinary trauma—a dry, tough, tragically gray piece of meat that has all the flavor and juiciness of a particle board coaster. You deserve better. Your grill deserves better. Today, we’re staging an intervention. We’re going to learn how to season pork chops for grilling using a two-pronged attack of science and flavor that will guarantee a juicy, tender, and incredibly delicious result every single time. Say goodbye to pork-flavored hockey pucks forever.
Why This Method Is Awesome (It’s Juiciness Insurance!)
So why are we getting so worked up about seasoning? Because this isn’t just about sprinkling some salt and pepper and hoping for the best. This is a foolproof system for pork perfection. This method is awesome because:
- It Guarantees Juiciness: We’re using a simple brine, which is basically a magic potion that forces moisture and flavor deep into the pork. It acts as “juiciness insurance,” giving you a much wider margin for error on the grill.
- It Builds an Incredible Crust: Our all-purpose dry rub is packed with a perfect balance of smoky, sweet, and savory flavors that caramelize on the grill to create an irresistible crust.
- It’s Unbelievably Flavorful: We’re seasoning the pork from the inside out (with the brine) and the outside in (with the rub). The result is a pork chop that is flavorful through and through.
- It’s Super Easy: Don’t let the word “brine” scare you. It’s just salty sugar water. The whole process is incredibly simple and makes you look like a seasoned pitmaster at your next cookout in your Khulna home.
You’re not just seasoning a pork chop; you’re transforming it into the best version of itself. It’s what the pork chop has always wanted to be.
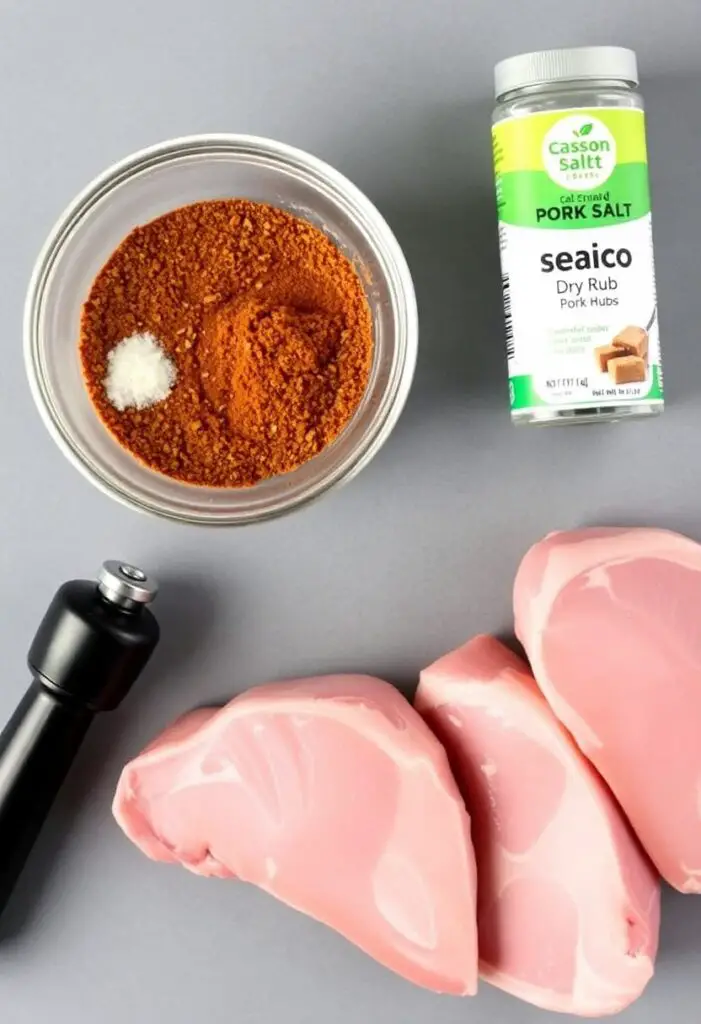
Ingredients: Your Flavor-Packed Arsenal
This is a two-part mission: first, we hydrate and season internally with a brine, then we build the external crust with a rub.
For the Simple Pork Chop Brine (The Juiciness Potion):
- 4 cups cold water
- ¼ cup kosher salt
- 2 tablespoons brown sugar
- 2-3 cloves garlic, smashed
- 1 teaspoon whole black peppercorns
For the All-Purpose Grilling Rub:
- 2 tablespoons packed brown sugar
- 1 tablespoon smoked paprika
- 2 teaspoons kosher salt
- 2 teaspoons black pepper
- 1 teaspoon garlic powder
- 1 teaspoon onion powder
- ½ teaspoon cayenne pepper (optional, for a little kick)
The Star of the Show:
- 4 thick-cut, bone-in pork chops (about 1 to 1 ½ inches thick). Thick-cut is key! Thin pork chops are destined for dryness on the grill.
Tools & Kitchen Gadgets Used: Your Grilling Command Center
You don’t need a massive BBQ pit, just the right gear for the job.
- A Large Ziploc Bag or a Container with a Lid (For brining.)
- A Grill (Gas or charcoal will work beautifully.)
- Grill Brush (For cleaning those grates!)
- Tongs
- A Small Bowl (For mixing the rub.)
- An Instant-Read Meat Thermometer (This is your most important tool. Seriously, it’s the only way to guarantee perfectly cooked pork.)
- Paper Towels
- A Plate or a Small Baking Sheet
Step-by-Step Instructions: The Path to Pork Perfection

Follow these steps with care, and you will be rewarded with the best pork chop of your life.
Act 1: The Brine (The Most Important 30 Minutes)
- Make the Brine: In a large bowl or container, combine the cold water, kosher salt, and brown sugar. Whisk until the salt and sugar are mostly dissolved. Add the smashed garlic cloves and peppercorns.
- Submerge the Chops: Place your pork chops in the brine, making sure they are fully submerged. You can do this directly in the container or transfer everything to a large Ziploc bag.
- The Magic Soak: Place the brining pork chops in the refrigerator for at least 30 minutes and up to 2 hours. Any longer can make the pork too salty. This is where the juiciness insurance kicks in.
Act 2: The Rub (Building the Crust)
- Dry Them Off: Remove the pork chops from the brine and discard the brine. Pat the pork chops completely dry with paper towels. A dry surface is essential for a good crust.
- Mix the Rub: In your small bowl, combine all the dry rub ingredients: brown sugar, smoked paprika, salt, pepper, garlic powder, onion powder, and cayenne.
- Season Generously: Sprinkle the rub liberally all over both sides of the dry pork chops. Use your hands to press the rub into the meat.
Act 3: The Grill (Where the Magic Happens)
- Preheat Your Grill: Preheat your grill to a solid medium-high heat (about 400-450°F or 200-230°C). Clean the grates well with a grill brush.
- Grill ‘Em Up: Place the seasoned pork chops on the hot grill. Cook for 5-7 minutes per side. The exact time will depend on the thickness of your chops.
- Check the Temp! This is the crucial part. Use your instant-read meat thermometer to check for doneness. You want to pull the pork chops off the grill when the internal temperature reaches 140-145°F (60-63°C).
- The Sacred Rest: Transfer the grilled pork chops to a clean plate, tent them loosely with foil, and let them rest for 5-10 minutes. The temperature will continue to rise a few degrees to a perfect 145°F, and the juices will redistribute throughout the meat. Do not skip the rest!
Calories & Nutritional Info (Per Pork Chop, Estimated)

This is a hearty, protein-packed meal.
- Estimated Calories per chop: ~350-450 calories
- Protein: ~30-40g
- Carbohydrates: ~5-8g (mostly from the sugar in the rub and brine)
- Fat: ~20-25g
Common Mistakes to Avoid: Don’t Commit These Grilling Crimes!
Avoid these pitfalls for pork chop perfection.
- Grilling Thin Chops: Thin-cut pork chops are a recipe for disaster on the grill. They cook through before they can get a good sear, resulting in dry meat. Use thick-cut chops, at least 1 inch thick.
- Skipping the Brine: You can skip it, but your chops will be noticeably less juicy and forgiving. It’s a simple step that makes a huge difference.
- Not Patting the Chops Dry: A wet pork chop will steam on the grill, preventing that beautiful, flavorful crust from forming.
- THE BIGGEST MISTAKE: Overcooking. The old rule of cooking pork until it’s white all the way through is outdated and the reason everyone thinks they hate pork chops. A little blush of pink in the center at 145°F (63°C) is perfectly safe and incredibly juicy. Use a meat thermometer!
Variations & Customizations: Your Grill, Your Rules
Once you’ve mastered the method, you can play with the flavors.
- Spicy Southwestern Rub: Ditch the paprika and cayenne. Use 1 tablespoon of ancho chili powder, 2 teaspoons of cumin, and 1 teaspoon of dried oregano in your rub. Serve with a squeeze of lime.
- Herby Mediterranean Rub: In your rub, use 1 tablespoon of dried oregano, 1 teaspoon of dried rosemary, and 2 teaspoons of lemon pepper.
- Sweet & Tangy Glaze: Make the rub without the brown sugar. In the last few minutes of grilling, brush the chops with a glaze made of ¼ cup maple syrup, 2 tablespoons apple cider vinegar, and 1 tablespoon of Dijon mustard.
FAQ Section: All Your Pork Chop Puzzles, Solved
You have questions about this grilling quest. I have answers.
- Q: Do I really have to brine the pork chops? A: For the juiciest possible result, yes. Brining is a simple chemical process where the salt helps the meat retain moisture. It makes a huge difference, especially for a lean cut like a pork chop.
- Q: I brined them for 4 hours and now they’re too salty! What happened? A: You over-brined them! For chops this size, 30 minutes to 2 hours is the sweet spot. Any longer and the meat will become too salty.
- Q: What’s the perfect internal temperature for pork chops? A: The USDA updated its guidelines years ago! Pork is safely cooked at 145°F (63°C), followed by a 3-minute rest. This will leave the center with a beautiful blush of pink and keep it incredibly juicy.
- Q: Can I use boneless pork chops? A: You can, but they will cook faster and have a little less flavor than bone-in chops. Keep a very close eye on the internal temperature, as they are much easier to overcook.
- Q: My sugar-based rub is burning on the grill! What do I do? A: This can happen if your grill is too hot. Cook over medium-high heat, not scorching high heat. You can also create two heat zones on your grill, searing the chops over the hot side first, then moving them to the cooler side to finish cooking.
- Q: Can I use this seasoning method for pan-searing instead of grilling? A: Absolutely! It’s fantastic. Use a hot, heavy skillet (like cast iron) and sear for 5-6 minutes per side, until the internal temperature reaches 145°F.
- Q: How do I get those perfect grill marks? A: Place the chop on the hot grill and don’t move it for at least 3-4 minutes. For a crosshatch pattern, rotate the chop 45 degrees halfway through cooking on each side.
Final Thoughts: You Are Now a Pork Chop Champion
Congratulations! You are now armed with the knowledge to grill a pork chop so juicy, so flavorful, and so perfectly cooked that it will bring a tear to your eye. You’ve learned the secrets of brining and the importance of temperature. Go forth, fire up that grill, and never suffer the indignity of a dry pork chop again. You’re a grilling hero now.