How to Frost a Cake Like a Pro (A Beginner’s No-Fail Guide!)
You’ve done the hard part. You followed a recipe, you measured, you mixed, and you baked a cake. It didn’t sink, burn, or permanently fuse itself to the pan. But now it sits there on your counter, naked and vulnerable, mocking you with its lumpy top and crumbly sides. You start scrolling through social media, seeing impossibly smooth, perfect cakes, and a familiar wave of panic sets in.
Fear not, my friend. Put down that can of store-bought frosting and step away from the butter knife. This is your official, no-fear, no-tears guide on how to frost a cake and achieve a result that looks professional, beautiful, and won’t make you want to throw a spatula across the room.
We’re not just slapping on some frosting today. We’re learning the secrets. We’re mastering the fundamentals. We are about to become cake artists.
Why This “Recipe” (Technique) is Awesome
This isn’t a recipe for a cake, but a recipe for success. Here’s why mastering these basic frosting techniques is a total game-changer for any home baker.
- It’s the Foundation of ALL Cake Decorating: Learning how to properly apply a smooth, clean coat of frosting is the single most important skill you can learn. Master this, and you can conquer any design, from a simple sprinkle border to an elaborate wedding cake. This is your cake decorating boot camp.
- It Makes Any Cake Look Expensive: A simple homemade cake with a flawlessly smooth or beautifully textured buttercream finish instantly looks like it came from a fancy boutique bakery. It’s all about that professional, polished touch. It’s the difference between “Oh, you baked?” and “WOW, you made that?!”
- It’s a Massive Confidence Booster: With the right tools and a few key secrets (like the magical, life-changing crumb coat), you will be absolutely shocked at how achievable a beautiful cake is. Say goodbye to lumpy, crumb-filled, frustrating frosting experiences forever.
Ingredients (Your “Paint”)
To decorate a cake like a pro, you need a great frosting to work with. This simple American Buttercream is easy to make, a dream to work with, and ridiculously delicious.
- 1 ½ cups (3 sticks) unsalted butter, softened
- 4-5 cups powdered sugar, SIFTED (I will mention this again, because it’s that important)
- ¼ cup heavy cream or whole milk, at room temperature
- 2 teaspoons pure vanilla extract
- A pinch of salt
- And of course: One baked, leveled, and completely cooled cake (a 2-layer, 8-inch cake is a perfect canvas to practice on)
Tools & kitchen gadgets used
This is the most important section of this entire guide. Having the right tools is not a suggestion; it is the secret to success and to keeping your sanity intact.
- A Turntable (Cake Decorating Stand): This is the #1 non-negotiable, game-changing tool. Trying to frost a cake without one is like trying to paint a wall with a Q-tip. Just get the turntable.
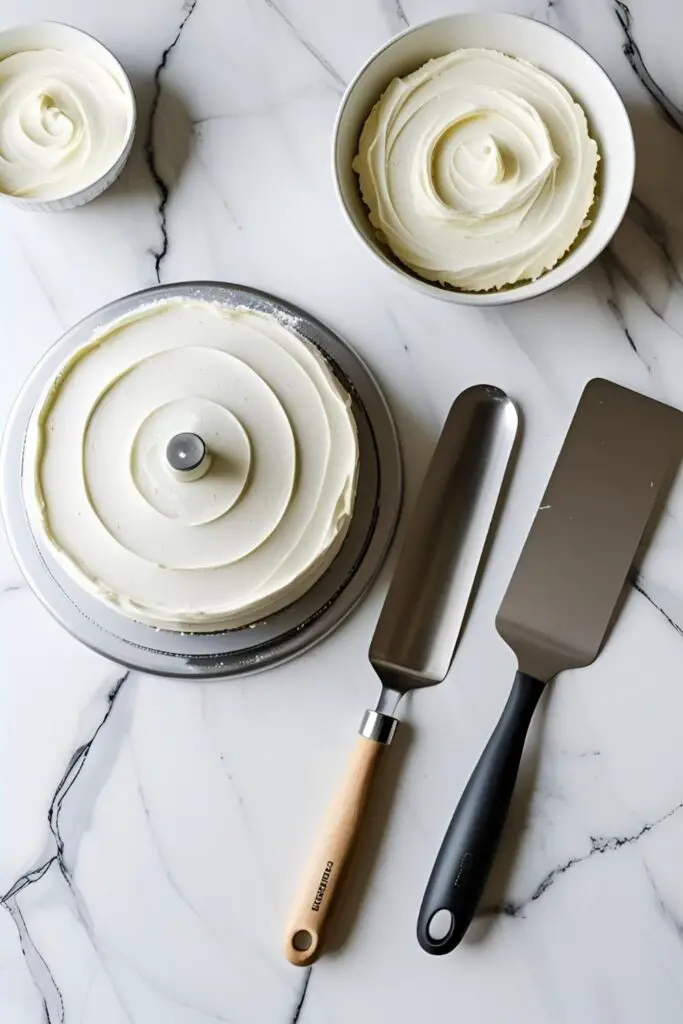
- An Offset Spatula: A large one for the top and sides, and a small one for detail work. The “offset” handle, which is bent, is key for keeping your knuckles out of the frosting.
- A Bench Scraper / Icing Smoother: This is the secret weapon for getting those impossibly smooth, sharp sides.
- A Large Serrated Knife (like a bread knife, for leveling your cake layers)
- A Cake Board or your final serving platter
- Piping Bags and Tips (optional, but great for decorative borders)
Step-by-step instructions

This is your cake decorating boot camp. Follow these steps in order, and I promise you a beautiful result.
Step 1: Create a Level Playing Field You cannot build a beautiful house on a crooked foundation. If your cooled cake layers have a dome on top, you must level them. Place the cake on your turntable and use your long, serrated knife to gently saw off the domed top, keeping your knife perfectly parallel to the counter. (The cake scraps are the baker’s reward. Enjoy them.)
Step 2: The First Layer and the “Frosting Dam” Place a small dollop of frosting on your cake board to act as glue. Place your first leveled cake layer on top, cut-side up. Now, for a pro move: if you have a softer filling like jam or curd, pipe a sturdy ring or “dam” of frosting around the top outer edge of your cake layer. This little wall will keep your delicious filling from oozing out the sides. Fill the center, then place your second cake layer on top, upside-down, so the flat bottom of the cake is now the perfectly flat top of your cake.
Step 3: The Crumb Coat: Your Secret Weapon This is the single most important step that most home bakers skip, and it’s the key to a clean, professional finish. A “crumb coat” is a thin, messy layer of frosting that you apply all over the cake to trap any loose crumbs. Using your offset spatula, apply a thin layer of buttercream over the top and sides. It doesn’t have to be pretty! Scrape off the excess with your bench scraper. It will look like a sad, see-through, crumb-filled mess. This is correct.
Step 4: Chill Out Now, you must send your cake to the spa for a little rest. Carefully place your crumb-coated cake in the refrigerator for at least 30 minutes. You want the frosting to be firm to the touch. This locks all those pesky crumbs in place so they can’t ruin your final, beautiful coat of frosting.
Step 5: The Final, Glorious Coat Your cake is now chilled and firm. Take your remaining buttercream and apply a generous layer all over the cake, starting with the top. Use your offset spatula to push the frosting over the edges, then cover the sides. Be generous! It’s better to have too much on there than too little. You’ll be scraping most of it off.

Step 6: The Magic of the Bench Scraper Time for the big reveal. Hold your bench scraper vertically and flat against the side of the cake. Now, with a steady hand, spin your turntable. Don’t move the scraper; move the cake. This will scrape away the excess frosting and leave behind a beautifully smooth surface. Scrape the excess frosting from your bench scraper back into the bowl and repeat until you’re happy with the sides.
Step 7: The Perfect Top Edge You’ll now have a “crown” or ridge of frosting around the top edge of your cake. Take your large, clean offset spatula, hold it at a 45-degree angle, and gently pull the ridge of frosting from the outer edge toward the center of the cake in one smooth, clean motion.
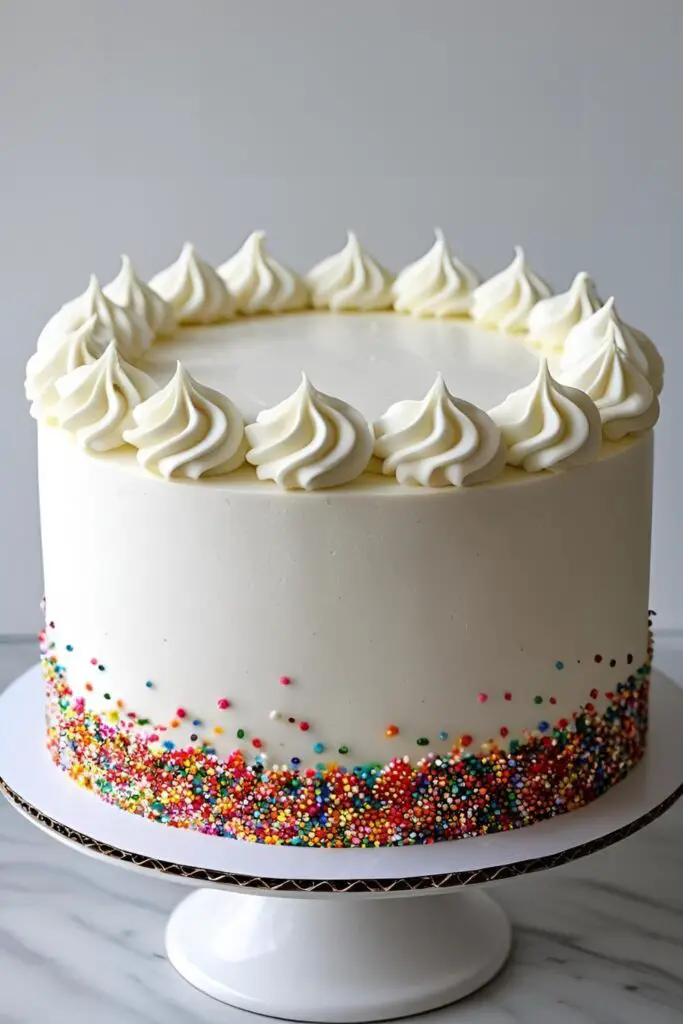
Step 8: The Simple, Stunning Finish Your cake is now a beautiful, smooth canvas. You could stop here and be a minimalist hero, or you can add a simple, elegant touch. Use the back of a small spoon to press gently into the frosting and create beautiful swooshes and swirls. Or, hold the cake over a baking sheet and gently press handfuls of colorful sprinkles onto the bottom third of the cake to create a beautiful sprinkle border.
Calories & Nutritional Info
This is for the buttercream recipe itself. The cake is your own beautiful business.
- Serving Size: 2 tablespoons (enough to frost one slice of cake)
- Estimated Calories: Around 130-150 kcal.
- Contains: The magical properties to turn any baked good from “meh” to “magnificent.”
Common Mistakes to Avoid
Avoid these decorating disasters, and you’ll be on the path to greatness.
- Frosting a Warm Cake: I will say this until the end of time, and I will have it carved on my tombstone. Do not frost a warm cake. It will melt your beautiful buttercream into a greasy, heartbreaking, soupy puddle. Your cake must be completely, totally, 100% cool to the touch.
- Skipping the Crumb Coat: I know it seems like an extra, fussy step. It is not. If you try to apply your final coat of frosting to a naked cake, you will fight a losing, tear-filled battle against cake crumbs, and your final finish will be a spotty, lumpy mess. The crumb coat is not optional. It is your best friend.
- Using the Wrong Tools for the Job: Trying to frost a cake smoothly without a turntable and an offset spatula is like trying to paint a wall with a Q-tip. It’s technically possible, but it will be a frustrating, lumpy mess. Invest in the basic tools. They do the work for you and are the key to a professional finish.
- Starting with a Gloppy Mess on Top: Don’t just slop a bunch of frosting all over. The best way to start is by placing a generous mound of frosting in the very center of the top of the cake. Use your offset spatula to push that mound of frosting outwards, over the edges. This method pushes crumbs away from the center, rather than pulling them up into your frosting.
Variations & Customizations (of Decorating Style)
Once you’ve mastered the smooth finish, you can use it as a base for anything!
- The Trendy “Naked” Cake: This is the easiest variation of all. After you fill and stack your cake layers, apply a very thin coat of frosting all over, and then use your bench scraper to scrape most of it off, leaving the beautiful cake layers peeking through. It’s rustic, it’s chic, and it’s very forgiving.
- The Funfetti Sprinkle Border: This is a super fun and easy way to add a pop of color. After you’ve achieved your smooth finish, place your cake on its stand inside a large, clean baking sheet (to catch the mess). Take handfuls of your favorite sprinkles and gently press them onto the bottom inch or two of the cake.
- The Dramatic Chocolate Drip: This looks incredibly fancy but is so easy. Chill your smoothly frosted cake until it’s very firm. Make a simple chocolate ganache (equal parts hot cream and chocolate chips, stirred until smooth). Let the ganache cool slightly, then use a spoon or a squeeze bottle to create elegant, dramatic drips down the sides of your cold cake.
FAQ Section

All your decorating-related fears and questions, answered.
1. What is the easiest way to decorate a cake for a beginner? The “semi-naked” style or a simple, rustic finish with swoops and swirls made by a spoon are the most forgiving and easiest styles for a true beginner.
2. How do you get buttercream frosting perfectly smooth? The secret is a combination of a good turntable, a bench scraper, and a chilled, crumb-coated cake. The tools do all the work!
3. What is a crumb coat and why is it so important? A crumb coat is a thin layer of frosting that “seals” in all the loose cake crumbs. After it chills and firms up, you can apply your final coat of frosting without any crumbs mixing in, ensuring a perfectly clean finish.
4. How do you properly level a cake? Use a long, sharp serrated knife. Place the cake on a flat surface or a turntable. Keep the knife parallel to the counter and use a gentle, back-and-forth sawing motion to slice off the domed top.
5. My frosting is full of air bubbles. How do I fix that? After you’ve finished whipping your buttercream, switch to the paddle attachment on your mixer and run it on the lowest possible speed for a few minutes. You can also press the frosting against the side of the bowl with a spatula to manually push out the air bubbles.
6. How do I store a decorated cake? Store the cake in a cake carrier or a tall, airtight container. Most buttercream cakes are fine at room temperature for a day or two, but if it’s warm or you have a perishable filling, it’s best to store it in the refrigerator.
7. What are the absolute must-have tools for a beginner cake decorator? If you only buy three things, make them a turntable, an offset spatula, and a bench scraper. These three tools will change your cake decorating life.
Final Thoughts
Look at you! You’re not just a baker anymore; you are officially a decorator. You’ve mastered the fundamentals, you’ve tamed the buttercream, and you’ve created a cake that looks every bit as good as it tastes. The world of beautiful, professional-looking cakes is now your oyster.
The next time you see one of those perfect cakes on social media, you won’t feel panic. You’ll feel a sense of recognition. You’ll think to yourself, “I can do that.” And you’ll be right.