How to Wrap Chocolates: The Ultimate “Recipe” for Gifts That Don’t Look… Homemade
You’ve done it. You’ve spent hours melting, tempering, and molding the most divine homemade chocolates. They taste like a dream. But then you look at your glorious creations, sitting naked and vulnerable on a sheet of parchment paper, and a cold dread sets in. How do you get them from your kitchen to a gift box without them looking like they were packaged by a toddler? My friend, you need a lesson in how to wrap chocolates, the final, crucial step in the recipe for “World’s Best Gift Giver.”
Why This “Recipe” is Officially Awesome
Let’s be brutally honest. Presentation is everything. You could hand someone a lump of gold, but if it’s wrapped in a sweaty paper towel, the magic is kind of lost, right? Learning how to wrap your chocolates properly is what separates the amateurs from the artisans. It’s the difference between “Oh, you made these?” and “Wow, where did you buy these?!”
This guide is your secret weapon. We’re not just protecting your precious chocolatey cargo from the elements (and fingerprints); we’re elevating it. A beautifully wrapped chocolate is a promise of the deliciousness inside. It makes your gift look thoughtful, professional, and frankly, expensive. Who doesn’t want that?
Your “Ingredients” (AKA The Supplies List)
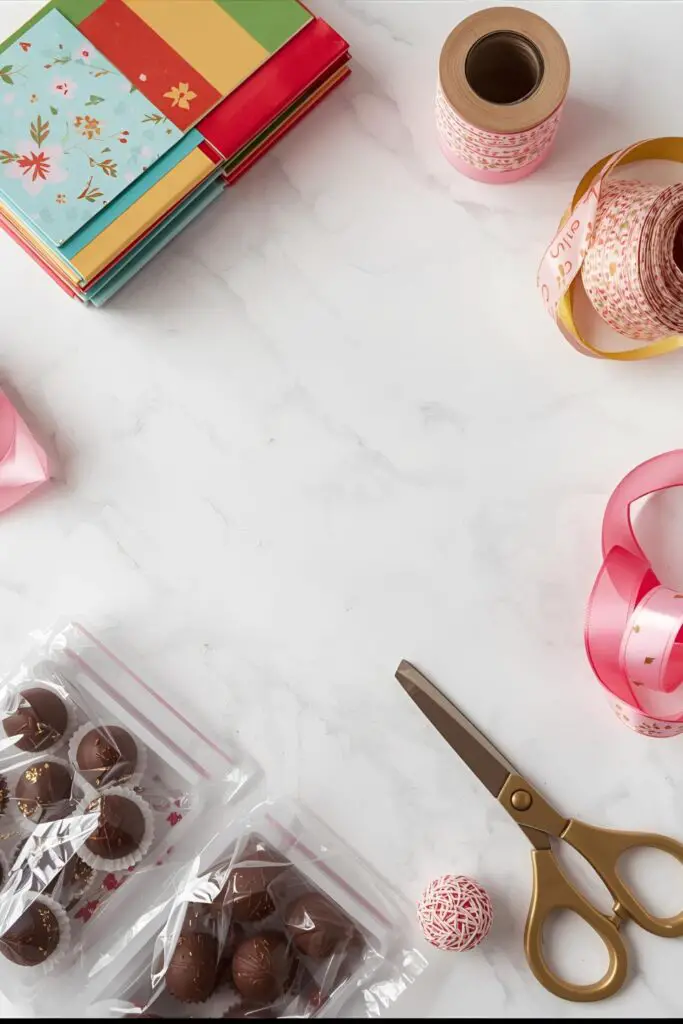
This is the easiest shopping list you’ll ever have. No need to hunt down organic, free-range anything.
- Your Homemade Chocolates: The stars of the show. Make sure they are fully set and firm before you even think about touching them.
- Chocolate Foil Wrappers: These are thin, flexible, and food-safe. They come in a rainbow of colors and are essential for that classic, crinkly, professional look. You can find them in squares or rectangles.
- Cellophane Bags or Sheets: Crystal clear or festively printed, cellophane is great for bundling a collection of chocolates or adding a protective, shiny outer layer.
- Ribbon, Twine, or Twist Ties: To secure your packages and add a little flair.
- Labels or Gift Tags: To add a personal touch (and maybe warn people about the nuts inside).
- Optional Flair:
- Small decorative boxes: For a more structured gift.
- Candy cups: To nestle individual chocolates in a box.
- Custom stickers: Slap your “brand” on there! You’re basically a professional chocolatier now.
Key Substitutions:
- Foil Wrappers: In a pinch, you can use high-quality aluminum foil, but it’s much thicker and harder to work with. Chocolate foils are specifically designed to be thin and hold their shape. Do not use plastic wrap! It clings weirdly and traps moisture.
Tools & Kitchen Gadgets You’ll Need
No mixers or ovens required for this part, thank goodness.
- Scissors: For cutting ribbons and trimming wrappers. A good, sharp pair will be your best friend.
- Ruler or Measuring Tape: To ensure your wrappers are the right size. Eyeballing it leads to sadness and wasted foil.
- Clean, Dry Work Surface: Obvious, but essential.
- Food-Safe Gloves (optional but recommended): Unless you want to leave a perfect CSI-style map of your fingerprints on every chocolate, wear gloves. They also help prevent your body heat from melting the goods.
- Heat Sealer (for the overachievers): If you’re using cellophane bags and want that super pro, airtight seal, a small heat sealer is a game-changer.
The “Cooking” Process: Step-by-Step Wrapping Techniques

Alright, wash your hands (or put on those gloves) and let’s get down to business. We’ll cover the greatest hits of chocolate wrapping.
Method 1: The Classic Foil Twist (Perfect for Truffles & Round Candies)
This is the easiest method and gives you that iconic, old-fashioned candy shop look.
- Measure and Cut (Or Just Buy the Right Size): Place your truffle in the center of a square foil wrapper. You want about 1 to 1.5 inches of excess foil on all sides. Too little and you can’t twist; too much and it looks sloppy.
- Center the Chocolate: Place your truffle, pretty-side down, in the middle of the foil sheet (shiny side of the foil facing down).
- Bring Up the Sides: Gently bring all four corners of the foil up to meet at the top, directly above the center of the truffle. The foil should now be hugging the bottom and sides of your chocolate.
- The Gentle Squeeze: Carefully gather the foil around the chocolate, smoothing it against the sides as you go. You’re trying to eliminate as much air as possible without squishing your masterpiece.
- Twist and Shout: Tightly twist the gathered foil at the top a couple of times to secure it. Don’t go crazy here; you’re securing a chocolate, not starting a lawnmower. The result should be a neatly wrapped truffle with a cute little twisted top.
Method 2: The Professional Pleat (For Chocolate Bars & Caramels)
This technique gives you clean lines and a sleek, store-bought finish. It takes a little practice, but the result is so worth it.
- Measure Twice, Cut Once: Lay your chocolate bar on your wrapping material (foil or specialty paper). You’ll need enough paper to wrap around the bar completely with a slight overlap (about 1/4 inch) and enough to cover both ends.
- The First Fold: Place the bar upside-down on the wrapper. Bring one long side of the paper over the back of the bar, then bring the other long side over to overlap it. Pull it snug and make a sharp crease.
- Secure the Seam: You can use a tiny piece of double-sided tape or a dab from a food-safe glue stick to secure the seam if you wish. Professionals often just rely on crisp folds.
- Tackle the Ends (The Tricky Part): Now for the ends. Gently press the top edge of the paper down against the end of the bar, creating two little triangular “wings” at the sides.
- Fold the Wings: Fold the two triangular wings inward, creasing them sharply against the bar.
- The Final Fold: Finally, fold the remaining bottom flap up, pulling it taut to create a neat, envelope-like seal. Repeat on the other end. You’ve just wrapped a chocolate bar like a pro.
Method 3: The Cellophane Bag & Ribbon (For Batches & Party Favors)
This is your go-to for gifting a variety of treats or creating cute little party favors.
- Choose Your Bag: Select a food-safe cellophane bag that’s an appropriate size for your chocolates. Don’t try to cram 20 truffles into a bag built for five.
- Arrange with Care: If you’re wrapping multiple chocolates, place them in the bag neatly. You can even use small candy cups to separate them.
- Leave Some Room: Don’t fill the bag to the brim. Leave at least 2-3 inches of empty space at the top for gathering and tying.
- Tie It Up Pretty: Gather the top of the bag, squeeze out any excess air, and twist it a couple of times to create a “neck.” Secure it tightly with a ribbon, a pre-made twist tie, or some rustic twine.
- Add a Tag: Tie on a gift tag, and you’re done! A beautiful, simple, and effective way to gift a batch of treats.
Calories & Nutritional Info

Let’s be real. You’re wrapping chocolates. The calorie count is “delicious,” and the nutritional value is “joy.” This is a problem for the person receiving the gift, not the person wrapping it. Move along. 😉
Common Mistakes to Avoid (The Wrapping Wall of Shame)
- The Fingerprint Fiasco: Seriously, wear gloves. Your warm hands are the natural enemy of smooth, glossy chocolate. Don’t leave your mark (literally).
- Using the Wrong Material: That cute wrapping paper from the dollar store? It’s not food-safe and will absorb the oils from your chocolates, leaving you with a greasy, sad-looking mess. Stick to foils and cellophane.
- The Rip and Tear: Chocolate foil is delicate. Don’t try to wrap with long, sharp fingernails, and be gentle when you’re smoothing and twisting. If it rips, take a deep breath and start over.
- Sloppy Sizing: Cutting your wrapper way too big results in a bulky, lumpy package. Cutting it too small means you can’t seal it properly. Take a second to measure.
- Wrapping Warm Chocolates: Don’t you dare! Ensure your chocolates are completely firm and chilled. Warm chocolate is soft, melty, and will make a huge mess.
Variations & Customizations (Unleash Your Inner Craft Guru)
- The Double Wrap: For a truly luxe look, first wrap your chocolate in a colored foil (say, gold), and then wrap it again in a piece of clear or lightly patterned cellophane. It adds depth and an extra layer of protection.
- Personalized Stickers: Design and print small stickers with your initials, a “Handmade with Love” message, or a fun design. Use them to seal the back of your wrapped chocolate bars for a custom touch.
- Themed Color Palettes: Going to a holiday party? Use red and green foils. Making a Valentine’s gift? Pinks, reds, and whites are your best friends. Coordinating your colors is a simple trick that makes your gift look incredibly cohesive and thoughtful.
FAQ Section: Your Chocolate Wrapping Conundrums, Solved.
- What is the best material for wrapping homemade chocolates? Food-grade foil wrappers are the gold standard. They are easy to use, protect the chocolate, and look professional.
- Can you use regular aluminum foil to wrap chocolates? You can in a pinch, but it’s much thicker, stiffer, and more prone to tearing than proper chocolate foils. It won’t give you that same smooth, professional finish.
- Why do I need to wear gloves? Two reasons: to prevent fingerprints and to stop the heat from your hands from melting or dulling the surface of the chocolate.
- How do professionals get such perfect, crisp folds? Practice, practice, practice! They also use high-quality wrapping materials and often work on cold surfaces (like marble slabs) to keep the chocolates firm.
- How far in advance can I wrap my chocolates? If stored correctly in a cool, dry place, you can wrap your chocolates a week or two in advance. Wrapping also helps protect them from air and moisture.
- Where can I buy chocolate wrapping foils? You can find them at craft stores, cake and candy supply shops, and easily online from a variety of retailers.
- How do I keep my wrapped chocolates from melting? Store them in a cool, dry place, away from direct sunlight or heat. The ideal temperature is between 60-68°F (15-20°C). Don’t store them in the fridge unless you have to, as condensation can be an issue.
Final Thoughts: Go Forth and Fold!
And there you have it! You are now fully equipped to wrap chocolates like you were born to do it. That final, beautiful package is the cherry on top of your delicious, homemade sundae. It’s the bow on the present, the frame on the masterpiece. So go on, turn your tasty treats into stunning gifts. They almost look too good to eat. Almost.