How to Dehydrate Apples: Your Guide to a Healthy, Crunchy Snack That Isn’t Sad
We’ve all been there. You buy a giant bag of apples at the store, filled with virtuous intentions of becoming that person who snacks healthily. A week later, those once-crisp beauties are looking a little… sad, a little wrinkly, and you’re starting to feel the guilt set in. Before you condemn them to the compost bin of broken dreams, I’m here to offer a delicious path to redemption. Today, you’re going to learn how to dehydrate apples and turn that potential food waste into the most addictive, crunchy, and genuinely healthy snack you’ve ever made.
Why This “Recipe” is a Total Game-Changer
Okay, so it’s less of a “recipe” and more of a superpower you’re about to unlock. Why is it so awesome? First, the flavor! Dehydrating apples concentrates all their natural sweetness and flavor into a crispy, chewy little chip. It’s like the very essence of apple, but in a form that’s way more fun to eat.
Second, it’s insanely easy. The hardest part is slicing the apples, and even that can be a therapeutic activity. It’s a low-and-slow process that requires minimal active effort but makes your entire house smell like an autumnal paradise. Plus, you get to control what goes on them—which, in this case, can be absolutely nothing! No weird preservatives, no sneaky added sugars. Just pure, unadulterated apple goodness.
Ingredients (Yes, Really, That’s It)
Prepare for the shortest ingredient list of your life. It’s almost comical.
- Apples: Shocking, I know. About 4-5 medium apples will fill a couple of baking sheets.
- Optional, but Recommended: A bowl of water with the juice of half a lemon. (This is for an acidic bath to prevent browning).
- Optional Flavor Enhancer: A sprinkle of ground cinnamon.
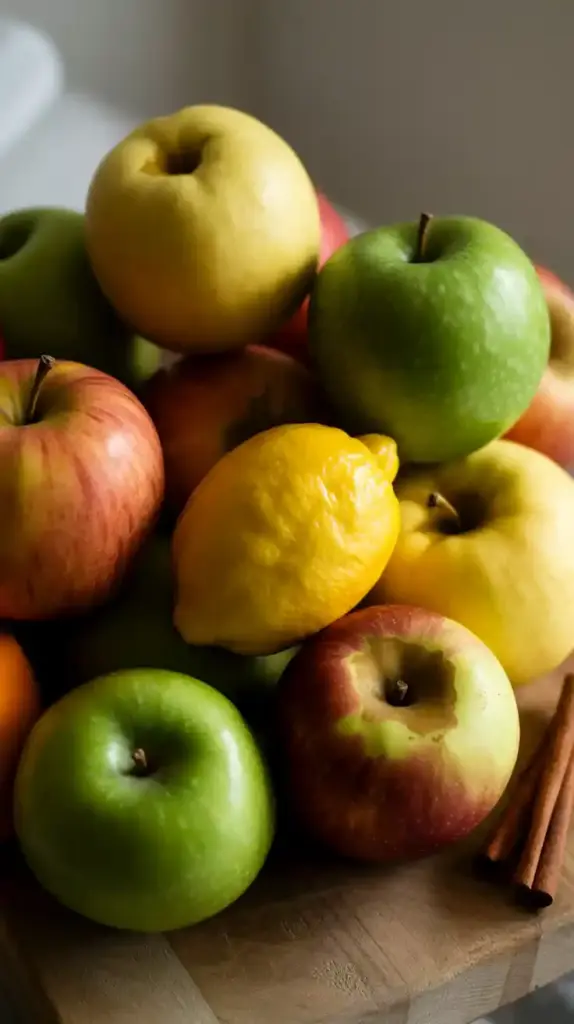
What are the Best Apples to Use?
Honestly, you can dehydrate any apple, but some are better than others.
- For Sweet Chips: Fuji, Gala, and Honeycrisp are fantastic. They hold their sweetness beautifully.
- For Tart Chips: Granny Smith and Braeburn will give you a tarter, tangier chip that’s absolutely delightful.
- Avoid: Softer apples like Red Delicious can become a bit mealy rather than crisp. But hey, if that’s all you’ve got, don’t let me stop you!
Tools & Kitchen Gadgets Used:
Your success depends on your chosen method. Here’s the gear you might need.
- A Good Knife or a Mandoline Slicer: A mandoline is the MVP for getting those paper-thin, uniformly sliced apples. If you don’t have one, a sharp knife and a steady hand will work just fine.
- Apple Corer: This little gadget makes removing the core quick and painless. You can also just quarter the apples and cut the core out.
- Vegetable Peeler: If you prefer your apple chips without skin. (I’m a peel-on kinda person for the extra fiber, TBH).
- Large Bowl: For the optional lemon water bath.
- Your Drying Machine of Choice:
- Oven Method: You’ll need baking sheets and parchment paper or silicone baking mats.
- Food Dehydrator Method: A food dehydrator. This is the most efficient and consistent method if you plan on doing this often.
- Air Fryer Method: An air fryer with a dehydrate function or the ability to set a very low temperature.
Step-by-Step Instructions (The Path to Apple Chip Nirvana)

Ready to turn those apples into crunchy gold? Let’s do this thing.
Part 1: The Apple Prep
- Wash and Dry: Give your apples a good wash and dry them thoroughly.
- Peel (or Don’t): Decide if you’re on Team Peel or Team No-Peel. If peeling, get that done now.
- Core ‘Em: Use your apple corer to remove the core. If you don’t have one, just slice the apple into quarters and cut the core out with a paring knife.
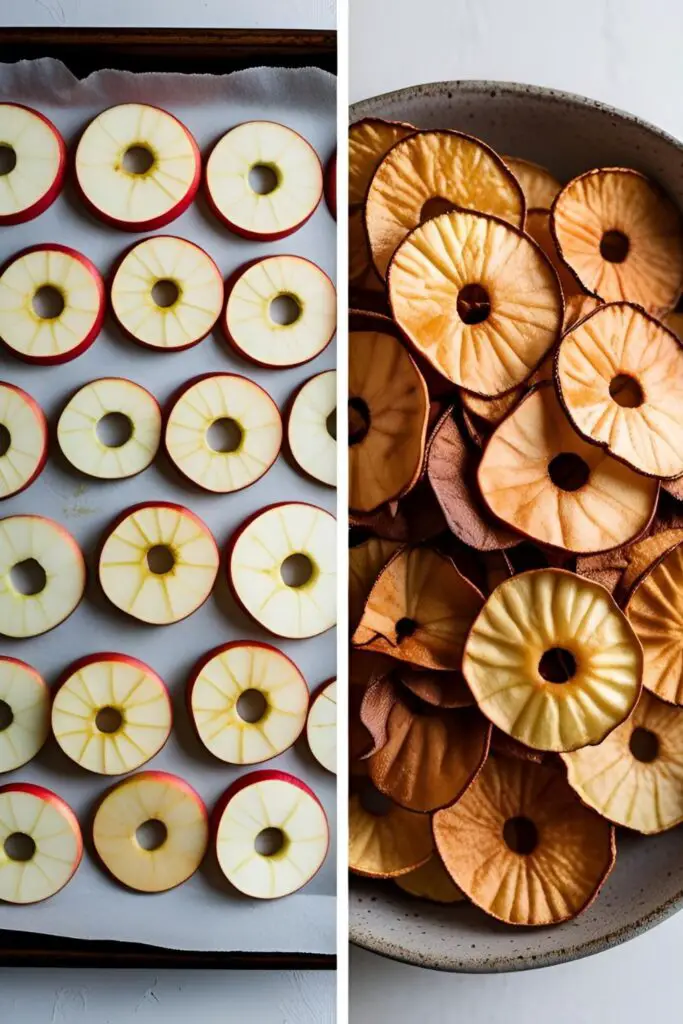
- The Slice is Right: This is the most important step! You need to slice your apples as thinly and uniformly as possible. Aim for about ⅛-inch thick. A mandoline makes this foolproof. If using a knife, just take your time. Inconsistent slices will dry unevenly, leaving you with a mix of burnt crisps and soggy duds.
Part 2: The Anti-Browning Bath (Optional)
- Prepare the Bath: Fill a large bowl with cool water and squeeze in the juice of half a lemon.
- Take a Dip: As you slice your apples, place them directly into the lemon water. This will help prevent them from oxidizing and turning brown.
- Drain and Pat Dry: Once all your apples are sliced and have had a little soak (a few minutes is fine), drain them well and pat them as dry as you can with a clean kitchen towel or paper towels.
Part 3: The Dehydrating Showdown (Choose Your Weapon)
Method 1: The Trusty Oven
- Set the Temp: Preheat your oven to its lowest possible temperature, usually around 200°F (95°C). Any hotter and you’ll bake the apples instead of drying them.
- Arrange the Slices: Line your baking sheets with parchment paper. Arrange the apple slices in a single layer, making sure they don’t overlap. Overlapping traps moisture and prevents even drying.
- Sprinkle (Optional): If you’re using cinnamon, give the slices a light dusting now.
- The Long Wait: Place the baking sheets in the oven. To allow for air circulation, you can prop the oven door open slightly with the handle of a wooden spoon.
- Dry ‘Em Out: Let them dehydrate for about 2-3 hours. Flip the slices halfway through. They’re done when they are dry to the touch and feel leathery or crisp, depending on your preference. They will crisp up more as they cool.
Method 2: The Food Dehydrator (The Pro Move)
- Arrange and Go: Arrange your apple slices in a single layer on the dehydrator trays, making sure they don’t overlap.
- Set It and Forget It: Set your dehydrator to the fruit setting, which is usually around 135°F (57°C).
- Check In: Let it run for 6-12 hours. The exact time will depend on your dehydrator, the humidity in your home, and the thickness of your slices. Start checking them around the 6-hour mark. They’re done when they’re leathery or crisp.
Method 3: The Speedy Air Fryer
- Single Layer is Key: Arrange the apple slices in a single layer in your air fryer basket. You’ll likely need to work in batches.
- Low and Slow: Set your air fryer to its lowest temperature, ideally a “dehydrate” setting around 135°F (57°C). If it doesn’t go that low, use the lowest temp possible (under 200°F/95°C is best).
- Air it Out: “Fry” for about 2-3 hours, flipping the slices every 30 minutes or so to ensure even drying. The time will vary wildly between models, so keep a close eye on them.
Calories & Nutritional Info (The Good, The Bad, The Sugary)
Here’s a rough idea of what you’re getting in a serving of homemade dried apples.
- Serving Size: about ¼ cup (a small handful)
- Estimated Calories: 50-60
- Fiber: 2-3g (A good source!)
- Sugar: 10-12g (It’s all-natural fruit sugar, but it’s concentrated, so don’t go too wild!)
- Vitamins: You’ll still get a decent amount of Vitamin C and other nutrients.
Common Mistakes to Avoid (Learn From My Soggy Slices)
- Uneven Slicing: I’m going to say it one more time for the people in the back: THIN, UNIFORM SLICES ARE KEY. A mandoline is your best friend here.
- Using Too High a Temperature: Patience is a virtue. If your oven or air fryer is too hot, you will cook or burn the apples, not dehydrate them. Low and slow is the name of the game.
- Overlapping the Slices: Apples need space to release their moisture. Give them room to breathe! A single, even layer is non-negotiable.
- Improper Storage: Don’t just throw your beautiful, crispy apple chips into a bag while they’re still warm. Let them cool completely, then store them in an airtight container. Any moisture will lead to sad, chewy chips or, worse, mold.
Variations & Customizations (Get a Little Crazy)
Plain apple chips are great, but why stop there?
- Autumn Spice Apple Chips: Before dehydrating, toss your apple slices in a mixture of cinnamon, a pinch of nutmeg, and a tiny dash of ground ginger or allspice. Your house will smell like a literal candle shop.
- “Caramel” Apple Chips: Once your apple chips are dehydrated and cooled, melt some caramel bits and give them a very light drizzle. Sprinkle with a tiny pinch of flaky sea salt. It’s an indulgent treat!
- Savory Apple Chips: Feeling adventurous? Sprinkle your apple slices with a tiny bit of salt and a pinch of smoked paprika before dehydrating. It sounds weird, but the sweet and savory combo is surprisingly addictive.
FAQ Section (Answering Your Apple Anxieties)
Got questions? I’ve got answers.
1. Do I really have to soak the apples in lemon water? No, you don’t have to. It’s purely for cosmetic reasons. If you don’t mind your apple chips being a little brown, you can skip this step entirely. They’ll taste just the same!
2. How do I know when my dehydrated apples are done? They should feel dry to the touch, not sticky. For chewy apple rings, they’ll be leathery and pliable. For crispy apple chips, they should snap when you bend them (though they’ll get crispier as they cool down).

3. How do I store homemade dried apples so they stay crispy? The key is an airtight container. A glass jar with a tight-fitting lid is perfect. Store them in a cool, dark place like your pantry.
4. How long will my homemade apple chips last? If they are fully dehydrated and stored properly, they can last for several months. But let’s be real, are they ever going to last that long without being eaten?
5. Can I dehydrate the apple peels too? Yes! Toss the peels with a little cinnamon and sugar and dehydrate them. They make a crunchy, delicious snack or a great topping for yogurt or oatmeal.
6. What’s the fastest way to dehydrate apples? An air fryer is generally the fastest method, but you have to work in small batches. A food dehydrator is the most efficient for doing a large quantity of apples at once.
7. Can I use this method for other fruits? Absolutely! This low-and-slow drying method works great for pears, bananas, strawberries, and mangoes. Just be prepared to adjust the drying times.
Final Thoughts (Go Forth and Get Crunchy!)
You are now fully equipped with the knowledge to conquer that mountain of apples on your counter. You have the power to create a healthy, delicious snack that will make you feel like a domestic superstar. Seriously, once you taste your own homemade apple chips, you’ll wonder why you ever paid a fortune for those tiny bags at the store.

So go on, get slicing! Your future self, reaching for a healthy snack, will thank you. Enjoy the incredible aroma that’s about to fill your home, and welcome to the wonderful world of dehydration! 🙂