How to Decorate a Cheesecake with Fresh Fruit (and Look Like a Pro)
So, you’ve done it. You’ve successfully baked a cheesecake and it didn’t crack into a map of the Grand Canyon. Congratulations, you’ve already won half the battle! But now it’s sitting there on your counter, a beautiful, creamy, naked canvas. What now? You could serve it as is, and it would be delicious. But you, my friend, are an artist, a visionary, a dessert Monet. It’s time to elevate that plain Jane cheesecake into a show-stopping masterpiece. Let’s dive into how to decorate a cheesecake with fresh fruit and make your friends think you secretly moonlight as a pastry chef.
Forget just tossing a few sad strawberries on top. We’re talking about creating a work of edible art that’s as stunning to look at as it is to eat. It’s easier than you think, I promise. No art degree required.
Why This “Recipe” Is Your New Party Trick
Okay, it’s less of a recipe and more of a technique, but why is this skill essential for your culinary toolkit? Let me count the ways.
First, it’s an instant glow-up. A plain cheesecake is nice. A cheesecake adorned with a vibrant, glossy crown of fresh fruit is spectacular. It’s the difference between showing up to a party in sweatpants versus a killer outfit. Both are fine, but one definitely makes a statement.
Second, it adds the perfect flavor balance. Cheesecake is rich, creamy, and decadent. The bright, fresh, and slightly tart fruit cuts through that richness beautifully, creating a perfectly balanced bite that will have your taste buds singing.

Third, it’s a brilliant way to hide imperfections. Did your cheesecake get a tiny crack despite your best efforts? Did you accidentally nick the side when getting it out of the pan? Pile on some berries and a mint sprig. Boom. What crack? It never happened. It’s the dessert equivalent of “I meant to do that.”
The Decorator’s Palette (Ingredients)
To create your masterpiece, you need the right materials. Think of yourself as an artist assembling your palette.
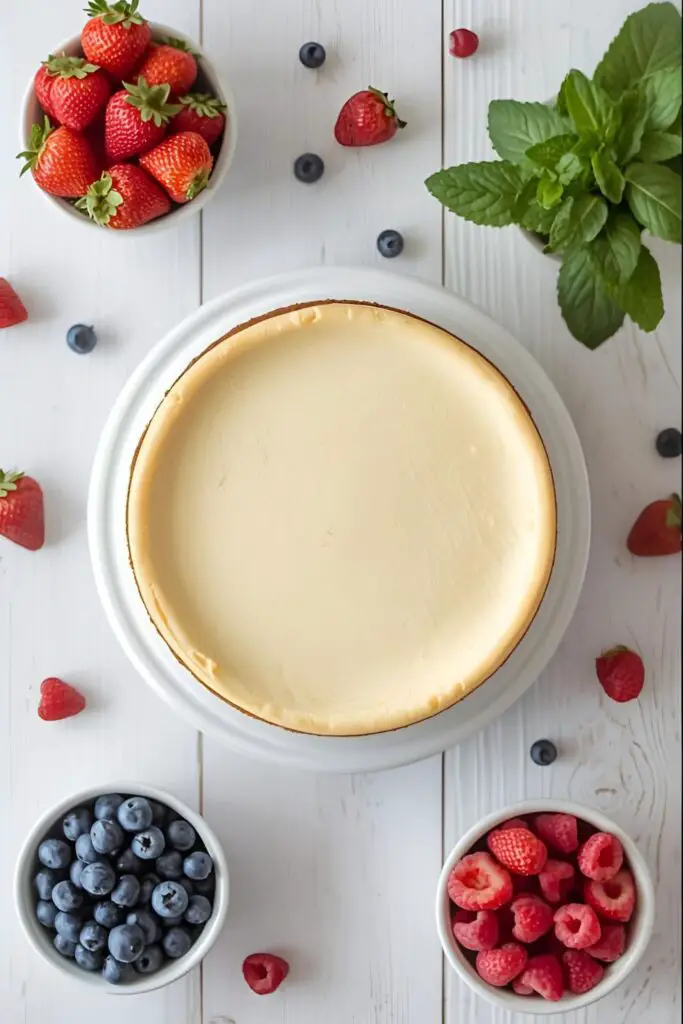
- The Canvas: 1 fully baked and completely chilled plain cheesecake. I cannot stress the “chilled” part enough. A room temperature cheesecake is a soft, squishy mess waiting to happen.
- The Jewels (Your Fruit): 2-3 cups of assorted fresh fruit. The key is to choose ripe, beautiful, and unbruised fruit.
- Berries: Strawberries (hulled, can be left whole, halved, or sliced), blueberries, raspberries, blackberries. These are the MVPs.
- Stone Fruit: Sliced peaches or nectarines (in season), pitted cherries.
- Tropical Vibes: Sliced kiwi, mango chunks, passion fruit seeds.
- The Shine (Optional but Highly Recommended): A simple fruit glaze will make your fruit look glossy and professional, and it helps keep it from drying out.
- ¼ cup apricot jam or seedless raspberry jam
- 1 tablespoon water
- The Final Flourishes (Also Optional):
- Fresh mint sprigs
- Powdered sugar for a light dusting
- Lemon or lime zest
The Artist’s Tools & Gadgets
You don’t need a fancy decorating kit. Just a few simple tools will do the trick.
- Cake Stand or Serving Platter: To showcase your glorious creation.
- Sharp Paring Knife: For slicing your fruit with precision.
- Cutting Board: The trusty sidekick to your knife.
- Paper Towels: Your secret weapon against watery fruit!
- Small Saucepan: If you’re making the glaze.
- Pastry Brush: For applying that beautiful, glossy glaze.
- Small Mesh Sieve: For a delicate, even dusting of powdered sugar.
Step-by-Step: From Plain to Posh
Ready to transform your cheesecake? Let’s get to the fun part.
Step 1: Prep Your Canvas and Your Jewels
First things first: your cheesecake must be cold and firm. Ideally, it has chilled in the fridge for at least 4 hours, or overnight.
Next, prepare your fruit. Wash all of your fruit gently and then—this is the most important step of the entire process—dry it completely. Lay it out on paper towels and pat it dry. Wet fruit will bleed its color all over your beautiful cheesecake, creating a sad, watery mess. We are not making a tie-dye cheesecake today. Once dry, hull and slice your strawberries, slice your kiwi, etc.
Step 2: Choose Your Design

This is where your inner artist gets to shine. You don’t have to be a professional food stylist. Here are a few easy yet stunning design patterns to try:
- The Classic Crescent: My personal favorite for elegance with minimal effort. Arrange a cascade of mixed berries and sliced fruit in a crescent moon shape along one edge of the cheesecake.
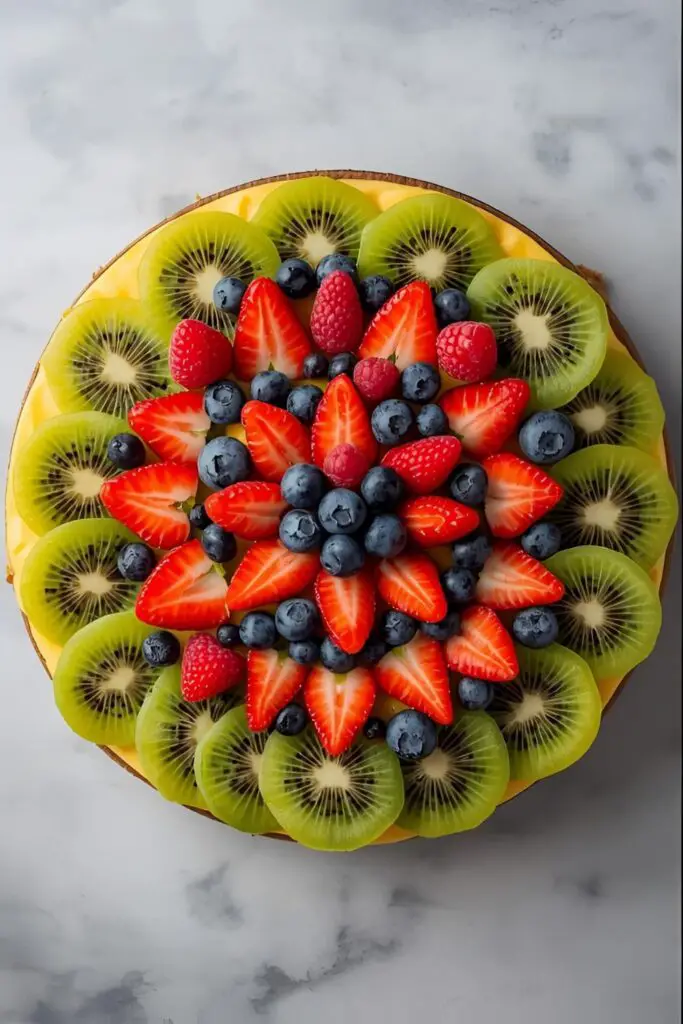
- The Full Fruit Jacket: For a look of abundance. Cover the entire top surface of the cheesecake with an artful arrangement of fruit. Start with larger fruits like strawberry halves around the edge and fill in the center with smaller berries.
- The “Organized Chaos” Pile: This sounds easy, but the key is to make it look intentional. Gently mound a generous pile of mixed berries right in the center of the cheesecake, letting a few spill over naturally.
- The Geometric Guru: Create concentric circles of different fruits. A circle of blueberries, then a circle of raspberry halves, then a circle of sliced strawberries. It’s very satisfying to look at.
Step 3: Arrange Your Masterpiece
Once you have a design in mind, start placing your fruit on the chilled cheesecake. Start with the larger, structural pieces first (like strawberry halves) and then fill in the gaps with the smaller berries. Don’t be afraid to move things around until you like how it looks!
Step 4: Add the Professional Shine (The Glaze)
This simple step takes your decoration from “homemade” to “holy cow, where did you buy this?” In your small saucepan, combine the jam and water. Heat over low heat, stirring constantly, until the jam has melted and the mixture is smooth.
Let the glaze cool for a minute or two—you don’t want to pour hot liquid on your cold cheesecake. Using your pastry brush, gently dab the warm glaze over the fruit. You don’t need to drench it; a light coating is all you need to create a beautiful, glossy finish.
Step 5: The Final Flourishes
Just before serving, tuck a few sprigs of fresh mint in and around your fruit arrangement for a pop of green. If you like, you can use your small sieve to give the edges of the cheesecake a light, snowy dusting of powdered sugar.
Calories & Nutritional Info (For the Topping, Anyway)
Let’s be real, the cheesecake itself is doing the heavy lifting in the calorie department. The fruit is just its beautiful, slightly healthier accessory.
- Serving Size: The fruit and glaze for 1 slice (1/12th of the cake)
- Estimated Calories: 30-60
- Main Benefit: Vitamins, fiber, and the moral high ground of having added fruit to your dessert. 🙂
Common Mistakes to Avoid (Save Your Cheesecake!)
- The Weeping Fruit Tragedy: You used wet fruit. I will say it until I’m blue in the face: DRY. YOUR. FRUIT. Pat it dry with paper towels like its life depends on it. Because your cheesecake’s life does.
- The Melty Mess: You tried to decorate a room-temperature cheesecake. The fruit will sink, the juices will run, and the whole thing will look like a sad puddle. Your cheesecake must be thoroughly chilled.
- Decorating a Day in Advance: Fresh fruit is at its best… well, when it’s fresh. For the best flavor and texture, decorate your cheesecake no more than 3-4 hours before you plan to serve it. The glaze will help, but time is still the enemy of crisp fruit.
- The Heavy Hand: Don’t just dump the fruit on there. Be intentional with your placement. It doesn’t have to be perfect, but a little thought goes a long way.
Variations & Customizations (Your Canvas, Your Rules)

This technique is a fantastic base. Feel free to play around!
1. The Monochromatic Masterpiece
Create a visually stunning cheesecake by using only fruits of one color. Think an all-red topping of strawberries, raspberries, and pomegranate seeds, or a dark and dramatic topping of blackberries and black grapes.
2. Tropical Paradise Cheesecake
Go for a tropical vibe! Top your cheesecake with sliced mango, kiwi, passion fruit pulp, and toasted coconut flakes. A lime zest in the cheesecake base would be a perfect complement.
3. Chocolate-Dipped Fruit Fantasy
For the ultimate indulgence, dip some of your strawberries in melted chocolate and let them set before arranging them on the cheesecake. You can also add a drizzle of melted chocolate over the entire fruit arrangement.
FAQ: Your Cheesecake queries, Conquered
Let’s tackle some of the most common questions about beautifying your bake.
1. What are the absolute best fruits for decorating a cheesecake? Sturdy fruits that don’t brown or get mushy quickly are your best bet. Berries (strawberries, blueberries, raspberries, blackberries), kiwi, mango, and pitted cherries are all fantastic choices.
2. How do I stop the fruit juices from making the cheesecake soggy? First, dry your fruit thoroughly. Second, the glaze acts as a barrier. Third, don’t decorate too far in advance. Some people also like to create a thin border of whipped cream or buttercream to act as a “dam.”
3. Can I use frozen fruit? I would strongly advise against it. When frozen fruit thaws, it releases a lot of water and becomes very soft and mushy. It’s perfect for making a fruit compote or sauce to serve alongside, but not for arranging on top.
4. How do I cut the cheesecake cleanly once it’s decorated? The secret is a long, thin, sharp knife and hot water. Fill a tall glass with hot water. Dip the knife in the water, wipe it clean with a paper towel, and make one firm, clean cut. Repeat the dip-and-wipe process for every single slice. It’s a little fussy, but it results in perfect slices.
5. Do I really need the jam glaze? You don’t need it, but it makes a huge difference. It gives the fruit that professional, glossy look and helps to seal it, keeping it looking fresh for longer. It’s a 2-minute step that adds a lot of wow-factor.
6. Should I cover the whole cheesecake or just part of it? That’s totally up to you! A crescent or central pile looks very elegant and makes slicing a bit easier. Covering the whole top is a look of pure abundance. There’s no wrong answer!
7. Can I use other things besides fruit? Of course! Think chocolate shavings, a caramel drizzle, chopped nuts, cookie crumbles, or piped whipped cream. This guide is for fruit, but the principles of design apply to anything!
Final Thoughts
You are now officially a cheesecake artist. You’ve learned the secrets to transforming a delicious dessert into an absolute showstopper. No longer will you look at a plain cheesecake with uncertainty. You now see a canvas of infinite, delicious possibilities.
So go forth, be the dessert hero you were always meant to be, and create something beautiful. And when your friends and family gasp in awe at your creation, just give them a cool, casual shrug and say, “Oh, this old thing? I just threw it together.”