To calculate the hatch area of multiple objects in AutoCAD, first select all the objects. Then, right-click and choose Hatch from the context menu. In the Hatch Creation dialog box, click Properties.
Finally, click Calculate to see the total hatch area.
- In Autocad, open the drawing that contains the objects to be hatched
- Select the objects to be hatched
- On the ribbon, click on the Hatch tool (in the Draw panel)
- In the Pattern Type drop-down list, select Multi-hatch
- In the Pattern Scale field, enter a number between 0 and 100 (this is optional)
- In the Associative drop-down list, select Yes or No (this is also optional)
- Click on OK to close the dialog box and hatch the selected objects with multiple hatches
Autocad Hatch Area Not Showing
If you’re using AutoCAD and have noticed that the hatch area isn’t showing up, don’t worry – there’s a simple fix. All you need to do is change the setting in your options menu. Here’s how:
1. Open the Options dialog box by typing OP on the command line or by clicking the icon in the upper-right corner of the AutoCAD window.
2. In the Options dialog box, click Display tab and then find the Graphics Performance section near the bottom.
3. Expand Graphics Performance if it’s not already expanded and then select Enable Hardware Acceleration from the drop-down menu next toGraphics Mode .
4. Click OK to close the dialog box and apply your changes. The hatch area should now be visible when you zoom in on your drawing.
Hatch Area Lisp Download
Lisp is a powerful programming language that has been used for decades to create some of the most complex software applications. Despite its age, Lisp is still very popular among developers and continues to be used in a variety of different ways. One such use is in the development of artificial intelligence (AI) programs.
Lisp was one of the first languages developed specifically for AI applications and remains an important tool for AI researchers today.
If you’re interested in learning Lisp, there are a few different ways to get started. One option is to download a copy of Hatch, an open source implementation of Common Lisp.
Hatch includes everything you need to start writing Lisp code, including an interactive development environment (IDE) and a comprehensive set of libraries. You can download Hatch from http://hatchlisp.org/.
How to Calculate Area of Irregular Shape in Autocad
When it comes to calculating the area of an irregular shape in Autocad, there are a few different methods that you can use. The most common method is to use the polygon command. This command will allow you to draw a polygon around the irregular shape and then calculate the area based on the number of sides that you have drawn.
Another method that you can use is to use the measure command. This command will allow you to click on various points around the irregular shape and then Autocad will give you the distance between those points. Based on these distances, you can then calculate the perimeter of the shape and then use that information to calculate the area.
Total Hatch Area Lisp
Lisp is a dialect of the programming language Scheme. It was originally created by John McCarthy in 1958. Lisp is used in a wide variety of applications, including artificial intelligence, computer graphics, and networked applications.
The name “Lisp” is an acronym for “LISt Processing”.
Lisp has a very simple syntax which allows programmers to write code that is easy to read and understand. This makes Lisp an ideal language for learning how to program computers.
In addition, Lisp provides many features that are not available in other languages, such as automatic memory management and garbage collection. These features make Lisp programs more reliable and easier to maintain than programs written in other languages.
Autocad Cumulative Area
If you work with AutoCAD, chances are you need to find the cumulative area of objects on a regular basis. Whether you’re trying to calculate the amount of material you need for a project, or simply want to know the size of an object, finding the cumulative area is a helpful skill to have.
Luckily, AutoCAD makes it easy to find the cumulative area of objects.
In this blog post, we’ll show you how to do just that. We’ll also provide some tips on troubleshooting common problems that can occur when finding the cumulative area in AutoCAD.

Credit: www.youtube.com
How Do You Find the Area of Multiple Objects in Autocad?

To find the area of multiple objects in AutoCAD, you can use the AREA command. This command will allow you to select multiple objects and then calculate the total area of all the selected objects. To use this command, simply type “AREA” into the command line and then press Enter.
This will bring up the Area dialog box. From here, you can select the objects that you want to include in your calculation. Once you have made your selections, simply click on the “Calculate” button and AutoCAD will provide you with the total area of all selected objects.
How Do You Calculate Hatch Area in Autocad?
When creating a new hatch in AutoCAD, you are prompted to specify the boundary of the area to be hatched. This can be done by selecting objects or drawing lines that enclose the area, or by specifying coordinates that define the perimeter. Once the boundary is defined, the hatch pattern and other options can be selected.
To calculate the hatch area:
-Select the Hatch tool from the Draw panel on the ribbon, or enter HATCH at the command line.
-Click inside an enclosed area or select its boundary objects.
-At the Enter internal point of region or [Undo]: prompt, specify a point inside the region to be hatched.
How Do You Create a Boundary for Multiple Hatches?
There are a few things to consider when creating boundaries for multiple hatches. The first is the size of the boundary. You’ll need to make sure the boundary is large enough to accommodate all of the hatches you plan on using.
The second is the shape of the boundary. You’ll want to make sure the boundary is shaped in such a way that it doesn’t interfere with the function of any of the hatches. The third is the location of the boundary.
You’ll want to make sure the boundary is located in an accessible spot that won’t be in the way of anything else. Once you’ve considered all of these factors, you should be able to create a boundary for multiple hatches that meets your needs.
How Do You Hatch Multiple Objects at Once?
If you’re looking to hatch multiple objects at once in Autodesk Revit, there are a few different methods you can use. One method is to select the objects you want to hatch, right click, and select “Hatch.” Another method is to use the “Hatch” tool located on the “Annotate” tab.
Finally, you can also use the fill pattern option under the “Edit Hatch” button.
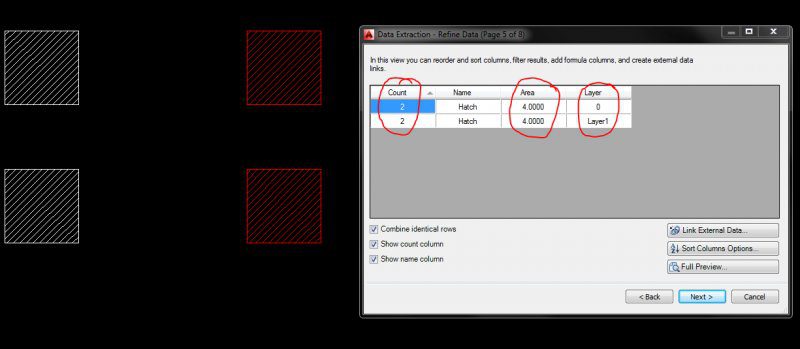
How to calculate the summation of hatch areas in AutoCad without any lisps
Conclusion
There are many ways to calculate multiple hatch areas in Autocad. One way is to use the “Area” command. This will give you the area of all the selected objects.
Another way is to use the “Hatch” command. This will create a hatched area based on the objects you have selected.
- Why Ease of Use is Crucial in Trucking Dispatch Software - September 22, 2024
- Better Communication With Dispatchers: How Trucking Dispatch Software Can Optimize Operations - September 7, 2024
- Maximizing Efficiency: The Importance of Accurate Location Tracking for Trucking Operations - August 23, 2024