Burning letters into wood without tools can easily be done using a pen-style soldering iron. To start, choose the surface you want to burn onto and draw your design with a pencil. Then heat up the soldering iron and carefully trace over each letter or line of your design.
As you move the heated tip along, it will leave behind a burnt mark in the wood where it has been touched. Make sure to keep moving continuously so that any one area does not get too hot and cause burning beyond just what is desired for your design. Allow the area to cool off before touching it or adding additional layers of burning for shading or other effects.
With some practice, this technique can be used to create beautiful works of art on wooden surfaces!
- Gather the Materials: To burn letters into wood without tools, you will need a piece of untreated hardwood, rubbing alcohol (70% isopropyl), and an open flame such as a lighter or match
- Prepare the Wood: Use sandpaper to smooth out any rough patches on the wood surface and remove any dirt or dust particles
- Trace Letters onto Wood: Using a pencil, draw your desired design directly onto the wood surface if you have steady hands; otherwise use carbon paper between the wood and your original artwork to trace it accurately onto the wood
- Apply Rubbing Alcohol: Once your design has been traced onto the wood, apply rubbing alcohol liberally overtop using either a brush or cotton ball for even coverage across all areas of your design that are intended for burning in order to create different depths when burned with fire later on
- Let dry completely before continuing on with step 5 below! 5
- Ignite Flame : When ready , ignite an open flame from either a match or lighter and carefully start at one end of your design then slowly move along until all lines have been adequately burned into their respective depths due to their pre-soakedness in rubbing alcohol beforehand
- Be sure not to hold on too long in one spot as this could cause unwanted charring !

Credit: www.wikihow.com
How Do You Burn Wood Without Tools?
Burning wood without tools is an easy and satisfying process that can be used for both practical purposes such as keeping warm or cooking, and recreational activities like camping. The two main ways to burn wood without tools are by using a fire lay or a teepee fire lay. To create a fire lay, start by gathering some dry tinder such as leaves, grasses, bark shavings and/or small twigs in the center of your designated area.
Then place larger pieces of kindling (such as sticks) around the tinder in a star-like shape so that air can circulate around it. Finally add larger fuel logs on top of the kindling to complete your fire lay. To ignite the pile use matches or another form of flame source such as lighters or magnifying glasses if available; otherwise you can also spark flint stones together to produce sparks which should then light up your tinder bundle.
A teepee style fire lay consists of placing several logs upright in a circle with their tips meeting at the center where you will place your tinder bundle; this allows more oxygen to enter from below resulting in quicker ignition than with a regular firelay. So there you go – burning wood without tools doesn’t have to be difficult! With these simple steps anyone can quickly get their own little campfire going anytime they need one!
How Do You Burn Letters into Wood at Home?
Burning letters into wood can be a great way to personalize items such as signs, plaques, and other decorations. It is surprisingly easy to do with the right tools and some practice. The first step is to gather your supplies which include: fine-tipped artist’s pen or pencil, a craft knife or engraving tool, letter stencils (or you could draw them out yourself), paper towels for wiping off any excess ink residue, and the wood that you will be burning onto.
Make sure the surface of the wood is smooth before beginning so it creates an even finish when finished. Trace your letters onto parchment paper with a pen or pencil using your stencils or freehand drawing them out if desired. Carefully cut along each line of every letter in order to make tracing easier later on; this will also help ensure accuracy when transferring from parchment paper over to the wood’s surface.
With all of your pieces cut out already on parchment paper, carefully place them one at a time onto the piece of wood that you are working with – making sure they are where you want them before continuing – then begin tracing each letter slowly but firmly so that it transfers completely from parchment paper onto the wooden surface. Once all of your letters have been transferred over properly use either a craft knife or an engraving tool depending on how deep and defined you would like for your burn marks/letters to appear; lightly trace around each letter pressing down enough pressure until it leaves behind burn marks without pushing too hard as it can damage both tools & materials! Finally allow plenty of time for cooling once done before removing any extra ashes created by this process & cleaning up afterwords – enjoy!
How Do You Burn Lettering to Wood?
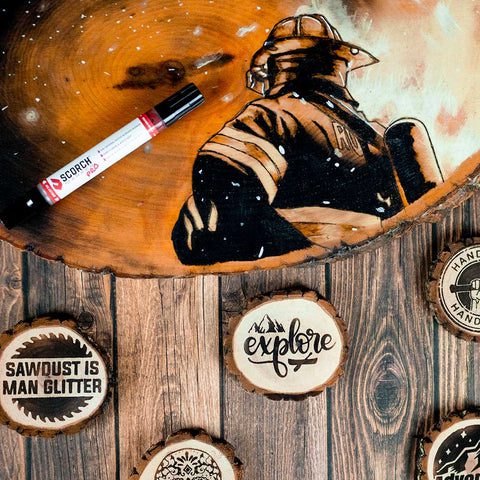
Burning lettering to wood is a unique way of adding a personalized touch to any piece of woodwork. The process, also known as pyrography, involves using an electrical tool like a soldering iron or special pen-shaped device that gets hot enough to burn the design onto the surface of the wood. To begin, you’ll need some basic supplies including your chosen burning tool and tips, some transfer paper for tracing designs onto your project if desired (or you could draw directly on the wood itself), sandpaper for smoothing out rough spots, and some light colored woods such as maple or birch which will take the burnt image best.
Once you have all these items ready and your design plan in place it’s time to start burning! Begin by heating up your burning tool until it reaches its maximum temperature setting (it should be hot enough so that when tested against scrap material it produces white smoke). When ready, lightly trace over each line in turn with steady pressure while keeping an eye on how deep into the grain you are going; too little pressure won’t create strong lines but too much can burn through completely – practice makes perfect here!
Finish off by sanding down any uneven areas with fine grit sandpaper before coating with varnish or oil. With patience and care you’ll end up with beautiful wooden lettering that’s sure to impress anyone who sees it!
What Can I Burn Letters In?
If you want to burn letters, there are a few things that can be used. You can use a fireplace or an outdoor fire pit if they are available and safe to do so. If those options aren’t available, you could also purchase a small metal trashcan with the lid removed and place it outside in an open space away from any flammable materials.
Fill the bottom of the trashcan with sand or dirt and light your letter on fire over it. Make sure to stand far enough away from the flame in case sparks fly out of the container when burning your letter! Additionally, you may wish to consider purchasing a small metal camping stove or other type of portable stove designed for outdoor use which would provide extra safety as well as control over how quickly your letter burns.
Whatever method you choose, make sure to take all proper safety precautions and check local laws before proceeding with burning letters outdoors just in case there is a ban on open fires in your area.
How To Burn Letters Into Wood without Tools – How To Write On Wood By Burning – wood burning tips
How to Burn Letters into Wood With a Torch
Using a torch to burn letters into wood is an easy and effective way to create beautiful, custom decorations or gifts. This method requires no special tools and can be completed with just a few inexpensive materials. First, draw the desired design onto the wood using a pencil or marker.
Then use a handheld butane torch to lightly trace over the lines of your design for about 10 seconds at time until you’ve created your desired effect. Once you’re finished burning in your lettering, sand down any rough edges and finish off with sealant or paint as needed!
Wood Burning Tool Substitute

For those wanting to create wood burnings without purchasing a specific tool, there are several safe and effective substitutes. Alternatives such as candle flame, soldering iron, nail and hammer or heated paper clip can all be used to get the desired effects of burning wood. It is important to note that these tools do not offer precise control like a dedicated wood burning tool would.
Additionally, proper safety measures must be taken when using any heat-based substitute for traditional pyrography tools.
Make Your Own Wood Burning Tools
Making your own wood burning tools is a great way to customize and personalize your projects. With the right supplies, you can make everything from basic points and lines to intricate designs and patterns with ease. All you need is a soldering iron, some metal rods or wires of different sizes, a few sanding sticks for shaping, and some safety equipment such as gloves and glasses.
With these tools in hand, you’ll be able to express yourself through wood burning in no time!
How to Burn Letters into Wood Diy
Burning letters into wood is a fun and creative way to personalize any piece of wood. You can use a wood burning tool, also known as pyrography, which allows you to draw or burn designs onto the surface of the wood. Start by sketching out your desired design on paper first before transferring it onto the wood with carbon paper.
Use different tips for various effects such as shading or outlining different elements in your design. Finally, heat up the tip of your pyrography tool and slowly trace along the lines that you have drawn on your wooden surface until your lettering appears!
Conclusion
Burning letters into wood may seem like an intimidating task, however this blog post has provided simple instructions that make it easy to achieve. With a few safety precautions and the right materials, anyone can create beautiful words and designs in wood without tools. Whether you’re creating something for yourself or giving someone a personalized gift, burning letters into wood is sure to impress.
- Ltl Dispatch Software: Revolutionize Your Logistics! - March 31, 2024
- Optimizing the Mixing: The Perfect Bacteriostatic Water Ratio for 3Mg Semaglutide - March 27, 2024
- Mobile Accessibility And Real-Time Tracking for Trucking Operations - March 26, 2024