How to Boil Shrimp on the Stove (So They’re Plump, Not Rubbery!)
Let’s talk about a culinary tragedy that unfolds in kitchens far too often: the sad, overcooked shrimp. You know the one. It’s a tight, rubbery, C-shaped curl of disappointment, a shadow of the plump, succulent crustacean it was meant to be. If you’ve ever boiled a batch of shrimp only to end up with something resembling pink pencil erasers, you are not alone. But today, that ends. We’re going to demystify the process and teach you how to boil shrimp on the stove so perfectly, they’ll be tender, snappy, and unbelievably flavorful every single time. Get ready to master the easiest, fastest, and most versatile cooking method in your arsenal.
Why This Method Is Awesome (It’s a 5-Minute Miracle)
Why bother mastering the art of boiling shrimp? Because it’s less of a recipe and more of a superpower. This method is awesome because:
- It’s Unbelievably Fast: We’re talking from raw to perfectly cooked in under 5 minutes. It’s the ultimate secret weapon for quick weeknight dinners, last-minute appetizers, or a healthy protein boost.
- It’s a Flavor Delivery System: We’re not just boiling shrimp in plain water (a cardinal sin!). We’re creating a quick, aromatic broth that infuses the shrimp with incredible flavor from the inside out.
- Guaranteed Perfect Texture: The secret isn’t in the boiling; it’s in the stopping. We’ve got the one crucial step that guarantees plump, snappy, and tender shrimp every time, without fail.
- Endlessly Versatile: Master this one simple technique, and you’ve got the base for a classic shrimp cocktail, a zesty shrimp salad, shrimp tacos, pasta dishes… the list goes on. It’s a foundational skill for any seafood lover, especially in a shrimp-loving place like Barishal!
You’re not just boiling shrimp; you’re creating a perfect, succulent building block for countless delicious meals.
Ingredients: Your Flavorful Bath
The key to flavorful boiled shrimp is to make the water taste amazing first.
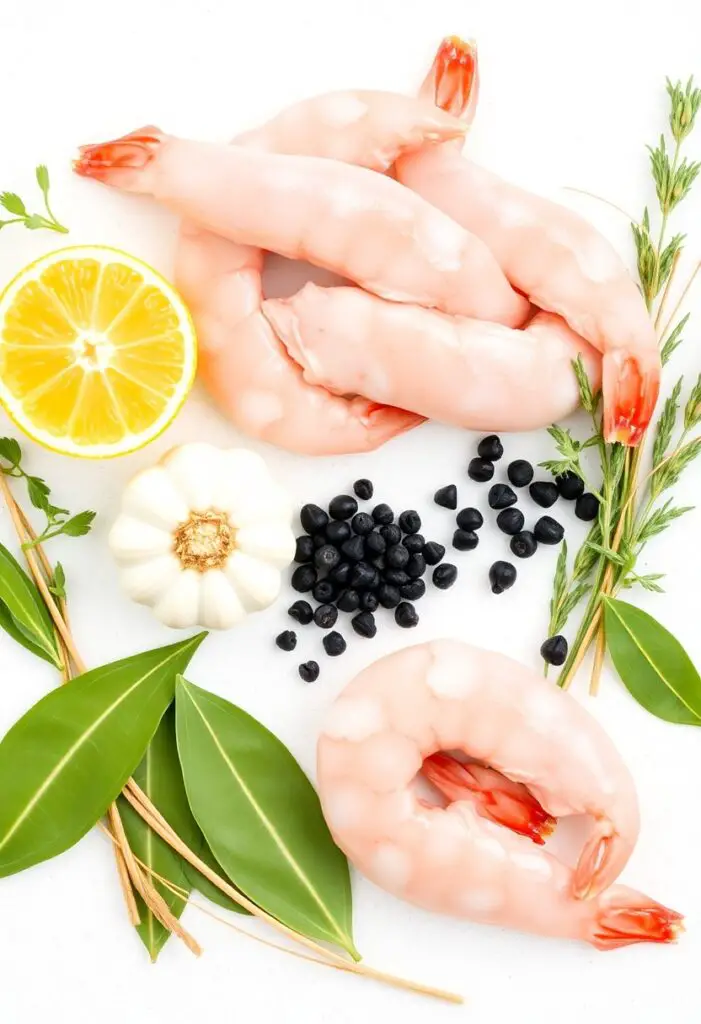
- 1 pound large raw shrimp, shell-on or peeled and deveined
- 6 cups of water
- 1 lemon, halved
- 1 head of garlic, sliced in half crosswise
- 1 tablespoon kosher salt
- 1 teaspoon whole black peppercorns
- 2 bay leaves
- For the Ice Bath (Non-Negotiable!):
- A large bowl of ice and cold water
A Very Important Note on Shrimp:
- Shell-on vs. Peeled: Cooking shrimp with the shells on will always result in a more flavorful and succulent shrimp, as the shells protect the meat and add flavor to the water. However, using peeled and deveined shrimp is a fantastic time-saver. Both work with this method!
Tools & Kitchen Gadgets Used: Your Boiling Brigade
You don’t need much to achieve shrimp perfection.
- A Large Pot or Dutch Oven
- A Large Bowl (for the ice bath)
- A Slotted Spoon or a Spider Strainer
- Tongs
- A Sharp Knife and Cutting Board
Step-by-Step Instructions: The Path to Plump Perfection
This process is incredibly fast. Have your ice bath ready before you even think about putting the shrimp in the water.
Act 1: Create the Aromatic Broth
- Combine the Flavor-Makers: In your large pot, combine the 6 cups of water, kosher salt, black peppercorns, and bay leaves. Squeeze the juice from the two lemon halves into the pot, then toss the squeezed lemon halves in as well. Add the halved head of garlic.
- Bring to a Rolling Boil: Place the pot on the stove over high heat and bring the mixture to a strong, rolling boil. Let it boil for about 5 minutes to allow all those beautiful aromatics to infuse the water.
Act 2: The Cook and the Chill (This is FAST!)
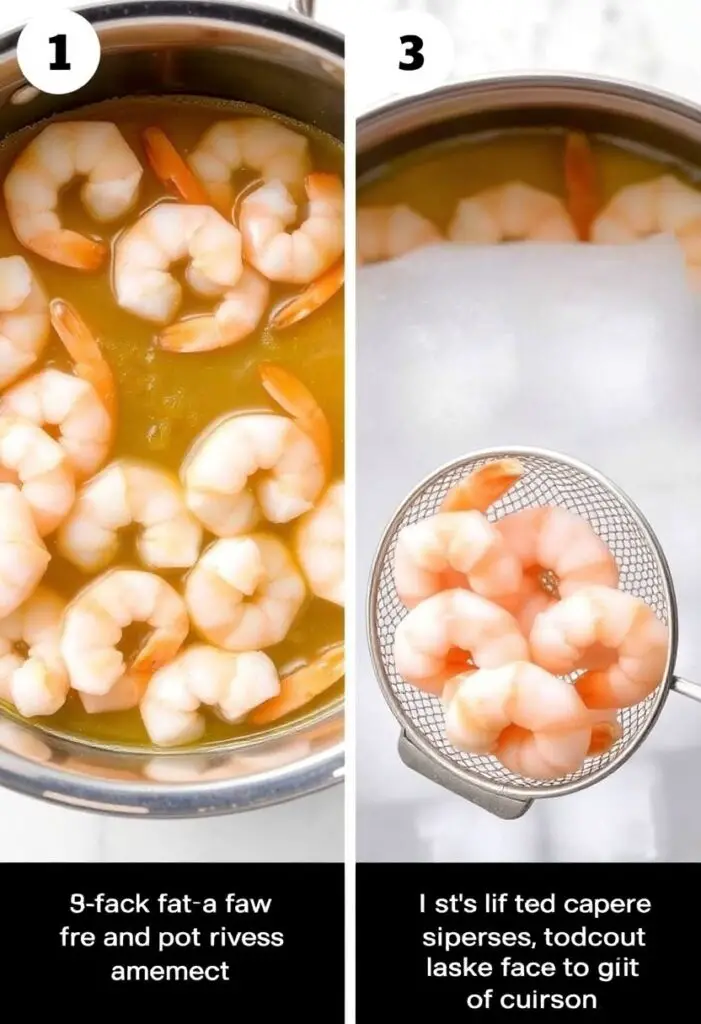
- Reduce to a Simmer: Once your water is fragrant and flavorful, reduce the heat so it’s at a gentle simmer, not a violent, churning boil. A hard boil will make your shrimp tough.
- Add the Shrimp: Gently add your raw shrimp to the simmering water.
- The 2-Minute Timer: Now, pay attention! This is where the magic happens. The shrimp will cook in just 1 to 3 minutes. The exact time depends on their size.
- Watch for the Signs: You’ll know they’re done when they turn pink and opaque, and they curl into a loose “C” shape. Do not let them curl into a tight “O” shape!
- The Ice Bath Plunge (The Most Important Step!): As soon as the shrimp are done, immediately use your slotted spoon or spider strainer to remove them from the hot water and plunge them directly into the ice bath.
- Let Them Chill: Let the shrimp sit in the ice bath for 2-3 minutes, until they are completely chilled. This immediately stops the cooking process, which is the absolute key to preventing them from becoming overcooked and rubbery from residual heat.
Act 3: The Finish
- Drain and Dry: Once chilled, remove the shrimp from the ice bath and drain them well. If you used shell-on shrimp, peel them now (the shells will come off very easily).
- Serve or Store: Your perfectly boiled shrimp are now ready! Serve them immediately in a shrimp cocktail, or store them in an airtight container in the fridge for your next delicious creation.
Calories & Nutritional Info (Per 4-Ounce Serving)
This is one of the healthiest, most delicious proteins you can eat!
- Estimated Calories per serving: ~100-120 calories
- Protein: ~20-24g (A fantastic lean source!)
- Fat: ~1g
- Good Stuff: A great source of selenium, vitamin B12, and other essential minerals.
Common Mistakes to Avoid: Don’t Commit These Shrimp Sins!
Avoid these pitfalls for perfect, plump shrimp every time.
- Violently Boiling: A hard, rolling boil will agitate the shrimp and make them tough. A gentle simmer is all you need.
- The Biggest Crime: Overcooking. I will say it again: shrimp cook in minutes. The second they turn pink and C-shaped, they are done. If they curl into a tight O, they are O-vercooked.
- Using Plain, Unseasoned Water: Boiling shrimp in plain water is a huge missed opportunity. A flavorful broth makes for flavorful shrimp.
- Skipping the Ice Bath: This is a non-negotiable, game-changing step. If you skip it, the shrimp will continue to cook from their own heat even after you take them out of the water, and they will turn rubbery. The ice bath is your secret weapon.
Variations & Customizations: Your Shrimp, Your Adventure
The flavorful broth is a perfect base for different flavor profiles.
- Classic Shrimp Boil Style: To your boiling water, add 2-3 tablespoons of Old Bay seasoning, a quartered onion, and even some small new potatoes and corn on the cob (cook the veggies first until tender, then add the shrimp at the end).
- Mexican-Inspired Shrimp: Add a handful of cilantro stems, half a white onion, and a whole, split jalapeño to your boiling water. Perfect for making shrimp tacos or a zesty shrimp salad.
- Asian-Inspired Poached Shrimp: Add a few slices of fresh ginger, a couple of whole scallions, and a splash of soy sauce to your boiling water. This is fantastic for adding to noodle bowls or summer rolls.
FAQ Section: All Your Boiling Questions, Answered
You have questions about this speedy seafood. I’ve got you covered.
- Q: Do I really have to use an ice bath? A: Yes! If you want perfectly cooked, tender shrimp, the ice bath is essential. It stops the cooking process instantly and keeps the shrimp plump and snappy.
- Q: How long does it really take to boil shrimp? A: It’s shockingly fast. For large shrimp (21-25 per pound), it’s usually 2-3 minutes. For smaller shrimp, it can be as little as 60-90 seconds.
- Q: Should I boil shrimp with the shell on or off? A: For the absolute best flavor and most tender result, boil them with the shells on. The shells protect the delicate meat and add a ton of flavor to the water. However, peeled and deveined is much more convenient.
- Q: Can I use frozen shrimp? Do I need to thaw it first? A: Yes, you can use frozen shrimp. For the best result, thaw them quickly first by running them under cold water in a colander for a few minutes. If you’re in a huge rush, you can add them directly from frozen, but you’ll need to add another 1-2 minutes to the cooking time.
- Q: Why did my shrimp still turn out tough and rubbery? A: You overcooked them. It’s the only reason. Even 30 seconds too long can make a difference. Watch them closely and pull them out the second they turn pink.
- Q: What can I do with the flavorful cooking liquid after I’m done? A: Don’t throw it out! You’ve just made a quick and delicious shrimp stock. Strain it, let it cool, and freeze it. It’s a fantastic base for seafood soups, bisques, or risottos.
- Q: How far in advance can I boil shrimp? A: You can boil them, peel them (if needed), and store them in an airtight container in the refrigerator for up to 2-3 days. They are a perfect make-ahead component for easy meals.
Final Thoughts: You Are Now a Master of the Plump Shrimp
You’ve done it. You have conquered the delicate art of boiling shrimp. You are now a master of the 2-minute timer, a champion of the ice bath, a true seafood savant. So go forth, make a perfect shrimp cocktail, build an epic shrimp salad, and never again suffer the tragedy of a rubbery, overcooked shrimp. You’ve got this.


