This Halloween Cake Pops Recipe Will Make You a Legend
Let’s be honest. You’ve seen those perfect little cake pops at a party or staring at you from the Starbucks display case and thought, “That’s witchcraft.” They seem like a dark art, a sticky, frustrating magic that mere mortals cannot master. Well, I’m here to pull back the curtain and show you that making adorable, spooky, and delicious Halloween cake pops is not only possible, it’s actually a ton of fun.
Forget your past Pinterest fails. We’re banishing the ghost of cake pops past—the ones that cracked, fell off the stick, or looked like sad, lumpy blobs. This is your foolproof guide to becoming the undisputed hero of the Halloween party. Get ready to create Halloween cake pops that are so cute, it’s scary.
Why This Halloween Cake Pops Recipe is Spooktacular
So, why should you dive into the world of cake on a stick this Halloween? Let me convince you.
First, they are the cutest things you will ever make. A platter of little ghosts, pumpkins, and mummies is basically the pinnacle of Halloween spirit. They are a decoration and a dessert all in one, and the “OMG, you made these?!” comments will be sweeter than any candy you get while trick-or-treating.
Second, this method is ridiculously forgiving. We’re using a simple, no-fuss method of cake and frosting. No fancy baking skills required. It’s a hands-on project that’s perfect for a chilly October weekend, and it’s even fun to do with kids (if you don’t mind a little bit of a mess).

Finally, they’re a certified party hit. People go absolutely bonkers for cake pops. They’re the perfect single-serving treat, easy to grab, and a welcome change from the standard bowl of fun-sized candy bars. You will be the most popular person at any spooky gathering.
Your Potion Ingredients
To brew up these spooky treats, you’ll need a few key components.
- For the Cake Pop “Guts”:
- 1 baked 9×13 inch cake, cooled (Chocolate, vanilla, or even red velvet works great. A box mix is your best friend here. Seriously.)
- ½ to ¾ cup of frosting (Canned cream cheese or vanilla frosting is perfect. The amount depends on the moistness of your cake.)
- For the Spooky Exterior:
- 1-2 bags of candy melts (White is essential for ghosts and mummies, and orange for pumpkins.)
- Black candy melts (for drawing faces)
- 1-2 teaspoons of coconut oil or Paramount Crystals (This is the secret to perfectly smooth, thin candy coating!)
- Lollipop sticks (The 6-inch ones are ideal.)
- Candy eyeballs (Because everything is better with googly eyes.)
Key Substitutions: You can use any cake flavor you like! Spice cake would be amazing for the pumpkin pops. No candy melts? White chocolate or almond bark can work, but candy melts are generally easier for beginners to work with.
Tools & Ghoulish Gadgets Used
Having the right equipment will save your sanity. Trust me.
- Large Mixing Bowl: For smooshing the cake and frosting together.
- Food Processor: Optional, but it crumbles a cake into fine crumbs in seconds.
- Cookie Scoop: A 1.5 tablespoon scoop is perfect for uniform-sized cake pops.
- Baking Sheets lined with Parchment Paper
- Styrofoam Block: This is NON-NEGOTIABLE for letting your cake pops dry perfectly. A block of floral foam or even a cardboard box with holes poked in it will work.
- Microwave-Safe Bowls: For melting your candy melts.
- Piping Bag or a Ziploc bag with the tip snipped off (for detail work).
Step-by-Step Instructions: Let’s Get This Haunt Started
Ready to make some magic? Let’s break it down into easy, non-scary steps.
H3: Step 1: Making the Cake Pop Dough
- Crumble the Cake: Once your cake is completely cool, crumble it into a large mixing bowl. You want fine, even crumbs with no big chunks. You can do this with your hands (which is oddly therapeutic) or pulse it in a food processor.
- Add the Frosting: Start by adding ½ cup of frosting to the cake crumbs. Mix it all together with a spatula or your hands until it has the consistency of a thick, pliable dough. If it’s still too crumbly, add more frosting, one tablespoon at a time. It should hold its shape when you squeeze it.
H3: Step 2: Rolling, Chilling, and Sticking
- Scoop and Roll: Use your cookie scoop to portion out the dough. Roll each portion between your palms into a smooth, round ball. For pumpkins, slightly flatten the top and bottom. For ghosts, roll them into a slight cone or teardrop shape.
- Chill Out: Place your rolled cake balls on a parchment-lined baking sheet and chill them in the refrigerator for at least 30 minutes or the freezer for 15 minutes. They should be firm, not frozen solid.
- The All-Important First Dip: Melt a small handful of candy melts. Dip the tip of a lollipop stick about half an inch into the melted candy, then push it about halfway into a chilled cake ball. This candy acts as “glue.” Repeat for all your pops and pop them back in the fridge for 5-10 minutes to set.
H3: Step 3: Dipping and Decorating Your Halloween Cake Pops
- Melt the Coating: In a microwave-safe, relatively deep bowl, melt your candy melts in 30-second intervals, stirring in between. Once melted, stir in the coconut oil or paramount crystals until the coating is smooth and fluid.
- The Big Dip: Hold the cake pop by the stick and dip it straight down into the melted candy until it’s fully submerged. Pull it straight out and gently tap the stick on the side of the bowl to let the excess drip off. Do not swirl it around!
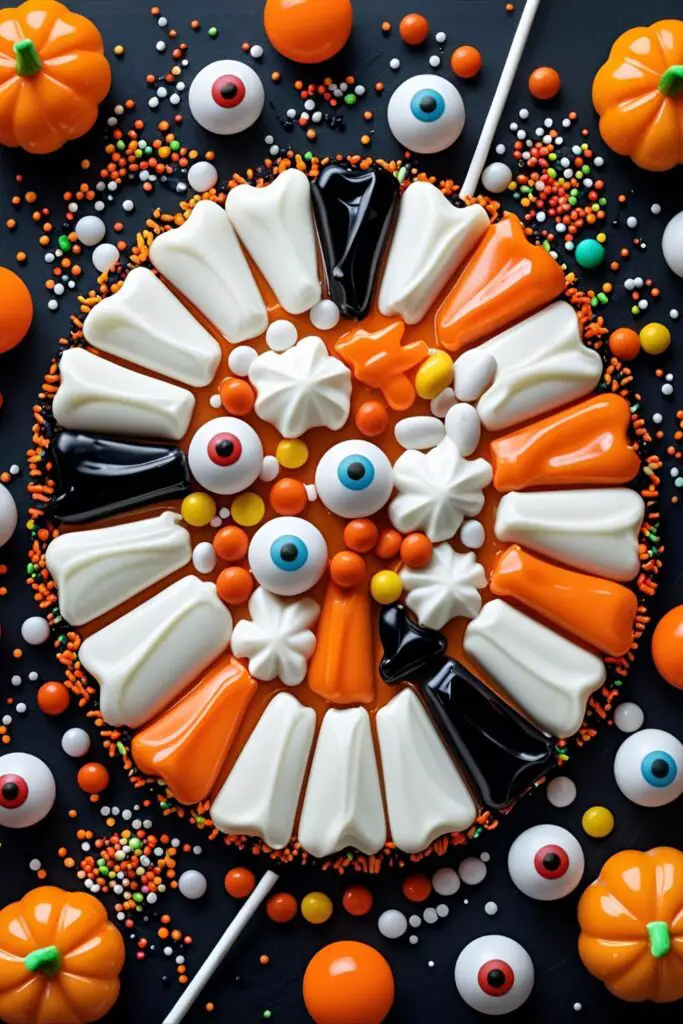
- Decorate! Now for the fun part:
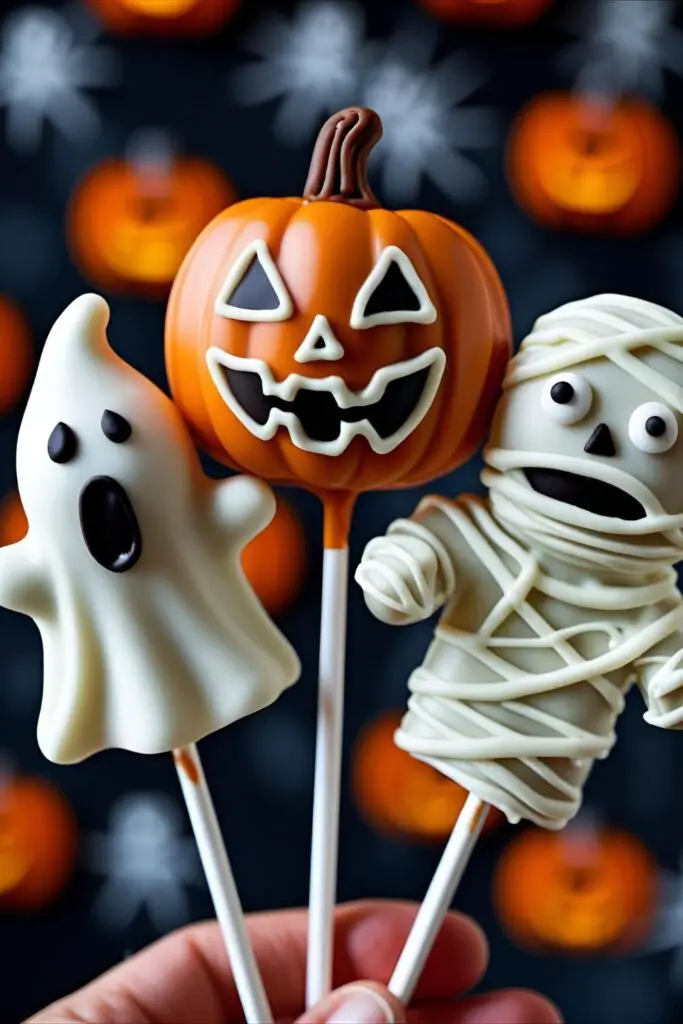
- For Ghosts: Dip in white candy melts. Before it sets, add two candy eyeballs. Let them dry completely. Use melted black candy melts in a piping bag to draw on a spooky “O” mouth.
- For Pumpkins: Dip in orange candy melts. Before it sets, you can use a toothpick to draw faint vertical lines. Use a tiny piece of a pretzel stick or a green sprinkle for the stem. Let dry, then draw on a jack-o’-lantern face with black candy melts.
- For Mummies: Dip in white candy melts and let them dry completely. Then, drizzle more white candy melt back and forth over the pop to create “bandages.” Add two candy eyeballs peeking out.
- Let Them Dry: Place the finished Halloween cake pops in your styrofoam block to dry completely.
Calories & Nutritional Info
It’s Halloween. Calories don’t count. But since you asked…
- Calories: Approximately 180-250 kcal per pop (depending on size and decorations).
- Sugar: A ghoulishly delightful amount.
- Fat: Yes.
- Spooky Vibes: 100%.

Disclaimer: These are for bringing joy and celebrating the season of sugar. Eat with abandon.
Common Mistakes to Avoid (A Halloween Horror Story)
- The Dreaded “Plop”: Your cake pop falls off the stick and into the candy melt abyss. This happens if you skip the crucial first dip where you glue the stick in place. Don’t skip it!
- Cracked Candy Shell: This happens when your cake balls are too cold when you dip them in the warm candy melts. The rapid temperature change causes cracks. Chill them in the fridge, not the freezer for an hour.
- A Thick, Gloopy Coating: Your candy melts are too thick. Thin them out with a teaspoon of coconut oil or paramount crystals. It should flow smoothly off a spoon. Also, don’t overheat the candy, or it will seize.
- Leaky Pops: If you see little oil spots on your finished pops, it means your cake dough was too oily (too much frosting). Be conservative with the frosting; you can always add more, but you can’t take it away.
Variations & Customizations
Once you master the basics, the spooky-verse is your oyster.
- Vampire Bites: Use a red velvet cake base with cream cheese frosting. Dip in white candy melts. Once dry, use a toothpick dipped in red food coloring to create two tiny “bite marks.”
- Frankenstein’s Monsters: Use a green-colored cake (vanilla cake with green food coloring). Dip in green candy melts. Top with black sprinkles for hair and add candy eyeballs. Use a black edible marker to draw a stitched mouth.
- Witch’s Cauldrons: Shape the cake pops into little pots. Dip in black candy melts. Before it sets, top with green nonpareils or nerds for a “bubbling” potion effect and stick half of a pretzel stick in the side for a stirrer.
FAQ: Your Spooky Cake Pop Questions Answered
Let’s clear the cobwebs from some common questions.
H3: Why do my cake pops keep falling off the stick?
You likely skipped the step of dipping the stick in melted candy before inserting it into the cake ball. That candy “glue” is the most important part of the process.
H3: Why is my candy coating cracking?
Your cake balls are too cold. The temperature difference between the chilled cake ball and the warm candy coating causes the shell to crack as it cools. A 30-minute chill in the fridge is plenty.
H3: Can I use chocolate chips instead of candy melts?
You can, but it’s trickier. Chocolate chips contain stabilizers that make them harder to melt smoothly for dipping. If you do use them, you’ll need to add a good amount of coconut oil or shortening to get a fluid consistency. Candy melts are designed for this.
H3: How do I thin my candy melts properly?

Start with 1 teaspoon of melted coconut oil or paramount crystals per 1 cup of candy melts. Stir it in completely. If it’s still too thick, add another ½ teaspoon until it drips smoothly from a spoon.
H3: How far in advance can I make Halloween cake pops?
You can make them up to 3-4 days in advance. The cake stays moist inside the candy shell.
H3: How do I store them?
Store them standing up in their styrofoam block, lightly covered with plastic wrap, at room temperature. Do not refrigerate the finished pops, as condensation can make the candy shell sticky.
H3: My cake pop dough is too oily or too dry. What do I do?
If it’s too oily, you’ve added too much frosting. Try mixing in more plain cake crumbs to balance it out. If it’s too dry and won’t hold together, you need more frosting. Add it one tablespoon at a time.
Final Thoughts: You Are the Ghostess with the Mostess
You did it! You have conquered the cake pop. You are now the proud creator of an adorable army of spooky, sweet treats. Go ahead and put them on display, and prepare for the onslaught of compliments.
Now you know the secret: Halloween cake pops aren’t dark magic, they’re just cake, frosting, and a little bit of spooky fun. So go on, be the hero of Halloween. You’ve earned it.