The Best of All Halloween Baking Ideas: Easy Mummy Brownies!
It’s October. The air is getting crisp, the spooky decorations are multiplying on your neighbor’s lawn, and your social media feed has become a haunted forest of impossibly perfect ghost meringues and intricate, professional-level spiderweb cakes. The pressure is on.
If your annual search for halloween baking ideas has left you more terrified than a midnight stroll through a cemetery, I am here to be your friendly ghostbuster. I bring you the ultimate spooky season secret weapon: the adorable, delicious, and so-easy-it-feels-like-cheating Mummy Brownie. This is the treat that says, “Yes, I am festive and creative,” but whispers, “…and I still had time to watch three horror movies.”
So, put down the complicated fondant tools. Let’s make something spooktacular that won’t give you a decorating-induced meltdown.
Why This Recipe is Awesome
In a world of overly ambitious Halloween projects, these Mummy Brownies are a breath of fresh, non-terrifying air.
- It’s Adorably Spooky, Not Gory: These are the perfect level of Halloween-y. They’re cute, they’re fun, and they won’t give the little kids (or, let’s be honest, you) nightmares. It’s more “Casper the Friendly Ghost” than “Texas Chainsaw Massacre,” and that’s a vibe we can all get behind.
- It Requires Absolutely Zero Artistic Skill: Can you drizzle melted chocolate in a vaguely chaotic, crisscross pattern? Can you stick two candy eyes on something before the chocolate sets? Congratulations, you have passed the rigorous artistic exam required to make these brownies.
- It’s Built for Shortcuts: We are all about working smarter, not harder, during the busiest, most sugar-fueled season of the year. This recipe is practically begging you to use a box brownie mix. I won’t tell if you don’t. In fact, I encourage it.
Ingredients
The ingredient list is so simple, it’s scary. (See what I did there?)
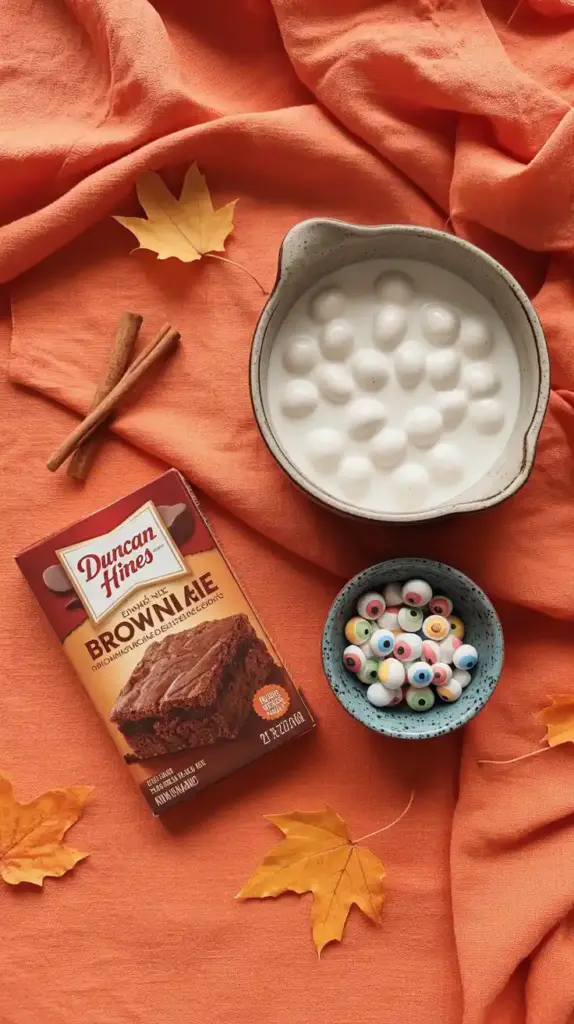
- 1 box (about 18 ounces) of your favorite fudge brownie mix, plus the ingredients called for on the box (usually oil, water, and eggs).
- 1 bag (10-12 ounces) of white chocolate chips or bright white candy melts. Candy melts are great because they set up very firm and bright white.
- 1 package of candy eyeballs. These are non-negotiable for the cute/spooky factor. You can find them in the baking aisle of most grocery stores, especially around Halloween.
- Optional: 1 teaspoon of vegetable shortening or coconut oil.
Tools & kitchen gadgets used

You don’t need a cauldron or any other spooky equipment for this easy project.
- An 8×8 inch or 9×9 inch square baking pan
- Parchment Paper
- A Large Mixing Bowl
- A Silicone Spatula
- A small, microwave-safe bowl for melting
- A Piping Bag with a small round tip, OR, my personal favorite, a simple Ziploc-style sandwich bag.
Step-by-step instructions
Let’s awaken these delicious mummies. It’s shockingly simple.
Step 1: Bake the Brownie Base Preheat your oven and prepare your brownie mix according to the package directions. Here’s a pro tip: line your baking pan with parchment paper, leaving a little overhang on two sides to act as “handles.” This will let you lift the entire slab of brownies out of the pan later for easy, clean cutting. Bake as directed.
Step 2: The Agonizing Cool Down Once baked, let the brownies cool in the pan for about 15 minutes, then use your parchment handles to lift them out and place them on a wire rack to cool completely. And I mean completely. If you try to cut warm brownies, you will have a fudgy, crumbly nightmare, not the clean rectangles our mummies deserve. For extra clean cuts, you can even chill them in the fridge for 30 minutes.
Step 3: Cut Your Mummies Once the brownie slab is cool and firm, use a large, sharp knife to cut it into rectangles. An 8×8 inch pan will give you about 12 nice, mummy-sized brownies (3 rows of 4).
Step 4: Melt the “Bandages” Place your white chocolate chips or candy melts in a microwave-safe bowl. Microwave them in 20 to 30-second intervals at 50% power. Stir well after each interval. White chocolate can be a diva and burn easily, so be patient. If your melted chocolate seems too thick, stir in about a teaspoon of shortening or coconut oil to make it smoother and more drizzle-able.

Step 5: Prepare for Drizzling Let the melted white chocolate cool for a minute or two. Then, transfer it to your piping bag or a Ziploc-style sandwich bag. If you’re using a Ziploc bag, push the chocolate down into one corner and snip a tiny, tiny bit off the tip. You can always make the hole bigger, but you can’t make it smaller!
Step 6: Time to Mummify! Arrange your brownie rectangles on a sheet of parchment paper. Now for the fun part! Squeeze the bag and drizzle the white chocolate back and forth over each brownie in a random, crisscrossing, overlapping pattern to create the look of mummy bandages. Don’t overthink it! The more chaotic, the better.
Step 7: Give Them Sight While the white chocolate “bandages” are still wet, gently press two candy eyeballs onto each brownie, letting them peek out from between the white stripes.
Step 8: Let Them Rest in Peace Let the brownies sit at room temperature for about an hour, or pop them in the fridge for 10-15 minutes, until the white chocolate is completely firm and set. Your army of adorable mummies is now ready for the party!
Calories & Nutritional Info

It’s Halloween. The calories don’t count until November 1st.
- Serving Size: 1 mummy brownie
- Estimated Calories: Around 200-250 kcal, depending on your brownie mix.
- Contains: A spooky amount of sugar and a ghoulishly good time.
Common Mistakes to Avoid
Avoid these horrifying mistakes for a perfect batch of mummies every time.
- Attempting to Cut Warm Brownies: This will result in a messy, crumbly nightmare, not clean, neat rectangles for your mummies. Your brownies must be completely cool. Chilling them for 30 minutes in the fridge before cutting is a game-changing tip for super clean edges.
- Scorching Your White Chocolate: White chocolate is notoriously fussy. If you overheat it, it will seize up and turn into a chalky, lumpy, unusable clump. The secret is to melt it slowly, in short 20-30 second bursts at a lower power setting (like 50%) and stir well after every interval.
- A Runny, Drippy Drizzle: If your melted white chocolate is too hot when you drizzle it, your “bandages” will just melt into a single, flat white puddle on top of the brownie. Let the chocolate cool for a couple of minutes after melting so it has a slightly thicker, more ribbon-like consistency that will hold its shape.
- Forgetting to Add the Eyes Quickly: That candy coating can set faster than you think, especially if your house is cool. Place the candy eyeballs immediately after you drizzle the bandages on each brownie. If you wait too long, you’ll have to perform minor surgery with a dab of extra chocolate to glue them on later.
Variations & Customizations

Feel like getting a little weird with your mummies? I support that.
- Blondie Mummies: Not a chocolate fan? Use your favorite blondie recipe or box mix as the base for a delicious, vanilla-and-brown-sugar-flavored mummy.
- Peanut Butter Cup Surprise Mummies: Use a brownie recipe that calls for a 9×9 pan and paper liners. Place a liner in each cup, fill it halfway with brownie batter, press a mini peanut butter cup into the center, and then top with more batter before baking. Then decorate your round mummies!
- Minty Monster Mummies: Add ½ teaspoon of peppermint extract to your brownie batter for a mint-chocolate vibe. Use green candy melts for the bandages to create a spooky and delicious Frankenstein’s monster/mummy hybrid.
FAQ Section
All your spooky, brownie-related questions, answered.
1. What are the best Halloween baking ideas for a crowd? Mummy brownies are perfect! They are easy to make in a big batch, they are pre-portioned, and they are a huge hit with both kids and adults. Other great ideas include simple decorated sugar cookies or a “graveyard” dirt pudding.
2. Can I make these brownies from scratch instead of a box mix? Absolutely! Just use your favorite recipe for fudgy 8×8 or 9×9 inch brownies. The decorating process is exactly the same.
3. Can I use regular white chocolate chips instead of candy melts? Yes, you can. However, candy melts are designed to set up harder and have a brighter white color. If you use white chocolate chips, adding that optional teaspoon of shortening or coconut oil will help it melt more smoothly and have a better consistency for drizzling.
4. How do I store mummy brownies? Store them in a single layer in an airtight container at room temperature for up to 4 days. Stacking them might smudge your beautiful bandage work.
5. Can I make these ahead of a Halloween party? Yes, they are perfect for making ahead! You can bake, cut, and decorate them a day or two in advance. They’ll be ready to go when the party starts.
6. Where can I find those little candy eyeballs? During the fall season, you can find them in the baking or seasonal aisle of most major grocery stores, craft stores like Michaels, and online.
7. My white chocolate is too thick for drizzling. How can I thin it out? Stir in a very small amount (start with ½ teaspoon) of neutral-flavored oil, like vegetable oil, canola oil, or melted coconut oil or shortening. This will make it much smoother and easier to drizzle.
Final Thoughts
And there you have it—an army of adorable, edible mummies that are guaranteed to be the life (or undeath) of the party. You’ve officially proven that you don’t need to be a professional pastry chef with a bucket of fondant to absolutely win at Halloween baking. All you need is a box of brownie mix, a little creativity, and a healthy appreciation for googly eyes.
Now go on, get your spook on, and enjoy your delicious, low-stress, and ridiculously cute creations!