The Ultimate “Gabby’s Dollhouse Cake” That’s Actually Easy!
You hear it whispered in a moment of birthday-planning excitement, a request filled with hope, dreams, and a dangerous amount of glitter: “I want a Gabby’s Dollhouse cake!” Your heart melts. And then, a tiny bead of sweat forms on your brow. You have visions of constructing an entire multi-story, architecturally sound dollhouse from sugar, complete with a functional slide-a-vator.
Deep breaths. Put down the structural engineering textbook. I’m here to tell you that creating a magical, “a-meow-zing,” and instantly recognizable Gabby’s Dollhouse cake is not only possible, it’s actually fun and shockingly easy. We’re not building a house; we’re capturing a vibe.
This is your official, stress-free guide to creating a cake that will earn you a “hug attack” from the birthday kid and admiring glances from the other parents. Let’s get tiny!
Why This Recipe Is a Cat-tastic Success
In the vast world of kids’ character cakes, why is this specific Gabby’s Dollhouse cake the one you should make?
First and foremost, it’s instantly recognizable with minimal effort. The secret is the iconic cat ears! We’re focusing on a simple, beautifully decorated layer cake that is topped with those signature pointy ears. It’s a design that immediately screams “Gabby’s Dollhouse” without you needing to sculpt a single tiny cat character.
Second, it’s a sprinkle-rific party on the inside. To match the fun, colorful, and slightly chaotic energy of the show, we’re making a from-scratch Funfetti cake. It’s a classic, crowd-pleasing flavor that kids adore, and the colorful sprinkles perfectly match the show’s aesthetic. It’s the perfect flavor for this Gabby’s Dollhouse cake.

Finally, it’s totally customizable. We’re providing the perfect base, but you can easily adapt the colors and details to feature the birthday kid’s favorite Gabby Cat, from Cakey to MerCat to Pandy Paws. This isn’t just one Gabby’s Dollhouse cake; it’s a blueprint for any version they can dream of.
The Dollhouse Delivery (Ingredients)
To make this masterpiece, you’ll need some simple, happy ingredients. No shrinky-dink potions required.
For the “Sprinkle Party” Funfetti Cake:
- 2 1/2 cups all-purpose flour
- 2 teaspoons baking powder
- 1/2 teaspoon salt
- 1 cup unsalted butter, softened
- 1 3/4 cups granulated sugar
- 4 large eggs, room temperature
- 1 tablespoon vanilla extract
- 1 cup buttermilk, room temperature
- 3/4 cup rainbow jimmies (the long sprinkles)
For the “Cat-tastic” Buttercream:
- 1 1/2 cups (3 sticks) unsalted butter, softened
- 5-6 cups powdered sugar, sifted
- 1/4 cup heavy cream or milk
- 2 teaspoons vanilla extract
- Pinch of salt
- Gel Food Coloring: Pink, purple, and teal are the classic Dollhouse colors.
For the Iconic Cat Ears:
- 1/4 cup black fondant
- 1/2 teaspoon Tylose Powder (or CMC) – Optional, but highly recommended for sturdiness.
- OR: Black cardstock paper for a super-easy, non-edible option.
The Craft Room (Tools & Gadgets)
Every great craft project needs the right tools. Here’s what you’ll need for your Gabby’s Dollhouse cake.
- A Stand Mixer: A trusty KitchenAid Stand Mixer will whip up your cake batter and fluffy frosting in a jiffy.
- Round Cake Pans: Two 8-inch round cake pans create the perfect sturdy base for your dollhouse-inspired creation.
- Piping Bags and a Large Star Tip: For adding a pretty, simple border that looks finished and professional. A Wilton 1M tip is perfect.
- Gel Food Coloring: A set with the key Gabby’s Dollhouse pastels is a must for getting those vibrant, show-accurate colors.
- Small Rolling Pin and a Sharp Knife: If you’re making the edible fondant ears.
- Two Wooden Skewers or Lollipop Sticks: To attach your cat ears to the cake.
Step-by-Step: Time to Get Tiny!

Ready to create some cake magic? Let’s follow the recipe and get baking!
Part 1: The Cake Foundation
Step 1: Prep Your Space Preheat your oven to 350°F (175°C). Grease and flour your two 8-inch cake pans. In a medium bowl, whisk together the flour, baking powder, and salt.
Step 2: Make the Batter In your stand mixer, beat the softened butter and sugar for 5 minutes until pale and fluffy. Add the eggs one at a time, followed by the vanilla. On low speed, alternate adding the dry ingredients and the buttermilk, ending with the dry. Mix until just combined. Gently fold in the rainbow jimmies with a spatula.
Step 3: Bake and Cool Divide the batter between the pans and bake for 30-35 minutes, or until a toothpick comes out clean. Let the cakes cool completely on a wire rack. A cool cake is a happy cake.
Part 2: The A-Meow-Zing Decorations
Step 4: The Cat Ears This is the most important part of any Gabby’s Dollhouse cake.
- Fondant Method: Knead the Tylose powder into your black fondant. Roll it out to about 1/4-inch thickness. Cut out two identical triangle shapes with a slightly curved bottom, about 3-4 inches tall. Carefully insert a wooden skewer into the bottom of each ear. Let them lie flat to dry and harden for at least a few hours, or preferably overnight.
- Cardstock Method: Cut the same ear shapes out of sturdy black cardstock and simply tape them to the skewers. Easy peasy!
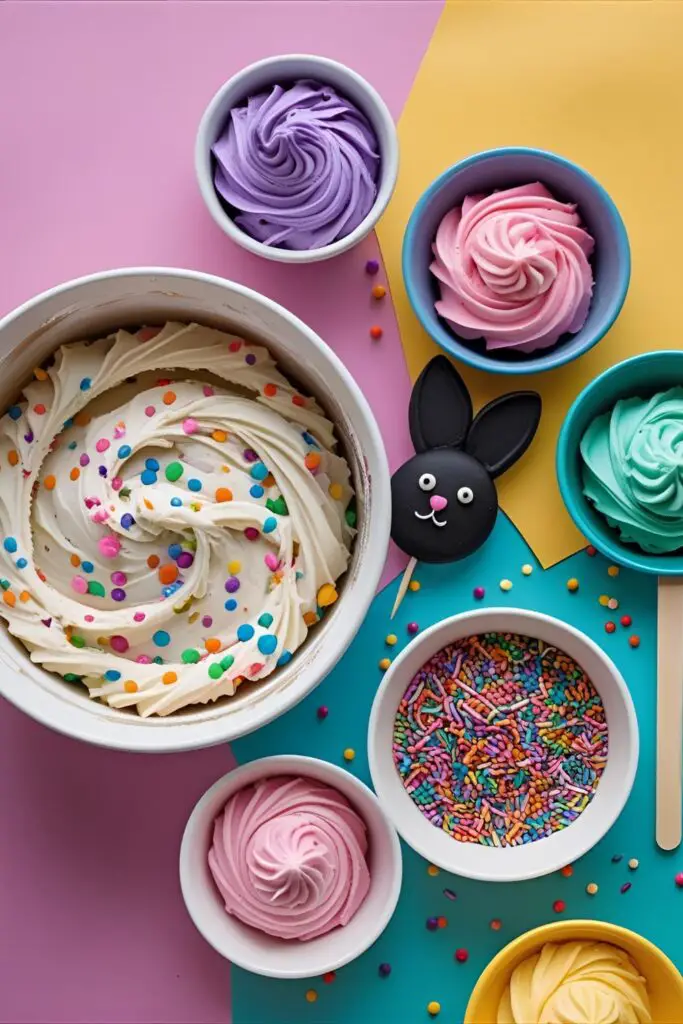
Step 5: The Frosting Make your buttercream. Divide it into 3-4 bowls. Leave some white, and use your gel food coloring to tint the others in the classic pastel pink, purple, and teal.
Part 3: The Grand Assembly

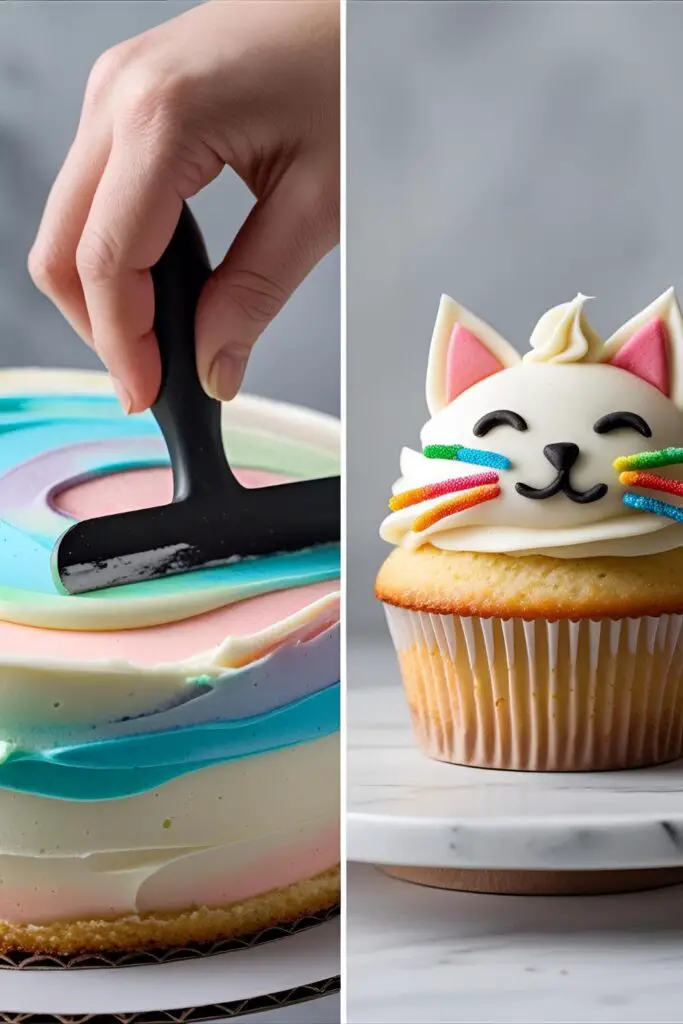
Step 6: Frost Your Cake Level and stack your cooled cakes with a layer of frosting in between. Apply a thin crumb coat and chill for 20 minutes. For a fun, dollhouse look, frost the cake with a “watercolor” effect. Apply random splotches of your colored frostings all over the white-frosted cake, then use a bench scraper to smooth it out into a beautiful pastel blend.
Step 7: The Finishing Touches Pipe a simple shell or star border around the top and bottom edges of the cake using any of your colors. Go wild with some fun, colorful sprinkles around the base.
Step 8: Add the Ears! Gently press the skewers of your hardened cat ears into the top of the cake, positioning them just like the ears on the dollhouse. Stand back and admire your cat-tastic Gabby’s Dollhouse cake!
Nutritional Info (Approved by Cakey Cat)
A special report from the Dollhouse kitchen.
- Serving Size: One sprinkle-riffic slice.
- Cuteness Level: 100% of your Daily Value.
- Calories: Enough to power you through a whole episode of crafting and adventure. (Realistically, about 650 per slice. It’s a party!)
- Primary Benefit: Guaranteed to result in a “hug attack.”
Common Mistakes to Avoid (Cake-tastrophes!)
Let’s sidestep these common pitfalls on our way to creating the perfect Gabby’s Dollhouse cake.
- The Droopy, Sad Ears: You made your fondant ears and immediately stuck them in the cake. They will flop over. You must let fondant ears dry and harden for several hours to give them structure. The cardstock option avoids this problem entirely.
- The Pastel Problem: Your colors are either way too bright or a muddy, sad gray. Use gel food coloring for vibrant colors, and add it a tiny drop at a time. To avoid muddying, apply colors in separate splotches for the watercolor effect, don’t mix them beforehand.
- The Sprinkle-pocalypse: You tried to put sprinkles on the side and they went everywhere. Place your cake on a baking sheet to catch the fallout. Gently press handfuls of sprinkles against the bottom border while the frosting is still sticky.
- The Last-Minute Panic: You tried to do everything on the morning of the party. Bake the cake layers and make the ears the day before. Day-of should just be for the fun part: assembly and decorating.
Variations & Customizations
Want to customize your Gabby’s Dollhouse cake? Here are a few fun ideas!
- The “Cakey Cat” Special: Focus on the show’s baker cat! Frost the cake in white. Use piping bags with different colored frosting to pipe on Cakey Cat’s simple, cute face with his rainbow sprinkle details.
- The MerCat Spa Cake: Give your cake a “spa science” theme. Frost it with a marbled teal and white buttercream. Top it with iridescent sprinkles, edible pearls, and rock candy “crystals” for a bubbly, magical look.
- The “Paw-some” Cupcakes: A great alternative for a crowd. Make a batch of Funfetti cupcakes. Frost them in the various Dollhouse pastel colors and top them with Gabby’s Dollhouse character rings or printable toppers. It’s an easy way to give every guest their own mini Gabby’s Dollhouse cake.
Frequently Asked Questions (Gabby’s Mail Time!)
You’ve got a question? Let’s check the mail!
1. What is the easiest way to make a Gabby’s Dollhouse cake? The method in this tutorial—a layered cake with simple frosting and the signature cat ear toppers—is by far the easiest way to create an instantly recognizable Gabby’s Dollhouse cake.
2. How do you make the cat ears for the dollhouse cake? The simplest way is to cut them from sturdy black cardstock and tape them to skewers. For an edible version, roll out black fondant, cut the shapes, insert skewers, and let them dry overnight to harden.
3. What are the main colors for a Gabby’s Dollhouse theme? The core palette is pastel pink, purple, teal, and white, with pops of rainbow colors from the sprinkles.
4. Can I make this cake without fondant? Absolutely! Use the cardstock method for the ears. It’s super simple and stress-free.
5. Where can I find Gabby’s Dollhouse cake toppers? If you want to add more characters, you can find official Gabby’s Dollhouse mini figurines online or in toy stores. These make great toppers that the birthday kid can keep and play with afterward.
6. What’s a good flavor for a kid’s birthday cake? Funfetti is the undisputed champion for kids’ parties. It’s delicious, and the colorful surprise inside is always a huge hit.
7. Can I make this cake ahead of time? Yes! You can bake the cake layers up to two days in advance and store them well-wrapped. You can make the fondant ears days in advance. The cake is best frosted and fully assembled the day of or the day before the party.
Final Thoughts
You did it! You took on the challenge and created a Gabby’s Dollhouse cake that is pure, sprinkle-riffic joy. You’ve proven that you don’t need a magic “cat-of-the-day” to create something truly special and memorable for a little one you love.
So go on, present your masterpiece, and get ready for the squeals of delight. You’ve officially earned your place in the Dollhouse. Now, who’s ready for a sprinkle party?