Rescuing the Fruit Cake: A Guide to Decoration That Doesn’t Suck
Ah, the fruit cake. The legendary holiday doorstop. The indestructible brick that gets passed around from family to family, year after year, until it achieves antique status. We’ve all seen them, cowering in the back of the pantry, adorned with terrifyingly bright green and red glacé cherries. But what if I told you it doesn’t have to be this way? What if we could stage an intervention? Welcome, my friends, to the ultimate guide to fruit cake decoration.
This is not your great-aunt Mildred’s fruit cake guide. We are officially banning the creepy plastic holly and weird neon fruit. Today, we’re giving this dense, boozy classic the glow-up it so desperately deserves, transforming it from a running joke into a stunning, elegant centerpiece. This is fruit cake decoration for the 21st century.
Why This Glow-Up is a Holiday Miracle
So why bother giving this old-timer a makeover? Why not just let it fade into obscurity?
First, the transformation is incredibly satisfying. Taking something that is traditionally seen as, let’s be honest, kinda ugly, and turning it into something genuinely beautiful is a culinary power trip of the highest order. You will feel like a wizard. A very stylish, festive wizard.
Second, it’s tradition, but with good taste. At its core, a well-made fruit cake is a delicious, complex, boozy treat. By decorating it with modern, natural elements, you get to honor the tradition without having to look at something that offends your modern sensibilities. It’s the best of both worlds.
Finally, these designs are way easier than they look. We’re not talking about intricate sugar work that requires the steady hand of a surgeon. We’re talking about arranging beautiful, natural elements on a clean, white canvas. It’s more about having a good eye than having a specific skill. You can do this!
Your Renovation Supply List

To begin this extreme makeover, you’ll need to gather your materials.
- The Foundation:
- One baked and matured traditional fruit cake. This is the dense, dark, brandy-soaked kind.
- A thin layer of apricot jam, warmed and sieved, to act as glue.
- The Undercoat (Non-Negotiable!):
- A block of marzipan or almond paste. This is the secret to a smooth, professional finish.
- The Canvas (Choose One):
- Royal Icing: The traditional, hard-setting choice. You’ll need powdered sugar, egg whites (or meringue powder), and lemon juice.
- White Fondant: The modern, clean, and easy-to-apply choice.
- The Art Supplies (The Fun Part!):
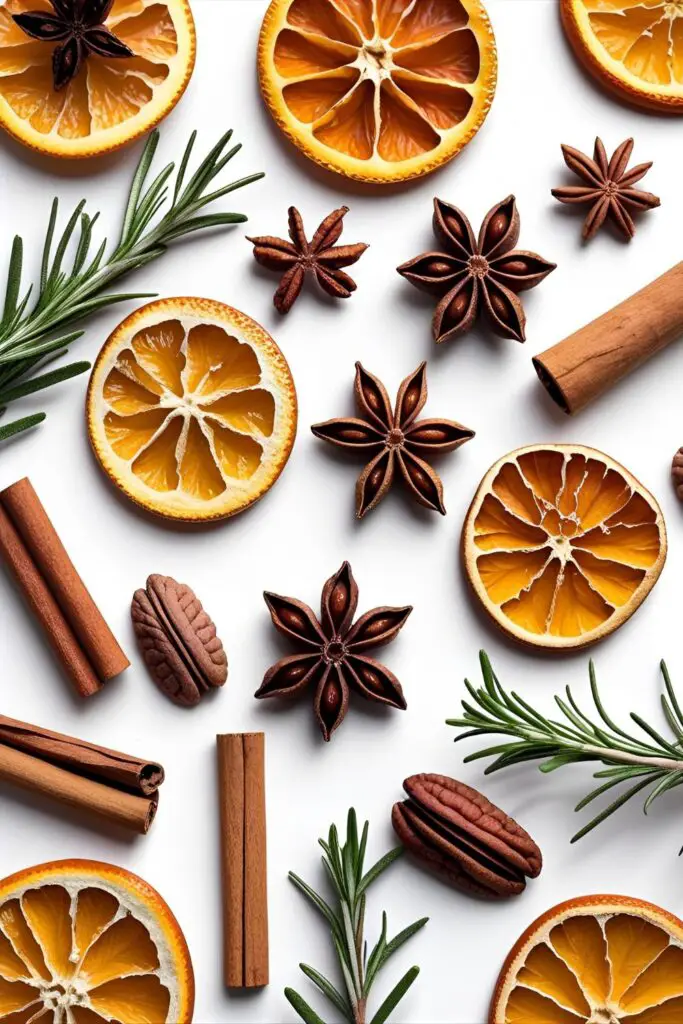
- Dried citrus slices (oranges, blood oranges, grapefruit)
- Whole spices like cinnamon sticks and star anise
- Fresh rosemary sprigs and fresh cranberries
- Edible gold leaf or gold luster dust
- Unsalted, shelled nuts like pecans, walnuts, and almonds
The Artist’s Toolbox
Here’s the gear you’ll need for this festive facelift.
- Pastry Brush
- Rolling Pin (preferably a non-stick one for the marzipan/fondant)
- Cake Smoother
- Offset Spatula
- Sharp Knife
- Small, food-safe paintbrush (for applying gold)
- Piping Bag (optional, for royal icing details)
Step-by-Step Instructions: The Fruit Cake Glow-Up
It’s time. Let’s turn that ugly duckling into a beautiful swan.
H3: Step 1: The All-Important Marzipan Layer
- Prep the Cake: If your fruit cake has any lumps or bumps on top, carefully level it with a serrated knife.
- The Apricot Glue: Gently warm your apricot jam and brush a thin, even layer over the entire surface of the cake. This will help the marzipan stick.
- Roll It Out: Lightly dust your work surface with powdered sugar. Knead your marzipan until it’s pliable, then roll it out into a large circle, big enough to cover the top and sides of your cake.
- Cover and Smooth: Carefully drape the marzipan over the cake. Use your hands and then a cake smoother to get a perfect, smooth finish, trimming any excess from the bottom.
- Let It Dry: This is a crucial step. Let the marzipan-covered cake sit in a cool, dry place for at least 24-48 hours to dry out. If you apply icing to wet marzipan, you’ll have a sticky, oily mess.
H3: Step 2: Applying Your Canvas (Icing or Fondant)
- For Fondant: Lightly brush the dried marzipan with a little water or clear alcohol. Roll out your fondant just like you did the marzipan, then cover and smooth it in the same way.
- For Royal Icing: Whip up your royal icing until it’s at a stiff peak. Use an offset spatula to apply a thick, even coat all over the cake. For a super smooth finish, dip your spatula in hot water, wipe it dry, and then smooth the icing.
H3: Step 3: Choose Your Fruit Cake Decoration Aesthetic
Now that you have a beautiful blank canvas, it’s time to decorate!
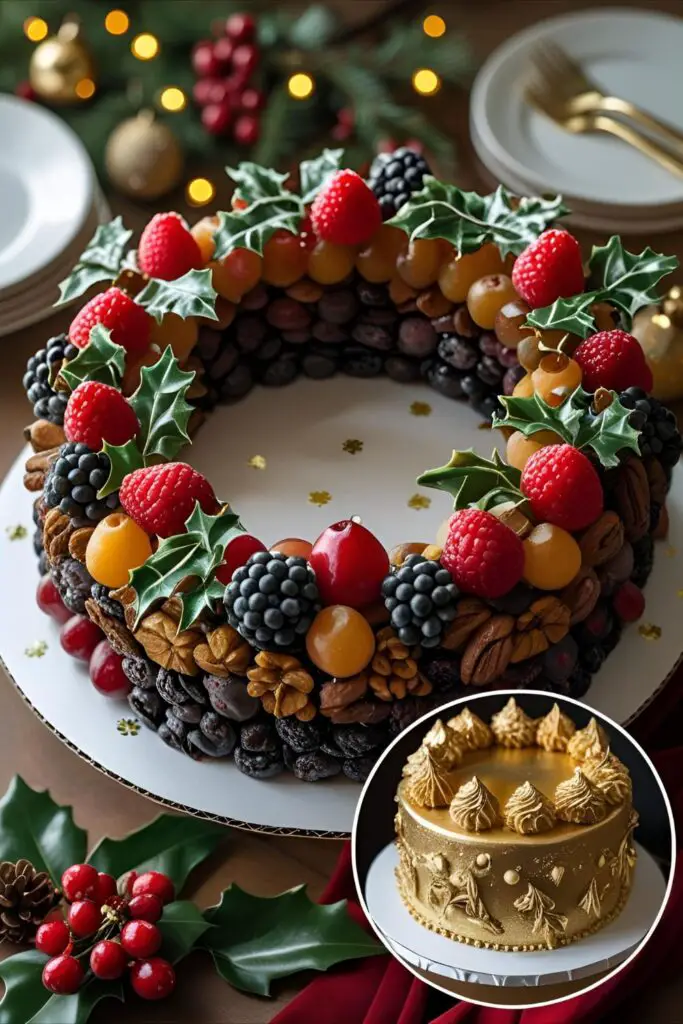
- Design 1: The Rustic Wreath
- This is my favorite. Arrange dried orange slices, cinnamon sticks, star anise, and whole nuts in a crescent or wreath shape on top of the cake. Tuck in a few sprigs of fresh rosemary to look like pine needles. It’s natural, fragrant, and stunning.
- Design 2: The Gilded & Glamorous
- Keep it simple. Place a few perfect glazed pecans or walnuts in an elegant cluster off to one side. Then, using tweezers and a small, dry brush, apply flakes of edible gold leaf to the nuts and scattered across the top of the cake. It’s minimalist, modern, and very chic.
- Design 3: The Minimalist Snowflake
- This works best on a smooth royal icing finish. Use a toothpick to lightly etch a large, geometric snowflake pattern on top of the cake. Then, using a piping bag with a small round tip, pipe over your etched lines with more royal icing. You can add a few silver dragées for a little sparkle.
Calories & Nutritional Info
You’re eating a brandy-soaked cake covered in almond paste and sugar icing. Let’s not pretend this is a health food.
- Calories: A small slice is dense and mighty, likely in the 400-600 calorie range.
- Main Ingredients: Sugar, butter, booze, dried fruit, and holiday spirit.
- Servings Per Cake: Theoretically, 16. Realistically, it will outlive us all.
Common Mistakes to Avoid (Or, How Not to Make It Look Old-Fashioned)
- Skipping the Marzipan: I know it seems like an extra step, but you need the marzipan. It creates a smooth barrier that prevents the oils from the dark fruit cake from seeping through and staining your pristine white icing.
- The Neon Cherries: Step away from the glacé cherries. Unless you’re going for a specific, ironic retro vibe, these are the fastest way to make your cake look dated. Stick to natural decorations.
- A Lumpy Finish: Whether using royal icing or fondant, the goal is a smooth canvas. Sift your sugar for the icing, knead your fondant well, and use a cake smoother to get rid of any lumps and bumps.
- Overcrowding: The key to a modern look is restraint. Don’t feel the need to cover every square inch of the cake with decorations. A simple, well-placed wreath or cluster is far more elegant. Less is more.
Variations & Customizations
Want to put your own spin on it? Go for it!
- The Spiced Orange Theme: Focus your decorations on beautiful, paper-thin dried orange and blood orange slices. Add cinnamon sticks and a few whole cloves. You can even add a little orange zest to your royal icing for extra fragrance.
- The Winter Woodland: This is a charming, rustic look. Use sprigs of fresh rosemary to simulate pine branches. Create “pinecones” by artfully arranging sliced almonds or pecan halves. Use fresh cranberries as “holly berries.”
- The “Naked” Fruit Cake: Don’t like icing? Skip the fondant and royal icing altogether! After applying the marzipan, create a beautiful arrangement of glazed fruits and nuts directly on top. A simple apricot glaze will give it a beautiful shine.
FAQ: Your Fruit Cake Queries, Answered

Let’s clear up some of the mysteries surrounding this classic cake.
H3: Do I really, truly have to use marzipan?
For the best, most professional, and long-lasting finish, yes. It provides a smooth surface and a barrier. If you absolutely hate almonds, you can apply a second “sacrificial” layer of fondant, but marzipan is the traditional and best method.
H3: What is the difference between marzipan and almond paste?
They are very similar. Marzipan is smoother and sweeter, with a higher sugar content, making it ideal for rolling and covering cakes. Almond paste is coarser and has a more pronounced almond flavor. For this project, you want marzipan.
H3: How do I get my royal icing perfectly smooth?
The trick is to use a metal offset spatula or bench scraper dipped in hot water. The heat from the metal slightly melts the surface of the icing as you smooth it, creating a glass-like finish.
H3: How long will a decorated fruit cake last?
Ages. Seriously. The cake itself is preserved by the alcohol and sugar. Once covered in marzipan and royal icing or fondant, it’s sealed in an airtight sugar tomb. It will easily last for several months in a cool, dark place.
H3: Can I decorate a fruit cake without any icing at all?
You can! This is often called a “naked” fruit cake. After baking, you can arrange a beautiful pattern of blanched almonds, pecans, and glazed cherries on top, then brush it with a shiny apricot glaze.
H3: Why did my royal icing crack?

This can happen if the icing is too thick and applied too heavily, or if it dries out too quickly. A little bit of glycerine added to your royal icing recipe can help keep it from getting too brittle.
H3: How should I store my finished masterpiece?
Store it in a cake tin or a cardboard box (not an airtight plastic container, which can cause sweating) in a cool, dark place. Do not refrigerate it.
Final Thoughts: The Fruit Cake’s Revenge
There you have it. You’ve taken the most maligned cake in history and turned it into a work of art. You are a re-brander, a visionary, a fruit cake revolutionary.
So this holiday season, don’t hide your fruit cake in the back of the cupboard. Give it the glow-up it deserves, place it proudly in the center of your table, and watch as the skeptics suddenly ask for a slice. Welcome to the fruit cake renaissance.