The “I Have No Plan for Dinner” Guide to Cooking Frozen Chicken in an Air Fryer
It’s 5:30 PM. The day has officially defeated you. You’re hungry, the family is hungry, and your brilliant dinner plan hinges on the chicken breasts that are currently residing in your freezer as solid, icy, unapologetic bricks. We’ve all done the dinner-time walk of shame: from the freezer to the microwave, where we attempt to “defrost,” only to create a sad, grey, half-cooked rubber puck. But what if I told you to skip the microwave? What if you could go straight from freezer to fabulous? This, my friend, is your complete guide on how to cook frozen chicken breast in an air fryer.
I know, it sounds like it breaks every rule in the culinary handbook. Cooking chicken from frozen? It feels wrong, doesn’t it? But your air fryer doesn’t care about the old rules. It’s here to save you from your own lack of planning, delivering a shockingly juicy, tender, and perfectly cooked chicken breast in about 25 minutes.
Why This Method is a Weeknight Miracle
So, why is this kitchen hack about to become your new best friend? Let me lay out the glorious reasons.
- It’s a Genuine Time-Saver: The number one benefit is NO THAWING REQUIRED. You can literally take a chicken breast straight from the freezer and have it ready to eat in less than half an hour. It’s the ultimate dinner emergency lifeline.
- Shockingly Juicy Results: I was a skeptic too, but the air fryer is magic. It circulates hot air so efficiently that it cooks the chicken from the outside in, locking in the juices. The result is a tender, moist chicken breast, not the dry, stringy tragedy we all fear.
- It’s a Healthy Blank Canvas: This is the perfect way to get a quick, lean protein on your plate. Once it’s cooked, you can slice it for salads, shred it for tacos, or serve it whole with a side of veggies. The possibilities are endless.
The Ingredient List: Simplicity is Key
You don’t need anything fancy to pull off this feat of culinary wizardry.
- Frozen Boneless, Skinless Chicken Breasts: 2 to 4, depending on the size of your air fryer. Try to use breasts that are similar in size for even cooking.
- Olive Oil or Avocado Oil: 1 tablespoon.
- The Go-To Seasoning Blend:
- 1 teaspoon Smoked Paprika
- 1 teaspoon Garlic Powder
- ½ teaspoon Onion Powder
- ½ teaspoon Salt
- ¼ teaspoon Black Pepper
Tools & Kitchen Gadgets: Your Dinner-Saving Kit
The right tools are essential, and one of them is absolutely, positively not a suggestion.
- An Air Fryer: The hero of our story.
- An Instant-Read Meat Thermometer: THIS IS THE MOST IMPORTANT TOOL FOR THIS RECIPE. I’m not kidding. Cooking chicken safely and perfectly is about temperature, not time. This is non-negotiable.
- Tongs: For flipping the chicken.
- A Small Bowl: For mixing your seasonings.
Step-by-Step Instructions: From Ice Block to Awesome
This is a simple, two-phase cooking process that ensures your chicken is seasoned well and cooked perfectly.
Step 1: The Initial Thaw & Cook
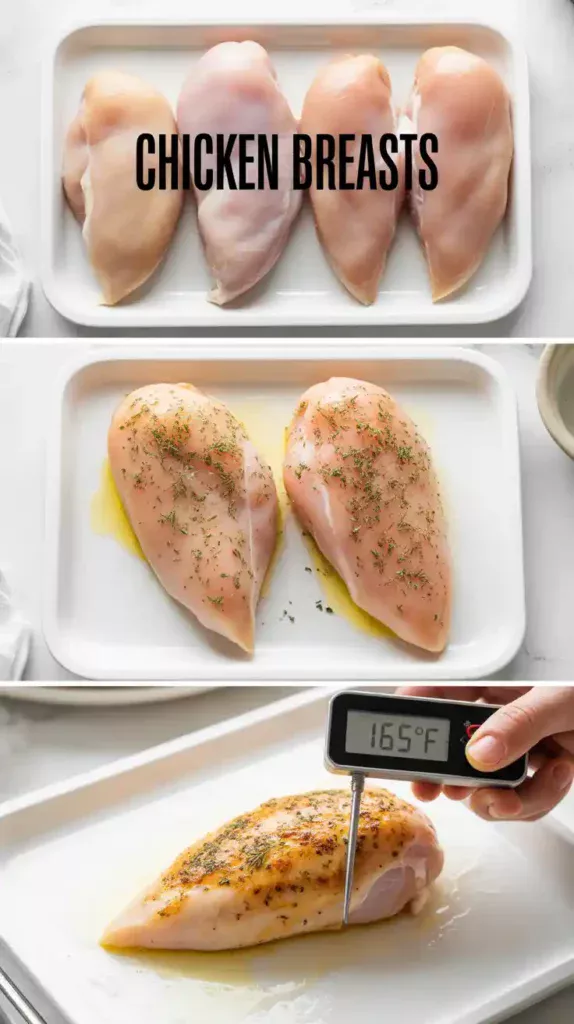
Take your frozen chicken breasts and place them directly into the air fryer basket. Make sure there’s some space between them for the air to circulate. Don’t season them yet!
Set your air fryer to 360°F (180°C) and cook for 10-15 minutes. This first step is all about thawing the chicken and starting the cooking process.
Step 2: The Seasoning Intermission
After the initial cook, carefully pull out the basket. The outside of the chicken breasts should be thawed and opaque. Now is the time to add flavor.
Brush the chicken breasts all over with olive oil. In your small bowl, mix together the smoked paprika, garlic powder, onion powder, salt, and pepper. Sprinkle the seasoning blend generously over all sides of the oil-coated chicken.
Step 3: The Final Cook
Place the seasoned chicken back into the air fryer basket. Continue to cook at 360°F (180°C) for another 10-15 minutes. The exact time will depend on the thickness of your chicken breasts.
Step 4: The Temperature Check of Truth
This is the most critical step. Your chicken is done when it’s golden brown on the outside and, more importantly, cooked through on the inside. Grab your instant-read meat thermometer. The chicken is safe and ready when the internal temperature in the thickest part reaches 165°F (74°C).
Step 5: The Mandatory Rest
Once your chicken hits that magic temperature, remove it from the air fryer and place it on a cutting board. Let it rest for 5-10 minutes before slicing. This allows the juices to redistribute throughout the meat, keeping it moist and tender. If you slice it immediately, all those lovely juices will run out onto your board.
Calories & Nutritional Info (Lean, Mean, Protein Machine)

This is a fantastic, healthy staple to have in your back pocket. Here’s a rough idea for a 6-ounce chicken breast.
- Calories: Approximately 250-280 kcal.
- Protein: A massive 40-45g!
- Fat: ~5-7g
- Carbohydrates: Less than 2g.
- Perfect For: A healthy, low-carb, high-protein meal.
Common Mistakes to Avoid (Chicken Catastrophes)
- NOT USING A MEAT THERMOMETER: I’m going to be dramatic about this because it’s a food safety issue. Guessing when chicken is done is a dangerous game. An undercooked chicken breast is a health hazard, and an overcooked one is a dry tragedy. You MUST use an instant-read meat thermometer. It is the only way to know for sure that it’s safe to eat and perfectly cooked.
- Seasoning a Block of Ice: If you try to season the chicken when it’s still frozen solid, the spices will just slide off. That initial 10-15 minute cook is crucial to thaw the surface so the oil and seasonings can stick.
- Overcrowding the Basket: The chicken breasts need space. If they are crammed together, they will steam instead of roast, and they won’t cook evenly. Cook in a single layer, and do batches if you have a very large family or a very small air fryer.
- Skipping the Rest: You’ve come this far. You’ve cooked a perfect, juicy chicken breast. Don’t ruin it in the final seconds! Letting it rest is the key to keeping all that moisture inside the chicken instead of on your cutting board.
Variations & Customizations
This simple seasoned chicken is a perfect base for a million different meals.
1. The Quick BBQ Chicken
During the last 3-4 minutes of cooking, brush the chicken breasts generously with your favorite BBQ sauce. It will get wonderfully thick and caramelized. Perfect for a quick BBQ chicken sandwich.
2. The Italian Herb Chicken
Instead of the paprika-garlic blend, season the chicken with a good Italian seasoning blend, salt, and pepper. Once it’s cooked and rested, slice it and serve it over pasta with marinara sauce or on a caesar salad.
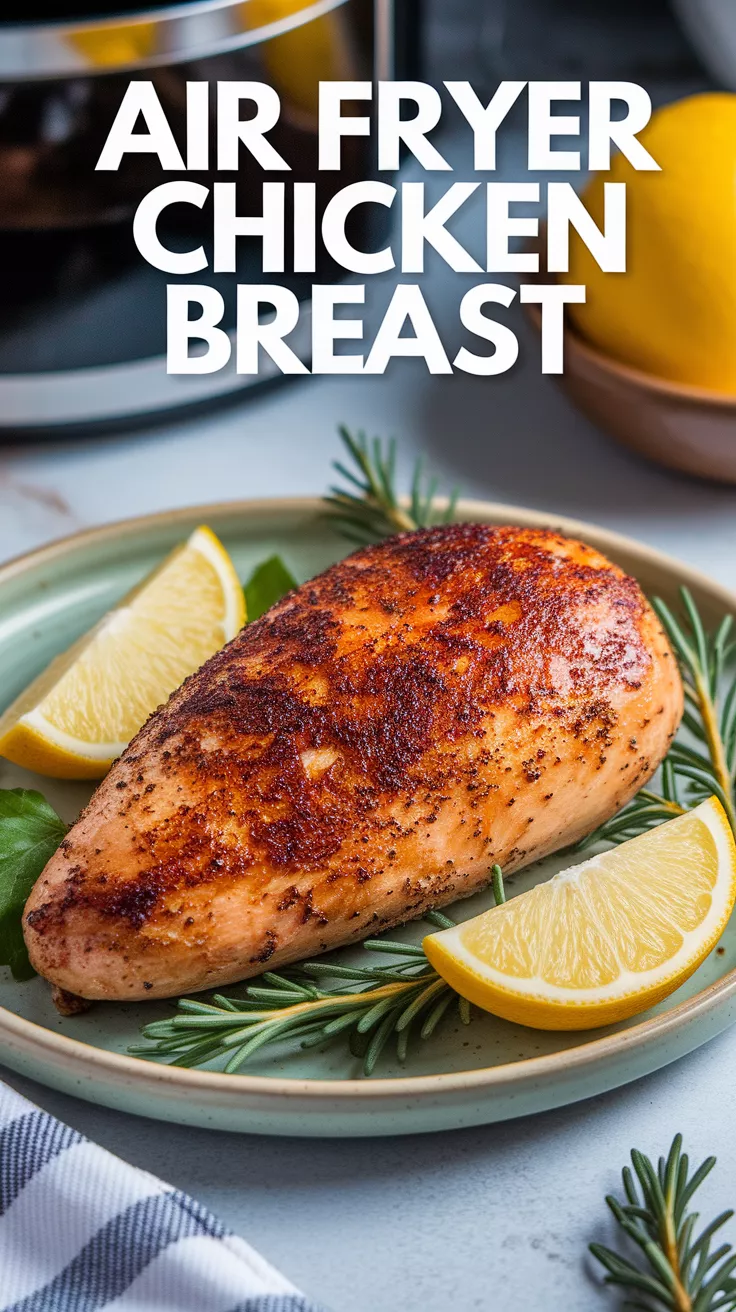
3. The Zesty Lemon Herb Chicken
A bright and fresh classic. Season the chicken with garlic powder, dried oregano, salt, and pepper. Once it’s cooked and rested, squeeze the juice of half a lemon over the top and sprinkle with fresh chopped parsley.
FAQ: Your Frozen Chicken Questions, Answered
Is it actually safe to cook chicken from frozen?
Yes, it is perfectly safe, with one very important rule: it must reach a safe internal temperature of 165°F (74°C). The air fryer is great for this because it cooks it through quickly and reliably. The only way to verify this is with a meat thermometer.
How long does it really take to cook a frozen chicken breast in the air fryer?
For an average-sized (6-8 ounce) breast, the total time is usually between 20 and 30 minutes. It depends heavily on the thickness of the chicken.
Why is my chicken always dry?
You are overcooking it. Period. Chicken breast is very lean, so the window between perfectly cooked and dry is very small. I’m going to sound like a broken record, but the only way to prevent this is to use a meat thermometer and pull it out the second it hits 165°F.
What if my frozen chicken breasts are all stuck together?
No problem! Just place the whole frozen lump in the air fryer for the initial 5-7 minutes of the thawing phase. When you pull the basket out, they should be thawed enough that you can easily pry them apart with a pair of tongs.
Can I use bone-in, skin-on chicken breasts?
You can, but the timing will be much longer. A frozen, bone-in chicken breast will likely take closer to 35-45 minutes. The skin will get beautifully crispy, though!
Does the texture of the chicken get weird?
Surprisingly, no! I was worried about this too, but it comes out incredibly tender and juicy. Because it cooks so quickly, it doesn’t have time to develop the tough, rubbery texture you get from improper thawing or slow, dry cooking methods.
How do I store and reheat leftovers?
Store the cooked chicken in an airtight container in the fridge for up to 3-4 days. You can reheat it gently in the microwave or, for best results, pop it back in the air fryer at 350°F (175°C) for 3-5 minutes until warmed through.
Final Thoughts
There you have it. You are now officially armed with one of the most powerful weeknight dinner hacks known to modern humanity. You can look a frozen block of chicken in the eye and know that in less than 30 minutes, it will be a delicious, juicy, and perfectly cooked meal.
Your freezer is no longer a graveyard for your well-intentioned but forgotten dinner plans. It is now a treasure chest of quick and easy meals, and your air fryer is the key. Go forth and conquer your weeknights.