The Perfect First Birthday Cake for a Girl (with a Healthy Smash Cake!)
You’ve done it. You’ve survived 365 days of diaper explosions, 3 a.m. feedings, and learning the unique dialect of a tiny human who communicates exclusively through squeals. Congratulations! Your reward for this Herculean effort? The pressure of throwing a picture-perfect first birthday party, complete with the ultimate first birthday cake girl centerpiece that is both beautiful for your guests and somehow healthy enough for the guest of honor to plunge her entire face into.
No pressure, right? It feels like you’re expected to go from sleep-deprived zombie to master baker overnight.
Deep breath. Put down the phone with that bakery that charges a small fortune for a cake your baby can’t even eat. I’ve got you. We’re going to make a stunning, delicious cake for the party and a separate, healthy, adorable smash cake for the birthday girl, all from ONE easy batter. This isn’t just a recipe; it’s a survival guide.
Why This “Two-in-One” Cake Recipe is a Lifesaver
So why are we going with this specific method instead of just buying something or hoping for the best? Because this approach respects your time, your baby’s tummy, and your desire for frame-worthy photos.
- Two Cakes, One Batter. This is the ultimate hack. You make one simple, delicious banana-based batter. Part of it becomes a tiny, no-sugar-added smash cake for the baby. You add a little sweetness to the rest for a tender, flavorful layer cake for the adults. It’s genius, and it cuts your work in half.
- A Genuinely Healthy Smash Cake. The smash cake is the star of the show, photos-wise. This one is sweetened only with ripe bananas and frosted with a simple, tangy yogurt frosting. It’s soft, easy for little hands to grab, and you can feel good about letting her go to town on it.
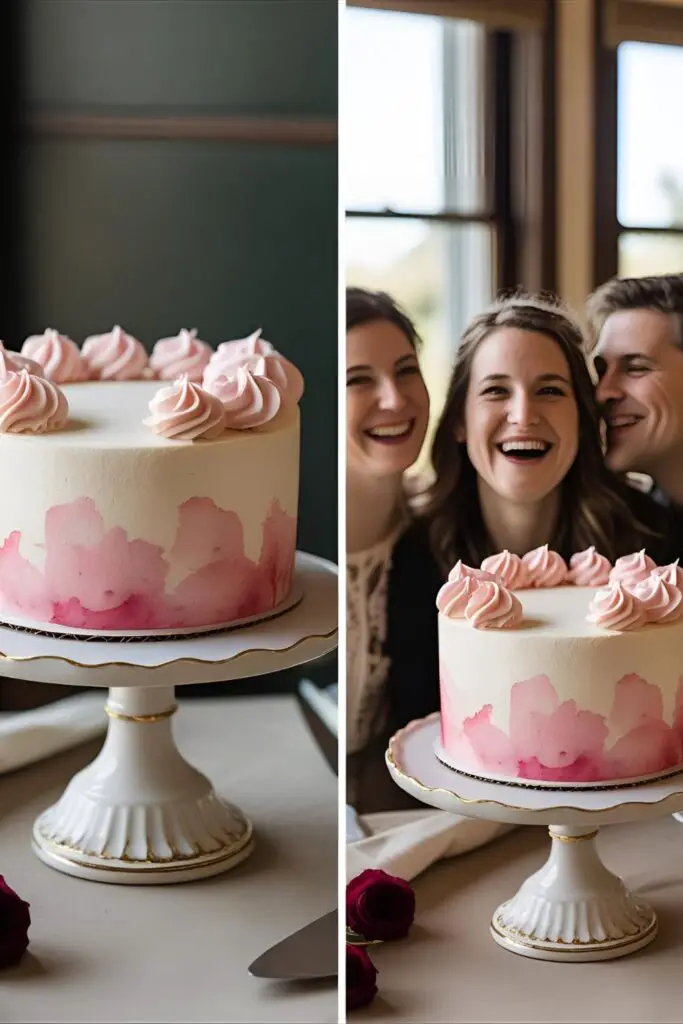
- A Showstopper Guest Cake. The adults get a beautiful, two-layer cake with a stunning (but secretly simple) watercolor rosette design. It looks like it came from a fancy bakery, but I promise, you can do it. It’s the perfect way to say “I’m a super-mom who totally has it all together,” even if you’re wearing a shirt with baby food on it.
The Shopping List for Your Masterpiece(s)
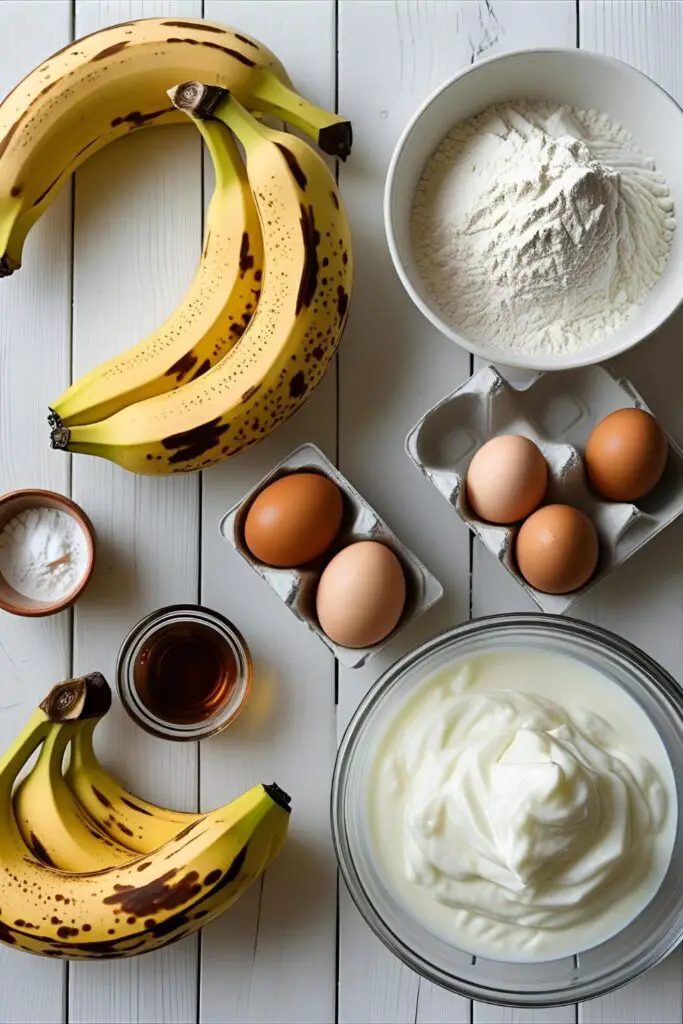
We’re keeping the ingredients list clean and simple. Remember, we’re making two cakes from one batter!

For the Versatile Banana Cake Batter:
- All-Purpose Flour: 3 cups
- Baking Powder: 1 tablespoon
- Baking Soda: 1 teaspoon
- Salt: ½ teaspoon
- Cinnamon: 1 teaspoon (optional, but lovely)
- Very Ripe Bananas: 4 large, mashed until smooth. The browner, the better—that’s where the sweetness comes from!
- Unsalted Butter: 1 cup (2 sticks), melted
- Eggs: 4 large, at room temperature
- Vanilla Extract: 1 tablespoon
- Buttermilk: 1 cup, at room temperature
For the GUEST Cake (The Add-Ins):
- Light Brown Sugar: 1 cup, packed. You’ll add this to the guest cake portion of the batter.
- Swiss Meringue Buttercream: A less-sweet, super stable frosting. You’ll need 4 egg whites, 1 ¼ cups granulated sugar, 1 ½ cups (3 sticks) unsalted butter, and 2 tsp vanilla. (Don’t worry, I’ll walk you through it!)
- Pink or Red Gel Food Coloring: For that beautiful watercolor effect.
For the SMASH Cake Frosting:
- Plain Greek Yogurt: 1 cup, full-fat is best.
- Maple Syrup or Honey: 1 teaspoon (optional, and only for babies over 1 year old if using honey).
The Tools for Your Baking Triumph
Having the right gear makes you feel like a pro and ensures a better result. No need to buy out the store, but these items are key.
- Stand Mixer or Hand Mixer: You’ll really want this for the Swiss Meringue Buttercream.
- Cake Pans: The ideal setup is two 6-inch round pans for the guest cake and one 4-inch round pan for the smash cake.
- Piping Bags: At least three for the watercolor frosting effect.
- Large Star Piping Tip: A Wilton 1M is the perfect, all-purpose tip for making beautiful rosettes.
- Offset Spatula & Bench Scraper: For getting those smooth sides on your guest cake.
- Cake Turntable: I know, it seems extra, but it makes frosting a layer cake SO much easier.
- Kitchen Scale: For dividing the batter accurately, if you want to be precise.
Step-by-Step to Dual-Cake Glory
Let’s break this down. Read through everything first, and I promise it will all make sense.
Stage 1: The “One Batter to Rule Them All”
- Preheat your oven to 350°F(175°C). Grease and flour your cake pans (two 6-inch, one 4-inch).
- In a large bowl, whisk together the flour, baking powder, baking soda, salt, and cinnamon.
- In another bowl, whisk the mashed bananas, melted butter, eggs, vanilla, and buttermilk until well combined.
- Pour the wet ingredients into the dry ingredients and mix with a spatula until just combined. A few lumps are okay. Do not overmix!
- DIVIDE AND CONQUER: Pour about 1 ½ cups of this batter into your prepared 4-inch smash cake pan.
- To the remaining batter in the bowl, add the 1 cup of brown sugar and gently fold it in until just combined. Divide this sweetened batter evenly between your two 6-inch guest cake pans.
- Bake all three cakes. The 4-inch smash cake will take about 20-25 minutes. The 6-inch guest cake layers will take about 30-35 minutes. A toothpick inserted into the center should come out clean.
- Let the cakes cool in their pans for 10 minutes before turning them out onto a wire rack to cool completely.
Stage 2: The Ethereal Guest Cake Frosting (Swiss Meringue)
- Set a saucepan with an inch of simmering water on the stove. In the heatproof bowl of your stand mixer, whisk together the egg whites and granulated sugar.
- Place the bowl over the simmering water (don’t let the bottom touch the water). Whisk constantly until the sugar is completely dissolved and the mixture is hot to the touch (about 160°F/71°C on a thermometer).
- Transfer the bowl to your stand mixer fitted with the whisk attachment. Beat on high speed for 10-15 minutes, until the mixture has formed a stiff, glossy meringue and the outside of the bowl is completely cool to the touch.
- Switch to the paddle attachment. With the mixer on low, add the softened butter, one tablespoon at a time. It might look curdled or soupy—DON’T PANIC! Just keep mixing, and it will magically come together into a silky-smooth frosting.
- Mix in the vanilla.
Stage 3: Assembling Your Masterpieces
- The Guest Cake: Place one 6-inch cake layer on your turntable. Cover with a layer of buttercream. Top with the second layer. Apply a thin “crumb coat” of frosting all over the cake and chill for 30 minutes.
- The Watercolor Effect: Divide the remaining buttercream into three bowls. Leave one white, tint one a pale pink, and one a darker pink.
- Apply random splotches of the white and two pink frostings all over the sides of the chilled cake. Then, use your bench scraper to smooth the frosting as you spin the turntable. The colors will blend into a beautiful, soft watercolor look.
- The Rosettes: Put your remaining pink and white frostings into piping bags fitted with the 1M tip. Pipe rosettes all over the top of the cake, alternating colors.
- The Smash Cake: This is the easy part. Place the cooled 4-inch cake on a small plate or high chair tray. Top it with the Greek yogurt. Done. It’s ready for smashing.
The Nutritional Reality Check
A quick look at what we’re serving.

Per Slice of Guest Cake (if cut into 8):
- Calories: Approximately 450-550
- Sugar: Definitely present and accounted for.
- Fat: It’s buttercream, what did you expect? 🙂
For the Entire Smash Cake:
- Calories: Approximately 300-350 (for the whole thing!)
- Sugar: Only naturally occurring sugars from the banana and a tiny bit from the yogurt/optional maple.
- Protein: A decent amount from the Greek yogurt frosting!
- FYI: This is a smash cake you can feel good about.
First Birthday Blunders to Avoid
- Giving the Baby the “Guest” Cake. Don’t do it. A one-year-old’s digestive system isn’t ready for that much sugar. The resulting sugar rush and potential tummy ache aren’t worth it. Stick to the plan!
- Freaking Out About Curdled Buttercream. Every person who makes Swiss Meringue for the first time panics when it looks curdled. It’s a normal stage. Just keep the mixer running, and I promise it will transform into silky perfection.
- Frosting a Warm Cake. I know you’re in a hurry, but you must wait. Frosting on a warm cake will melt into a greasy, heartbreaking puddle.
- Forgetting to Have Fun. This is a celebration of your baby and your survival of the first year! If a rosette is lopsided or your watercolor is a little blotchy, who cares? The baby certainly doesn’t.
Fun Twists on the Classic Theme
Once you have the method down, you can adapt it to any theme!
H3: “Wild One” Boho Chic Cake
Keep the guest cake “naked” by applying only a very thin layer of frosting on the sides. Top with a few sprigs of fresh, food-safe rosemary or eucalyptus and a cute woodland animal topper. The smash cake can be topped with a single, perfect blackberry.
H3: “Twinkle Twinkle Little Star” Theme
Tint the buttercream pale yellow and a light gray for the watercolor effect. Use a small star-shaped cookie cutter to gently press star imprints into the top, or use edible gold star sprinkles.
H3: Berry Beautiful Cake
Fold some mashed raspberries or strawberries into the buttercream for a naturally pink, fruity frosting. Top the cake with a crown of fresh berries instead of piped rosettes. It’s simple, rustic, and gorgeous.
Your Burning First Birthday Questions, Answered

Let’s tackle the things keeping you up at night (other than the baby, of course).
H3: Can I really make this all ahead of time?
Yes! Bake the cake layers up to two days in advance. Once cool, wrap them tightly in plastic and store at room temp. You can make the buttercream three days ahead and store it in the fridge; just let it come to room temp and re-whip it before using. Assemble the day of the party.
H3: I’m scared of Swiss Meringue Buttercream. Can I use something else?
You can, but I encourage you to try it! If you must substitute, a simple American buttercream (butter + powdered sugar) will work, but it will be much, much sweeter.
H3: What if I don’t have 4-inch and 6-inch cake pans?
You can bake the batter in an 8-inch pan and use cookie cutters or a small bowl as a guide to cut out your layers. It’s a little more work, but totally doable!
H3: Is this recipe allergen-friendly?
As written, it contains gluten, dairy, and eggs. You could try substituting with a 1-to-1 gluten-free flour blend and using dairy-free butter and milk alternatives, but results may vary. For the smash cake frosting, whipped full-fat coconut cream is a great dairy-free alternative to yogurt.
H3: How do I transport the guest cake?
Chill the finished cake in the fridge for at least 30 minutes to firm up the frosting. A cake box is ideal. Place it on the flat floor of your car, not a slanted seat.
H3: Do I really need a separate smash cake?
Need? No. But it makes for incredible photos, lets the baby have her own special treat, and saves your beautiful guest cake from being destroyed by tiny, grabby hands. IMO, it’s worth it.
H3: My watercolor just looks like a muddy mess. What did I do wrong?
You may have over-smoothed it. The trick is to apply the splotches of color and then go around with your bench scraper just a couple of times. The less you blend, the more distinct the watercolor patches will be.
Final Thoughts: You’ve Got This
You made a human and kept them alive for a whole year. You are a certified rockstar. Making a cake—even two cakes—is nothing compared to that.
This recipe is your secret weapon to looking like the calm, cool, collected super-parent you are (even if you’re running on caffeine and chaos on the inside). So bake the cake, take the pictures, and watch your little girl experience her first taste of birthday magic. You’ve earned this celebration more than anyone.