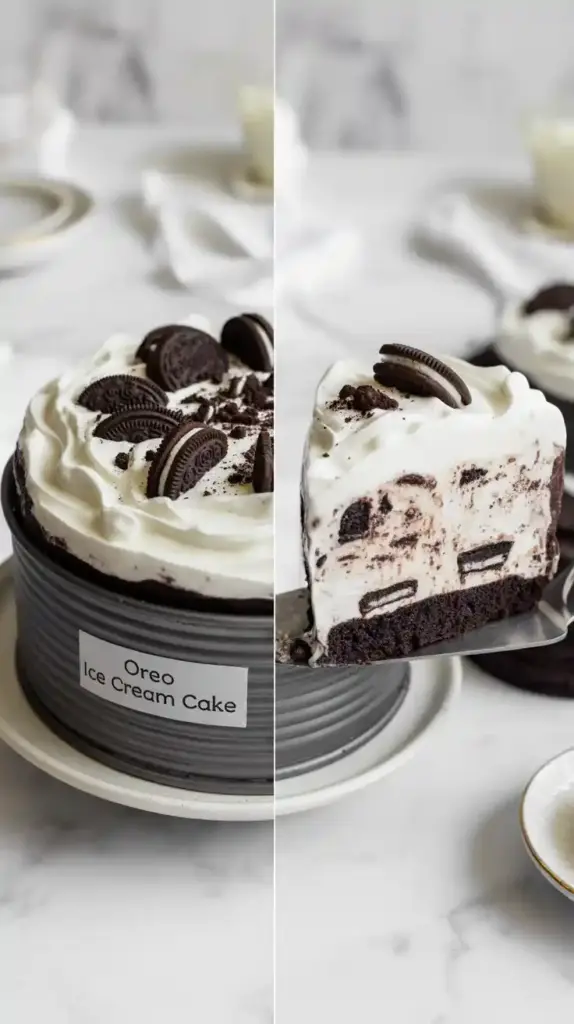
Oh. My. Oreo: The Lazy Person’s Guide to an Epic Ice Cream Cake
Let’s be real. Sometimes, the urge for something decadent hits hard, but the energy levels? They’re hitting the snooze button. Enter the oreo ice cream cake. This isn’t some delicate, multi-layered patisserie nightmare. Nope. This is the dessert equivalent of throwing a pizza party – minimal effort, maximum satisfaction, and everyone will think you’re a genius. Did someone say “instant crowd-pleaser”? Because that’s exactly what this is.
Why This Oreo Ice Cream Cake Is Basically Magic
So, why should you ditch the complicated baking plans and embrace the beautiful simplicity of this oreo ice cream cake? Firstly, flavor. We’re talking Oreos, people! And ice cream! It’s a match made in dessert heaven. That perfect blend of crunchy chocolate cookies and cold, creamy goodness? Unbeatable.
Secondly, the ease is almost insulting. If you can crush cookies and spread ice cream, congratulations, you’re practically a professional ice cream cake architect. This recipe requires zero baking and minimal brainpower. Perfect for those days when even making toast feels like a Herculean task, right? Plus, it looks way more impressive than the effort it actually takes. Talk about a win-win!
Ingredients (The Short and Sweet List)
You probably have half of this stuff in your pantry or freezer already. Isn’t that a lovely thought?
The Cookie Crust & Layers:
- About 36 Oreo cookies (the regular kind works best, but hey, go wild if you’re feeling adventurous).
- ¼ cup melted unsalted butter.
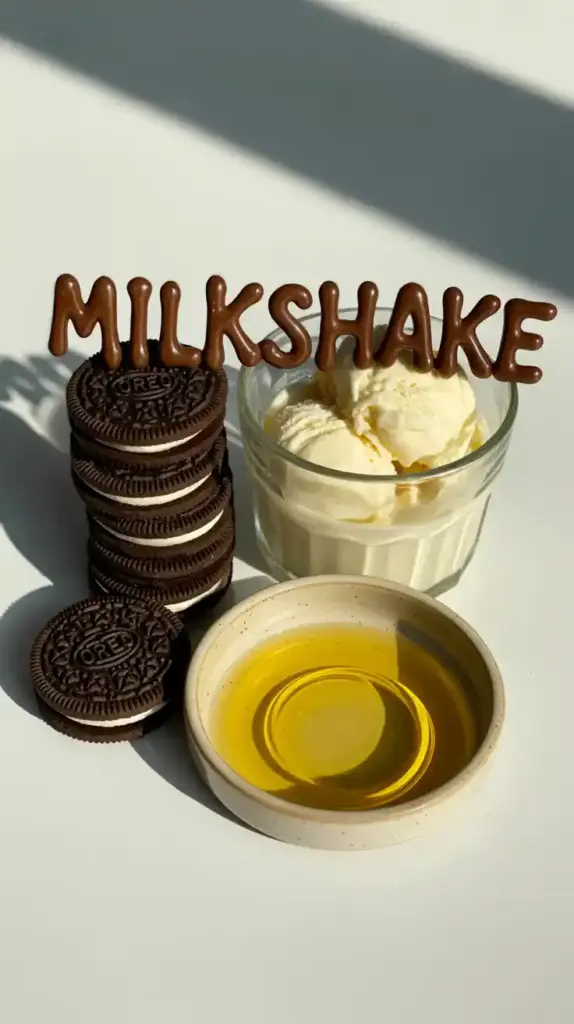
The Star of the Show (Ice Cream!):
- 1 (48-ounce) container of your favorite ice cream, softened (vanilla, chocolate, cookies ‘n cream… the world is your oyster!).
Optional (But Highly Recommended) Goodies:
- Hot fudge sauce for drizzling.
- Whipped cream for topping.
- Extra crushed Oreos for garnish (because, why not?).
Key Substitutions:
- Oreos: Any chocolate sandwich cookie will work in a pinch, but let’s be honest, nothing beats the original. Gluten-free Oreos? Go for it!
- Butter: You can use melted coconut oil if you prefer.
- Ice Cream: Seriously, pick what makes your heart sing. Different flavors for different layers? You rebel!
Tools & Kitchen Gadgets Used:
You won’t need much to whip up this masterpiece.
- 9-inch Springform Pan: This makes removing the cake a breeze. Trust me on this one.
- Food Processor (optional): Makes quick work of crushing the Oreos. A zip-top bag and some elbow grease work too.
- Large Mixing Bowl: For the softened ice cream if you plan on adding mix-ins or layering flavors.
- Rubber Spatula: Essential for pressing the crust and spreading the ice cream.
- Measuring Cups and Spoons: For the butter (and optional mix-ins).
- Freezer: Obviously. This is an ice cream cake, after all.
Step-by-Step Instructions (So Easy, It’s Almost Illegal)
Alright, let’s get this frozen fiesta started!
Crushing the Cookie Dreams:
- Smash ‘Em: Place the Oreo cookies in a food processor and pulse until you have fine crumbs. Alternatively, put them in a large zip-top bag and whack them with a rolling pin (therapeutic, right?).
- Butter Up: Pour the melted butter over the Oreo crumbs and mix well until everything is evenly moistened. It should resemble wet sand.
- Press It: Press the crumb mixture firmly and evenly onto the bottom of your 9-inch springform pan. You can use the back of a spoon or a flat-bottomed glass for this. This will be your glorious cookie crust.
- Chill Out (Part One): Place the pan in the freezer for at least 15-20 minutes to allow the crust to firm up. This helps prevent it from crumbling later.
Layering the Frozen Goodness:
- Soften Up: Make sure your ice cream is softened enough to spread easily but not completely melted into a sad soup. Nobody wants a soupy cake.
- Spread the Love (First Layer): Take your crust out of the freezer and spread about half of the softened ice cream evenly over the cookie base.
- Get Creative (Optional Layer): If you’re feeling fancy, drizzle some hot fudge or sprinkle some extra crushed Oreos over the ice cream layer. Why not? Live a little!
- Spread More Love (Second Layer): Spread the remaining ice cream evenly over the top.
- Smooth It Out: Use your spatula to smooth the top of the ice cream layer as much as possible. It doesn’t have to be perfect, but a relatively flat surface will make for a prettier cake.
- Chill Out (Part Two): Cover the pan tightly with plastic wrap and return it to the freezer for at least 4-6 hours, but preferably overnight. This is where the magic solidifies (literally).
The Grand Finale (Serving Time!):
- Release the Beast: When you’re ready to serve, remove the ice cream cake from the freezer and let it sit at room temperature for about 5-10 minutes to slightly soften. This makes it easier to slice.
- Unmold It: Carefully release the sides of the springform pan.
- Dress It Up (Optional): Top with whipped cream and more crushed Oreos or a drizzle of hot fudge. Get as extra as you like!
- Slice and Enjoy: Slice your magnificent oreo ice cream cake and prepare for the happy dance.
Calories & Nutritional Info (The Part We Secretly Ignore)

Alright, let’s address the elephant in the room (or should I say, the cake in the freezer?). This isn’t exactly a health food. But hey, it’s a celebration in cake form! Estimates per slice (assuming 8 generous slices):
- Estimated Calories: 400-600 (depending on your ice cream and toppings)
- Fat: Probably a decent amount. We’re talking cookies and ice cream here.
- Carbohydrates: Yep, those Oreos and that ice cream have carbs.
- Sugar: Sweet, sweet sugar. It’s an ice cream cake, what did you expect? 😉
Nutritional notes? It’s a treat. Enjoy it in moderation (if you can resist!).
Common Mistakes to Avoid (Don’t Be That Person)
This cake is pretty forgiving, but here are a few pitfalls to watch out for:
- Not Pressing the Crust Firmly: A loose crust will crumble when you try to slice the cake. Put some muscle into it!
- Using Rock-Solid Ice Cream: Trying to spread ice cream straight from the freezer is a recipe for frustration (and possibly a bent spoon). Let it soften slightly!
- Letting the Ice Cream Melt Too Much: On the flip side, if your ice cream is soup, you’ll end up with a frozen puddle. Find that sweet spot of spreadable softness.
- Not Freezing Long Enough: Patience, young grasshopper! If you don’t freeze the cake long enough, it will be a melty mess when you try to slice it. Trust the process. Overnight is your friend.
- Forgetting the Springform Pan: While you could make this in a regular cake pan, getting it out cleanly will be a challenge. A springform pan is a game-changer for ice cream cakes. Just saying.
Variations & Customizations (Let Your Inner Child Run Wild)
Want to jazz up your oreo ice cream cake? Here are a few ideas to get those creative juices (or should I say, ice cream swirls?) flowing.
- Mint Chocolate Mania: Use mint chocolate chip ice cream and add a layer of crushed mint Oreos (the green ones!). A drizzle of chocolate syrup would be the perfect finishing touch.
- Peanut Butter Bliss: Use peanut butter ice cream and a layer of crushed peanut butter Oreos. A swirl of peanut butter sauce? Yes, please!
- Coffee Lover’s Dream: Coffee ice cream with a layer of regular Oreos soaked briefly in cold coffee. Top with whipped cream and a sprinkle of cocoa powder for an extra caffeine kick (sort of).
FAQ Section (Your Burning Oreo Questions Answered)
Got some lingering questions about this frozen delight? Let’s dive in.
1. Can I use Double Stuf Oreos? Absolutely! More filling just means extra creamy goodness in your crust. You might need slightly fewer cookies to get the same amount of crumbs.

2. Do I need to crush the Oreos super finely? Not necessarily. Some small chunks are totally fine and add a bit of texture. It’s really up to your personal preference.
3. How far in advance can I make this ice cream cake? You can make this cake up to a week in advance and store it in the freezer, tightly covered.
4. What’s the best way to slice an ice cream cake? Run a large, sharp knife under hot water for a few seconds, then wipe it dry before slicing. Repeat as needed for clean slices.
5. Can I make this without the butter in the crust? The butter helps bind the crust together. Without it, the crust might be too crumbly. If you’re avoiding butter, try a little melted coconut oil or even a tablespoon or two of softened cream cheese as a binder.
6. My ice cream is melting too fast while I’m working with it. What do I do? Pop it back in the freezer for 10-15 minutes to firm up a bit. It’s better to work with slightly firmer ice cream than a melty mess.
7. Can I make individual oreo ice cream cakes? Definitely! Use muffin tins lined with paper liners. Press the Oreo crust into the bottom of each liner, then add a scoop of softened ice cream and freeze.
Final Thoughts (Go Forth and Conquer That Ice Cream Cake!)

There you have it! The ridiculously easy, unbelievably delicious oreo ice cream cake recipe. It’s the perfect dessert for when you want maximum impact with minimal effort. So, ditch the complicated recipes, grab some Oreos and your favorite ice cream, and get ready to impress everyone (including yourself).
Now, if you’ll excuse me, I think my freezer is calling my name. Go make your own Oreo dreams come true! And hey, if you make a particularly epic version, tag me in your photos! Let’s spread the Oreo love. 😉