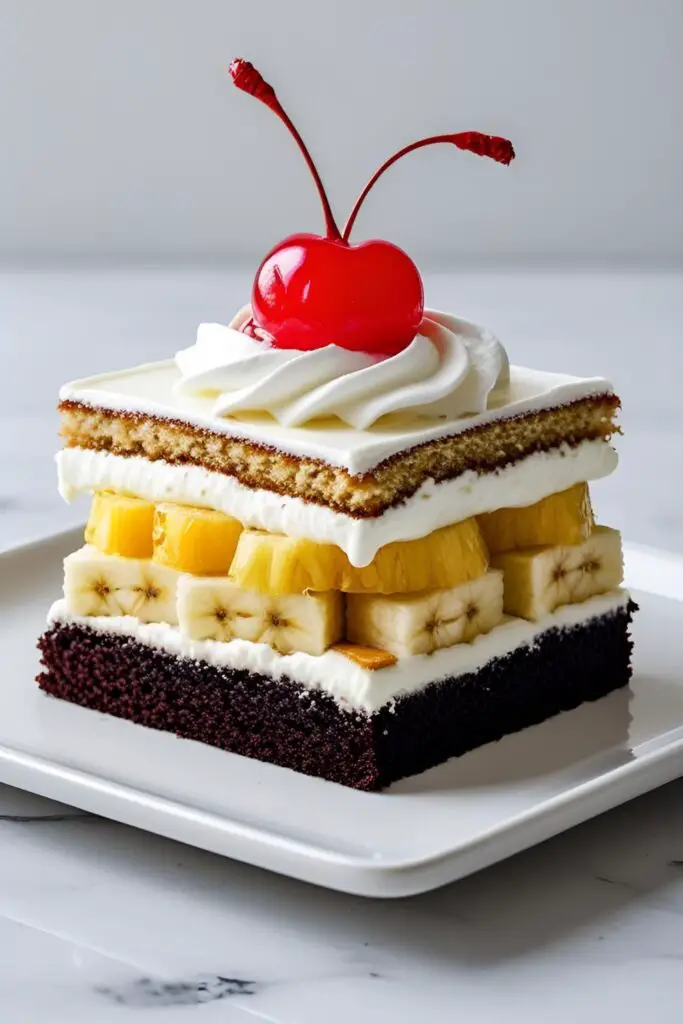
The Ultimate No-Bake Banana Split Cake (Your Oven Can Stay Off)
It’s 2:31 AM here in Khulna, and the air is so thick with humidity you could practically swim through it. On nights like this, the very thought of turning on the oven is enough to make you break into a sweat. But what if the craving for a decadent, over-the-top dessert strikes? My friend, allow me to introduce you to your new best friend and summer savior: the legendary no-bake banana split cake. This isn’t just a recipe; it’s a glorious, multi-layered masterpiece of nostalgia that delivers all the joy of a classic banana split, no baking required. You’re welcome.
Why This Recipe Is Pure, Unadulterated Genius
Let’s be clear: this cake is a work of art. It’s the dessert equivalent of a summer blockbuster—full of familiar, beloved characters all coming together for an epic performance. You’ve got a buttery graham cracker crust, a tangy cream cheese layer, sweet bananas, juicy pineapple, and the whole thing is crowned with whipped topping, chocolate, nuts, and cherries. What’s not to love?
The best part? It’s a completely no-bake dessert. You will not preheat your oven. You will not sweat over a hot stove. You will simply layer, chill, and accept the thunderous applause of your friends and family. It’s the perfect make-ahead dessert for potlucks, barbecues, or any occasion where you want to bring the “wow” factor with minimal actual effort.
The All-Star Cast of Ingredients
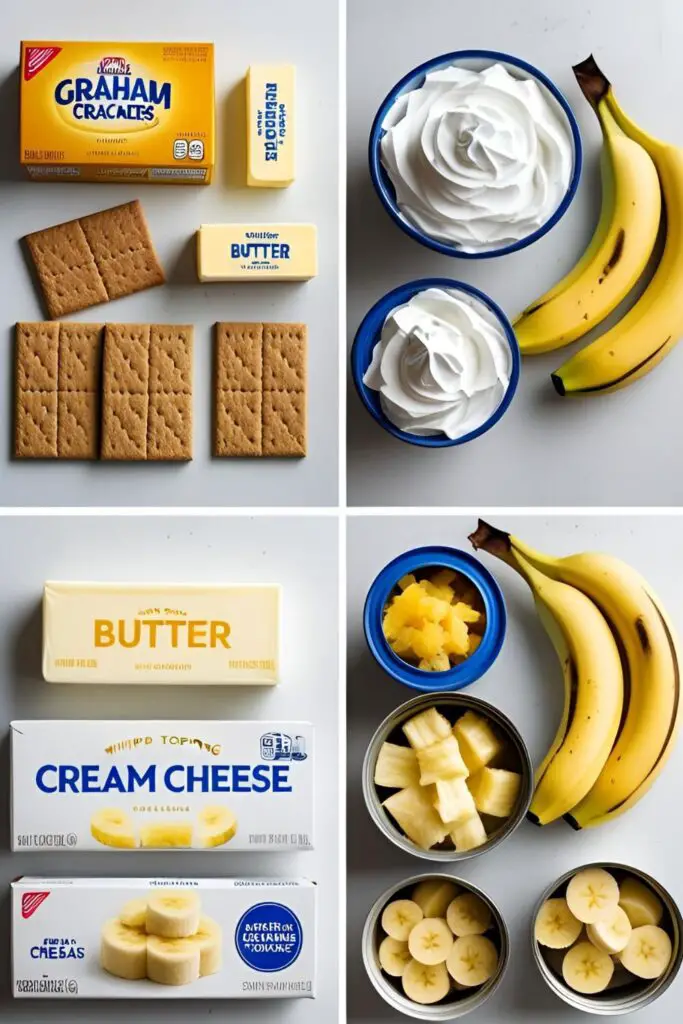
This cake is all about layers of flavor. Here’s what you’ll need to assemble your masterpiece.
For the Buttery Crust:
- Graham Cracker Crumbs (2 cups): You can buy them pre-crushed or have a little therapeutic fun crushing your own.
- Granulated Sugar (½ cup): Just a little to sweeten the crust.
- Salted Butter (½ cup / 1 stick, melted): The glorious glue that holds our foundation together.
For the Creamy Dreamy Layer:
- Cream Cheese (8 oz / 1 block): Must be softened to room temperature for a smooth, lump-free texture.
- Powdered Sugar (1 cup): To sweeten our creamy layer.
- Whipped Topping (like Cool Whip, one 8 oz tub, thawed): We’ll use some in the layer and some on top.
For the Fruity Middle & Toppings:
- Bananas (3-4 medium): Ripe but still firm.
- Crushed Pineapple (one 20 oz can): This needs to be EXTREMELY well-drained. I cannot stress this enough.
- Chocolate Syrup: For that classic drizzle.
- Chopped Nuts (½ cup): Pecans or walnuts are classic, but peanuts work too.
- Maraschino Cherries: For dotting the top.
- Sprinkles (optional, but are they really?): Rainbow sprinkles for maximum joy.
Your No-Bake Arsenal (Tools & Kitchen Gadgets)
No oven mitts needed here! This is all about assembly.
- A 9×13 inch Baking Dish: This is the perfect vessel for our layered creation.
- An Electric Mixer (Hand or Stand): Essential for whipping the cream cheese layer into smooth, fluffy submission.
- Mixing Bowls: One for the crust and one for the cream cheese layer.
- An Offset Spatula: The best tool for getting those layers perfectly smooth and even. A regular spatula works too, but an offset one makes you feel like a pro.
- Measuring Cups and Spoons: For some semblance of order amidst the delicious chaos.
- A Fine-Mesh Sieve or Cheesecloth: Not required, but highly recommended for getting every last drop of juice out of that pineapple.
Step-by-Step Instructions to Layered Bliss

This is more of an art project than a recipe. Let’s build our masterpiece.
Step 1: Lay the Foundation (The Crust)
In a medium bowl, mix together the graham cracker crumbs, sugar, and melted butter until the mixture looks like wet sand. Press this mixture firmly and evenly into the bottom of your 9×13 inch pan. Use the bottom of a glass or measuring cup to pack it down tight. Pop it in the refrigerator to chill while you prepare the next layer.
Step 2: Whip Up the Creamy Layer
In a large bowl, use your electric mixer to beat the softened cream cheese until it’s completely smooth and free of lumps. Add the powdered sugar and beat again until combined. Now, gently fold in 1 cup of the thawed whipped topping with a spatula. Don’t beat it in, or it will deflate! Spread this glorious mixture evenly over your chilled crust.
Step 3: Add the Fruit
Slice your bananas and arrange them in a single layer on top of the cream cheese mixture. Next, take your VERY well-drained crushed pineapple and sprinkle it evenly over the bananas. Seriously, squeeze that pineapple like it owes you money. Excess juice is the enemy.
Step 4: The Fluffy Cloud Topping
Gently spread the remaining whipped topping over the pineapple layer, sealing in all that fruity goodness. Use your offset spatula to create pretty swirls, or just get it on there. No judgment.
Step 5: Garnish Like a Champion
Now, go wild. Drizzle the top with chocolate syrup. Sprinkle generously with your chopped nuts and rainbow sprinkles. Finally, dot the top with maraschino cherries. Stand back and admire your work. It’s a thing of beauty.
Step 6: The Hardest Part – The Big Chill

This step is non-negotiable. Cover the dish with plastic wrap and place it in the refrigerator to chill and set for at least 4-6 hours, but overnight is even better. This allows all the layers to firm up and the flavors to meld together. If you cut it too soon, you’ll have a delicious, soupy mess.
Calories & Nutritional Info (A Slice of Pure Joy)
This is a potluck-champion, celebration-in-a-pan dessert. Let’s just enjoy it for what it is.
- Serving Size: One respectable square (about 1/15th of the cake).
- Calories: Somewhere in the 400-550 kcal range. It’s a rich dessert!
- Key Nutrients: Happiness, nostalgia, and the ability to make friends at any social gathering.
- FYI: It contains fruit, so it’s practically a health food. That’s my story and I’m sticking to it.
Common Mistakes to Avoid (Banana Split Sabotage)
Don’t let these simple errors turn your masterpiece into a mess.
- Not Draining the Pineapple Enough: I’m saying this for a third time because it’s that important. If your pineapple is watery, it will seep into the cream cheese layer and make your crust soggy. Drain it, press it, squeeze it.
- Being Impatient: If you don’t chill the cake for long enough, it won’t set properly. You’ll be serving soup instead of slices. Let it chill overnight for the best results.
- Lumpy Cream Cheese Layer: This happens when your cream cheese isn’t fully softened to room temperature before you start beating it. Let it sit out on the counter for an hour first.
- Using Unripe Bananas: Green-tinged bananas will be firm but won’t have that sweet, classic banana flavor. Use bananas that are yellow with a few brown specks for the best taste.
Variations & Customizations (Remix Your Split)
The classic is classic for a reason, but who doesn’t love a good remix?
- Chocolate Lover’s Dream: Swap the graham cracker crust for a crust made from crushed Oreo cookies (filling and all!).
- Strawberry Fields Forever: Instead of pineapple, use a can of strawberry pie filling or a layer of sliced fresh strawberries for a different fruity twist.
- Peanut Butter Cup Version: Use a chocolate cookie crust, skip the pineapple, and drizzle the top with both chocolate syrup and melted peanut butter. Garnish with chopped peanuts or mini peanut butter cups.
FAQ: Your Burning Banana Split Cake Questions
Let’s clear up the confusion so you can get to the chilling.
1. Can I make this cake ahead of time?
Yes! In fact, it’s better if you make it the day before you plan to serve it. It needs that long chill time to fully set up.
2. How long will it last in the refrigerator?

It will keep for about 3 days in the fridge. The bananas will start to brown a bit after the first day, but it will still be delicious.
3. Can I use fresh whipped cream instead of whipped topping (Cool Whip)?
You can, but it’s not as stable and will start to weep after a day. If you want to use fresh cream, you’ll need to stabilize it by adding a little unflavored gelatin or cornstarch while you’re whipping it.
4. Why did my cake turn out watery?
One hundred percent, without a doubt, you did not drain the pineapple well enough. It’s the only real way to mess this up.
5. Can I freeze this dessert?
It’s not recommended. The texture of the cream cheese, bananas, and whipped topping can become strange and watery upon thawing. This cake is best enjoyed fresh from the fridge.
6. Do I have to use nuts?
Absolutely not. If you have a nut allergy or just don’t like them, simply leave them off. The cake will still be fantastic.
7. Could I use a different fruit instead of pineapple?
Sure! A can of well-drained mandarin oranges or a layer of fresh berries would be a delicious substitution. Get creative!
Final Thoughts
You now hold the key to the ultimate no-bake dessert. You have the power to create a ridiculously delicious, crowd-pleasing cake without ever turning on your oven. This is a skill that will serve you well in the hot, humid days of Khulna, at potlucks, and during late-night dessert emergencies.
So go forth and layer. Embrace the joy of a no-bake masterpiece. And when everyone is begging you for the recipe, you can just smile and say, “Oh, it’s just something I whipped up.” They never have to know how easy it truly was.