Sweet Relief: Your Idiot-Proof Guide on How to Make Chocolate Icing
Let’s face it. A cake without frosting is like a day without sunshine… or, more accurately, a tragedy. But have you ever scrolled through Pinterest and felt like making perfect chocolate icing requires some sort of arcane knowledge? Fear not, my friend! Today, we’re diving headfirst into the luscious world of how to make chocolate icing that’s so easy, even your pet hamster could probably manage it (though I wouldn’t recommend it). Prepare for a serious upgrade to your dessert game.
Why This Chocolate Icing Will Be Your New BFF
Why bother making your own chocolate icing when you can just grab a tub from the store? Oh, let me count the ways! Firstly, the taste is infinitely better. Like, seriously, store-bought stuff tastes vaguely of chocolate-adjacent sadness. Homemade icing? It’s a rich, decadent cloud of pure chocolate bliss.
Secondly, it’s surprisingly easy and quick to whip up. We’re talking minutes, people! And let’s be honest, that feeling of accomplishment when you slather your cake with something you made from scratch? Totally worth it. Plus, you control the ingredients! Want it darker? More milk chocolatey? You’re the boss! So ditch the questionable tubs and let’s get to the good stuff.
Ingredients (The Chocolate Dream Team)
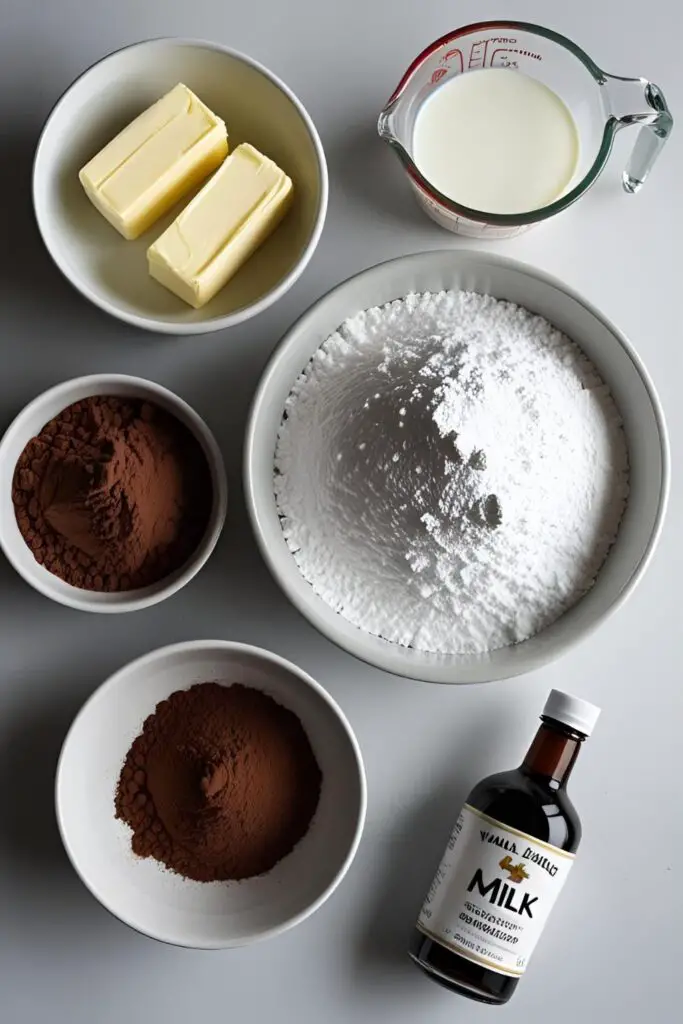
You won’t need a laundry list of fancy ingredients for this magic. Keep it simple, keep it delicious.
- ½ cup (1 stick) unsalted butter, softened (and I mean actually soft, not melted!)
- ¾ cup unsweetened cocoa powder (Good quality makes a difference, just sayin’)
- 3 cups powdered sugar, sifted (Trust me on the sifting. Lumps are the enemy.)
- ⅓ cup milk (Whole milk or 2% works best, but in a pinch, whatever you’ve got will likely do.)
- 1 teaspoon vanilla extract
- Pinch of salt (Don’t skip this! It enhances the chocolate flavor.)
Key Substitutions:
- Butter: For a dairy-free option, you can try a good quality vegan butter stick. The results might vary slightly, but it should still be delicious.
- Milk: Dairy-free milks like almond or oat milk can be used as a substitute.
- Cocoa Powder: If you only have Dutch-processed cocoa, that will work too, and will give a slightly richer, less acidic flavor.
Tools & Kitchen Gadgets Used:
You won’t need anything too crazy here, just the essentials.
- Electric Mixer (handheld or stand mixer): While you could whisk by hand, your arm will thank you for using a mixer.
- Large Mixing Bowl: For all the chocolatey goodness to come together.
- Rubber Spatula: For scraping down the bowl and ensuring everything gets incorporated.
- Measuring Cups and Spoons: Because precision in baking (and icing!) matters.
- Sifter or Fine-Mesh Sieve: For getting that lump-free powdered sugar. Trust me on this one.
Step-by-Step Instructions (The Path to Chocolate Nirvana)

Alright, buckle up buttercup, it’s time to get this chocolate party started!
- Cream the Butter: In your large mixing bowl, beat the softened butter with your electric mixer on medium speed until it’s smooth and creamy. This usually takes about 1-2 minutes.
- Incorporate the Cocoa: Gradually add the sifted cocoa powder to the butter, mixing on low speed until it’s fully combined and the mixture looks like a dark, slightly dry paste. Don’t breathe in too deeply, or you’ll end up in a cloud of cocoa (not the worst problem, TBH).
- Sweeten Things Up (Gradually!): With the mixer on low speed, gradually add the sifted powdered sugar, about one cup at a time, beating well after each addition. If you dump it all in at once, prepare for a powdered sugar explosion that will haunt your kitchen for days.
- Add the Wet Stuff: Pour in the milk and vanilla extract. Add the pinch of salt.
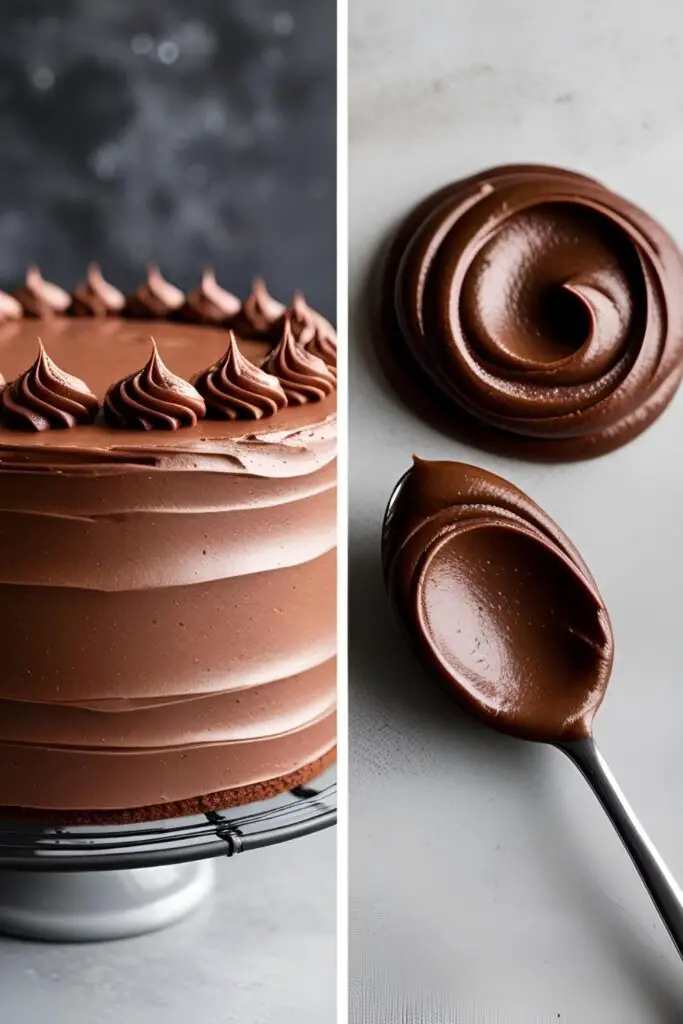
- Whip It Good: Increase the mixer speed to medium-high and beat the icing for 2-3 minutes, or until it’s light, fluffy, and the desired consistency. If it seems too thick, add a teaspoon of milk at a time until it reaches the perfect spreadable texture. If it’s too thin (oops!), add a tablespoon of powdered sugar at a time until it thickens up.
- Frost Away!: Your glorious chocolate icing is now ready to adorn cakes, cupcakes, cookies, or, let’s be honest, just eat it straight from the bowl with a spoon. No judgment here.
Calories & Nutritional Info (The Price of Deliciousness)
Let’s be real, this isn’t a health food. But it’s chocolate icing! We’re here for a good time, not a long time… of denying ourselves deliciousness. (Disclaimer: These are estimates and can vary based on exact measurements.)
- Serving Size: About 2 tablespoons
- Estimated Calories: 150-200
- Fat: 8-10g (depending on the butter)
- Saturated Fat: A fair amount, thanks to the butter.
- Carbohydrates: 20-25g (mostly from sugar)
- Sugar: 20-25g (surprise!)
Nutritional notes? Enjoy in moderation. It’s a treat, not a staple food group (though it might feel like one sometimes).
Common Mistakes to Avoid (Don’t Be a Chocolate Failure!)
Even though this is easy, there are a few ways you can go wrong. Let’s steer clear of those, shall we?
- Using Cold Butter: Cold butter will result in lumpy icing. Make sure your butter is properly softened to room temperature. It should be soft enough that you can easily make an indentation with your finger, but not melted.
- Not Sifting the Powdered Sugar: I know, I know, it’s an extra step. But unsifted powdered sugar will give you lumpy, gritty icing. Trust me, the extra minute of sifting is worth the smooth, dreamy texture.
- Adding Too Much Liquid at Once: Resist the urge to dump all the milk in at the beginning. Add it gradually until you reach your desired consistency. You can always add more, but you can’t easily take it away.
- Overmixing: Once the icing comes together, don’t beat it for an excessive amount of time. Overmixing can incorporate too much air and make the icing too airy and less stable.
- Not Scraping Down the Bowl: Make sure to stop your mixer periodically and scrape down the sides and bottom of the bowl with your rubber spatula. This ensures all the ingredients are evenly incorporated.
Variations & Customizations (Spice Up Your Sweet Life!)
Want to get a little fancy or cater to different tastes? Here are a few fun tweaks.
- Dark Chocolate Indulgence: Use dark cocoa powder instead of regular unsweetened cocoa for a richer, more intense chocolate flavor. You might also want to add a tablespoon of melted dark chocolate (cooled slightly) to the icing.
- Mocha Magic: Dissolve a teaspoon of instant coffee or espresso powder in the warm milk before adding it to the icing for a delicious coffee-chocolate combo. Perfect for the coffee lovers in your life!
- Mint Chocolate Dream: Add ¼ teaspoon of peppermint extract (start small, it’s potent!) along with the vanilla extract for a refreshing minty twist. You can even add some mini chocolate chips for extra texture.
FAQ Section (Your Chocolate Icing Conundrums Solved)
Got some burning chocolate icing questions? Let’s get them sorted.

1. Why is my chocolate icing grainy? This is usually due to unsifted powdered sugar or not beating the icing long enough to dissolve the sugar. Make sure you sift and beat until smooth!
2. How do I make chocolate icing without powdered sugar? This recipe relies on powdered sugar for its structure. For a powdered sugar-free option, you could explore recipes using melted chocolate and heavy cream (ganache) or a meringue-based frosting with cocoa.
3. Can I make chocolate icing ahead of time? Yes! Store the icing in an airtight container in the refrigerator for up to a week. Let it come to room temperature and re-beat it briefly with your mixer to restore its smooth and fluffy consistency before using.
4. Why is my chocolate icing too stiff? You’ve likely added too much powdered sugar or not enough liquid. Add a teaspoon of milk at a time and beat until it reaches the desired consistency.
5. Why is my chocolate icing too runny? You’ve probably added too much liquid. Add a tablespoon of sifted powdered sugar at a time and beat until it thickens.
6. Can I freeze chocolate icing? While you can freeze chocolate buttercream, the texture might change slightly upon thawing, potentially becoming a little grainy. If you do freeze it, thaw it slowly in the refrigerator and re-beat it thoroughly.

7. What’s the best way to frost a cake smoothly? Use an offset spatula! It gives you more control. Apply a thin “crumb coat” of icing first to trap any loose crumbs, chill the cake for about 15-20 minutes, then apply the final layer of frosting.
Final Thoughts (Go Forth and Frost Fearlessly!)
Well, there you have it! You are now armed with the knowledge to create seriously delicious chocolate icing that will elevate all your baked goods. Say goodbye to those sad tubs of store-bought frosting and hello to a world of rich, homemade goodness. Now go forth, bake (or buy, no judgment!), and frost like the chocolate-loving superhero you were always meant to be. And hey, don’t forget to lick the bowl. It’s the baker’s privilege! 😉