The Dreamiest Cake for a Baby Girl (That’s Actually Easy to Make!)
Let’s be real for a moment. You’re planning a celebration for a very special little lady. Whether it’s her first trip around the sun or a shower to welcome her into the world, the pressure is ON. You’ve scrolled through a million Pinterest boards, and you’re starting to think you need a degree in structural engineering to create the perfect cake. Well, I’m here to tell you to take a deep breath. You can make a show-stopping, photo-album-worthy, absolutely beautiful cake for baby girl celebrations, and you don’t need to be a professional to do it.
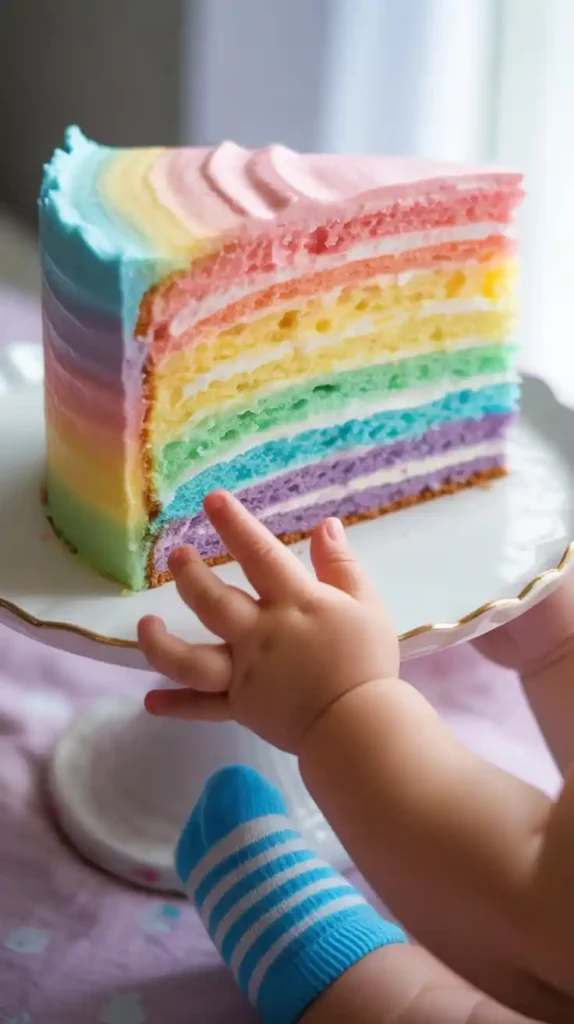
We’re going to create a dreamy, soft, pastel rainbow layer cake that looks like it was baked by a fairy godmother. It has a magical surprise inside and is decorated with the simplest, most forgiving technique ever: fluffy buttercream clouds and pretty sprinkles. It’s the perfect combination of “wow, you made that?!” and “wow, that was easy!”
Why This Cake is an Absolute Dream Come True
So, why is this the perfect recipe for such a special occasion?
- It’s a Magical Surprise Inside: The outside is a beautiful, dreamy sky-blue, but the real magic happens when you cut the first slice. Revealing those soft, pastel rainbow layers is a guaranteed “ooh” and “ahh” moment, perfect for that first birthday photo op.
- The Design is Incredibly Forgiving: Worried about getting your frosting perfectly smooth? Don’t be! The fluffy piped clouds and cascade of sprinkles are strategically designed to hide any imperfections. It’s a “no-stress” decorating zone.
- The Flavor is Perfect for Everyone: We’re making a super soft, tender, and moist vanilla bean cake with a classic, not-too-sweet buttercream. It’s a crowd-pleasing flavor that kids and adults will both adore.
The Ingredient List: A Recipe for Sweet Dreams
To build our dreamy creation, we need soft colors and delicate flavors.
For the Dreamy Pastel Rainbow Cake:
- Cake Flour: 3 cups, sifted. Cake flour is the secret to a super soft, tender crumb.
- Granulated Sugar: 2 cups.
- Baking Powder: 1 tablespoon.
- Salt: ½ teaspoon.
- Unsalted Butter: 1 cup (2 sticks), at room temperature.
- Large Egg Whites: 6, at room temperature. Using only egg whites keeps the cake’s color pale, so our pastels stay pure and beautiful.
- Buttermilk: 1 ¼ cups, at room temperature.
- Sour Cream: ½ cup, at room temperature.
- Clear Vanilla Extract: 1 tablespoon.
- Pastel Gel Food Colorings: Soft pink, peach, yellow, mint green, and baby blue.
For the Fluffy Cloud Buttercream & Sparkles:
- Unsalted Butter: 3 cups (6 sticks), softened.
- Powdered Sugar: 8-9 cups, sifted.
- Heavy Cream or Milk: 6-8 tablespoons.
- Clear Vanilla Extract: 1 tablespoon.
- A Pinch of Salt.
- The Sparkles: A beautiful mix of white, gold, and pastel sprinkles. Edible stars or pearls are a lovely touch.
Tools & Kitchen Gadgets: Your Magic Wand Kit
You don’t need a fairy godmother, just a few key pieces of equipment.
- Five 8-inch Round Cake Pans: For the rainbow layers. If you don’t have five (who does?!), you can absolutely bake in batches.
- A Stand Mixer or Hand Mixer.
- A Cake Turntable: For making the frosting process a breeze.
- An Offset Spatula and a Bench Scraper.
- Several Medium-Sized Bowls: For coloring your batter.
- A Piping Bag and a Large Round or Star Tip (like a Wilton 1A or 1M): For piping on the fluffy clouds.
- A Cute Cake Topper (optional): A “One” topper, a moon, or a cloud are all adorable choices.
Step-by-Step Instructions: Creating a Dream
Ready to make some magic? Let’s break it down into simple, easy steps.
Step 1: Bake a Pastel Rainbow
- Prep: Preheat your oven to 350°F (175°C). Grease and flour your cake pans.
- Make the Batter: In your stand mixer, whisk together the sifted flour, sugar, baking powder, and salt. Add the room temperature butter and mix on low until it looks like damp sand. In a separate bowl, whisk the egg whites, buttermilk, sour cream, and vanilla.
- Combine: On low speed, pour the wet ingredients into the dry in two additions, mixing until just combined. Do not overmix!
- Create the Colors: Divide the white batter evenly among five bowls. Using the “toothpick dip” method (dip a clean toothpick in the gel color, then swirl it in the batter), tint each bowl a different soft pastel shade.
- Bake: Pour each color into its own pan and bake for 18-22 minutes. Because the layers are thin, they bake quickly. Let the layers cool completely.
Step 2: Whip the Fluffy Clouds
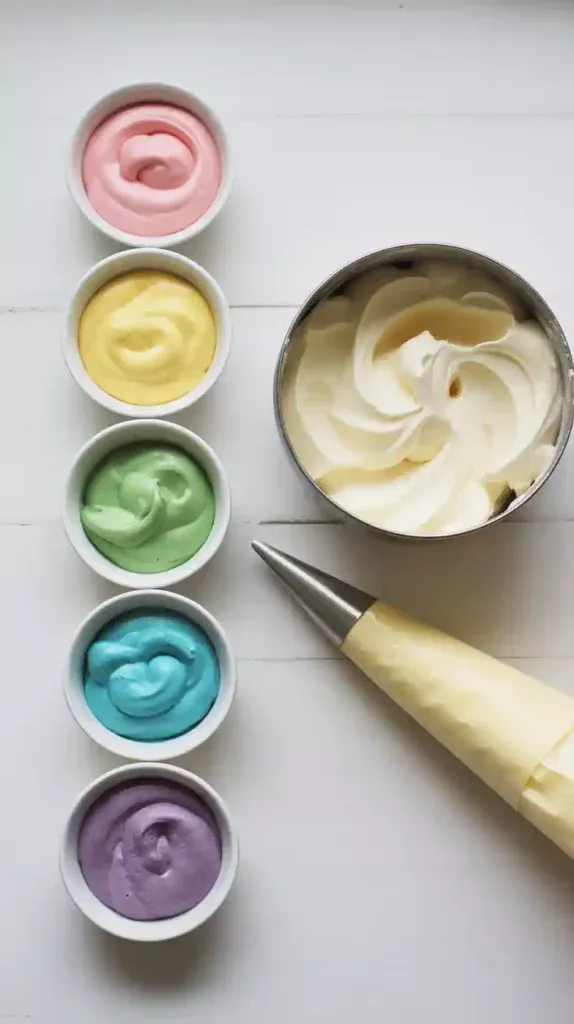
While the cakes cool, make your buttercream. Beat the softened butter until creamy. Gradually add the sifted powdered sugar, then the vanilla, salt, and cream. Whip on high speed for 5 minutes until it’s very light and fluffy. Set aside about two-thirds of the white frosting, and tint the remaining third a very pale sky blue.
Step 3: Build Your Dreamy Tower
- Level your cooled cake layers.
- Begin stacking your pastel layers on your cake board, with a thin layer of white buttercream between each colorful layer.
- Once all five layers are stacked, apply a thin crumb coat of white frosting and chill for 30 minutes to firm everything up.
Step 4: The Sky Blue Canvas
Apply a final, smooth coat of your pale sky blue buttercream all over the cake. Use your bench scraper and turntable to get it as smooth as you can, but don’t stress about perfection!
Step 5: The Finishing Touches
- Fit a piping bag with your large round or star tip and fill it with your remaining white buttercream.
- Pipe a generous, fluffy border of “clouds” around the bottom edge of the cake. Add a few more fluffy clouds on top.
- Now for the magic! Take your beautiful sprinkle mix and create a cascading “sprinklefall” down the side of the cake, nestled among the clouds. Add a few more to the top.
- If you have a cake topper, place it on top. You’re done!
Calories & Nutritional Info (Sweet Dreams are Made of This)
This cake is made of sugar, spice, everything nice, and a whole lot of love.
- Main Ingredient: Pure, unadulterated cuteness.
- Calories: Let’s just say it’s a “special occasion” number.
- Good For: Making the best memories (and the best photos).
Common Mistakes to Avoid (Party Puddles)
- Garish, Not Pastel, Colors: The key to this dreamy aesthetic is soft, pastel colors. When you’re tinting your batter, use a clean toothpick to add the tiniest possible amount of gel food coloring. You can always add more, but you can’t take it away.
- A Leaning Tower of Cuteness: A five-layer cake is tall and can get wobbly. Leveling your cake layers is a non-negotiable step for stability. A flat, even surface for each layer is key.
- A Crumbly, Messy Sky: If you see little colored specks of cake in your beautiful blue frosting, you probably skipped the crumb coat. That thin, chilled layer of frosting locks in all the crumbs so your final coat is pristine.
- Sad, Melty Clouds: If your piped clouds are looking a little droopy and sad, your buttercream is probably too warm. Pop the piping bag and your bowl of frosting in the fridge for 15 minutes to firm up before you pipe.
Variations & Customizations (Choose Your Dream)
This cake is a beautiful canvas. Here are a few other dreamy ideas.
1. The “Twinkle Twinkle Little Star” Cake
A perfect theme for a first birthday. Frost the cake in a soft lavender or pale pink. Instead of clouds, pipe on some simple star shapes. Use a mix of edible gold and white star-shaped sprinkles. Top with a beautiful moon and stars cake topper.
2. The Sweet Bunny Cake
A timeless classic for a baby girl. Frost the cake in a smooth white buttercream. Use pink and black frosting in piping bags with small round tips to pipe on a simple, sweet, sleepy bunny face on the side of the cake. You can even add two simple fondant ears on top.
3. The Watercolor Dream
Instead of a solid blue, create a beautiful watercolor effect. On your chilled, white-frosted cake, add random smears of pastel pink, yellow, and blue buttercream. Then, use your bench scraper to take one or two smooth passes around the cake to gently blend the colors.
FAQ: Your Sweetest Questions, Answered
Is this cake okay for a one-year-old to eat?
This cake is perfect for the party guests! For the birthday girl, especially for her “smash cake” moment, it’s a good idea to make a smaller, separate cake with less sugar or a naturally sweetened recipe. A small taste of this big cake is perfectly fine, of course!
How can I make a smaller “smash cake” to go with it?
Easy! Just reserve a small amount of your colored batters and bake them in a 4-inch or 6-inch round cake pan. A single, small layer is perfect for a smash cake.
How do I get those perfect, soft pastel colors?
The secret is to use gel food coloring and the “toothpick method.” Dip a clean toothpick into the gel, get a tiny amount, and then swirl that into your batter or frosting. It gives you so much more control than just squeezing the color in.
What if I don’t have five cake pans?
No one does! Just bake in batches. Bake two or three layers at a time. Let the pans cool for a few minutes, then carefully turn the cakes out, wash and re-grease the pans, and bake your next batch.
My white buttercream always looks a little yellow. How do I fix it?
This is a classic baker’s trick! Add the tiniest possible dot of violet gel food coloring to your finished buttercream. The purple tones will neutralize the yellow from the butter and make your frosting look brilliantly white.
Final Thoughts
You’ve done it. You have created a cake that is a dream come true. It’s a beautiful, celebratory centerpiece for a truly special day, filled with love, magic, and a whole rainbow of pastel colors.
So go on, light that single candle, sing your heart out, and get your camera ready. And don’t worry if most of the cake ends up on the baby’s face, in her hair, and on the floor. That’s the best part. Those are the memories you’ll treasure forever.


