How to Make Vanilla Bean Paste (And Never Pay $20 a Jar Again)
Let’s talk about that moment of culinary reckoning. You’re in a fancy grocery store, feeling inspired. You grab a tiny, 2-ounce jar of vanilla bean paste, admiring the beautiful specks. Then you flip it over and see the price tag. Your eyes widen. Your wallet whimpers. You wonder if each of those little seeds is individually insured. I’m here to tell you there’s a better way. Today, you’re going to learn how to make vanilla bean paste at home, and it’s so ridiculously easy and cost-effective, you’ll feel like you’ve just discovered a major life hack.
Seriously, why are we letting big-box stores gatekeep this liquid gold? It’s time to take the power, the pods, and the paste back into our own kitchens. Prepare to feel like a domestic deity.
Why This Homemade Version Is a Game-Changer
So, why bother making your own when you can just… buy it? Besides saving enough money to fund a small vacation (or at least a very nice dinner), there are a few key reasons this recipe will rock your world.
First, the flavor is absolutely explosive. This isn’t the diluted, vaguely vanilla-scented stuff. This is a concentrated punch of complex, floral, and deeply aromatic vanilla. It will make your baked goods taste like they were made by an angel who moonlights as a pastry chef.
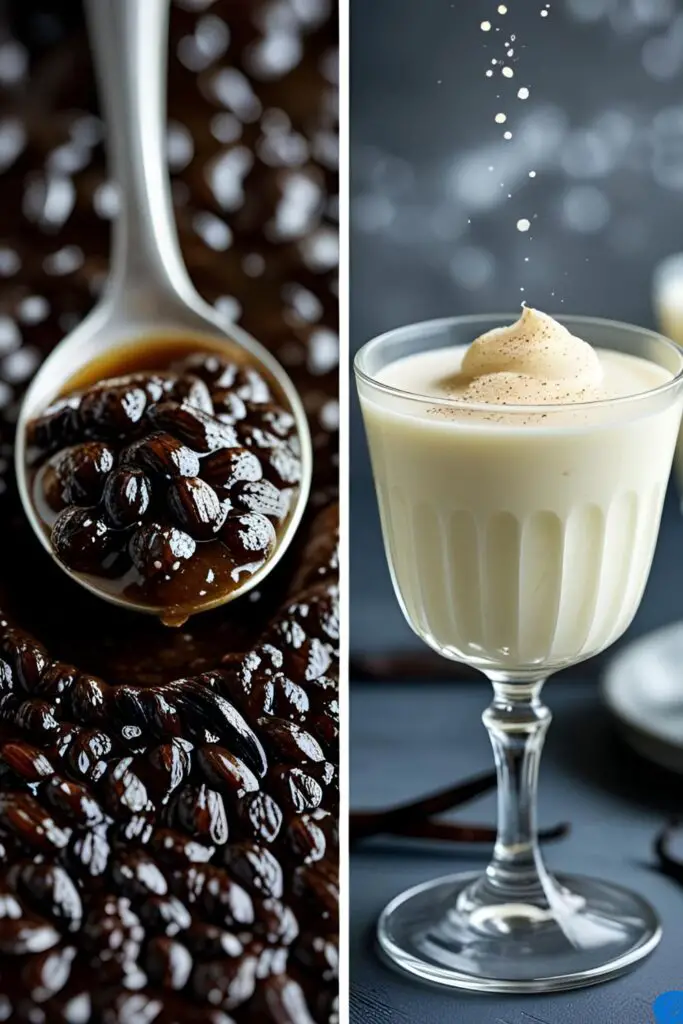
Second, you get those gorgeous vanilla specks. You know what I’m talking about. Those tiny black dots that signal to everyone, “Yes, this is the real deal.” They make ice cream, custards, and whipped cream look incredibly professional and appetizing. It’s a visual cue for deliciousness.

And finally, it’s a fantastic and impressive gift. Pour your homemade vanilla bean paste into a cute little jar, slap a ribbon on it, and you’ve got a thoughtful, gourmet gift for any foodie in your life. They’ll think you’re a culinary genius, and we’ll just keep how easy it was our little secret.
The Short-but-Sweet Ingredients List
This isn’t a massive grocery run. You only need a few key players to create this magical concoction.
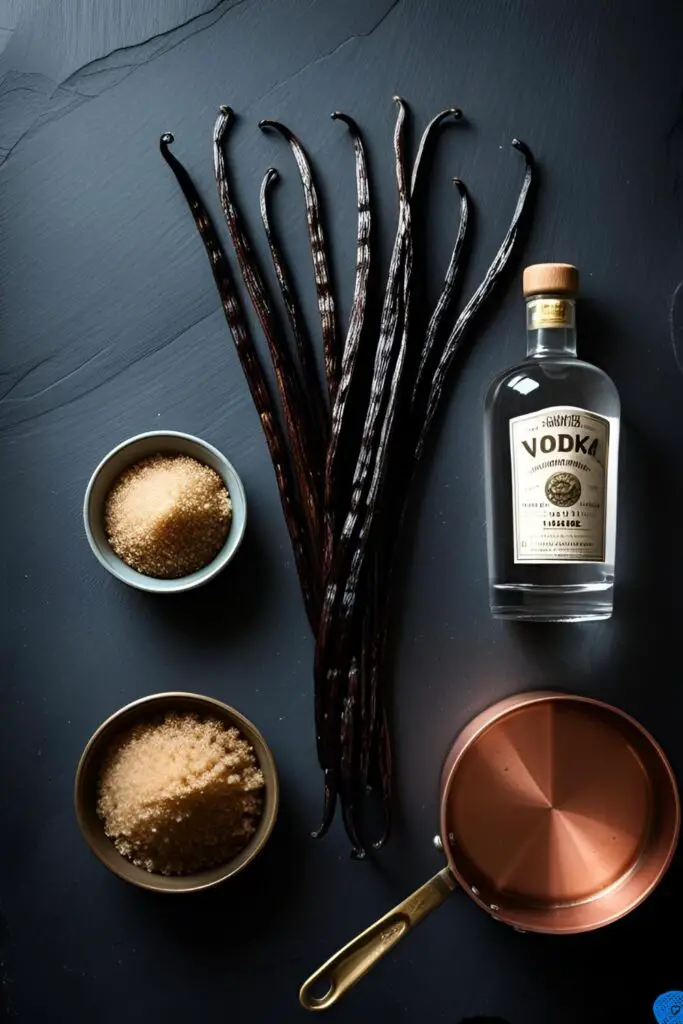
- 5-6 Whole Vanilla Beans: This is the star of the show. Grade B vanilla beans (also called extract grade) are perfect for this and more affordable than Grade A. They have a lower moisture content, but since we’re rehydrating them, they work beautifully. Look for plump, fragrant beans.
- ½ cup (100g) Granulated Sugar: Plain white sugar is all you need.
- ½ cup (120ml) Water: To create our simple syrup base.
- 1 tablespoon Light Corn Syrup or Agave Nectar: This is our binder. It helps create that thick, paste-like consistency and prevents the sugar from crystallizing.
- 1 tablespoon Vodka or Bourbon: This acts as a preservative, extending the shelf life of your paste. It also helps to extract even more flavor. The alcohol content is negligible, but it’s a crucial component.
Your Trusty Tools & Gadgets
Gather your equipment. Having everything ready to go makes the process smooth and enjoyable.
- Small Saucepan: For making the simple syrup.
- Sharp Paring Knife & Cutting Board: Essential for splitting and scraping the vanilla beans.
- Small Blender or Food Processor: A personal-sized blender like a NutriBullet or Magic Bullet is perfect for this. It’s the key to getting a smooth paste.
- Silicone Spatula: For scraping down the blender and getting every last precious drop.
- Airtight Glass Jars: For storing your finished masterpiece. Small 4-ounce jars are ideal.
- Small Funnel: Makes transferring the paste into the jars a clean, mess-free process.
The Step-by-Step Guide to Vanilla Glory
Ready to feel like an alchemist? Let’s turn these simple ingredients into liquid gold. It’s easier than you think.
Step 1: Create the Syrup Base
In your small saucepan, combine the sugar and water. Bring the mixture to a simmer over medium heat, stirring until the sugar is completely dissolved. Once it’s simmering and clear, add the corn syrup or agave and stir to combine. Remove it from the heat.
Step 2: The Great Vanilla Bean Heist
Lay your vanilla beans flat on the cutting board. Using the tip of your sharp paring knife, carefully split each bean in half lengthwise, from tip to tip. Open the bean up like a book to expose the treasure trove of seeds inside.
Step 3: Scrape It Like You Mean It

Using the back (blunt) side of your knife, scrape the tiny seeds out of each half of the vanilla pods. Get all of it. Scrape it like you’re trying to get every last bit of brownie batter out of the bowl. Collect all these glorious seeds (this is called vanilla “caviar”) into a small pile. Don’t you dare throw away those scraped pods!
Step 4: Infuse and Conquer
Add the scraped vanilla seeds AND the empty pods directly into the warm simple syrup in your saucepan. Give it a stir and let it steep for about 30 minutes to an hour. This allows the pods to infuse the syrup with even more deep, woody vanilla flavor.
Step 5: Blend It All Together
Once the syrup has steeped and cooled slightly, fish out the vanilla pods. Now, you have a choice. For a slightly milder, smoother paste, you can set the pods aside to dry and stick them in your sugar jar to make vanilla sugar. For a super-intense, no-waste paste, chop the steeped pods into small pieces and toss them into your blender along with the seed-infused syrup.
Pour the entire contents of the saucepan into your small blender or food processor. Blend on high for a good 1-2 minutes, until the mixture is as smooth as possible and has a thick, paste-like consistency. It won’t be perfectly smooth if you included the pods, but it will be amazing.
Step 6: The Finishing Touch
Pour the blended paste into a clean bowl or measuring cup. Stir in the tablespoon of vodka or bourbon. This is your flavor-booster and preservative. Mix it well.
Step 7: Jar It Up!
Using your small funnel, carefully pour the finished vanilla bean paste into your clean, airtight glass jars. Seal them up tight, and you’re done! You just made vanilla bean paste. Go ahead, feel smug about it. You’ve earned it.
Nutritional Reality Check

Look, you’re using this by the teaspoon. But for those who are curious, here’s an estimated breakdown per teaspoon:
- Calories: Approximately 20
- Fat: 0g
- Carbohydrates: Approximately 5g
- Sugar: Approximately 5g
- Protein: 0g
Disclaimer: This is mostly sugar and deliciousness. It’s meant to flavor things, not to be a primary food group. Although, I wouldn’t blame you for wanting to try.
Common Pitfalls and How to Sidestep Them
Let’s avoid any potential “oops” moments, shall we?
- Using Sad, Dry Vanilla Beans: If your beans are brittle and don’t have a strong aroma, your paste will be lackluster. Source plump, pliable, and fragrant beans. You can find great ones online for a fraction of the grocery store price.
- Scorching the Syrup: Don’t walk away from your simmering sugar. It can go from dissolved to burnt caramel in a flash. Keep the heat on medium and watch it carefully.
- Being Shy with the Scraper: The vast majority of the flavor and those beautiful specks are in the seeds. Scrape thoroughly! No seed left behind is the motto.
- Skipping the Alcohol: It might seem optional, but the alcohol is crucial for preventing mold and bacteria. It ensures your paste lasts for months instead of weeks. Don’t skip it.
Let’s Get Fancy: Paste Variations
The classic is amazing, but who doesn’t love a good remix?
1. Spiced Bourbon Vanilla Paste
When you make your simple syrup, add a cinnamon stick and one star anise to the pot. Let them simmer with the sugar and water. Use bourbon instead of vodka for the final step. The result is a warm, spicy paste that’s incredible in fall baking and coffee.
2. Sugar-Free & Keto-Friendly Paste
For a keto version, make your simple syrup with a powdered allulose or erythritol blend instead of sugar. To get the thick, paste-like consistency without corn syrup, dissolve ¼ teaspoon of xanthan gum into your tablespoon of vodka before stirring it into the final blended mixture. It works like a charm.
3. Espresso-Infused Vanilla Paste
Want to add a jolt to your desserts? Add 1 teaspoon of high-quality instant espresso powder to your simple syrup as it simmers. This creates a deep, rich paste that is phenomenal in chocolate desserts. FYI, the intense flavor of this homemade paste holds up beautifully against other additions, like food coloring. It’s perfect for making a vibrant blue cookie monster cake frosting that still tastes like rich vanilla, not just red dye #40’s cousin.
Your Questions, Answered (Because I’m Psychic)
Here are a few things that might be rattling around in your brain.
1. How long does homemade vanilla bean paste last? Thanks to the sugar and alcohol, it’s quite stable. Stored in an airtight jar in a cool, dark place (like your pantry), it will last for at least 6 months, and often up to a year.
2. What’s the difference between vanilla bean paste and vanilla extract? Extract is a thin liquid made by soaking beans in alcohol. Paste is a thick, syrupy suspension of the actual vanilla seeds in a sugar syrup. Paste gives you more intense flavor and those visible specks.
3. Can I use my old, dried-out vanilla beans for this? You can! This recipe is a great way to rescue beans that are a bit past their prime. Because you’re simmering them in syrup, it rehydrates them and extracts every last bit of flavor.
4. Do I absolutely have to use alcohol? For shelf stability, yes. If you absolutely must omit it, you must store the paste in the refrigerator and use it within 3-4 weeks. The alcohol is what makes it shelf-stable.
5. How do I substitute vanilla bean paste for extract in a recipe? It’s a simple 1:1 substitution. If a recipe calls for 1 teaspoon of vanilla extract, you use 1 teaspoon of vanilla bean paste. Easy peasy.
6. Help! My paste isn’t very thick. What did I do wrong? It might just need to cool and set. The paste will thicken considerably as it cools completely. If it’s still too thin after cooling, you may have used slightly too much water. You can pour it back in a saucepan and simmer it gently for a few more minutes to reduce it further.
7. What kind of vanilla beans are the best for paste? Madagascar Bourbon beans are the classic choice, with a creamy, rich flavor. Tahitian beans are more floral and fruity. Honestly, any decent quality Grade B bean will make a fantastic paste.
Final Thoughts
You are now officially a vanilla aficionado. You’ve unlocked a new level of baking prowess. Go forth and add this magical paste to everything: cookies, cakes, frosting, coffee, oatmeal, you name it.
Every time you open that jar and see those beautiful specks, you can give yourself a little pat on the back. You did that. And you’ll never have to suffer the indignation of a $20 price tag on a tiny jar of vanilla paste ever again. Welcome to the good life.
how much does this recipe make?