The Ultimate Aesthetic 18th Birthday Cake (That’s Actually Achievable)
The 18th birthday. It’s a rite of passage. A grand entrance into the world of… well, being able to sign contracts and vote. But more importantly, it’s a day that absolutely must be documented perfectly on every social media platform known to humankind. The pressure is immense, and sitting at the center of this milestone moment, glowing under the light of 18 candles, is The Cake.
Before you start hyperventilating and typing “boutique bakery near me” into your phone, take a breath. What if I told you that you could create a jaw-dropping, Pinterest-worthy, chic-as-heck aesthetic 18th birthday cake all by yourself? A cake that looks like it cost a small fortune but is secretly your own brilliant creation.
Forget the generic sheet cakes. We’re entering our adulting era with style, sophistication, and a truly spectacular cake. Let’s do this.
Why This Recipe is Awesome (And Will Make You Look Cool)
First of all, this cake is the epitome of grown-up elegance. We’re using a delicate, moist champagne-infused cake that whispers “celebration” and a silky-smooth Swiss meringue buttercream that is light, airy, and not cloyingly sweet. The flavor is as sophisticated as the person turning 18.
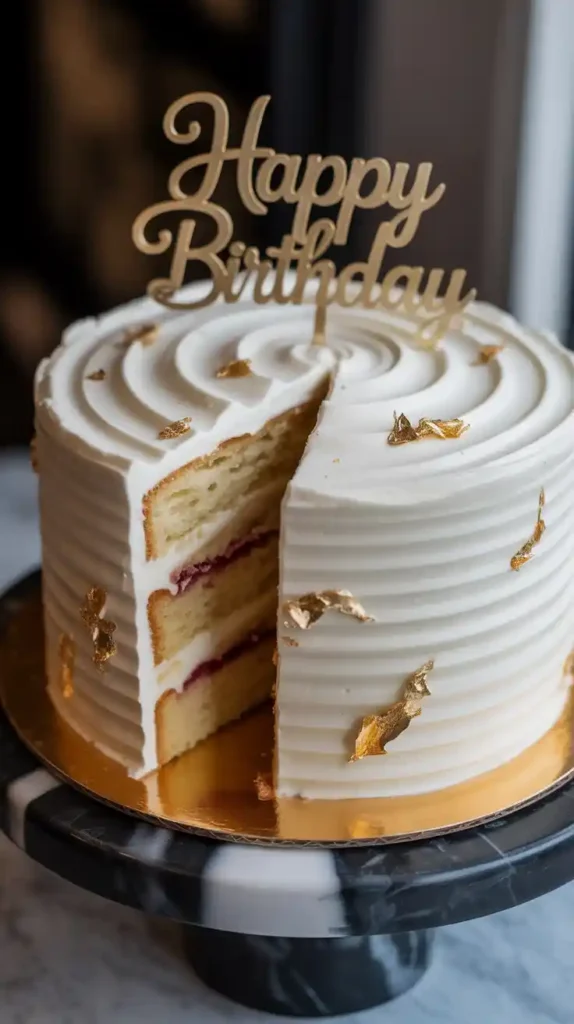
Second, the aesthetic is everything. This recipe is designed to help you achieve that clean, minimalist, modern look that’s all over your feed. We’re talking sharp edges, a smooth finish, and delicate, intentional decorations. It’s a cake that doesn’t scream for attention; it confidently commands it.
Finally, while it looks incredibly professional, I’ve broken down every single step to be completely manageable. Even the slightly intimidating Swiss meringue buttercream will feel like a breeze. You’ll get to feel like a high-end pastry chef without having a full-scale kitchen meltdown.
Ingredients You’ll Need

An elegant cake calls for elegant ingredients. We’re elevating things just a touch for this special occasion.
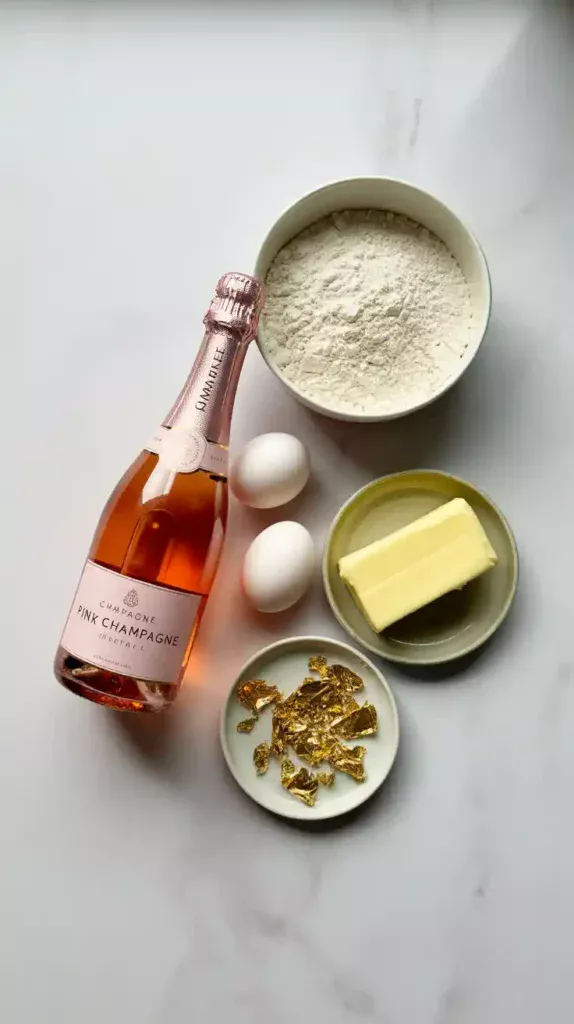
For the Pink Champagne Cake:
- 2 ¾ cups (330g) cake flour (cake flour makes it extra tender!)
- 3 teaspoons baking powder
- 1 teaspoon salt
- 1 cup (226g) unsalted butter, softened to room temperature
- 1 ¾ cups (350g) granulated sugar
- 5 large egg whites, at room temperature
- 2 teaspoons pure vanilla extract
- ¾ cup (180ml) pink champagne, prosecco, or sparkling rosé, at room temperature
- ½ cup (120ml) whole milk, at room temperature
For the Silky Swiss Meringue Buttercream:
- 5 large egg whites
- 1 ¾ cups (350g) granulated sugar
- 2 cups (454g) unsalted butter, cut into cubes and cool but malleable (not rock hard, not melty)
- 2 teaspoons pure vanilla extract
- Pinch of salt
For the Aesthetic Decorations (Choose 1-2):
- Edible gold leaf
- A few fresh, food-safe flowers (like roses or baby’s breath)
- 3-4 beautiful macarons
- A chic acrylic cake topper (like “18” or “Happy Birthday”)
Tools & Kitchen Gadgets Used
The right tools are essential for achieving that clean, professional look.
- Stand Mixer: This is almost non-negotiable for making Swiss meringue buttercream. A hand mixer can work, but it will be an epic arm workout.
- Three 6-inch Round Cake Pans: A taller, 6-inch cake looks more modern and chic than a wider 9-inch one.
- Cake Turntable: The key to getting smooth, even sides.
- Bench Scraper: Your secret weapon for flawlessly smooth frosting.
- Large Offset Spatula: For applying and leveling the frosting.
- Digital Kitchen Scale: For accurate measurements, leading to a perfect bake.
- Candy Thermometer: Essential for getting the egg white and sugar mixture to the right temperature.
- Parchment Paper, Tweezers (for gold leaf), Floral Tape.
Step-by-Step Instructions: Your Guide to Chic Confections
Ready to create something beautiful? Let’s break it down into manageable steps.
H3: Part 1: Baking the Champagne Cake Layers
- Prep and Preheat: Preheat your oven to 350°F (175°C). Grease your three 6-inch cake pans, line the bottoms with parchment, and grease the parchment.
- The Dry Ingredients: In a medium bowl, whisk together the cake flour, baking powder, and salt.
- Creaming with Class: In your mixer, beat the softened butter on its own for a minute. Then, gradually add the granulated sugar and beat on medium-high for 5 minutes until it’s very pale and fluffy.
- Add the Egg Whites: With the mixer on low, add the room temperature egg whites one at a time, mixing well after each. Scrape down the bowl, then beat in the vanilla extract.
- The Bubbly: In a liquid measuring cup, combine the room temperature champagne and milk.
- The Final Mix: On low speed, alternate adding the dry ingredients and the wet ingredients in this order: one-third of the dry, half of the wet, one-third of the dry, the rest of the wet, and finally the last of the dry. Mix only until the last streak of flour is gone.
- Bake and Cool: Divide the batter evenly between your three pans. Bake for 25-30 minutes, or until a toothpick inserted into the center comes out clean. Let the cakes cool in the pans for 15 minutes before turning them out onto wire racks to cool completely.
H3: Part 2: Mastering the Swiss Meringue Buttercream

This sounds fancy, but it’s just a few steps. You can do this.
- The Double Boiler: Fill a saucepan with an inch of water and bring it to a simmer. In the clean, grease-free bowl of your stand mixer, whisk together the egg whites and sugar.
- Heat It Up: Place the mixer bowl over the simmering water (don’t let the bowl touch the water). Whisk constantly until the sugar completely dissolves and the mixture reaches 160°F (71°C) on your candy thermometer. It should feel completely smooth between your fingers.
- Whip It to Stiff Peaks: Transfer the bowl to your stand mixer fitted with the whisk attachment. Whisk on high speed for 10-15 minutes, until the meringue is thick, glossy, and the outside of the bowl is completely cool to the touch. This is the most important part!
- The Butter Stage (Don’t Panic!): Switch to the paddle attachment. With the mixer on low-medium speed, start adding your cool, cubed butter one piece at a time.
- The Curdled Mess Phase: At some point, it will look like a soupy, curdled disaster. THIS IS NORMAL. Do not stop. Just keep mixing. It will magically come back together.
- The Magic Transformation: After a few more minutes of mixing, it will transform into a thick, silky, unbelievably smooth buttercream. Once it’s smooth, beat in the vanilla and salt.
H3: Part 3: The Art of the Aesthetic Assembly
- Level and Fill: Once cooled, level your cake layers with a serrated knife if needed. Place the first layer on your turntable. Top with a ½-inch layer of buttercream. Repeat with the second and third layers.
- The Crumb Coat: Apply a very thin, neat layer of buttercream all over the cake to trap any crumbs. Use your bench scraper to get it nice and straight. Chill the cake in the fridge for 30 minutes until firm.
- The Flawless Finish: Apply a thicker, final coat of buttercream. Hold your bench scraper straight against the side of the cake at a 45-degree angle and spin the turntable to create an impossibly smooth finish. Smooth the top with your offset spatula.
- Decorate with Restraint: This is where less is more.
- For Gold Leaf: Use clean, dry tweezers to gently apply small flakes of edible gold leaf to one side of the cake.
- For Flowers: Never put flower stems directly in the cake. Cut the stems short, wrap them tightly in floral tape, and then insert them. Arrange just a few blooms in a delicate cluster.
- For Macarons: Arrange 3-4 macarons in a neat little pile near one edge.
Calories & Nutritional Info
It’s an 18th birthday. Calories don’t count on your 18th birthday. It’s a scientific fact. (Okay, not really).
- Calories per slice (1/12th of cake): Approximately 550-650 kcal.
- Primary Nutrient: Elegance. Sophistication. Celebration.
- Note: This is a rich, decadent cake for a very special occasion. It is meant to be savored, enjoyed, and posted on Instagram with a suitably cool caption.
Common Mistakes to Avoid (How to Keep it Chic, Not a Shriek)
- The Over-Decorated Disaster: You got excited and used gold leaf, flowers, macarons, sprinkles, and a giant topper. It now looks like a chaotic craft store project. Breathe. Choose one or two decorative elements and arrange them artfully. Less is always more in the world of aesthetic cakes.
- The Swiss Meringue Soup Kitchen: Your frosting is a runny, soupy mess. This happens when you add the butter while the meringue is still warm. The bowl MUST be completely cool to the touch. The fix? Pop the whole bowl in the fridge for 20 minutes, then whip it again. It should come back together.
- Poisonous Petals: You just grabbed a pretty flower from the garden and stuck it on the cake. BIG MISTAKE. Many common flowers are toxic. Only use flowers that you know are food-safe or create a barrier by wrapping stems in floral tape or using special flower pics.
- The Leaning Tower of Cake: Your finished cake is lopsided. This usually happens if your layers weren’t level to begin with. Taking a minute to level your cooled cake layers with a knife makes a huge difference in the final structure.
Variations & Customizations (Choose Your Aesthetic)
- Dark & Moody Chocolate Gold: For a more dramatic vibe, make a rich dark chocolate cake. Cover it in a dark chocolate ganache or buttercream. Decorate sparsely with flakes of edible gold leaf.
- Boho Chic Naked Cake: Frost the cake “naked” or “semi-naked” style, where the cake layers are visible through a very thin layer of frosting. Decorate with fresh berries (raspberries, figs) and a sprig of eucalyptus (make sure it doesn’t touch the cake directly).
- Vintage Lambeth Heart Cake: Bake the cake in a heart-shaped pan. Use a classic American buttercream (which is stiffer) and various piping tips to create elaborate, old-school, over-the-top frills and scrolls. It’s a maximalist aesthetic that’s very on-trend.
FAQ Section: Your 18th Birthday Cake Conundrums
- What are some sophisticated flavors for an 18th birthday cake? Besides champagne, consider elderflower and lemon, raspberry and white chocolate, or a rich dark chocolate with a salted caramel filling. Think beyond basic vanilla!
- How do I make a cake look “aesthetic”? It’s all about clean lines, smooth frosting, a limited color palette, and intentional, minimalist decoration. A tall, slender cake (like a 6-inch, 3-layer) often looks more modern and aesthetic than a shorter, wider one.
- Is Swiss meringue buttercream really hard to make? It’s more technical than American buttercream, but not hard if you follow the steps! The key is a clean bowl, a thermometer, and patience during the mixing process. The silky, less-sweet result is 100% worth it.
- How do you safely put fresh flowers on a cake? First, ensure the flower itself is non-toxic and food-safe. Never let the stem touch the cake directly. You can either wrap the stem tightly in floral tape or insert it into a special plastic holder called a flower pic.
- Can I make this cake ahead of time? Yes! Bake the layers, cool, wrap tightly, and freeze for up to a month. The buttercream can be made a few days ahead and stored in the fridge (you’ll need to re-whip it). The cake can be fully assembled and decorated a day in advance.
- What can I write on an aesthetic cake? TBH, most minimalist cakes look better without writing. Instead of piping words, consider a chic, slim, custom acrylic topper with “18” or the person’s name. It keeps the look clean and modern.
- My frosting sides aren’t smooth! What am I doing wrong? The secrets are a good crumb coat, a cake turntable, and a bench scraper. Apply a generous final coat of frosting, then hold the bench scraper straight and spin the turntable. It takes a little practice, but it’s the best way to get that flawless finish.
Final Thoughts
Congratulations. You have created a work of art. You’ve baked a cake that is not only a delicious entry into adulthood but also a testament to your own impeccable style and skill. This is more than just a dessert; it’s the centerpiece of a core memory.
Now, go present your masterpiece, take way too many pictures of it, and enjoy the stunned silence followed by a flood of compliments. Welcome to your cake-baking era. It looks good on you.