The Disney Princess Cake Guide for Mortals (Not Fairy Godmothers)
We’ve all seen it. The legendary doll cake. That towering triumph of sugar and engineering where a real princess doll stands majestically, her gown a mountain of perfectly piped buttercream. It’s the cake that launches a thousand birthday party dreams. And let’s be honest, it looks like something only a certified fairy godmother with a magic wand could create. But what if I told you that you don’t need magic, just a plan? Get ready to make the ultimate Disney Princess cake.
I’m here to demystify this iconic cake. We’re going to break down the “how-in-the-world-do-they-do-that?!” into simple, manageable steps. This isn’t just a baking project; it’s your official coronation as the coolest cake-maker in the kingdom. You are about to create a Disney Princess cake that will make you a hero.
Why This Disney Princess Cake Is the Crown Jewel
So, why embark on this royal quest? Beyond making a child’s (or, let’s be real, your own) dream come true, there are some solid reasons.
First, the sheer “WOW” factor is unparalleled. When you walk into a room carrying this cake, time stops. Jaws drop. It is the absolute pinnacle of birthday cake showstoppers. You’re not just serving dessert; you’re creating a core memory.
Second, it’s a ridiculously fun project. You get to bake, sculpt, and play with frosting like a royal artist. Choosing the princess, the colors, the style of the dress—it’s a creative explosion that’s way more satisfying than just plopping a plastic ring on a sheet cake. TBH, it’s the most fun you can have with a Barbie doll and five pounds of butter.

Finally, you will save a king’s ransom. A custom cake of this magnitude from a professional bakery costs a fortune. By making it yourself, you get all the glory for a fraction of a price. Who needs a prince when you’ve got skills like these?
Your Royal Decree of Ingredients & Supplies
To build this edible palace, you’ll need to assemble your royal court of supplies.
- For the Cake “Gown”:
- 2 boxes of a sturdy cake mix (like pound cake or a butter/yellow cake mix). You need a dense cake to hold the weight and the doll. We are not making a delicate chiffon gown today.
- Ingredients called for on the cake mix box (usually eggs, oil, water).
- For the Royal Buttercream:
- 2 cups (4 sticks) unsalted butter, softened
- 8-9 cups powdered sugar, sifted
- ¼ cup milk or heavy cream
- 2 teaspoons vanilla extract
- Pinch of salt
- Gel food coloring (in the color of your chosen princess’s dress, e.g., yellow for Belle, blue for Cinderella).
- The Princess:
- One official Disney Princess doll (the 11.5-inch Barbie style). Make sure it’s one whose top half/bodice is painted or molded on, which makes your life way easier.
- For Decorating:
- Edible glitter, sprinkles, sugar pearls (optional but highly encouraged).
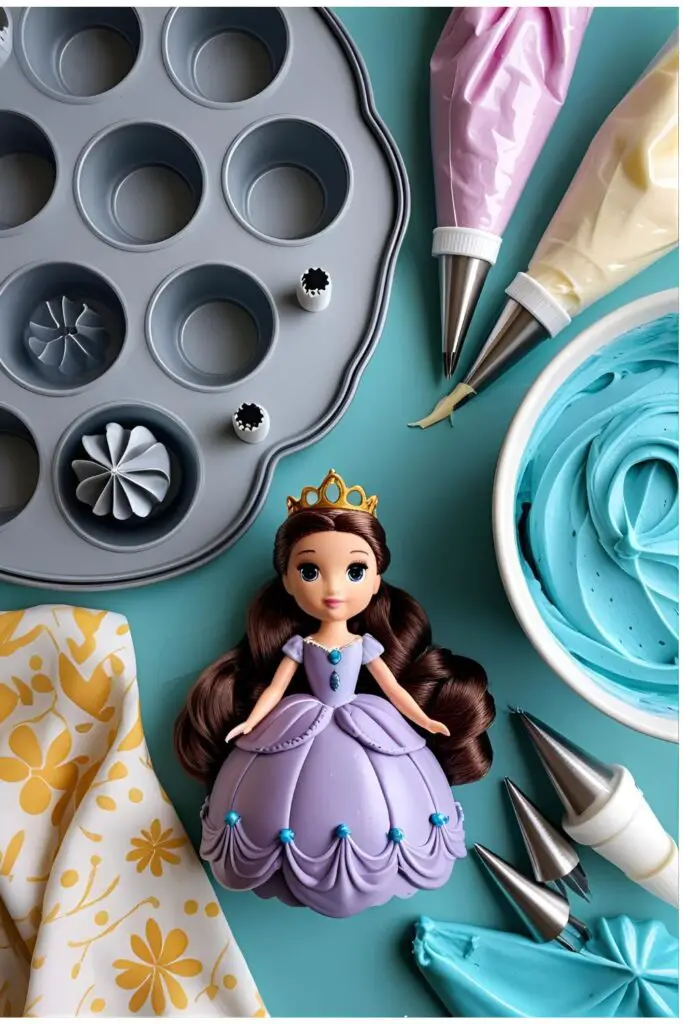
The Royal Tools & Gadgets
You can’t build a castle without the right tools. Here’s what you’ll need.
- Wilton Wonder Mold Pan Set: This is the classic dome-shaped pan designed specifically for this cake. It’s the easiest, most direct route to success. (Alternatively, you can use one 8-inch oven-safe glass bowl and two 8-inch round cake pans).
- An Official Disney Princess Doll
- Plastic Wrap
- Cake Turntable
- Offset Spatula (both large and small are helpful)
- Piping Bags
- Piping Tips: A large star tip (like Wilton 1M) and a petal/ruffle tip (like Wilton 104) are fantastic for this project.
- A Serrated Knife (for carving)
Step-by-Step Instructions: Your Magical Transformation
Ready to bibbidi-bobbidi-bake? Let’s do this thing.
H3: Step 1: Prepare the Princess and Bake the Gown
- Prepare the Princess: First, the doll needs a spa day. Remove her clothes and wash her thoroughly. Once she’s dry, tightly wrap her from the waist down in plastic wrap. This is a crucial food safety step!
- Bake the Cake: Prepare your cake batter according to the box directions. You’ll likely need both boxes of mix to fill the Wonder Mold pan. Grease and flour your pan thoroughly and bake according to the pan’s instructions. Baking will take much longer than a standard cake, likely over an hour. A skewer inserted into the center should come out clean.
- Cool Completely: Let the cake cool in the pan for 15-20 minutes before inverting it onto a wire rack. Then, let it cool 100% completely. I’m talking room temperature, not a hint of warmth. This can take a few hours.
H3: Step 2: Assembly and the Crumb Coat
- Level and Carve: Place the cooled, dome-shaped cake on your turntable. If the bottom isn’t flat, level it with a serrated knife.
- Insert the Doll: Now, for the main event. Carefully cut a hole in the center of the cake, from the top down, just wide enough to fit the doll’s wrapped legs. Gently wiggle the doll down into the cake until her waist is flush with the top of the cake.
- The Crumb Coat: Apply a thin layer of your buttercream all over the cake “skirt.” This traps any loose crumbs and acts as a primer. Pop the whole thing into the fridge for at least 30 minutes to firm up.
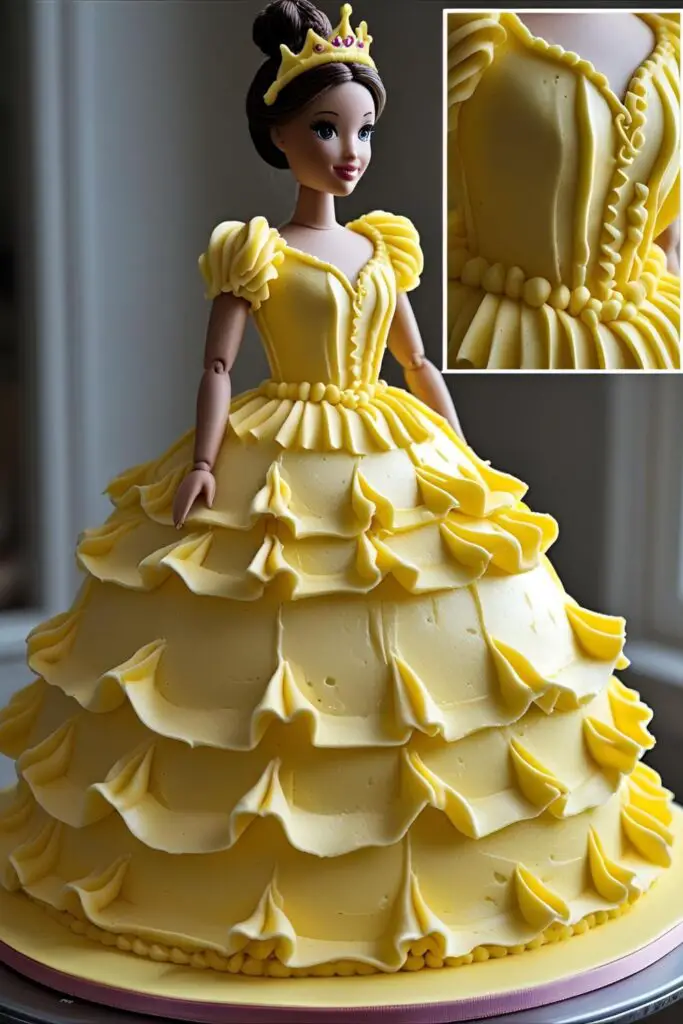
H3: Step 3: Decorating Your Disney Princess Cake
- Color the Frosting: Tint the majority of your buttercream with the gel food coloring of your choice.
- Frost the Gown: Apply a smooth base layer of your colored buttercream over the entire crumb-coated skirt. Don’t worry about it being perfect; you’re about to cover it with pretty details.
- Pipe the Details: This is where the magic happens.
- For Ruffles: Use your ruffle tip (like #104) and, starting from the bottom of the dress, pipe vertical lines of ruffles all the way around the cake.
- For Rosettes: Use your star tip (like 1M) to cover the entire skirt in beautiful rosettes.
- For the Bodice: Use a small star tip to carefully pipe frosting onto the doll’s torso to match her gown, covering any gaps.
- Add Sparkle: While the frosting is still soft, add your edible glitter, sprinkles, or sugar pearls.
Calories & Nutritional Info
This cake is a literal princess gown made of sugar. Let’s not kid ourselves.
- Calories: Let’s just say a slice is “royally indulgent.” Probably 700-900 kcal.
- Serving Size: One magical, fantasy-fulfilling slice.
- Primary Nutrient: Unadulterated joy.
Disclaimer: This cake is made for wishes and dreams, not for counting calories. Enjoy the magic.
Common Mistakes to Avoid (Or, How to Avoid a Royal Disaster)
- The Leaning Tower of Cake: The most common mistake is using a cake that’s too light and airy (like an angel food cake). It will collapse. You must use a dense, sturdy cake like a pound cake or butter cake.
- Forgetting to Wrap the Doll: Seriously, don’t forget this. You need a food-safe barrier between the plastic doll and the cake she’s buried in. Wrap her legs in plastic wrap.
- A Sinking Princess: If the hole you cut is too wide, the doll will be wobbly. Cut a narrow hole first; you can always make it wider. The cake should be dense enough to hold her snugly.
- The Dreaded Buttercream Soup: Trying to pipe intricate ruffles with buttercream that’s too warm is a recipe for tears. If your frosting gets too soft, pop it back in the fridge for 15 minutes to firm up.
Variations & Customizations

Once you’ve mastered one princess, the whole Disney dynasty is yours to bake!
- The Princess Roster: This design is all about the details!
- For Belle: Use yellow frosting and pipe delicate rosettes. Add some red frosting roses.
- For Cinderella: Use light blue frosting, white ruffle details, and lots of silver edible glitter.
- For Tiana: Use light green and pale yellow frosting, and pipe leaf and vine details.
- The No-Doll Tiered Cake: Don’t want to sacrifice a doll? Create a two-tiered round cake. Decorate it with the colors, symbols, and style of your favorite princess (e.g., a sea-shell and dinglehopper theme for Ariel).
- Princess Gown Cupcakes: Frost cupcakes with a tall swirl of colored buttercream. Place a printed paper princess top on a toothpick and stick it in the swirl to create adorable mini-gowns.
FAQ: Your Royal Questions Answered
Here are the answers to your most pressing royal inquiries.
H3: What is the best cake pan to use?
The Wilton Wonder Mold pan is specifically designed for this and is the easiest option. If you don’t have one, you can bake two 8-inch round layers and one layer in an 8-inch oven-safe glass bowl to create a dome shape when stacked.
H3: How do I keep such a big cake from being dry?
Using a moist, dense cake recipe like a pound cake or a butter cake with buttermilk is key. Also, don’t overbake it! Check for doneness regularly. You can also brush the layers with a simple syrup before frosting.
H3: What is the best frosting for piping a dress?
A sturdy American buttercream is ideal because it holds its shape beautifully for piping ruffles and rosettes.
H3: How far in advance can I make a Disney Princess Cake?
You can bake the cake layers up to two days ahead and store them tightly wrapped at room temperature. You can fully assemble and decorate the cake a day in advance and store it in the fridge.
H3: Do I have to use a real doll?

It’s the classic way, but you don’t have to. You can buy specialty plastic doll picks (just the torso on a stick) from craft or cake decorating stores.
H3: How do I transport this tall, majestic cake?
With extreme caution and a prayer. A tall cake box is essential. Place it on a flat surface in your car (the floor is often best) and drive like you’re carrying the crown jewels.
H3: How do people serve this cake?
You present the cake for the “wow” moment and photos. Then, you remove the doll (this is the slightly awkward part), and slice the cake “gown” just like you would any other cake.
Final Thoughts: A Dream is a Wish Your Hands Make
You did it. You took on the Mount Everest of birthday cakes and you conquered it. You now have a stunning Disney Princess cake and the skills to recreate any princess in the kingdom. You are officially the fairy godmother of cake.
So go on, present that masterpiece. Watch the birthday kid’s eyes light up. You didn’t just bake a cake; you made a real-life fairytale come true. And it tastes way better than a glass slipper.