The “No-Bake” Recipe for a Perfect Birthday Cake Illustration
Alright, let’s get creative. Today, we’re stepping out of the kitchen and into the studio. We’re putting away the flour and sugar, and breaking out the pencils and pens. You’re here because you want to create something sweet, celebratory, and full of joy, but without the impending doom of a mountain of dirty dishes. You, my friend, are here to learn how to create the perfect birthday cake illustration.
I know, it sounds a little different, right? But think of it this way: we’re still following a recipe. We’re still gathering ingredients (art supplies!), following step-by-step instructions, and creating a masterpiece that’s designed to make someone happy. The only difference is, this version is 100% calorie-free and will last forever. Ready to cook up some creativity?
Why This “Recipe” is an Artistic Delight
So, why should you bother learning to draw a cake when you could just, you know, bake one?
- It’s a Foolproof Formula for Adorable Art: You don’t need to be a professional artist to follow this guide. These steps are designed to be simple, easy, and totally achievable for a complete beginner. We’re aiming for charming and cute, not a photorealistic masterpiece.
- It’s a Calorie-Free Creative Outlet: Drawing is an incredibly fun and relaxing way to unwind. You get all the joy of creating something beautiful and celebratory without having to preheat your oven or worry about a soggy cake bottom.
- It’s an Infinitely Versatile Skill: Once you master this simple drawing, you can use it for anything! Create your own custom birthday cards, design party invitations, make gift tags, or just fill a sketchbook with adorable, happy doodles.
The “Ingredients” (Your Art Supplies)
To cook up this illustration, you’ll need a few key supplies from your creative pantry.
- The “Plate” (Paper): A clean sheet of drawing paper, cardstock, or even just good quality printer paper.
- The “Flour” (Pencil): A standard graphite pencil with a good eraser. An HB or 2B is perfect for sketching.
- The “Chocolate Ganache” (Fine-Liner Pen): A black, waterproof, fine-liner pen is the key to those crisp, clean cartoon outlines. A 05 or 08 size is great.
- The “Frosting & Sprinkles” (Colors): Your choice of coloring tools! Colored pencils, markers (like Copic or Ohuhu), or even watercolors will bring your cake to life.
Tools & Kitchen Gadgets (The Drawing Utensils)
Every artist needs their tools. Here’s what will make the process easier.
- A Ruler: For getting those cake layers nice and straight. There’s no shame in using a ruler!
- A Circle Template or the rim of a glass: For tracing a perfect plate or cake stand.
- A Good Eraser: Because “happy little accidents” sometimes just need to be completely removed.
- A Comfortable Chair and Good Lighting.
Step-by-Step Instructions: The Recipe for a Perfect Drawing
Ready to get sketchy? Let’s break this down into simple, easy-to-follow steps.
Step 1: “Measure” Out Your Layers
Using your pencil, start by lightly sketching the basic shapes. We’re building from the bottom up.
- Draw a wide, slightly flattened oval. This will be the bottom of your cake stand or plate.
- From the ends of that oval, draw two short, vertical lines up, and connect them with a curved line to create the base of the stand.
- On top of the stand, draw another, wider oval. This is the bottom of your first cake layer.
- Draw two straight vertical lines up from the ends of this oval, and connect them with another curved line to create your first cake cylinder.
- Repeat this for a second, slightly smaller layer on top. Keep all your lines light and sketchy!
Step 2: “Whip Up” the Frosting
Now for the fun part. Let’s get messy (but not really).
- On top of your cake layers, sketch a big, fluffy, cloud-like pile of frosting.
- Between your two cake layers, draw a wiggly, scalloped line to represent the delicious filling peeking out.
Step 3: Add a “Drizzle” of Detail
To make it look extra delicious, draw a thick, cartoonish “drip” coming down from the top layer of frosting onto the side of the cake. Think of it as a thick, gooey river of icing.
Step 4: The “Garnish” (Candles!)
On top of your fluffy pile of frosting, draw a few simple, slightly tilted birthday candles. Just little rectangles with a teardrop shape on top for the flame. Don’t forget the little action lines around the flame to show it’s glowing!
Step 5: “Ink” Your Creation
Take a deep breath. Grab your black fine-liner pen. Carefully trace over the final pencil lines that you want to keep. This is the step that makes it look like a real, clean illustration. Take your time, and don’t be afraid to make your lines bold and confident. Once the ink is completely dry (give it a few minutes!), use your eraser to get rid of all the original pencil sketch lines.
Step 6: “Frost” with Color
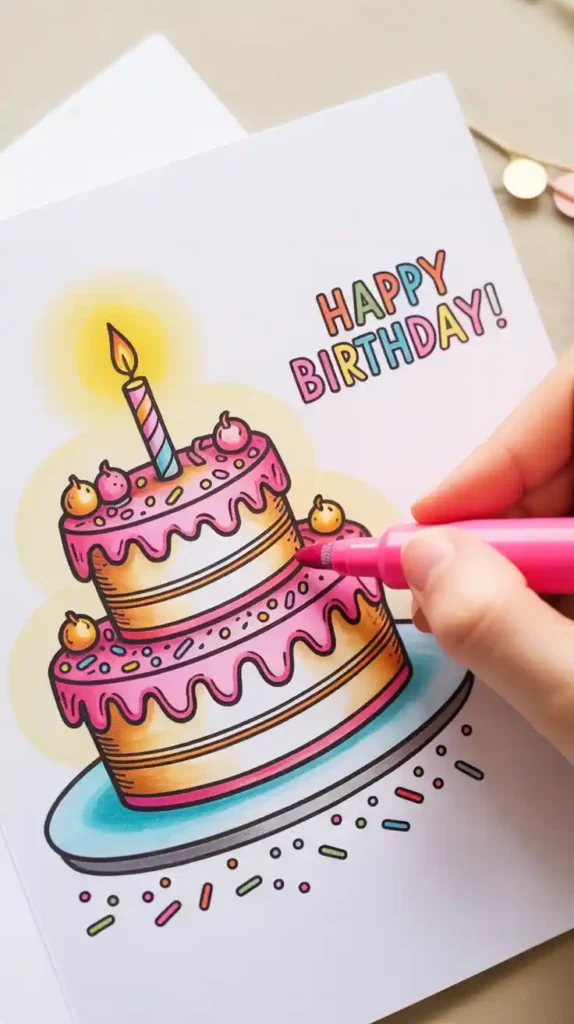
This is the final, joyful step. Grab your markers or colored pencils and bring your cake to life. Use bright, happy colors. A classic combo is a pink cake with white frosting, but you can go wild! Add some colorful dots for sprinkles.
“Nutritional Info” (aka The Creative Output)
- Serving Size: One beautiful, completed illustration.
- Calories: 0.
- Nutritional Value: High in creativity, boosts dopamine, 100% good for the soul.
- Shelf Life: Forever.
Common Mistakes to Avoid (Artistic Errors)
- Pressing Too Hard with Your Pencil: If your initial sketch lines are too dark, they will be a nightmare to erase and will leave ugly indentations on your paper. Keep your initial sketch light and loose.
- The Smudge-pocalypse: This happens when you try to erase your pencil lines before the black ink from your fine-liner is completely dry. You will be rewarded with a sad, grey smear across your beautiful drawing. Be patient.
- Wobbly, Scared Lines: When you’re inking, try to use confident, smooth strokes. If you draw with a shaky, hesitant hand, your lines will look fuzzy. It’s better to have a confident line that’s slightly imperfect than a shaky one.
- Fear of the Blank Page: The biggest mistake of all is being too intimidated to start. It’s just a piece of paper! It doesn’t have to be perfect. The goal is to have fun and create something cute.
“Variations” (Choose Your Artistic Style)
Once you’ve mastered the basic recipe, you can get creative.
1. The Perfect Slice Illustration
Instead of a whole cake, draw a single, tall, triangular slice. This is a great way to practice drawing the different layers of cake and frosting on the inside. Draw it on a cute, cartoonish plate with a fork next to it.
2. The Character Topper
After you’ve drawn your basic cake, sketch a simple, cute animal or character on top! A little cat, a teddy bear, or a simple smiling star can add a ton of personality and turn it into a more specific themed illustration.
3. The Minimalist “Coloring Book” Style
For a super chic and modern look, follow the steps all the way through the inking phase, but don’t add any color. The clean, black-and-white line drawing is a beautiful, minimalist piece of art on its own.
FAQ: Your Most Creative Questions, Answered
What are the best pens to use for the black outlines?
Look for pens that are labeled “archival ink” and “waterproof.” This means the ink won’t smudge if you decide to color over it with markers or watercolor. Popular brands that are great for beginners are Sakura Pigma Micron, Faber-Castell Pitt Artist Pens, or Copic Multiliners.
I can’t draw a straight line or a perfect circle to save my life!
Then don’t! Use your tools! There is absolutely no shame in using a ruler for the sides of your cake and tracing the bottom of a cup to get a perfect circle for your plate. Artists do it all the time.
How do I choose the right colors?
Have fun with it! A classic birthday cake look is a pale yellow or pink cake with white frosting and rainbow sprinkles. But you can do anything you want. Look at pictures of real cakes on Pinterest for inspiration, or just grab your three favorite colors and go to town.
What if I really, truly mess it up?
That’s what erasers are for! And if you mess up the inking, guess what? You can just grab another “plate” (a new sheet of paper) and start a new “batch.” Every drawing is a chance to practice and get better.
Can I do this on a tablet or computer?
Absolutely! The exact same steps apply to digital drawing. Use a light-colored brush on a low opacity for your initial “pencil” sketch on one layer. Then, create a new layer on top and use a black inking brush for your final outlines. Then, color on a layer underneath the ink.
Final Thoughts
You’ve done it. You have successfully followed a recipe, mixed your ingredients, and cooked up a masterpiece without ever turning on your oven. You have created a sweet, celebratory, and utterly charming piece of art that is guaranteed to make someone smile.
So go on, put your finished drawing on the fridge. Give it as a gift. Post it online. You didn’t just doodle; you created something. And that, my friend, is always worth celebrating.


