Skip the Drive-Thru: Crispy Homemade Chicken Nuggets That Actually Taste Like Chicken
Let’s be honest, that siren song of the drive-thru can be 강력하게 appealing when hunger strikes. But have you ever really looked at those processed little… things they call chicken nuggets? What are they, even? Today, we’re throwing shade at the mystery meat and taking back our taste buds with seriously delicious homemade chicken nuggets. Prepare for crispy, golden perfection that will make you say, “Why haven’t I been doing this all along?”
Forget those questionable frozen lumps. We’re talking real chicken, simple ingredients, and a crunch that will make your inner child (and maybe your actual children) do a happy dance. Are you ready to experience chicken nugget nirvana?
Why These Homemade Nuggets Are Pure Gold
Okay, so you’re probably thinking, “Homemade nuggets? Sounds like a project.” Trust me, it’s way easier than navigating rush hour traffic. Here’s why these little bites of awesome are worth the tiny bit of effort.
First off, you know exactly what’s in them. No weird fillers, no unpronounceable ingredients. Just good quality chicken and simple pantry staples. Isn’t that a comforting thought?
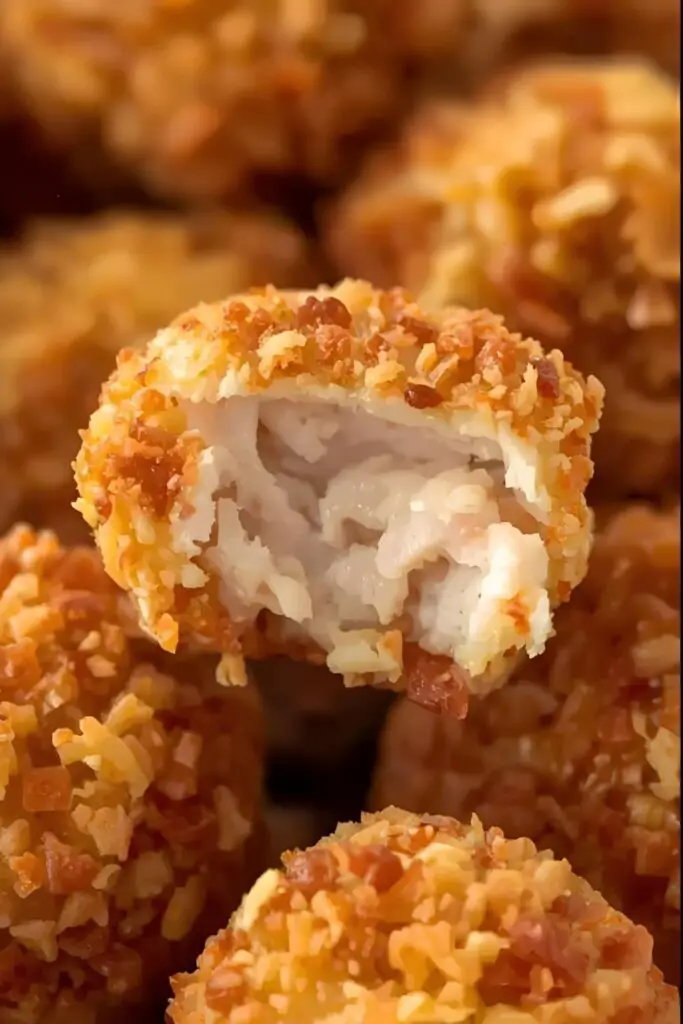
Second, they taste infinitely better. Seriously. The flavor and texture of these homemade nuggets blow the store-bought stuff out of the water. They’re juicy on the inside, perfectly crispy on the outside, and actually taste like… wait for it… chicken! What a concept!
And finally, they’re surprisingly versatile and fun to make. Get the kids involved in the breading process! Experiment with different seasonings! Dunk them in whatever sauce your heart desires! The possibilities are endless.
The Star-Studded Ingredient Lineup
We’re keeping it simple and delicious with ingredients you likely already have or can easily find.
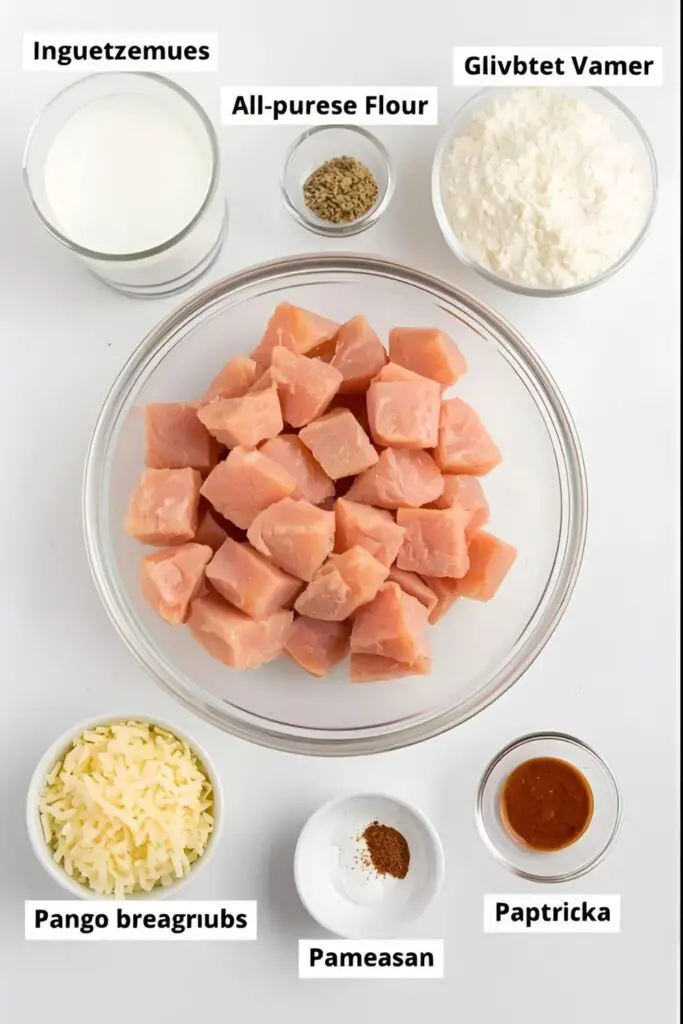
- Chicken Breast: 1 lb boneless, skinless chicken breasts, cut into 1-inch chunks. You can also use chicken thighs for a richer flavor.
- Milk or Buttermilk: ½ cup. Buttermilk adds a lovely tang and helps tenderize the chicken, but milk works just fine in a pinch.
- All-Purpose Flour: ¾ cup. For the first layer of that crispy coating.
- Panko Breadcrumbs: 1 ½ cups. This is the secret to ultimate crunch! Don’t substitute with regular breadcrumbs if you can help it.
- Grated Parmesan Cheese: ¼ cup. Adds a subtle cheesy flavor and helps with browning.
- Seasonings: 1 teaspoon salt, ½ teaspoon black pepper, 1 teaspoon garlic powder, ½ teaspoon onion powder, ½ teaspoon paprika. Feel free to get creative with your spice rack!
- Vegetable Oil or Other Neutral Oil: For frying. You’ll need about ½ inch depth in your skillet. You can also bake or air fry them (see variations!).
Your Nugget-Making Toolkit
You don’t need a fancy deep fryer or any specialized equipment for this. Just a few basics.
- Large Bowl: For soaking the chicken in milk.
- Two Shallow Dishes or Plates: For your dredging station (flour and breadcrumb mixture).
- Large Skillet: A heavy-bottomed skillet works best for even frying.
- Tongs: Essential for safely flipping and removing the hot nuggets.
- Wire Rack with a Baking Sheet: To drain excess oil and keep the nuggets crispy after frying.
- Food Processor (Optional but Recommended): For achieving that classic, slightly smoother nugget texture. If you prefer more texture, you can simply cut the chicken into smaller pieces.
Let’s Get Nugget-izing: Step-by-Step Instructions
Alright, buckle up, nugget enthusiasts. We’re about to create some serious magic.
Step 1: Prep the Chicken (The Soaking Ceremony)
Cut your chicken breasts into roughly 1-inch chunks. If you’re going for that classic nugget texture, you can pulse the chicken in a food processor a few times – don’t overdo it, you want small pieces, not a paste!
Place the chicken pieces in the large bowl and pour the milk or buttermilk over them. Make sure all the chicken is coated. Let this sit for at least 20 minutes. This helps the breading adhere and keeps the chicken moist.
Step 2: Set Up Your Breading Station (The Crispy Runway)
In one shallow dish, place the all-purpose flour and season it with a pinch of salt and pepper.
In the other shallow dish, combine the Panko breadcrumbs, grated Parmesan cheese, salt, pepper, garlic powder, onion powder, and paprika. Mix everything together thoroughly.
Step 3: The Dredge and Coat (The Crispy Armor Application)
Take a piece of chicken out of the milk, letting any excess drip off. First, dredge it in the seasoned flour, making sure it’s fully coated. Shake off any excess flour.
Next, dip the floured chicken into the Panko mixture, pressing firmly so the breadcrumbs adhere well on all sides. Place the coated nugget on a clean plate or the wire rack. Repeat with all the chicken pieces.
Step 4: Time to Fry (The Golden Transformation)
Pour about ½ inch of vegetable oil into your large skillet and heat it over medium-high heat. You’ll know it’s ready when a few stray breadcrumbs sizzle gently when dropped in. Don’t let the oil get smoking hot!
Carefully place the coated chicken nuggets into the hot oil in a single layer. Don’t overcrowd the pan! Cook in batches if necessary to ensure they cook evenly and get nice and crispy.
Fry the nuggets for about 3-4 minutes per side, or until they are golden brown and cooked through. The internal temperature should reach 165∘F (74∘C).
Step 5: Drain and Serve (The Moment of Truth)
Remove the cooked nuggets from the skillet with tongs and place them on the wire rack lined with a baking sheet to drain any excess oil. This is crucial for keeping them crispy.
Serve immediately with your favorite dipping sauces. Ketchup? Mustard? Ranch? Honey mustard? The world is your saucy oyster!
Calories & Nutritional Info (The Numbers Game – Ish)
Let’s be real, you’re making homemade chicken nuggets, not a kale salad. But here’s a rough idea:
- Serving Size: About 4-5 nuggets
- Estimated Calories: 250-350 (depending on size and cooking method)
- Protein: Around 20-25 grams (good job getting your protein!)
- Fat: Varies depending on frying, but definitely some fat involved.
- Carbohydrates: Mostly from the breading.
Common Mistakes to Avoid (Don’t Be a Nugget Newbie)
- Soggy Nuggets Alert: You didn’t pat the chicken dry before coating. Excess moisture prevents the breading from sticking and getting crispy.
- The Oil Temperature Rollercoaster: Your oil was either not hot enough (resulting in greasy nuggets) or too hot (leading to burnt outsides and raw insides). Use the breadcrumb test and maintain a consistent temperature.
- Overcrowding the Fryer: Too many nuggets in the pan at once will lower the oil temperature, leading to… you guessed it… soggy nuggets. Be patient and cook in batches.
- Bland Breading Blues: You skimped on the seasonings. Don’t be afraid to be generous with those spices! They’re what make your nuggets flavorful.
Variations & Customizations (Get Your Creative Nuggets On)
Want to jazz up your nugget game? Here are a few ideas:
1. Baked Nuggets for a (Slightly) Healthier Twist
Preheat your oven to 400∘F (200∘C). Place the breaded nuggets on a baking sheet lined with parchment paper. Lightly spray them with cooking oil. Bake for 15-20 minutes, flipping halfway through, until golden brown and cooked through. They won’t be quite as crispy as fried, but still delicious!
2. Spicy Kick Nuggets
Add a pinch of cayenne pepper or a dash of hot sauce to the milk mixture or the breadcrumb mixture for a little heat. You can also use a spicy seasoning blend.
3. Cheesy Herb Nuggets
Mix some dried herbs like rosemary, thyme, or oregano (about 1 teaspoon total) into the breadcrumb mixture along with an extra sprinkle of Parmesan cheese.
FAQ: Your Burning Nugget Questions Answered
Let’s tackle those nugget-related quandaries.
1. Can I use ground chicken to make nuggets? Yes, you can! Mix ground chicken with a binder like breadcrumbs and an egg, season well, shape into nugget shapes, and then bread and cook as directed. The texture will be slightly different, but still tasty.
2. Can I freeze homemade chicken nuggets? Absolutely! Once the cooked nuggets have cooled completely, arrange them in a single layer on a baking sheet and freeze for about 30 minutes. Then, transfer them to a freezer-safe bag or container. To reheat, bake them in a 375∘F (190∘C) oven for 15-20 minutes, or until heated through and crispy.
3. What are some good dipping sauces for chicken nuggets? Oh, the possibilities! Ketchup, mustard, honey mustard, ranch dressing, BBQ sauce, sweet and sour sauce, buffalo sauce… the choice is yours! Get creative!
4. Can I make these gluten-free? Yes! Use a gluten-free all-purpose flour blend and gluten-free Panko breadcrumbs. The rest of the recipe should be naturally gluten-free, but always double-check your ingredient labels.
5. Why is my breading falling off the chicken? Make sure you’re pressing the breadcrumbs firmly onto the chicken. The milk bath helps the flour adhere, which in turn helps the breadcrumbs stick. Don’t skip those steps!
6. How can I make the nuggets extra crispy? Using Panko breadcrumbs is key. Also, don’t overcrowd the pan when frying, and make sure the oil is at the right temperature. Baking on a wire rack also helps the bottoms stay crispy.
7. Are homemade chicken nuggets healthier than store-bought? Generally, yes. You control the ingredients, so you can avoid many of the fillers, preservatives, and excessive sodium found in processed nuggets. Baking or air frying them also reduces the amount of oil compared to deep frying.
Final Thoughts
Congratulations! You are now officially a homemade chicken nugget master. You’ve conquered the mystery meat and created golden, crispy bites of pure chickeny goodness. Go forth and enjoy your superior nuggets, dunk them with pride, and maybe even host a “nugget night” for your friends. Just try not to look too smug when they rave about how much better yours are than the drive-thru version. Or, you know, go ahead and be a little smug. You earned it.