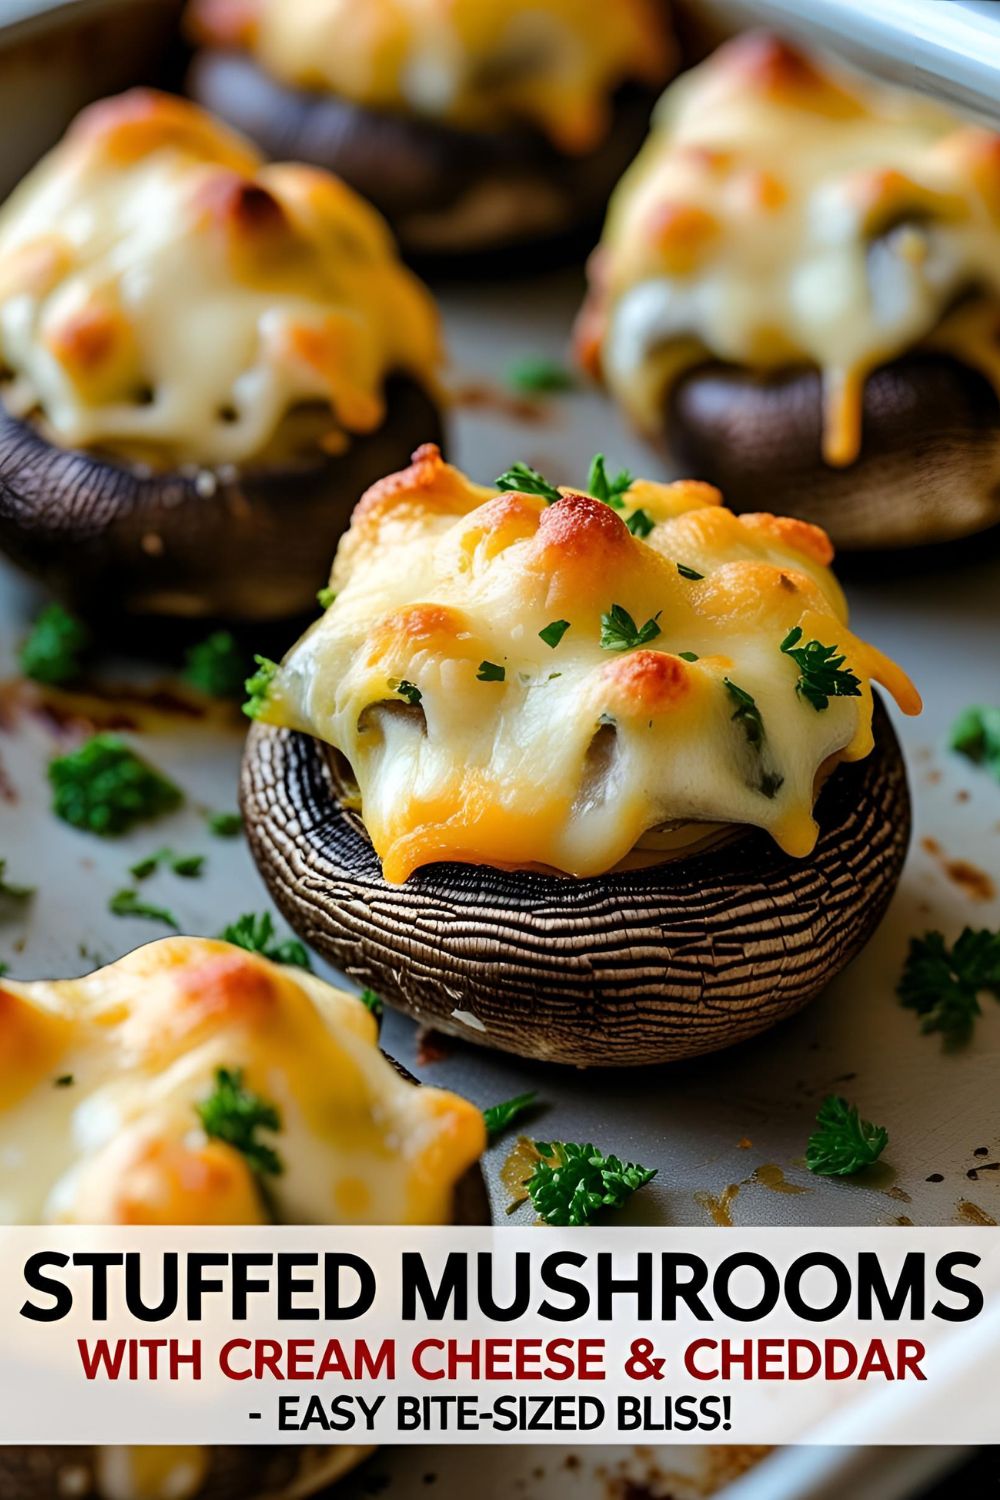
Skip to content
Home » Blog » The Ultimate Cookies and Cream Cake Recipe (An Oreo Lover’s Dream!)

The Ultimate Cookies and Cream Cake Recipe (An Oreo Lover’s Dream!)

Remember that pure, unadulterated joy of twisting open an Oreo? The perfect crack of the chocolate wafer, the sweet promise of the creamy filling. It’s a top-tier cookie experience. Now, what if I told you that you could take that exact feeling and turn it into a magnificent, towering, glorious cake? Welcome, my friend, to the ultimate cookies and cream cake.

This isn’t just a vanilla cake with a few sad cookie crumbs thrown in as an afterthought. Oh no. This is a cake that respects the cookie. We’re talking a moist, tender cake studded with generous chunks of real Oreo cookies, enveloped in a frosting so creamy and packed with cookie goodness, you’ll wonder why you ever bothered with a glass of milk. This is the cookies and cream cake you’ve been dreaming of.

Why This Cookies and Cream Cake Recipe is a Certified Banger

So, what makes this cake recipe the undisputed champion of cookie-based desserts? I’m so glad you asked.

First, it’s authentically Oreo. We are using a LOT of actual Oreo cookies in this recipe. They’re in the cake, they’re in the frosting, they’re on top for decoration. The flavor is pure, nostalgic cookies and cream, not some weird artificial “cookie” flavoring.

Second, the texture is out of this world. You get the soft, moist crumb of the vanilla cake, the delightful, slightly softened chunks of chocolate cookie, and the smooth, creamy, slightly crunchy frosting. It’s a symphony of textures that will make your taste buds sing.

Finally, it’s a guaranteed crowd-pleaser. Seriously, who doesn’t love cookies and cream? It’s a universally beloved flavor that appeals to kids, adults, and everyone in between. Bring this cake to a party, and you will instantly become the most popular person in the room. It’s a scientific fact.

The All-Star Ingredient Lineup

To build this monument to cookie greatness, you’ll need the best players on your team.

  • For the Oreo-Studded Cake:
    • 2 ½ cups all-purpose flour
    • 2 ½ teaspoons baking powder
    • 1 teaspoon salt
    • 1 cup (2 sticks) unsalted butter, softened to room temperature
    • 1 ¾ cups granulated sugar
    • 4 large eggs, at room temperature
    • 1 cup buttermilk, at room temperature
    • 2 teaspoons vanilla extract
    • 15-20 Oreo cookies, coarsely chopped (this is important!)
  • For the Dreamy Cookies and Cream Frosting:
    • 1 ½ cups (3 sticks) unsalted butter, softened
    • 4-5 cups powdered sugar, sifted
    • ¼ cup heavy cream or milk
    • 1 ½ teaspoons vanilla extract
    • Pinch of salt
    • 15 Oreo cookies, finely crushed (wafers only for a whiter frosting, see notes!)
  • For Garnish (aka More Oreos):
    • Mini Oreos, whole Oreos, crushed Oreos
    • A simple chocolate ganache drip (optional, but awesome)

Key Substitutions: You can use any brand of chocolate sandwich cookie you like. For a tangier frosting, swap half the butter for an 8 oz block of softened cream cheese.

Tools & Kitchen Gadgets Used

Every great baker needs their trusty sidekicks. Here’s the gear for this mission.

  • Stand Mixer or a reliable Hand Mixer
  • Three 8-inch Round Cake Pans
  • Parchment Paper
  • Food Processor (for crushing Oreos easily) or a Ziploc bag and a rolling pin
  • Rubber Spatula
  • Wire Cooling Rack
  • Cake Turntable (your best friend for easy frosting)
  • Offset Spatula
  • Bench Scraper
  • Piping Bag and a Large Star Tip (like a Wilton 1M) for decoration

Step-by-Step Instructions: Let’s Build This Dream Cake

Ready to make some magic? Let’s get baking.

H3: Step 1: Baking the Oreo-Packed Cake Layers

  1. Prep your Station: Preheat your oven to 350°F (175°C). Grease and flour your three 8-inch cake pans, and don’t forget to line the bottoms with parchment paper.
  2. Mix the Dry Stuff: In a medium bowl, whisk together the flour, baking powder, and salt. In a separate small bowl, toss your coarsely chopped Oreos with a tablespoon of the flour mixture. This helps prevent them from sinking to the bottom of the cake!
  3. Cream Butter & Sugar: In your stand mixer, beat the softened butter and sugar on medium-high speed for a solid 3-4 minutes until it’s super light and fluffy.
  4. Add Eggs & Vanilla: Add the room-temperature eggs one at a time, mixing well after each one. Then, mix in the vanilla extract.
  5. Alternate Dry & Wet: On low speed, add about one-third of your dry ingredients, then half of the buttermilk. Repeat the process, ending with the dry ingredients. Mix only until just combined. Do not overmix!
  6. Fold in the Cookies: Gently fold in your flour-coated Oreo chunks with a rubber spatula.
  7. Bake Away: Divide the batter evenly between your pans. Bake for 25-30 minutes, or until a toothpick inserted into the center comes out clean. Let the cakes cool in the pans for 15 minutes before turning them out onto a wire rack to cool completely. And I mean completely.

H3: Step 2: Whipping Up the World’s Best Frosting

  1. Crush Your Cookies: For the frosting, you want finely crushed cookie crumbs. For the whitest frosting, separate the Oreo wafers from the cream filling and crush only the wafers in a food processor or a sealed bag with a rolling pin.
  2. Make the Buttercream: In your stand mixer, beat the softened butter until it’s smooth and creamy. Gradually add the sifted powdered sugar.
  3. Combine and Fluff: Add the vanilla and salt. With the mixer on low, slowly stream in the heavy cream. Once combined, turn the mixer up to medium-high and beat for 3-4 minutes until it’s light and fluffy.
  4. Add the Magic: On low speed, mix in your finely crushed Oreo crumbs until they are evenly distributed.

H3: Step 3: Assembling Your Cookies and Cream Cake

  1. Build Your Tower: Place one cooled cake layer on your turntable. Top with a thick layer of that glorious frosting. Repeat with the second and third layers.
  2. The Crumb Coat: Apply a thin layer of frosting all over the outside of the cake. This is your “crumb coat,” which traps all the loose crumbs. Chill the cake in the fridge for 30 minutes to let it set.
  3. The Final Look: Cover the chilled cake with the rest of your frosting. Use a bench scraper for smooth sides and an offset spatula for the top. Decorate with piped swirls of frosting and more Oreos. Go wild.

Calories & Nutritional Info

This cake is an absolute unit of deliciousness. It is not a health food.

  • Calories: Somewhere in the realm of 600-750 kcal per glorious slice.
  • Sugar: A delightful amount.
  • Regrets: Zero.
  • Best Enjoyed: With friends, or alone in your pajamas. No judgment.
  • Pulverizing Your Oreos: For the cake batter, you want coarsely chopped cookie pieces, not dust. If you grind them too fine, your cake will just turn a murky grey color instead of having distinct, beautiful black-and-white specks.
  • The Dreaded Grey Frosting: This happens when you crush the entire Oreo—cream filling and all—into your frosting. For a prettier, whiter frosting with black specks, use only the chocolate wafers for the frosting crumbs.
  • Sinking Cookies: Did your Oreo chunks all sink to the bottom of the pan? You probably forgot to toss them in a tablespoon of flour before folding them into the batter. This simple step helps suspend them.
  • A Dry, Sad Cake: The number one cake killer is overbaking. Start checking your cake layers a few minutes early. The second a toothpick comes out clean, they’re done.

Variations & Customizations

Feel like twisting things up? Let’s play.

  1. The “Inside Out” Cake: Flip the script! Bake a rich, dark chocolate cake and fill and frost it with the white, cookie-studded frosting. The visual contrast is stunning.
  2. Mint Cookies and Cream: Use Mint Oreos instead of the classic ones. You can even add a ¼ teaspoon of peppermint extract to the frosting for a cool, refreshing twist.
  3. Golden Oreo & Funfetti Explosion: Use Golden Oreos instead of chocolate ones and add ½ cup of rainbow sprinkles to the cake batter. It’s a pure vanilla, festive dream cake.

You’ve got questions, I’ve got cookie-dusted answers.

H3: Can I use a box cake mix to make this cake?

Absolutely! To keep things simple, a white or vanilla box cake mix is a great base. Just prepare it according to the package directions and fold in the flour-coated, chopped Oreos at the end.

H3: What’s the best way to crush Oreos?

A food processor is the fastest and easiest way. For the frosting crumbs, it gives you a fine, sand-like texture. For the cake chunks, just a few quick pulses will do. No food processor? A Ziploc bag and a rolling pin work great for some therapeutic smashing.

H3: How do I keep the Oreos from sinking in the cake?

The trick is to toss the chopped Oreo pieces in a tablespoon of your dry flour mixture before you fold them into the finished batter. This light coating of flour helps them “grip” the batter and stay suspended instead of sinking.

H3: Can I make this cookies and cream cake ahead of time?

Yes! You can bake the cake layers, let them cool completely, and wrap them tightly in plastic wrap. They’ll stay fresh at room temperature for up to two days. The frosting can also be made ahead and stored in the fridge; just let it come to room temp and re-whip it before using.

H3: Why does my Oreo frosting sometimes look grey?

That greyish tint comes from the cream filling of the Oreos being blended into the white frosting. To get a crisp, white frosting with black specks, scrape out the cream filling and use only the chocolate wafer cookies for your frosting crumbs.

H3: Can I use other types of chocolate sandwich cookies?

For sure. Any brand will work. You can even experiment with different flavors like peanut butter, mint, or golden cookies.

H3: How should I store the finished cake?

Store the cake in a cake carrier or loosely covered in the refrigerator because of the butter and cream in the frosting. Let it sit at room temperature for about 30-45 minutes before serving for the best flavor and texture.

There you have it. You are now the proud owner of a recipe for the most epic cookies and cream cake on the planet. You’ve taken a simple, beloved cookie and transformed it into a show-stopping dessert that’s guaranteed to make people happy.

So go on, bake this masterpiece. Share it with people you love. Or don’t. We wouldn’t blame you for wanting this glorious cake all to yourself.

Leave a Reply

Your email address will not be published. Required fields are marked *