Cookie Decorating 101: Your Guide to Avoiding Pinterest Fails
Alright, let’s have a talk. You’ve seen them. Those impossibly perfect, intricately decorated sugar cookies that flood your social media feeds. They’re beautiful, they’re artistic, and they look like they were decorated by magical elves with impossibly steady hands. And you’ve probably thought, “I can do that!” only to end up with a blobby, color-bled mess that looks less like a cute snowman and more like a melted marshmallow that’s seen better days. We’ve all been there.
But what if I told you that learning how to decorate cookies isn’t about having the steady hands of a surgeon, but about knowing a few simple tricks of the trade? Forget those Pinterest fails. Today, we’re demystifying the art of cookie decorating. We’re going to turn your plain sugar cookies into tiny, edible masterpieces that will make you look like a total pro, even if you feel like a toddler with a piping bag.
Why This is More Than Just Slapping on Frosting
So, why dive into the world of royal icing and piping bags? Isn’t a simple schmear of buttercream good enough? Sometimes, yes. But if you want to level up, here’s why this is awesome.
First, it’s pure creative expression. This is your chance to play with your food in the most artistic way possible. Whether you’re in Khulna on a rainy Tuesday or prepping for a big celebration, decorating cookies is a wonderfully therapeutic and fun activity. It’s like a coloring book, but you get to eat your creation at the end.
Second, decorated cookies make incredible, personalized gifts. A box of beautifully decorated homemade cookies is a top-tier present for any occasion. It says, “I spent time on this for you,” which is way better than a gift card, IMO.
And finally, it’s way easier than it looks. The secret to those perfectly smooth, professional-looking cookies is a simple technique called “outlining and flooding.” Once you master that, you can decorate pretty much any shape your heart desires.
The Ingredients: Your Edible Art Supplies
This isn’t a recipe for the cookies themselves, but for the “paint” we’ll be using to make them beautiful. Let’s talk icing.
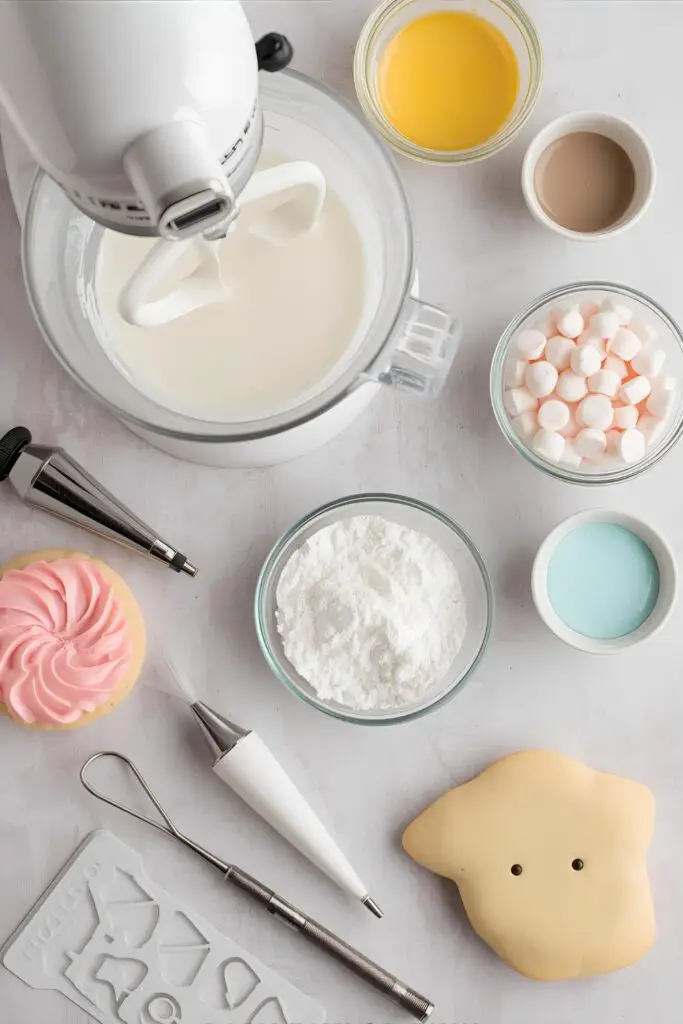
- The Canvas: A batch of your favorite cut-out sugar cookies, baked and completely cooled. (I cannot stress the “completely cooled” part enough). A good no-spread sugar cookie recipe is your best friend here.
- The Magic Icing (Easy Royal Icing):
- 4 cups Powdered Sugar, sifted: Sifting is not optional unless you enjoy lumpy icing.
- 3 tablespoons Meringue Powder: This is our secret weapon. It’s dried egg whites, which makes the icing safe to eat, stable, and helps it dry hard and beautifully. You can find it in the baking aisle or at craft stores.
- 9-12 tablespoons Lukewarm Water: We’ll use this to get our icing to the perfect consistencies.
- 1 teaspoon Vanilla Extract or Almond Extract: For a lovely flavor.
- Gel Food Coloring: Do not use liquid food coloring! Gel coloring is highly concentrated, so you can get vibrant colors without thinning out your icing.
Your Artist’s Toolkit: Gadgets & Gizmos
To become a cookie Picasso, you’ll need a few key tools.
- Stand Mixer or a powerful Hand Mixer: This is highly recommended for making royal icing. It needs a good, long whip to get to the right consistency.
- Piping Bags: Disposable or reusable, your choice.
- Piping Tips: Small round tips (like a Wilton #2 or #3) are perfect for beginners for outlining.
- A Scribe Tool or a simple Toothpick: This is your magic wand for spreading icing into tight corners and popping pesky air bubbles.
- Squeeze Bottles (optional): These can make the “flooding” step much cleaner and easier than using a piping bag.
- Small Bowls and Spoons: For mixing up all your beautiful colors.
Let’s Decorate! Your Step-by-Step Guide to Cookie Art
Ready to turn those naked cookies into works of art? Let’s do this.
Step 1: Start with a Cool Canvas
I’m going to say this one more time for the people in the back: your cookies must be 100% completely, utterly, and totally cool. Decorating even a slightly warm cookie will cause your icing to melt into a sugary puddle of sadness.
Step 2: Make the Royal Icing
In the bowl of your stand mixer (or a large bowl with a hand mixer), combine the meringue powder and 9 tablespoons of the lukewarm water. Beat with the whisk attachment until it’s frothy, about 30 seconds.
Add the sifted powdered sugar all at once. Mix on low speed until the sugar is incorporated, then turn the speed up to medium-high and beat for about 5-7 minutes. The icing should become thick, glossy, and form stiff peaks. When you pull the whisk out, the peak should stand straight up without flopping over. Stir in your vanilla extract at the end.
Step 3: Master the Consistencies (This is the REAL secret!)
This is the most important part of the whole process. We need two different icing consistencies.
- Piping/Outline Consistency: This is the thick icing straight from the mixer. It should be the consistency of toothpaste. This is what you’ll use to draw the “dams” around the edges of your cookies.
- Flood Consistency: This is a thinner icing used to fill in the outlines. To get this, take some of your stiff icing and add a tiny bit of water at a time (I’m talking 1/4 teaspoon), stirring gently with a spatula until it’s thinner. The “10-second rule” is your guide: if you drag a knife through the surface of the icing, the line should disappear in about 10-15 seconds.
Step 4: Color Your World
Divide your icing into small bowls – one for each color you want to make. Remember to create both a stiff and a flood consistency for each color you plan to use as a base. Add a tiny drop of gel food coloring at a time and stir until you get your desired shade. A little goes a long way!
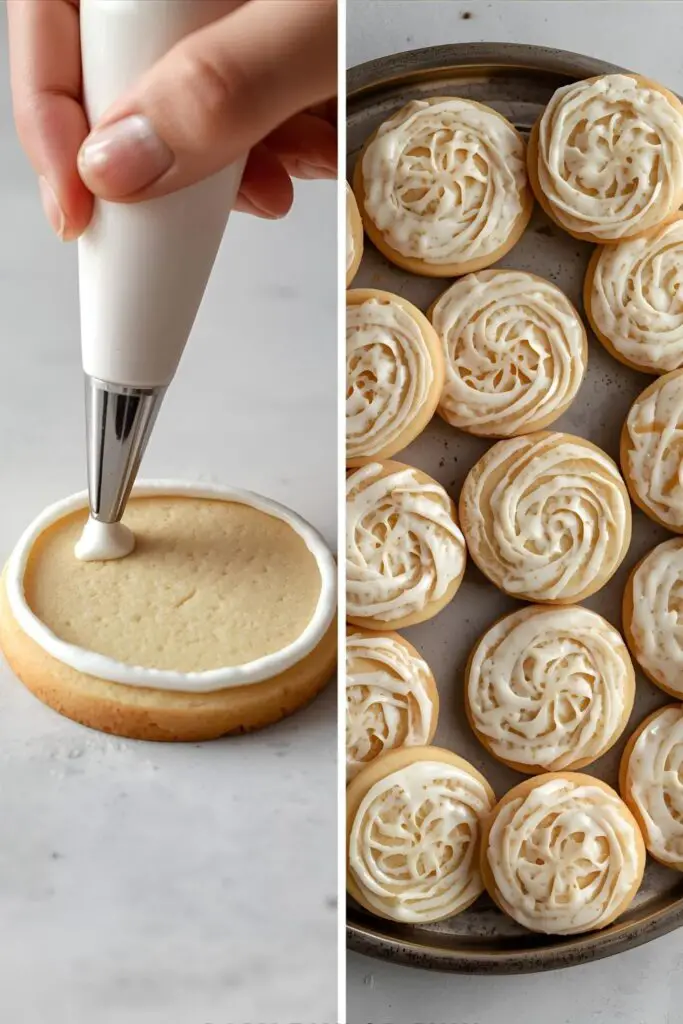
Step 5: Outline Your Cookie
Fill a piping bag fitted with a small round tip with your stiff consistency icing. Hold the bag at a 45-degree angle, slightly above the cookie surface. Gently squeeze the bag with consistent pressure and let the icing “fall” onto the cookie as you guide it around the edge. This creates a little wall or dam. Let this outline set and dry for about 15-20 minutes.
Step 6: It’s a Flood!
Now, take your flood consistency icing (in a squeeze bottle or another piping bag with the tip snipped off) and fill in the area inside your outline. Don’t go all the way to the edge; let gravity help you out.
Step 7: Smooth and Pop
Use your scribe tool or a toothpick to gently nudge the flood icing into all the corners and up against the outline. You’ll also see little air bubbles rise to the surface. Use the tip of your scribe or toothpick to pop them for a perfectly smooth finish.
Step 8: The Hardest Part… Waiting
Now, you must leave your beautifully flooded cookies alone to dry. They need to sit undisturbed at room temperature for at least 8 hours, or preferably overnight, for the icing to harden completely. Do not touch them! Do not try to stack them! Go watch a movie. Go to sleep. Just let them be.
Calories & Nutritional Info
Let’s be real, we’re decorating with sugar on top of a buttery, sugary cookie. This is a treat. The nutritional info is for the icing only, as your cookie recipe will vary. This is a rough estimate for the icing on one medium-sized cookie:
- Calories: Approximately 50-80 kcal
- Fat: 0g
- Carbohydrates: Roughly 12-20g (It’s almost pure sugar, folks!)
- Protein: < 1g
- Note: Enjoy your edible art!
Common Mistakes to Avoid (Or, How to Not End Up on a “Nailed It!” Episode)
- Decorating Warm Cookies: I’ve mentioned it three times. It’s that important. If you do this, your icing will melt. Let them cool completely.
- Getting the Icing Consistency Wrong: This is the biggest hurdle for beginners. Too thin, and your outline will spread. Too thick, and your flood icing won’t settle smoothly. Practice the 10-second rule!
- Using Liquid Food Coloring: It will add too much liquid to your perfectly calibrated icing and ruin the consistency. Stick to gel food coloring.
- Impatience: Royal icing needs a long time to dry hard. If you try to stack or package them too early, you’ll end up with dents, smudges, and heartbreak.
Variations & Customizations: Get Fancy!
Once you’ve mastered the basics, you can try some fun techniques!
- Wet-on-Wet Technique: While your base flood icing is still wet, immediately drop dots or pipe lines of another color of flood icing on top. Then, drag a scribe or toothpick through the designs to create hearts, chevrons, or marbled patterns.
- Add Some Sparkle: While the flood icing is still wet, sprinkle on some sanding sugar, nonpareils, or edible glitter for a bit of texture and sparkle.
- Layered Details (3D Effect): Let your flooded base layer dry completely overnight. The next day, you can use your stiff consistency icing to pipe details on top, like a snowman’s scarf, the seeds on a strawberry, or writing.
Frequently Asked Questions (Your Cookie Conundrums, Solved)
1. What kind of icing is best for decorating cookies that need to harden? Royal icing is the gold standard. It dries hard and matte, which makes the cookies stackable and perfect for gifting.
2. How long does it really take for royal icing to dry? To be safe for stacking and bagging, give it at least 8 hours, but overnight is best. Humidity can affect drying time, so if it’s a humid day in Khulna, it might take even longer.
3. Why isn’t my royal icing hardening? You probably added too much water, or the humidity is very high. Try letting them dry in front of a small fan to improve air circulation.
4. Can I use buttercream instead? You can, but buttercream frosting doesn’t dry hard (it just crusts over). It’s delicious but not ideal for cookies that need to be stacked or transported.
5. What is meringue powder, and is it necessary? It’s pasteurized, dried egg whites. It’s a safe and stable alternative to using raw egg whites in royal icing, and I highly recommend it for both safety and consistency.
6. How do I get my icing so smooth? The key is using the right “flood” consistency. If it’s the right runniness, it will level itself out beautifully. The scribe tool helps guide it and pop any air bubbles.
7. Can I just use the icing that comes in a tube from the store? You can use it for simple lines or details, but it won’t give you that smooth, flat, “flooded” look that professional cookies have. It also doesn’t dry as hard as royal icing.
Final Thoughts
Look at you! You’ve officially graduated from amateur cookie baker to budding cookie artist. You’ve faced the piping bag, mastered the flood, and emerged victorious. You have turned a simple cookie into a canvas for your creativity.
So go on, start simple with some basic shapes and have fun with it! Don’t worry if your first few aren’t perfect. They’ll still be delicious, and practice makes perfect. Now go forth and create some beautiful, edible art. You’ve earned it!


