It’s Not Just a Cake, It’s a Chocolate Cake Aesthetic
You know those pictures on your feed. The ones with a slice of chocolate cake that looks so deeply, darkly, decadently perfect it almost hurts. It’s not just a cake; it has a vibe. It’s moody, it’s chic, it’s rustic, and you want it. This, my friend, is the chocolate cake aesthetic, and today, you’re going to master it.
Forget those bland, pale brown chocolate cakes that taste like sweet dust. We are diving headfirst into the world of intensely rich, moist, and visually stunning chocolate cake. This is the cake you make when you want to impress someone, or when you just want to treat yourself to something that looks as incredible as it tastes. Get ready to create a chocolate cake aesthetic so powerful, your friends will ask you which cool, underground bakery you bought it from.
Why This Recipe is an Entire Mood
So, what makes this cake recipe the key to unlocking that coveted aesthetic? It’s all about depth, drama, and deliciousness.
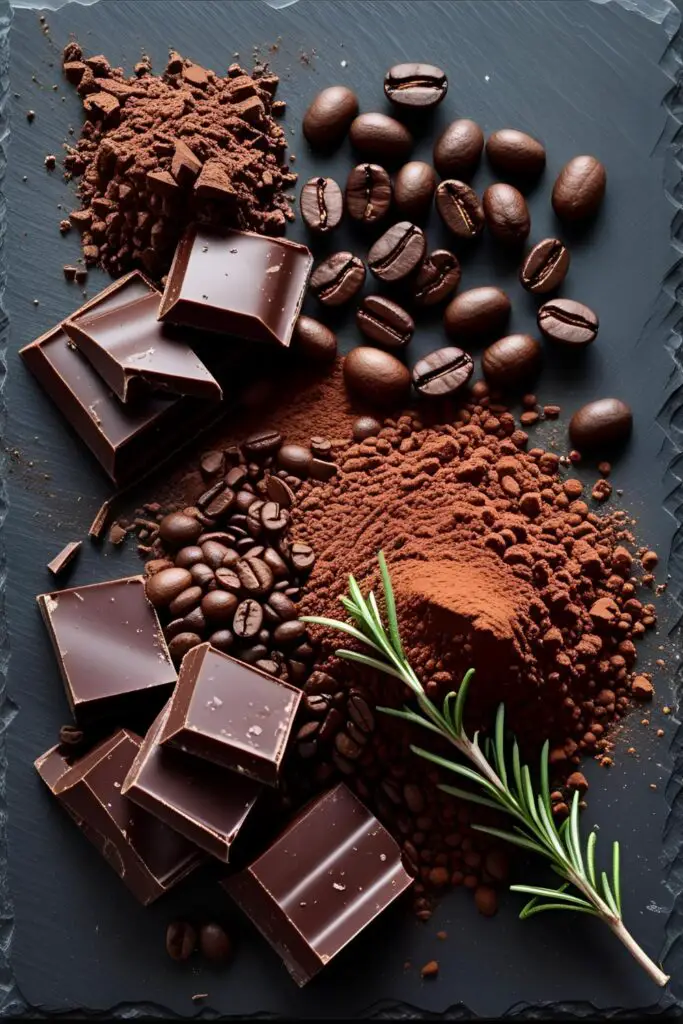
First, the flavor is intensely chocolatey. We’re not playing around here. We use two secret weapons: hot coffee and Dutch-process cocoa powder. The coffee doesn’t make the cake taste like coffee; it just makes the chocolate taste more like itself—deeper, darker, and more complex. The Dutch-process cocoa provides that rich, dark color and smooth, non-bitter flavor.
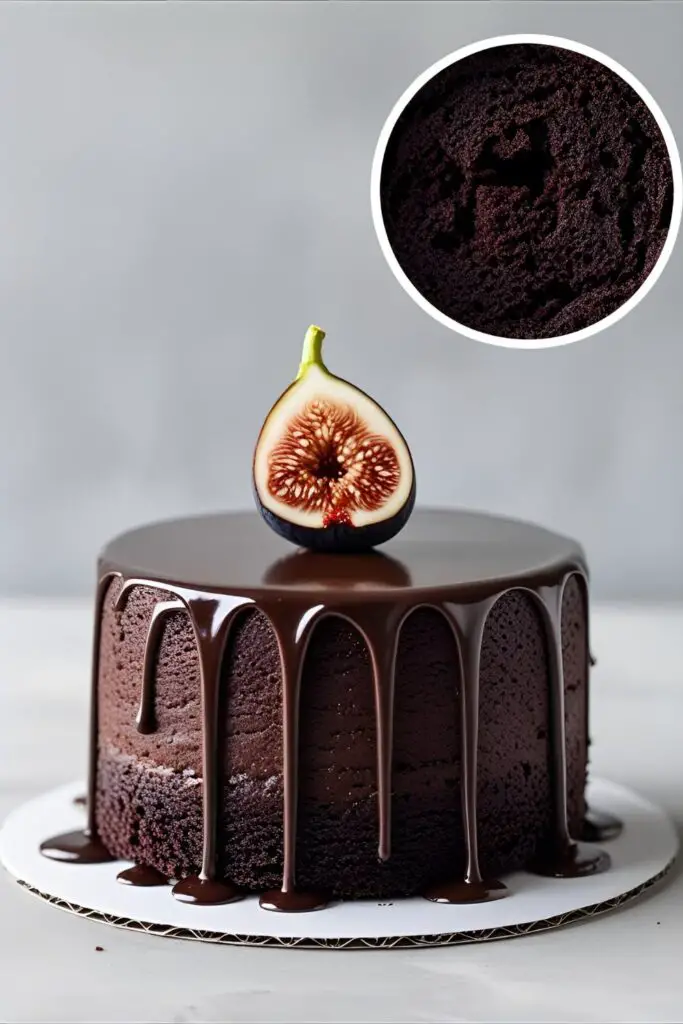
Second, the look is effortlessly cool. The beauty of the chocolate cake aesthetic is that it’s not about perfection. It’s about rustic-chic touches—a perfectly imperfect frosting swoop, a dramatic chocolate drip, and simple, elegant garnishes. It looks like it took hours of professional styling when, in reality, it’s way easier than piping a million tiny rosettes.
Finally, it’s a timeless classic. This cake is a blank canvas for any occasion. Birthday? Anniversary? A particularly dramatic Tuesday? This cake fits the bill every single time. It’s your new go-to.
The Dark & Moody Ingredients List

To create this vibe, you’ll need a squad of high-quality, flavor-packed ingredients.
- For the Dark Chocolate Cake:
- 1 ¾ cups all-purpose flour
- ¾ cup Dutch-process cocoa powder (This is a must for the dark color and smooth flavor!)
- 2 cups granulated sugar
- 1 ½ teaspoons baking soda
- 1 ½ teaspoons baking powder
- 1 teaspoon salt
- 2 large eggs, room temperature
- 1 cup buttermilk, room temperature
- ½ cup vegetable oil
- 2 teaspoons vanilla extract
- 1 cup hot, freshly brewed coffee
- For the Dark Chocolate Ganache Drip & Frosting:
- 12 oz (about 2 cups) good-quality dark chocolate, chopped
- 1 ½ cups heavy cream
- For Aesthetic Garnishes (Choose 1-2):
- Fresh figs or blackberries
- Sprigs of fresh rosemary or mint
- Chocolate shavings or shards
- A dusting of cocoa powder
The Artist’s Tools & Gadgets
To create your work of art, you’ll need the right tools in your studio.
- Stand Mixer or Hand Mixer
- Two 8-inch or 9-inch Round Cake Pans
- Parchment Paper
- Flour Sifter or a fine-mesh sieve
- Wire Cooling Rack
- Cake Turntable
- Offset Spatula
- Bench Scraper
- Squeeze Bottle or a spoon for the drip
- Heatproof Bowl for the ganache
Step-by-Step Instructions: Creating the Vibe
Let’s bake this masterpiece. It’s a simple process with a dramatic payoff.
H3: Step 1: Baking the Perfect Dark Chocolate Cake
- Prep the Realm: Preheat your oven to 350°F (175°C). Grease your cake pans and line the bottoms with parchment paper.
- Mix the Dry Ingredients: In the bowl of your stand mixer (or a large bowl), sift together the flour, Dutch-process cocoa powder, sugar, baking soda, baking powder, and salt. Give it a quick whisk to combine.
- Add the Wet Ingredients: To the dry ingredients, add the eggs, buttermilk, oil, and vanilla. Beat on medium speed for about 2 minutes until everything is well combined. The batter will be thick.
- The Magic Step: With the mixer on low, carefully pour in the hot coffee. The batter will become very thin. This is normal! This is what makes the cake so moist.
- Bake: Pour the thin batter evenly between your two prepared pans. Bake for 30-35 minutes, or until a toothpick inserted into the center comes out with moist crumbs, but not wet batter.
- Cool Down: Let the cakes cool in their pans for about 15 minutes before turning them out onto a wire rack to cool completely.
H3: Step 2: Making the Silky Ganache
- Heat the Cream: Place your chopped chocolate in a heatproof bowl. Heat the heavy cream in a small saucepan until it just begins to simmer around the edges.
- Combine and Wait: Pour the hot cream directly over the chopped chocolate. Do not stir! Let it sit for 5 full minutes to allow the cream to melt the chocolate gently.
- Stir to Perfection: After 5 minutes, stir the mixture slowly from the center outwards until a smooth, glossy ganache forms.
- Let it Cool: To use as frosting, let the ganache cool at room temperature (or briefly in the fridge), stirring occasionally, until it reaches a thick, spreadable consistency, like Nutella. To use as a drip, you’ll want it slightly warmer and more fluid.
H3: Step 3: Assembling the Chocolate Cake Aesthetic
- Frost the Cake: Place one cake layer on your turntable. Top with a generous amount of the cooled, spreadable ganache. Add the second layer. Now, you have a choice:
- For a “Naked” Look: Apply a very thin layer of ganache around the outside, scraping most of it off with your bench scraper so the cake layers peek through.
- For a Fully Frosted Look: Cover the entire cake with the ganache and smooth it with your bench scraper and offset spatula.
- Chill Before the Drip: Place your frosted cake in the fridge for 20-30 minutes to firm up. This is crucial for a controlled drip.
- The Perfect Drip: Make sure your remaining ganache is slightly warm and pourable (but not hot!). You can test it on the side of a cold glass. Use a squeeze bottle or a spoon to apply the drip around the top edge of the chilled cake, letting it run down the sides. Cover the top with the remaining ganache.
- The Final Touches: Now for the aesthetic part. Less is more. Artfully arrange a few halved figs, some fresh blackberries, or a single sprig of rosemary on top.
Calories & Nutritional Info
This cake is an experience, not a health supplement.
- Calories: Let’s just say each slice is a rich and decadent 600-800 calories.
- Fat: A glorious amount that contributes to the decadent flavor.
- Mood Boost: 1000%
- Best Paired With: A glass of red wine or a cup of black coffee and your favorite moody playlist.
Common Mistakes to Avoid (Or, How to Protect the Vibe)
- Using the Wrong Cocoa: If you use regular natural cocoa powder, your cake won’t have that signature deep, dark color or smooth flavor. Use Dutch-process cocoa. It makes a huge difference.
- A Botched Drip: This is the #1 aesthetic killer. If your ganache is too hot, the drips will run all the way to the bottom of the cake. If it’s too cold, they’ll be thick and clumpy. Your cake must be chilled, and your ganache must be slightly warm and fluid.
- Over-Decorating: The chocolate cake aesthetic is about minimalism. Don’t throw the entire produce section and a bucket of sprinkles on top. Choose 1-2 elegant garnishes and arrange them thoughtfully.
- A Dry, Crumbly Cake: The kiss of death. Do not overbake your cake. Chocolate cakes are notorious for going from moist to dry in a minute. Check them early.
Variations & Customizations
Want to change up the aesthetic? No problem.
- The Vintage Heart Aesthetic: Bake the cake in a heart-shaped pan. Frost it with a dark chocolate buttercream and use a piping bag with various star tips to create intricate, Lambeth-style vintage borders. Very trendy, very aesthetic.
- Spicy-Moody Chocolate Cake: Add 1 teaspoon of cinnamon and ½ teaspoon of cayenne pepper to your dry ingredients. This Mexican chocolate-inspired twist adds a subtle, warming heat that’s incredibly sophisticated.
- Black & White Film Noir Aesthetic: Make the dark chocolate cake as directed, but frost it with a stark white vanilla bean or ermine buttercream. Use the dark chocolate ganache for a high-contrast drip. It’s dramatic and stunning.
FAQ: Your Aesthetic Inquiries
Let’s answer the questions I know you have.
H3: What exactly is Dutch-process cocoa?

It’s cocoa powder that has been treated with an alkalizing agent to neutralize its acidity. This results in a darker color and a smoother, less bitter flavor, perfect for achieving the chocolate cake aesthetic.
H3: How do I get the perfect ganache drip consistency?
The ideal consistency is when the ganache is fluid enough to drip but thick enough to stop. It should be around 90°F (32°C). A good test is to dip a spoon in it; it should coat the back of the spoon but still drip off slowly.
H3: Can I make this cake ahead of time?
Yes! The cake layers can be baked, cooled, and wrapped tightly for up to 2 days at room temperature. The fully assembled and frosted cake is actually best the next day, as it allows the flavors to meld.
H3: What’s the best chocolate to use?
For a rich ganache, use a high-quality dark chocolate you would enjoy eating on its own, somewhere in the 60-72% cacao range. Chocolate chips contain stabilizers and won’t melt as smoothly.
H3: My cake seems oily. What happened?
This recipe uses oil for a super moist crumb that stays soft even when refrigerated. If it seems excessively oily, it might just need to fully cool and set. Don’t be alarmed; that oil is your friend.
H3: How can I make my cake even darker?
For an almost-black cake, use Dutch-process cocoa powder (sometimes labeled “black cocoa”) and a very strong, dark-roast coffee.
H3: What are some other “aesthetic” garnish ideas?

Think simple and natural. A few perfect raspberries, shards of homemade chocolate bark, gold leaf applied sparingly, or even just a beautiful dusting of cocoa powder can look incredibly chic.
Final Thoughts: You Didn’t Just Bake a Cake, You Created Art
Congratulations. You are no longer just a baker; you are a food stylist, a vibe curator, an artist. You’ve created a cake that not only satisfies a chocolate craving but also satisfies the soul (and the algorithm).
So put on your favorite indie music, pour yourself a beverage, and cut a slice of that moody, magnificent masterpiece. You didn’t just follow a recipe; you captured the chocolate cake aesthetic. And it’s a beautiful thing.