Birthday Cake Decorating for People Who Think They Can’t Decorate
Have you ever seen a gorgeous cake on Pinterest and thought, “I can do that”? Fast forward three hours, your kitchen is a warzone covered in powdered sugar, your cake looks like it survived a natural disaster, and you’re questioning all your life choices. We’ve all been there. But what if I told you that stunning, professional-looking birthday cake decorating is not some dark art practiced only by baking wizards? It’s a skill, and I’m about to be your slightly sarcastic but very helpful guide.
Forget those tragic “Nailed It!” moments. Today, we’re demystifying the process. We’re talking smooth sides, sharp edges, and a decadent drip that will make your friends ask, “Which bakery did you get this from?” Get ready to become the hero of every future birthday party.
Why You Should Bother Learning This (Besides Bragging Rights)
Let’s be honest: the bragging rights are a huge part of it. There is no feeling quite like placing a masterpiece on the table and casually saying, “Oh this? Yeah, I just whipped it up.” It’s a power move.
But beyond that, decorating your own cakes is incredibly rewarding. You get to control everything—the flavors, the colors, the exact level of sprinkle-to-cake ratio. It’s cheaper than buying a custom cake from a bakery, and IMO, it’s way more personal. It transforms a simple dessert into a heartfelt, edible gift. Plus, it’s a surprisingly zen activity… once you get past the initial “what have I done?” phase.
The “Ingredients” for a Beautiful Cake
This isn’t just about the cake itself; it’s about what you slather all over it. We’re starting with a classic, foolproof American Buttercream that’s perfect for beginners.
- Unsalted Butter: 1 cup (227g), softened to room temperature. And I mean actually room temperature. Not half-melted from the microwave. If you press it, your finger should make an indent easily, but not sink through.
- Powdered Sugar: 4 cups (about 500g), sifted. Yes, you have to sift it. Unless you enjoy chewing on sugary rocks. Your call.
- Heavy Cream or Milk: 2-4 tablespoons. This adjusts the consistency.
- Vanilla Extract: 1 tablespoon of the good stuff.
- Pinch of Salt: Just a tiny pinch to balance the sweetness.
- For the Chocolate Drip:
- Semi-Sweet Chocolate Chips: 1/2 cup (90g).
- Heavy Cream: 1/4 cup (60ml).
- Adornments: Sprinkles, candies, edible glitter. Go wild.
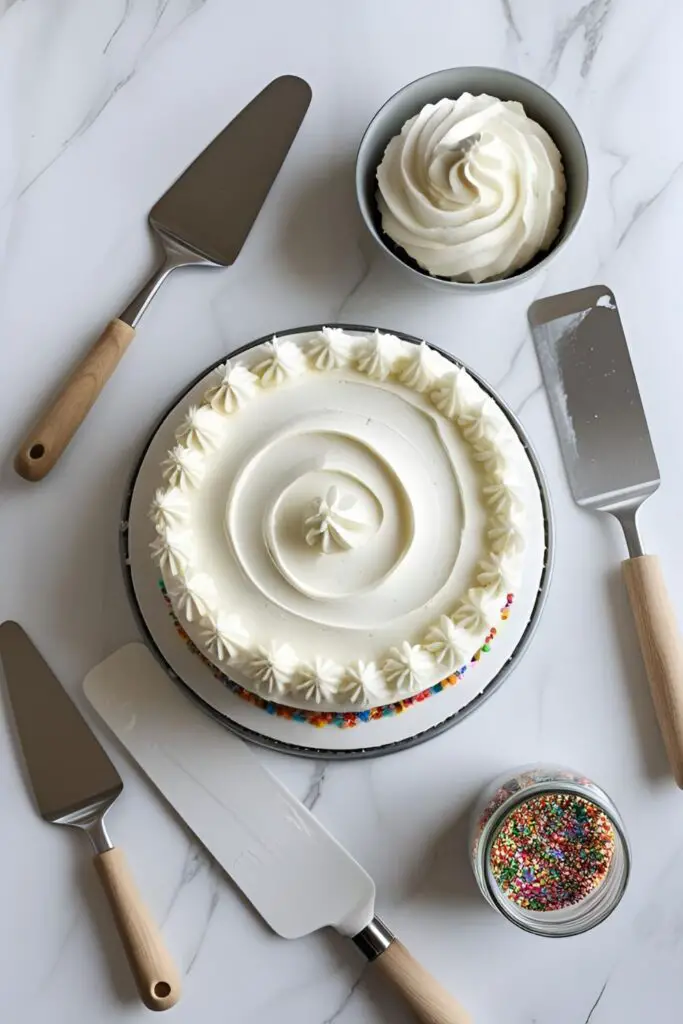
Your Decorating Toolkit: The Real MVPs
The secret to great cake decorating isn’t talent; it’s having the right tools. Seriously, these gadgets do most of the work for you.
- Cake Turntable: This is non-negotiable. Trying to decorate a cake without one is like trying to paint a portrait while the canvas runs away from you.
- Offset Spatula: Get a large one for spreading frosting and a small one for detail work. It feels weird at first, but you’ll soon realize it’s an extension of your hand.
- Bench Scraper (or Icing Smoother): This is the magic wand for achieving impossibly smooth sides. A simple, flat piece of metal or plastic will change your life.
- Piping Bags and Tips: You don’t need a 100-piece set. A few basics like a large round tip (for filling) and a star tip (for borders) are all you need to start.
- Squeeze Bottle: For applying that perfect, controlled drip. So much easier than using a spoon and praying.
- Gel Food Coloring: Gel colors are far more concentrated than liquid ones, so you won’t water down your frosting.
- A Pre-Baked and Cooled Cake: Obviously. Make sure your cake layers are completely cool and preferably chilled before you even think about frosting them.
Let’s Make Some Magic: The Step-by-Step Guide

Alright, take a deep breath. Put on some good music. Let’s do this. For this tutorial, we’re assuming you have a baked, cooled, and leveled layer cake ready to go.
Step 1: Make That Dreamy Buttercream
In a large bowl, use an electric mixer to beat the softened butter on medium-high speed for about 5 minutes. You want it to be super light, fluffy, and pale in color. Scrape down the sides of the bowl often.
Turn the mixer to low and gradually add the sifted powdered sugar. Once it’s mostly incorporated (so it doesn’t create a sugar dust storm), crank the speed back up to medium-high and beat for another 3-5 minutes until it’s silky smooth. Add the vanilla, salt, and 2 tablespoons of cream. Mix to combine, adding more cream one tablespoon at a time until you reach a nice, spreadable consistency.
Step 2: The Crumb Coat (aka The Ugly First Draft)
What’s a crumb coat? It’s a thin layer of frosting you apply to the cake to trap all the loose crumbs. This is the single most important step for a clean, professional finish. Place your first cake layer on the turntable. Plop a decent amount of frosting on top and use your large offset spatula to spread it evenly.
Add your next layer of cake and repeat. Once stacked, cover the top and sides of the entire cake with a thin, semi-translucent layer of frosting. It will look messy and full of crumbs. This is normal. Use your bench scraper to smooth the sides as best you can. It doesn’t need to be perfect; it just needs to be coated.
Step 3: Chill Out
Now, put the entire cake in the refrigerator for at least 30 minutes (or the freezer for 15). The frosting needs to be firm to the touch. This locks in the crumbs and gives you a stable surface for your final coat. Do not skip this step!
Step 4: The Final Coat & Getting Smooth

Take your chilled cake out. Apply a much thicker, more generous layer of frosting all over the top and sides. Be liberal with it! You’ll be scraping most of it off.
Now, grab your bench scraper. Hold it vertically against the side of the cake at a 45-degree angle. While spinning the turntable with your other hand, hold the scraper steady and let it smooth the frosting. Scrape the excess frosting off your scraper into a bowl after each pass. Fill in any gaps and repeat until it’s smooth. For the top, use your offset spatula to gently pull the raised edge of frosting toward the center.
Step 5: The Perfect Drip
Gently heat the heavy cream in the microwave until it’s hot but not boiling. Pour it over the chocolate chips in a bowl and let it sit for 5 minutes. Whisk until completely smooth.
Let the ganache cool for about 10-15 minutes. It should be slightly warm, but not hot. If it’s too hot, it will melt your buttercream. If it’s too cold, it won’t drip. Test it on the side of a glass. Using your squeeze bottle, apply drips around the edge of your chilled cake. Once the drips are done, you can flood the top with the remaining ganache.
Step 6: The Grand Finale
This is the fun part! Before the drip sets, go crazy with sprinkles. Add some piped borders or rosettes on top using a star tip. Stick some fun candies on there. You’re the artist!
The Nutritional “Fine Print” (For the Frosting)

Because you definitely care about the calories in a giant pile of butter and sugar. 😉
- Serving Size: 1 generous slice’s worth of frosting & drip
- Estimated Calories: ~350 kcal
- Sugar: A glorious amount.
- Fat: ~20 g
- Joy: 100% of your daily recommended value.
- Note: This is a wild guess. Please don’t eat cake for its nutritional value.
Common Decorating Disasters & How to Avoid Them
- Frosting a Warm Cake: You will create a soupy, sliding, weeping mess. The Fix: Patience. Let your cake cool completely. Then chill it. Then chill it again.
- Skipping the Crumb Coat: Your final coat will be full of ugly crumbs, making it impossible to get a smooth finish. The Fix: Just do the crumb coat. It’s 10 minutes of work that saves you a world of pain.
- A Runny, Tragic Drip: Your ganache was too hot or your cake wasn’t cold enough. The Fix: Chill your frosted cake thoroughly. Let your ganache cool to lukewarm before applying.
- Grainy Buttercream: You didn’t sift your powdered sugar, or you didn’t beat your butter long enough. The Fix: Sift that sugar! And beat the butter like it owes you money, both before and after adding the sugar.
Get Creative: Fun Decorating Styles

Once you’ve mastered the smooth finish and drip, try these trendy variations!
- The “Semi-Naked” Cake: This rustic, chic look is basically just an enhanced crumb coat. You apply a very thin layer of frosting so that parts of the cake layers peek through. It’s minimalist and beautiful, especially when adorned with fresh flowers or fruit.
- Watercolor Buttercream: For this artistic effect, dot splotches of different colored frosting onto your white final coat. Then, use your bench scraper to smooth and blend the colors together as you spin the turntable. It creates a gorgeous, painted look.
- Sprinkle Fault Line Cake: This looks complicated but is surprisingly simple. After your crumb coat, apply a thick band of sprinkles around the middle of the cake. Then, apply a thick layer of frosting above and below the sprinkle line, leaving the sprinkles exposed. Use your offset spatula to create a rugged “fault line” edge.
Frequently Asked Questions From the Trenches
How do you get buttercream SO smooth?
The holy trinity: a cake turntable, a bench scraper, and a chilled cake. The turntable provides smooth motion, and the bench scraper does the smoothing for you. A cold, firm cake prevents sliding.
Why is my buttercream grainy or runny?
Grainy usually means you didn’t sift your powdered sugar. Runny means your butter was too warm or you added too much liquid. You can thicken it by adding more sifted powdered sugar, or firm it up by chilling it in the fridge for 15-20 minutes.
What is a crumb coat and is it REALLY necessary?
It’s a thin “sealing” layer of frosting that traps crumbs. And yes, it is 100% necessary if you want a clean, professional-looking cake free of brown flecks.
Can I decorate a cake the day before an event?
Yes! In fact, it’s often better. Buttercream cakes hold up beautifully in the refrigerator. Just store it in a cake box or a covered container. Let it sit at room temperature for about 30-60 minutes before serving for the best texture.
How do I fix cracks in my frosting?
Cracks usually form when a cold cake is moved and flexes. You can often repair them by running a hot offset spatula (dip it in hot water and wipe it dry) very gently over the crack to smooth it out.
What’s the easiest birthday cake decorating idea for a total beginner?
The rustic, semi-naked look! It’s incredibly forgiving, and imperfections are part of its charm. Slap on some frosting, scrape most of it off, and top with fresh berries. Done.
How much frosting do I need for a standard cake?
A recipe making about 4-5 cups of frosting (like the one above) is usually enough to fill, stack, and frost a standard 3-layer, 8-inch round cake. It’s always better to have a little extra than not enough.
Final Thoughts
You now hold the keys to the kingdom of birthday cake decorating. Gone are the days of sad, lopsided cakes. You are now a certified cake artist, a buttercream boss, a sprinkle surgeon. So go forth and create something delicious and beautiful.
And when your friends and family gasp in awe, just give them a cool, nonchalant shrug and say, “Oh, it was nothing.” We’ll know the truth. Welcome to the club.