This Better-Than-Takeout Orange Chicken Recipe Will Ruin Delivery For You
Let’s have a brutally honest chat about takeout. You’ve had a long day. The idea of cooking feels like a punishment. You pull up your favorite delivery app, your thumb hovering over that familiar picture of glossy, sweet, and sticky chicken. But when it arrives, it’s… fine. A little soggy, maybe a bit too sweet, and definitely not as crispy as you dreamed. What if I told you that you could make a truly phenomenal orange chicken recipe at home, faster than your delivery driver can find your apartment? This, my friend, is that recipe. Prepare to delete your takeout apps.
You’re skeptical. I get it. “Frying is messy,” you say. “Sauces are complicated.” Forget all that. We are about to embark on a journey to crispy, tangy, perfectly balanced orange chicken nirvana, and I’ll be your slightly sarcastic but very trusty guide.
Why This Recipe is Awesome (And Will Make You Famous)
First, let’s talk about the CRUNCH. We are not making sad, soggy chicken nuggets. We are creating a shatteringly crisp coating that stays crunchy even after being lovingly tossed in that glorious sauce. This is the texture you’ve been searching for your whole life.
Second, the sauce is perfection. It’s not the one-note, corn-syrupy sweet goo you get from the food court. This sauce is a symphony of flavors—bright with real orange juice and zest, savory from soy sauce, and tangy from rice vinegar, with just the right amount of sweetness. It’s a grown-up orange chicken sauce.
Finally, it’s shockingly fast. Once you have your ingredients prepped (what the fancy people call mise en place), the actual cooking process is a whirlwind of delicious chaos. You’ll have a restaurant-quality meal on the table in about 30-40 minutes. Your family will think you’re a superhero. Let them.
Ingredients: Your Path to Crispy, Saucy Enlightenment
This recipe has a few components, but don’t panic! They’re all simple. We’ll break it down.
For the Crispy Chicken:
- Chicken: 1.5 lbs of boneless, skinless chicken thighs, cut into 1-inch chunks. Thighs are superior here for their flavor and moisture, but breasts will work in a pinch.
- For the Marinade/Coating:
- 1 large egg, beaten.
- 1 tablespoon soy sauce.
- 1/2 teaspoon white pepper (or black pepper if that’s all you have).
- 1/2 cup all-purpose flour.
- 1/2 cup cornstarch. This is the secret to an ultra-crisp coating.
- Frying Oil: About 3-4 cups of a neutral oil with a high smoke point, like canola, vegetable, or peanut oil.
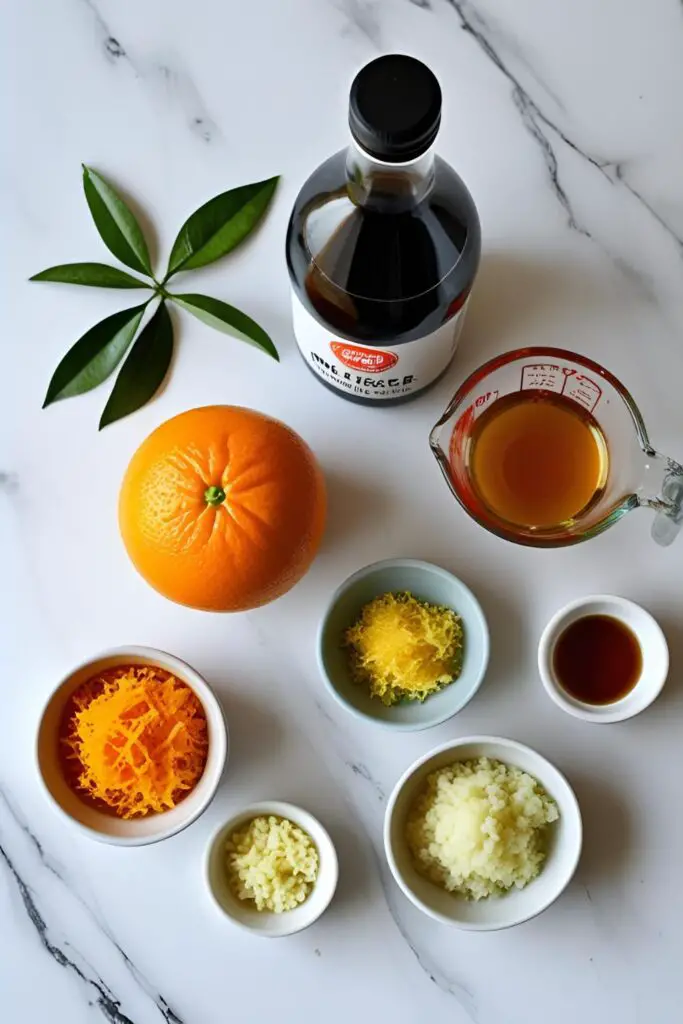
For the Perfect Orange Sauce:
- Orange Juice: 1 cup of freshly squeezed orange juice. Seriously, fresh makes a HUGE difference. You’ll need about 2-3 large oranges.
- Orange Zest: 1 tablespoon of fresh orange zest. This is where the real orange flavor comes from.
- Soy Sauce: 1/4 cup of low-sodium soy sauce.
- Rice Vinegar: 3 tablespoons. For that essential tangy kick.
- Sugar: 1/4 cup of granulated sugar (or sub honey/maple syrup).
- Aromatics: 1 tablespoon freshly grated ginger and 2 cloves of minced garlic.
- Cornstarch Slurry: 1 tablespoon cornstarch mixed with 2 tablespoons of cold water. This is our thickening agent.
- Garnish (Optional but Recommended): Toasted sesame seeds and sliced green onions.
Substitution Notes: For a gluten-free version, use tamari instead of soy sauce and a gluten-free all-purpose flour blend for the coating.
Tools & Kitchen Gadgets Used
Having the right gear makes frying way less intimidating. Here’s what you’ll need:
- A Wok or a Large, Heavy-Bottomed Skillet/Pot: You need something deep enough to hold a couple of inches of oil safely.
- Spider Strainer or Slotted Spoon: For safely fishing your golden-brown chicken out of the hot oil.
- Wire Rack: Placing the fried chicken on a wire rack (set over a baking sheet) keeps it crispy all around. Draining on paper towels can make the bottom soggy.
- Mixing Bowls: You’ll need a couple for coating the chicken and mixing the sauce.
- Whisk: For creating a smooth, lump-free sauce.
- Kitchen Thermometer: A deep-fry or candy thermometer is a game-changer for getting the oil temperature just right. It’s not mandatory, but it helps immensely.
- Microplane or Zester: For getting that fine zest from your orange and grating the ginger.
Step-by-Step Instructions: Let’s Get Cooking
Alright, deep breath. You can do this. It’s going to get a little messy, but it will be so, so worth it.
Step 1: Make the Sauce First
In a small saucepan, whisk together all the sauce ingredients—except for the cornstarch slurry. That’s the orange juice, zest, soy sauce, rice vinegar, sugar, ginger, and garlic. Bring the mixture to a simmer over medium heat. Let it bubble for a couple of minutes for the flavors to meld. You’ll thicken it later. Just set it aside for now. See? Easy.
Step 2: Prep and Coat the Chicken
Pat your chicken chunks thoroughly dry with paper towels. This is a critical step for a crispy coating. In a large bowl, whisk the beaten egg, 1 tablespoon of soy sauce, and white pepper. Add the dry chicken chunks and toss to coat them evenly.
In a separate shallow dish or another bowl, whisk together the flour and cornstarch. Working with a few pieces at a time, dredge the egg-coated chicken in the flour mixture, pressing gently to make sure it’s fully and generously coated. Place the coated pieces on a plate or tray in a single layer.
Step 3: Heat the Oil (The Moment of Truth)
Pour your frying oil into your wok or large pot until it’s about 2 inches deep. Heat it over medium-high heat until it reaches 350°F (175°C). If you don’t have a thermometer, you can test it by dropping a tiny bit of batter in; if it sizzles vigorously and turns golden in about 30-45 seconds, you’re ready.
Step 4: Fry the Chicken in Batches
Carefully place about a third of the chicken pieces into the hot oil, one by one. Do not crowd the pan! This is the cardinal sin of frying and will result in sad, greasy chicken. Fry for about 4-5 minutes, turning occasionally, until the chicken is a beautiful golden brown and cooked through.
Use your spider strainer to remove the chicken and let it drain on the wire rack. Repeat with the remaining batches, making sure the oil comes back up to temperature between each batch.
Step 5: Thicken the Sauce and Combine
Bring your sauce back to a simmer over medium heat. Give your cornstarch slurry a quick re-stir (it separates quickly) and slowly whisk it into the simmering sauce. Continue to cook, stirring, for about 1-2 minutes until the sauce thickens enough to coat the back of a spoon.
Turn off the heat. Add all your beautifully crispy fried chicken to the pot with the sauce. Gently toss everything together until every single piece of chicken is coated in that glossy, magical orange glaze. WORK QUICKLY! You want to serve it immediately to preserve that crunch.
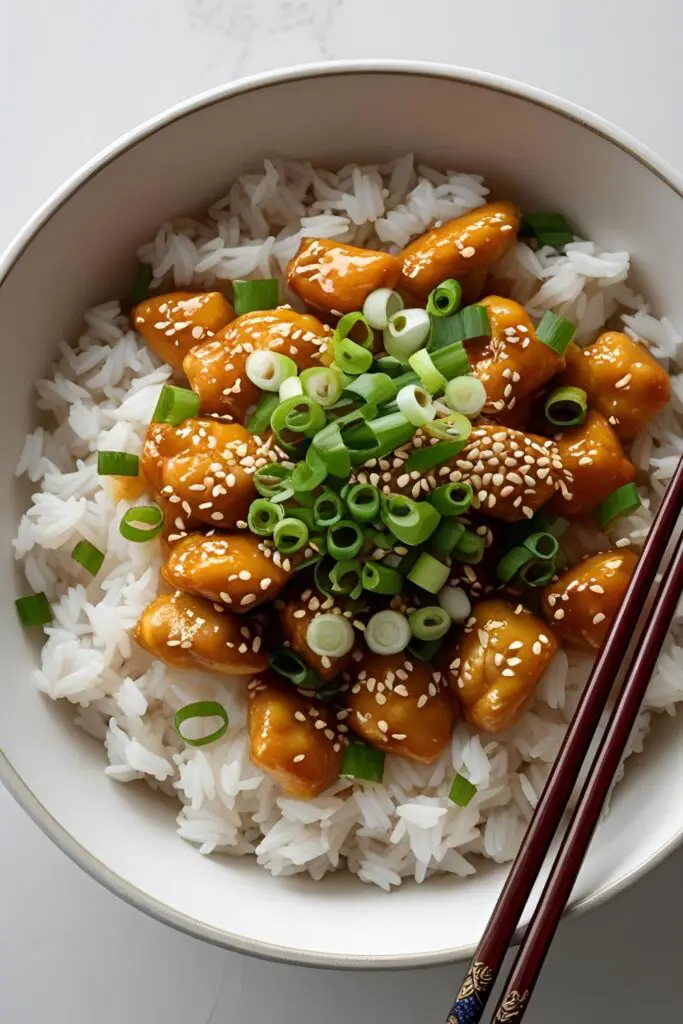
Step 6: Serve and Accept Your Crown
Serve your masterpiece immediately over fluffy white rice. Garnish with a sprinkle of toasted sesame seeds and sliced green onions to make it look extra fancy. Now, step back and accept the thunderous applause.
Calories & Nutritional Info
Let’s be real, this is a treat. But if you must know, here’s an estimate per serving (assuming 4-5 servings).
- Calories: Approximately 600-750 kcal
- Protein: Around 30g
- Carbohydrates: Around 50g (mostly from the coating and sugar)
- Fat: Around 35g (mostly from the frying oil)
- Note: This is a classic takeout-style dish. It’s high in sugar, sodium, and fat, which is precisely why it tastes so darn good. Enjoy it in moderation! 🙂
Common Mistakes to Avoid (Listen Up!)
I’m telling you this because I care. Don’t let these simple mistakes stand between you and orange chicken glory.
- The Soggy Chicken Debacle: This happens for three reasons: your oil wasn’t hot enough, you crowded the pan, or you let the finished chicken sit in the sauce for too long. Use a thermometer, fry in batches, and sauce right before serving.
- Using Bottled Orange Juice: I know it’s tempting, but bottled OJ can be overly sweet and lacks the bright, zesty punch of the real thing. Freshly squeezed juice and zest are non-negotiable for the best flavor.
- The Gloopy Sauce Tragedy: Did you dump all the cornstarch slurry in at once? Tsk tsk. Whisk it in slowly to a simmering sauce. If it gets too thick, you can thin it out with a splash of water or more orange juice.
Variations & Customizations
Feeling creative? Go for it. This recipe is a great canvas.
Spicy Orange Chicken
This is a no-brainer. Add 1-2 teaspoons of sriracha or a hefty pinch of red pepper flakes to the sauce when you’re simmering it. Adjust the amount to your preferred level of heat.
The “Healthier” Baked Orange Chicken
Don’t want to deep-fry? I get it. Coat the chicken as directed, then arrange it in a single layer on a baking sheet lined with parchment paper. Spray generously with cooking oil and bake at 425°F (220°C) for 20-25 minutes, flipping halfway through, until golden and cooked. It won’t be as crispy, but it’s still delicious. An air fryer also works wonders here!
Vegetarian Orange Tofu
Swap the chicken for a block of extra-firm tofu. Press it well to remove as much water as possible, then cut it into 1-inch cubes. Coat and fry it just like the chicken. It’s a fantastic vegetarian alternative.
FAQ: Your Orange Chicken Questions, Answered
Here are some things you might be wondering about.
1. What’s the difference between Orange Chicken and General Tso’s Chicken? They’re similar, but General Tso’s is typically spicier and has a more complex, savory-sweet flavor profile, while Orange Chicken is sweeter and defined by its citrusy taste.
2. How do I get my chicken extra, extra crispy? The secret is a double fry! Fry the chicken for 2-3 minutes in the first pass. Remove and let it rest while you fry the other batches. Then, increase the oil temperature to 375°F (190°C) and fry each batch again for 1-2 minutes until deep golden brown. It’s extra work, but the crunch is insane.
3. What should I serve with orange chicken? Simple steamed rice (jasmine or basmati) is classic. You could also serve it with fried rice or steamed veggies like broccoli or bok choy to round out the meal.
4. Can I prepare any of this ahead of time? Yes! You can make the sauce and store it in the fridge for up to 3 days. You can also cut up and coat the chicken a few hours ahead of time and keep it refrigerated. Then, just fry and combine when you’re ready to eat.
5. How do I store and reheat leftovers? Store leftovers in an airtight container in the fridge for up to 3 days. FYI, the chicken will lose its crispiness. To reheat, your best bet is the oven or an air fryer at around 375°F (190°C) for 10-15 minutes to try and revive some of the crunch.
6. My sauce isn’t thickening. What did I do wrong? First, make sure your sauce is at a simmer when you add the slurry. Second, ensure you mixed your cornstarch with cold water. Adding cornstarch directly to a hot liquid will create lumps. If it’s still thin, just make another small slurry and add a bit more.
7. Can I use chicken breasts instead of thighs? You absolutely can. Just be careful not to overcook them, as breast meat can dry out more easily than thigh meat. Cut them into uniform 1-inch pieces to ensure even cooking.
Final Thoughts
You did it. You faced the hot oil, you whisked the perfect sauce, and you created a dish that will make your local takeout place wonder why you stopped calling. You are now the master of your own orange chicken destiny. Go forth and be crispy. Never settle for soggy again.