The Ultimate Cars Birthday Cake Tutorial (It’s a Total Piston Cup Winner)
Alright, parents, let’s huddle up. Your little one’s birthday is approaching, and they’ve made their request. They don’t just want any cake; they want a cars birthday cake. You have visions of spending hundreds of dollars on a professional cake or spending days wrestling with fondant to sculpt a perfect, edible Lightning McQueen. I am here today to tell you to put down the fondant. Back away slowly. There is a better, easier, and way more fun way to make a cake that will have your kid yelling, “Ka-chow!”
We are about to create a jaw-dropping racetrack cake using one simple sheet cake, some clever frosting, and a brilliant hack that doubles as a birthday present. This isn’t just a recipe; it’s a strategy. It’s the ultimate “work smarter, not harder” guide to winning the birthday party game.
Why This Racetrack Cake is a Genius Move
So, why is this method the absolute best way to tackle a “Cars” cake? Let’s get into the specs.
- It’s Incredibly Easy: I’m serious. The most complicated part of this cake is crushing some cookies. You’re essentially just frosting a cake and playing with dirt (the delicious, chocolatey kind). No carving, no sculpting, no tears.
- The “Toy Topper” Hack: The best part? The characters are real toy cars. This means you don’t have to create them, and the birthday kid gets to keep and play with them after the candles are blown out. It’s a decoration and a gift all in one. You’re a hero.
- It Looks Amazing: This cake has a huge “wow” factor. The contrast of the green “grass,” the black “asphalt” road, and the colorful cars creates a vibrant, action-packed scene that kids go absolutely bonkers for.
The Ingredient Lineup: Fuel for the Big Race
To build our racetrack, we need a solid foundation and some delicious scenery.
For the Sturdy Chocolate Sheet Cake:
- All-Purpose Flour: 2 cups.
- Granulated Sugar: 2 cups.
- Unsweetened Cocoa Powder: ¾ cup.
- Baking Soda: 2 teaspoons.
- Baking Powder: 1 teaspoon.
- Salt: 1 teaspoon.
- Large Eggs: 2.
- Strong Hot Coffee or Hot Water: 1 cup.
- Buttermilk: 1 cup.
- Vegetable Oil: ½ cup.
- Vanilla Extract: 1 teaspoon.
- The Ultimate Shortcut: Don’t have time for scratch baking? One box of your favorite chocolate cake mix will work perfectly. The kids will never know the difference, I promise.
For the Frosting & Scenery:
- Unsalted Butter: 1 ½ cups (3 sticks), softened.
- Powdered Sugar: 5-6 cups, sifted.
- Milk or Heavy Cream: 4-5 tablespoons.
- Vanilla Extract: 1 ½ teaspoons.
- Salt: A pinch.
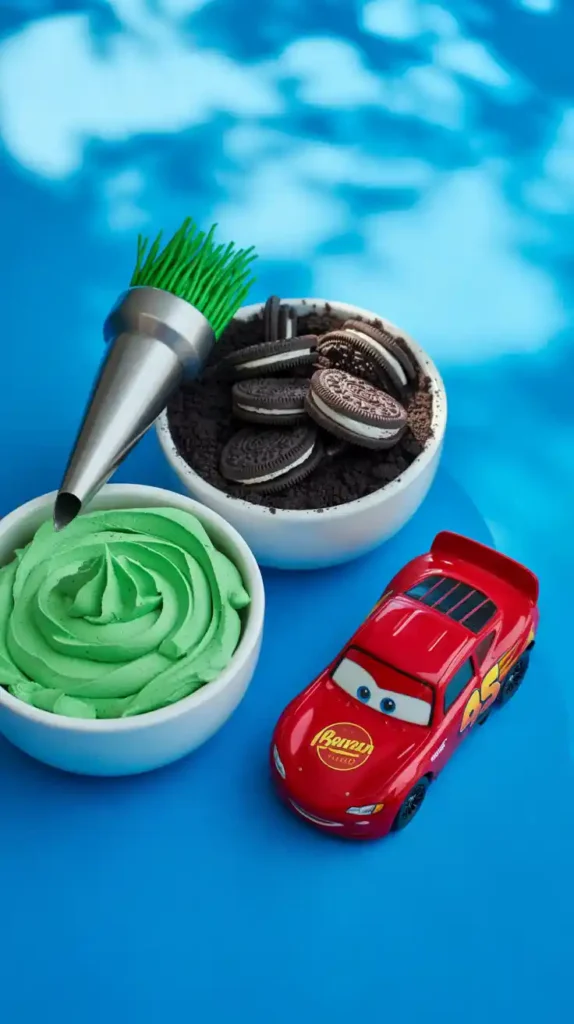
- Gel Food Colorings: Green and Black (or just use more Oreos for black).
- The “Asphalt”: One package of Oreo cookies, filling and all.
- The Racers: A few new, clean toy cars from the “Cars” movie (Lightning McQueen, Mater, Sally, etc.).
Tools & Kitchen Gadgets: Your Pit Crew
Gather your equipment. It’s time to get this show on the road.
- A 9×13 inch Rectangular Cake Pan: The perfect size for a racetrack.
- A Stand Mixer or Hand Mixer: For whipping up your cake and frosting.
- A Large Offset Spatula: Your best friend for frosting a sheet cake smoothly.
- A Large Cake Board or Cookie Sheet: To present your masterpiece.
- A Food Processor or a Ziploc Bag and a Rolling Pin: For pulverizing the Oreos into “asphalt.”
- Piping Bags and Tips (Optional): A grass tip (Wilton #233) is amazing for creating grassy textures, and a small round tip is great for the road lines.
Step-by-Step Instructions: Building the Racetrack

Gentlemen (and ladies), start your engines! Let’s build this cake.
Step 1: Pave the Foundation
- Preheat your oven to 350°F (175°C). Grease and flour your 9×13 inch pan.
- In a large bowl, whisk together all your dry cake ingredients. In a separate bowl, whisk the wet ingredients. Pour the wet into the dry and mix until just combined.
- Pour the batter into your prepared pan and bake for 30-35 minutes, or until a toothpick inserted into the center comes out clean. Let the cake cool completely in the pan.
Step 2: Create the “Asphalt”
While the cake cools, make your road. Place the entire package of Oreo cookies (filling included) into a food processor and pulse until they are fine crumbs. No food processor? No problem. Put them in a sturdy Ziploc bag, seal it, and go to town on it with a rolling pin. It’s great for stress relief.
Step 3: Lay the Landscape
- Once the cake is totally cool, it’s time to frost. Tint the majority of your buttercream a nice, grassy green.
- Frost the entire surface of the cake with a smooth, even layer of the green frosting. This is your grassy field.
Step 4: Build the Racetrack
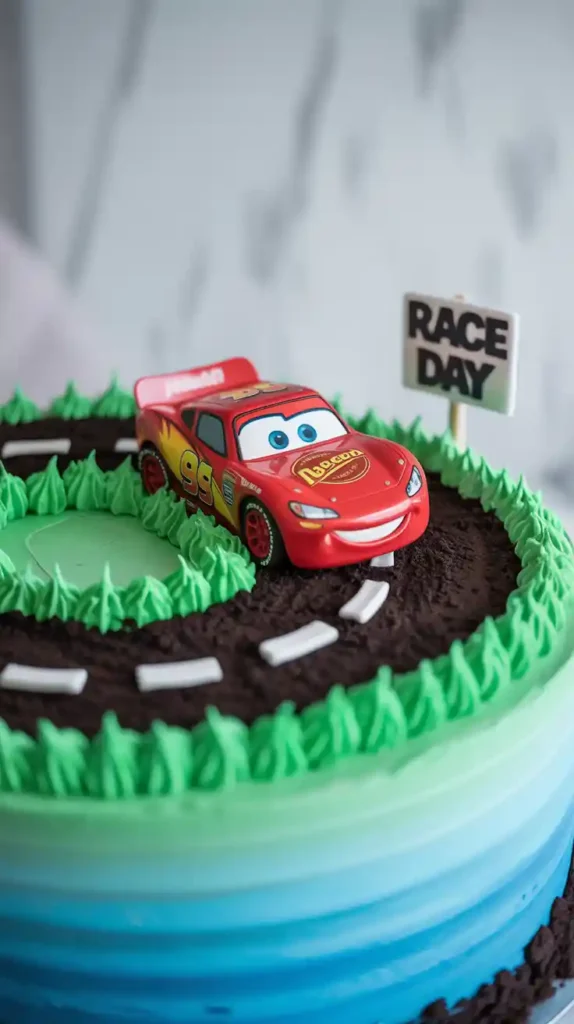
Now for the fun part. Using your Oreo crumbs, carefully spoon out a road shape onto the green frosting. You can do a simple oval, a winding “S” shape, or a figure-eight if you’re feeling ambitious. Gently pat the crumbs down so they stick to the frosting.
Step 5: The Finishing Touches
- Using a small round piping tip with white or yellow frosting, pipe a dashed line down the middle of your Oreo road.
- If you have a grass tip, pipe some tufts of grass along the edges of the road for a more realistic look.
- Wash and thoroughly dry your new toy cars. This is a very important step!
- Arrange Lightning McQueen, Mater, and friends on the racetrack. Place a checkered flag at the finish line. Stand back and marvel at your creation.
Calories & Nutritional Info (Race Day Fuel)
This is a birthday cake designed for pure joy and a sugar rush sufficient to power a small stock car.
- Serving Size: One happy kid.
- Primary Nutrients: Sugar, fun, and glory.
- Calories: Enough to get you through a few victory laps around the living room.
Common Mistakes to Avoid (Race Day Disasters)
- A Bumpy Racetrack: If your cake has a big dome in the middle, your racetrack will be hilly. Use a long serrated knife to level the cake before you frost it for a nice, flat surface.
- Placing Dirty Toys on the Cake: I know it’s exciting, but you must wash the new toy cars with soap and water and dry them completely before they touch the frosting.
- The Oreo Avalanche: Don’t just dump the Oreo crumbs on the cake. Spoon them on carefully to create your road shape, then gently press them into the frosting to secure them.
- The Sinking Car: If your frosting is very soft or the room is warm, the cars might sink a little. Popping the frosted cake in the fridge for 15-20 minutes to firm up before adding the Oreos and cars can help.
Variations & Customizations
Want to take a detour? Here are a few fun ideas.
1. The Radiator Springs Desert Scene

Instead of green frosting, tint your buttercream a sandy beige or light orange. Use crushed Graham crackers or Nilla Wafers for the “sand.” You can pipe on a few green cacti and use chocolate rocks for boulders to complete the desert look.
2. The Figure-Eight Speedway
Feeling ambitious? Create a more complex figure-eight racetrack that overlaps in the middle. You can even create a little “bridge” out of a piece of chocolate or a Kit Kat bar.
3. The Tire Stack Cake
For a different take, bake two or three 8-inch round chocolate cakes. Stack them and frost them with black-tinted frosting. Use a piping bag to pipe grey “treads” and a “hubcap” design on the side. It looks just like a stack of tires from Luigi’s shop!
FAQ: Your Pit Crew Questions, Answered
Do I have to make the cars out of fondant?
Please don’t, unless you are a professional and/or enjoy suffering. Using clean, new toy cars is so much easier, looks fantastic, and the birthday kid gets a present out of it. It’s the ultimate cake hack.
What is the best way to make the black road?
Crushed Oreo cookies are the undisputed champion. They have the perfect color and texture, and they taste delicious with the chocolate cake.
Can I make this cake ahead of time?
Yes! You can bake the sheet cake a day or two in advance. Let it cool, then wrap it tightly and store at room temperature. Frost and decorate it the day of or the day before the party. Just add the toy cars right before serving.
How do I get my Oreo crumbs to stick without making a huge mess?

Apply them to the frosting while it’s still fresh and tacky. Use a spoon to control where the crumbs go. Pat them down gently with the back of the spoon.
Is this cake design good for a beginner?
This is one of the easiest and most forgiving character cakes you can possibly make. It’s perfect for beginners who want to create something with a huge “wow” factor.
What other decorations can I add to the scene?
Get creative! You can use small checkered flags, green-tinted coconut flakes for extra-textured grass, or candy rocks. You could even add a few of the green army men toys, just like in the movie.
How do I store leftovers?
Cover the cake and store it in the refrigerator. It will stay fresh for up to 3-4 days. Just remove the toy cars before storing.
Final Thoughts
You did it. You navigated the twists and turns and crossed the finish line. You have created a Cars birthday cake that is destined for the winner’s circle. You have saved yourself time, stress, and the headache of trying to sculpt a car out of frosting.
So get ready for the roar of the crowd (or, you know, the excited squeals of a bunch of kids). You’re about to be the hero of the birthday party. Ka-chow!