How to Bake a Ridiculously Aesthetic Chocolate Cake (It’s Easier Than You Think!)
Ever find yourself in a doom-scroll spiral, staring at impossibly perfect cakes on your feed? You know the ones. They’re moody, minimalist, and look like they were baked by a food stylist with a degree in architecture. You sigh, double-tap, and resign yourself to another year of buying a generic sheet cake from the grocery store. Well, what if I told you that making your own aesthetic chocolate cake is not only possible but actually… easy?
Yes, you heard me. This isn’t one of those recipes with a ten-page instruction manual and ingredients you have to forage for during a full moon. This is the cake that will make your friends gasp, your family question if you secretly went to pastry school, and your Instagram followers flood your DMs.
So, let’s ditch the intimidation and bake a cake that tastes even better than it looks. Ready?
Why This Recipe is Your New Best Friend
Honestly, where do I begin? This cake isn’t just a pretty face.
First, the flavor is out of this world. We’re talking deep, dark, ridiculously moist chocolate flavor. This is thanks to a couple of secret weapons (hello, coffee and buttermilk!) that create a tender crumb that practically melts in your mouth. It’s rich without being overwhelmingly sweet.
Second, it’s deceptively simple. The cake batter comes together in one bowl. The “frosting” is a simple two-ingredient ganache that looks incredibly fancy but is basically just melted chocolate and cream. No complex buttercream techniques here, folks.

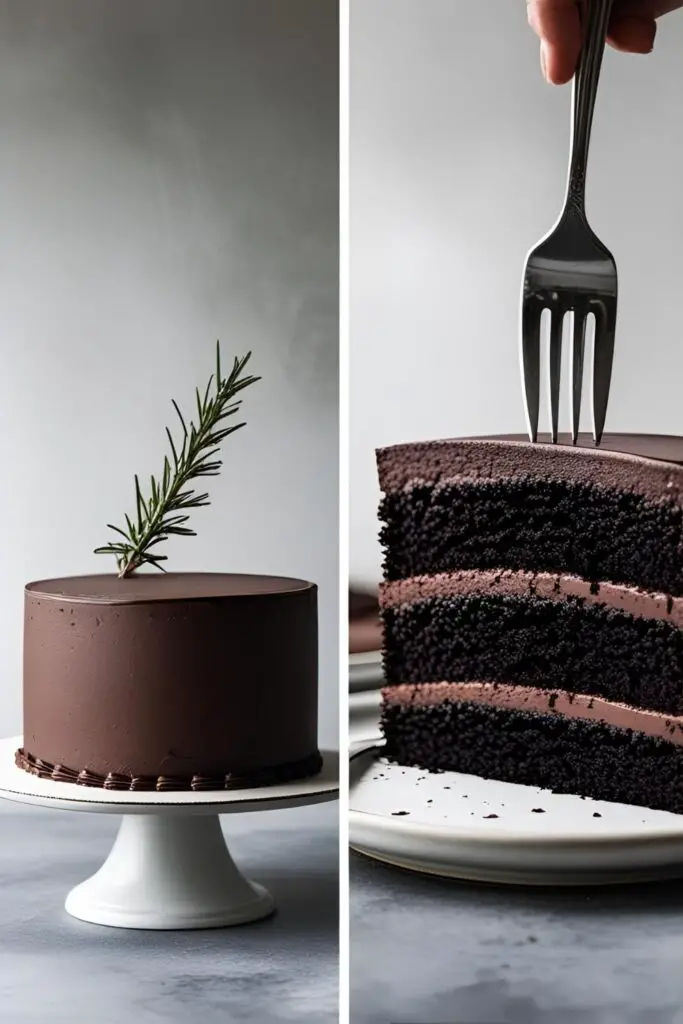
Finally, the “wow” factor is off the charts. The beauty of an “aesthetic” cake is its minimalism. A perfectly smooth ganache finish, maybe a single sprig of rosemary or a few fresh berries on top, and voilà. You’ve created a masterpiece that looks effortlessly chic.
The All-Star Ingredients List

No weird stuff here, I promise. Here’s what you’ll need to assemble your masterpiece.
For the Most Moist Chocolate Cake:
- 143 cups (220g) all-purpose flour
- 2 cups (400g) granulated sugar
- 43 cup (75g) high-quality Dutch-processed cocoa powder (This is key for that deep, dark color!)
- 2 teaspoons baking soda
- 1 teaspoon baking powder
- 1 teaspoon salt
- 2 large eggs, at room temperature
- 1 cup (240ml) buttermilk, at room temperature (Don’t have any? Mix 1 cup of milk with 1 tablespoon of lemon juice or white vinegar and let it sit for 10 minutes.)
- 21 cup (120ml) vegetable oil (or any neutral oil)
- 2 teaspoons pure vanilla extract
- 1 cup (240ml) freshly brewed hot coffee (Trust me on this. It enhances the chocolate flavor and doesn’t make the cake taste like coffee.)
For the Silky Smooth Chocolate Ganache:
- 12 ounces (340g) good-quality dark or semi-sweet chocolate, finely chopped
- 121 cups (360ml) heavy cream
Tools & Kitchen Gadgets You’ll Need
Having the right tools makes the difference between a fun baking project and a kitchen catastrophe. Here’s your checklist:
- Stand Mixer or Electric Hand Mixer: You can mix by hand, but a mixer makes life so much easier.
- Large Mixing Bowl: One-bowl wonder, remember?
- Whisk & Silicone Spatula: For mixing and scraping down the bowl.
- Measuring Cups and Spoons: Baking is a science, after all.
- Two 8-inch Round Cake Pans: The standard for a classic layer cake.
- Parchment Paper: To prevent your beautiful cakes from sticking.
- Wire Cooling Rack: Absolutely essential for cooling cakes properly.
- Small Saucepan: For heating the cream for your ganache.
- Offset Spatula: Your secret weapon for achieving that smooth, professional frosting finish.
- Bench Scraper: The other secret weapon for getting those sharp, clean sides.
- Cake Turntable (Optional): Not strictly necessary, but OMG it makes frosting so much faster and more fun.
Step-by-Step Instructions: Let’s Do This!
Take a deep breath. We’re going to break this down into manageable chunks. You’ve got this.
H3: Part 1: Baking the Perfect Cake Layers
- Prep Your Station: Preheat your oven to 350°F (175°C). Grease your two 8-inch round cake pans and line the bottoms with parchment paper. Then, grease the parchment paper too. Overkill? Maybe. But a stuck cake is a sad cake.
- Mix the Dry Stuff: In your large bowl (or the bowl of your stand mixer), whisk together the flour, sugar, cocoa powder, baking soda, baking powder, and salt. Make sure it’s all nicely combined—no lumps allowed!
- Add the Wet Stuff: Add the eggs, buttermilk, oil, and vanilla extract to the dry ingredients. Beat on medium speed for about 2 minutes. The batter will be thick. Don’t panic.
- The Magic Touch: Carefully pour the hot coffee into the batter. Mix on low speed until just combined. The batter will be very thin. This is normal! It’s the secret to a moist cake. Don’t overmix, or you’ll undo all our good work.
- Bake It: Pour the batter evenly between your two prepared pans. Bake for 30-35 minutes, or until a wooden skewer inserted into the center comes out clean.
- Cool It Down: Let the cakes cool in the pans for about 15 minutes before inverting them onto a wire rack. Peel off the parchment paper and let them cool completely. I’m serious. Do not even think about frosting a warm cake.
H3: Part 2: The Easiest, Fanciest Ganache & Assembly
- Prep the Chocolate: Place your finely chopped chocolate in a medium-sized heatproof bowl. The finer you chop it, the more evenly it will melt.
- Heat the Cream: Pour the heavy cream into a small saucepan and heat it over medium heat until it just begins to simmer around the edges. Don’t let it boil over!
- Combine & Wait: Pour the hot cream directly over the chopped chocolate. Let it sit, untouched, for 5 minutes. This lets the hot cream gently melt the chocolate. Don’t stir it yet!
- Whisk to Perfection: After 5 minutes, start whisking from the center of the bowl outwards. Keep whisking until the mixture is smooth, glossy, and completely combined. It should look like liquid silk.
- Let It Thicken: Let the ganache cool at room temperature for at least an hour, or until it has thickened to a spreadable consistency, like thick peanut butter. You can pop it in the fridge to speed this up, but stir it every 15 minutes so it doesn’t get too hard.
- Assemble Your Masterpiece: Place one cake layer on your serving plate or turntable. Top with a generous scoop of ganache and spread it evenly. Place the second cake layer on top.
- The Crumb Coat: Apply a thin layer of ganache all over the cake (top and sides). This is called a crumb coat, and it traps any loose crumbs. Chill the cake in the fridge for 20-30 minutes until the ganache is firm.
- Final Coat: Apply the remaining ganache, using your offset spatula and bench scraper to get the top and sides as smooth and sharp as you desire. Don’t aim for perfection, aim for “character.” 😉
- Garnish (or Don’t): Top with a few fresh berries, a sprig of mint or rosemary, or a dusting of cocoa powder. Or leave it completely bare for that ultra-minimalist vibe. You’re the artist here.
Calories & Nutritional Info (The Fine Print)
Let’s be real, this is a celebration cake, not a kale smoothie. But if you must know…
- Serving Size: 1 slice (assuming the cake is cut into 12 slices)
- Estimated Calories: Around 580 kcal per slice.
- Fat: High. It’s what makes it delicious.
- Sugar: Also high. Duh, it’s a cake.
- Nutritional Note: This cake is rich in happiness and is best consumed with friends, family, or alone on the couch with a fork. It’s called self-care, look it up.
Common Mistakes to Avoid (Because I’ve Made Them All)
- Frosting a Warm Cake: I know I said it before, but it bears repeating. You will create a chocolate landslide. Your frosting will melt, your cake layers will slide, and you will be sad. Patience is a virtue.
- Overmixing the Batter: This develops the gluten in the flour and leads to a tough, rubbery cake. Mix until just combined and then stop. Step away from the mixer.
- Using Cold Ingredients: Room temperature eggs and buttermilk incorporate into the batter much more smoothly, creating a more uniform and tender crumb.
- Skipping the Sift: Sifting your dry ingredients, especially cocoa powder, prevents lumps. Are lumps aesthetic? No, they are not.
- Eyeballing Measurements: Baking is chemistry. Close enough is not good enough. Use proper measuring cups and spoons.
Variations & Customizations (Because You’re Creative)
Want to put your own spin on it? I fully support this.
- Spicy Chocolate Cake: Add 21 teaspoon of cayenne pepper or ancho chili powder to your dry ingredients. It adds a subtle, smoky heat that is absolutely divine with the dark chocolate.
- Mocha Madness: Dissolve 2 tablespoons of instant espresso powder in the hot coffee before adding it to the batter. You can also add a teaspoon of espresso powder to your ganache for a double coffee kick.
- Fruity & Fabulous: Add a thin layer of raspberry or cherry jam between the cake layers before adding the ganache. Garnish with matching fresh fruit for a beautiful color contrast.
Frequently Asked Questions (That You Were Too Afraid to Ask)
What makes a chocolate cake “aesthetic”?

It’s less about complex piping and more about clean lines and simple elegance. Think smooth frosting, sharp edges, a dark, rich color, and minimalist garnishes. It’s the “less is more” approach to cake decorating.
Can I make this cake ahead of time?
Absolutely! The cake layers can be baked, cooled, and wrapped tightly in plastic wrap a day or two in advance. You can store them at room temperature or in the fridge. The ganache can also be made ahead and stored in the fridge. Just let it come to room temperature before whipping or spreading it.
Why is my chocolate cake always dry?
Common culprits are overbaking or not enough fat/moisture. This recipe combats that with oil, buttermilk, AND hot coffee, a trifecta of moisture. Use a skewer to test for doneness and pull it out as soon as it’s ready.
What’s the best cocoa powder for a dark chocolate cake?
Dutch-processed cocoa powder, 100%. It has been treated to neutralize its acidity, resulting in a smoother, less bitter flavor and a much darker, richer color. It’s a game-changer for that aesthetic look.
How do I get the ganache frosting so smooth?
A crumb coat is your best friend. After that, a cake turntable and a bench scraper are the pro tools. Hold the bench scraper straight against the side of the cake and spin the turntable. For the top, use a long offset spatula to smooth it in one or two passes. A little practice goes a long way!
Can I turn this recipe into cupcakes?
For sure! This recipe will make about 24 cupcakes. Line a muffin tin with paper liners and fill them about two-thirds full. Bake for 18-22 minutes at 350°F (175°C).
My ganache is too thick/thin. How can I fix it?

If it’s too thick, gently warm it over a double boiler or in the microwave in 10-second bursts, stirring until it’s the right consistency. If it’s too thin, it just needs to cool longer. You can also add more chopped chocolate (a little at a time) to thicken it up.
Final Thoughts
There you have it. Your official permission slip to stop drooling over social media and start creating your own edible art. This aesthetic chocolate cake is more than just a dessert; it’s a confidence booster, a creative outlet, and a surefire way to become the most popular person at any gathering.
So go forth and bake! And when you post your stunning creation, be sure to look smugly at the camera. You’ve earned it. IMO, you’ll never go back to store-bought again.