The Ultimate Dessert Facile et Rapide (A 2-Ingredient Magic Trick!)
So, you typed “dessert facile et rapide” into your search bar. I see you. You’re looking for something easy and quick, a little bit of French elegance without the French-level effort. You want a dessert that says, “I’m a sophisticated culinary genius,” when in reality, you just spent five minutes in your kitchen and barely broke a sweat. Welcome, my friend. You’ve come to the right place. Forget complicated recipes. Today, we’re making a rich, decadent, mind-blowingly delicious chocolate mousse with just two ingredients. Yes, you read that right. Two.
Why This Recipe Is Awesome (It’s Actual Kitchen Sorcery)
Why is this the only easy and quick dessert recipe you’ll ever need? Because it’s a legitimate magic trick that will make you look like a pastry chef. This recipe is:
- Shockingly Simple: We’re talking two, maybe three, ingredients. It’s almost embarrassingly easy.
- Incredibly Fast: The active “cooking” time is about 5 minutes. The hardest part is waiting for it to chill (and even then, you don’t have to).
- Unbelievably Decadent: Despite its simplicity, this mousse is intensely rich, deeply chocolatey, and has a velvety-smooth texture that rivals any fancy restaurant dessert.
- Naturally Vegan & Dairy-Free: That’s right! By using dark chocolate and water, this impressive dessert is naturally free from dairy and eggs.
It’s the ultimate ace up your sleeve for last-minute dinner guests, a sudden late-night craving in your Barishal home, or any time you want to feel a little bit fancy without any of the fuss.
Ingredients: The World’s Shortest Shopping List
Prepare to be amazed. This is all you need for your culinary magic act.
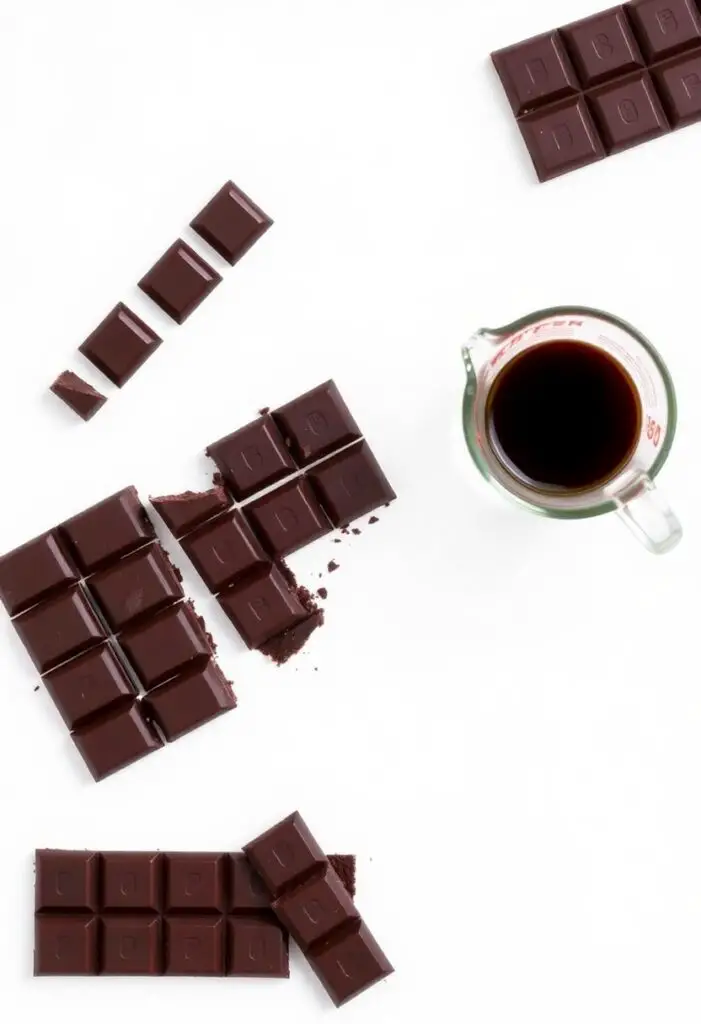
- 6 ounces (about 170g) good-quality dark or bittersweet chocolate, (60-72% cacao), finely chopped
- ¾ cup very hot water (or freshly brewed hot coffee/espresso)
- Optional: 1 teaspoon of vanilla extract or a splash of your favorite liqueur (like Grand Marnier or rum)
The Golden Rules of Ingredients:
- Good Quality Chocolate: This is NON-NEGOTIABLE. Since chocolate is the star of the show, you must use a good quality bar that you would enjoy eating on its own. Do not use chocolate chips, as they contain stabilizers that will prevent your mousse from setting correctly.
- Hot Liquid: The water or coffee needs to be very hot, almost boiling. This is what will melt your chocolate into a smooth, glossy base.
Tools & Kitchen Gadgets Used: Your Magic Kit

You don’t need a fancy stand mixer for this one.
- A Medium-Sized Metal or Glass Mixing Bowl
- A Large Bowl (for the ice bath)
- A Whisk (A balloon whisk works great. An electric hand mixer makes it even faster!)
- Ice
- Rubber Spatula
- Small saucepan or kettle (for heating the water)
- Serving glasses or ramekins
Step-by-Step Instructions: The 5-Minute Magic Show
This all happens very quickly. Read the steps, get your station ready, and prepare to be amazed.
Act 1: The Setup
- Prepare the Chocolate: Finely chop your good-quality dark chocolate and place it in your medium-sized mixing bowl.
- Prepare the Ice Bath: Fill your large bowl about halfway with ice and a little cold water. You want enough to come up the sides of your medium mixing bowl. Set it aside for now.
- Heat Your Liquid: Bring your ¾ cup of water or coffee to a near boil in a kettle or small saucepan.
Act 2: The Emulsion (The “How is this possible?!” part)
- Melt the Chocolate: Pour the very hot liquid all at once over the chopped chocolate. Let it sit for one full minute without touching it.
- Stir Until Smooth: After a minute, gently stir the mixture with your rubber spatula until the chocolate is completely melted and the mixture is smooth, glossy, and uniform. If you’re adding vanilla or liqueur, stir it in now.
- The Ice Bath Transformation: Now for the magic. Place the bowl of melted chocolate directly into the ice bath.
- Whisk Like You Mean It: Begin to whisk the chocolate mixture vigorously. If using an electric hand mixer, start on low and increase to medium. You are whipping air into the mixture as it rapidly chills.
- Watch the Magic Happen: In just 1-3 minutes, you will see the mixture transform. It will go from a thin liquid to a slightly thickened sauce, then to a soft pudding consistency, and finally to a thick, spoonable mousse. Stop whisking as soon as it reaches a thick, mousse-like texture.
Act 3: The Grand Finale
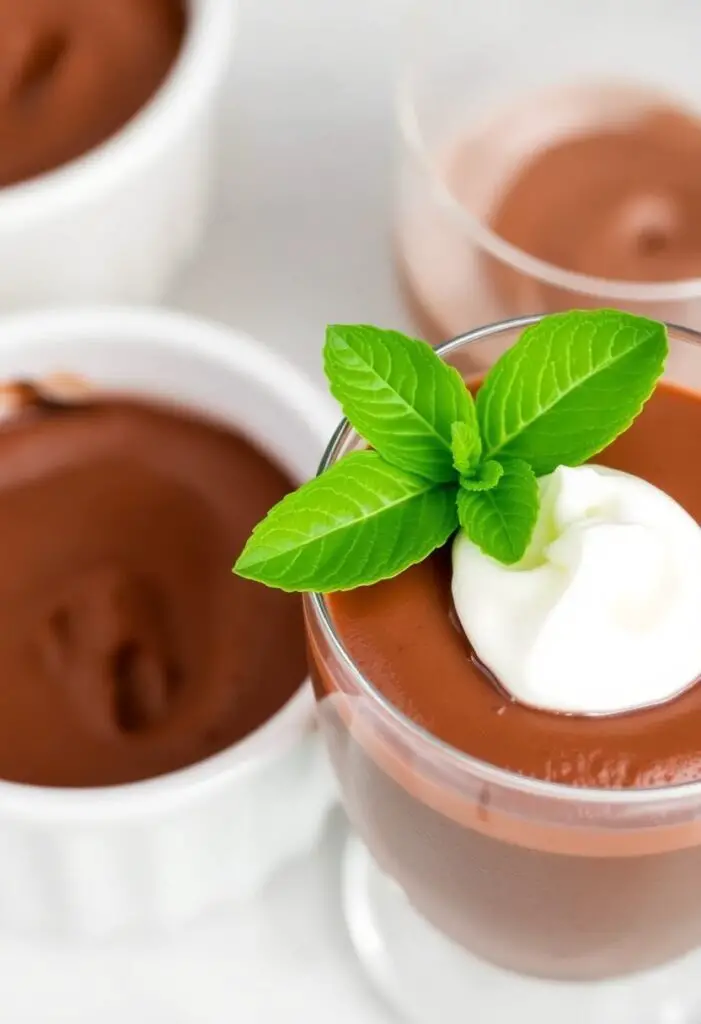
- Serve Immediately: Spoon the finished mousse into your serving glasses or ramekins. You can enjoy it right away for a soft, luscious texture.
- Or Chill for a Firmer Set: For a firmer, more traditional mousse, cover the glasses with plastic wrap and chill in the refrigerator for at least 1 hour.
- Garnish and Take a Bow: Top with a dollop of coconut cream, some fresh raspberries, or chocolate shavings before serving. You just performed a miracle.
Calories & Nutritional Info (Per Serving, Estimated)
This is a rich, decadent treat, but surprisingly light! (This is for one serving, assuming 4 servings.)
- Estimated Calories per serving: ~200-250 calories (depending on chocolate)
- Fat: ~15g
- Carbohydrates: ~18g
- Good Stuff: Packed with antioxidants from the dark chocolate!
Common Mistakes to Avoid: Don’t Ruin the Magic Trick!
Even the simplest magic can go wrong if you don’t follow the rules.
- Using Bad Chocolate: Using cheap chocolate or chocolate chips will result in a greasy, grainy mess that refuses to set properly. You must use a good quality dark chocolate bar.
- Over-Whisking: If you keep whisking after the mousse has thickened, the emulsion can break. The cocoa butter will separate, and you’ll be left with a grainy, oily texture. Stop as soon as it’s thick.
- Not Whisking Vigorously Enough: You need to incorporate air while it chills. A gentle stir won’t do it. You need to be actively whisking to create that light, airy texture.
- Getting Water in the Chocolate (Before the Recipe Starts): Any stray drops of water that get into your chocolate while you’re chopping or melting it can cause it to “seize” and become a clumpy mess. Make sure your bowl and tools are perfectly dry before you start.
Variations & Customizations: Your Mousse, Your Magic
The two-ingredient base is a perfect canvas for other flavors.
- Spicy Aztec Mousse: Whisk ¼ teaspoon of cinnamon and a tiny pinch of cayenne pepper into the hot liquid before pouring it over the chocolate. The subtle heat is incredible.
- Mint Chocolate Marvel: Instead of water, use very hot, strongly brewed peppermint tea. It infuses the mousse with a delicate mint flavor.
- The “Three-Ingredient” Upgrade: For an even richer, more traditional mousse, you can make this with hot heavy cream instead of water. It’s no longer vegan, but it is unbelievably decadent.
FAQ Section: All Your Magical Questions, Answered
You have questions about this culinary sorcery. I have the answers.
- Q: How does this even work with just chocolate and water? A: It’s science! It’s a process called emulsion. When you vigorously whisk the melted chocolate (which contains cocoa butter, a fat) with the water as it rapidly chills, you’re forcing the fat and water to bind together while trapping air bubbles. This creates the stable, airy structure of a mousse without any eggs or cream.
- Q: Can I use milk chocolate or white chocolate? A: It’s much trickier. Milk and white chocolate have a lower percentage of cocoa solids and a different fat/sugar ratio, so they don’t emulsify as reliably with this method. Stick to dark or bittersweet chocolate (60-72%) for the best results.
- Q: My mousse became grainy and separated! Can I fix it? A: You likely over-whisked it. You might be able to save it! Gently reheat a few tablespoons of the mixture in the microwave until just melted, then vigorously whisk it back into the main bowl to try and bring the emulsion back together.
- Q: Can I make this ahead of time? A: Yes! It’s a fantastic make-ahead dessert. You can store it in individual serving glasses, covered, in the refrigerator for up to 3 days.
- Q: Is the ice bath really necessary? A: Yes, it is 100% necessary. The rapid chilling is what forces the cocoa butter in the chocolate to solidify and set, creating the mousse structure. It won’t work without it.
- Q: How should I serve this? A: It’s wonderful on its own, but also amazing with fresh berries (like raspberries), a dollop of whipped coconut cream, or some chocolate shavings on top.
- Q: Is this recipe vegan? A: Yes! As long as you use a high-quality dark chocolate that does not contain any dairy (most good ones don’t), this recipe is naturally vegan.
Final Thoughts: Voilà! You’re a Pastry Chef!
You did it. You took two simple ingredients and, with a little bit of science and some vigorous whisking, you created a dessert that is elegant, decadent, and deeply satisfying. You’ve officially proven that you don’t need a long list of ingredients or complicated steps to make something truly magical. So go on, take a spoonful of your glorious creation and take a bow. You’ve just mastered the ultimate dessert facile et rapide.